選擇組織
Enable Tooling API to Use the Perm Dependency Report Feature in the Profile and Permission Set Helper App
發佈日期: Oct 13, 2022
描述
解決方案
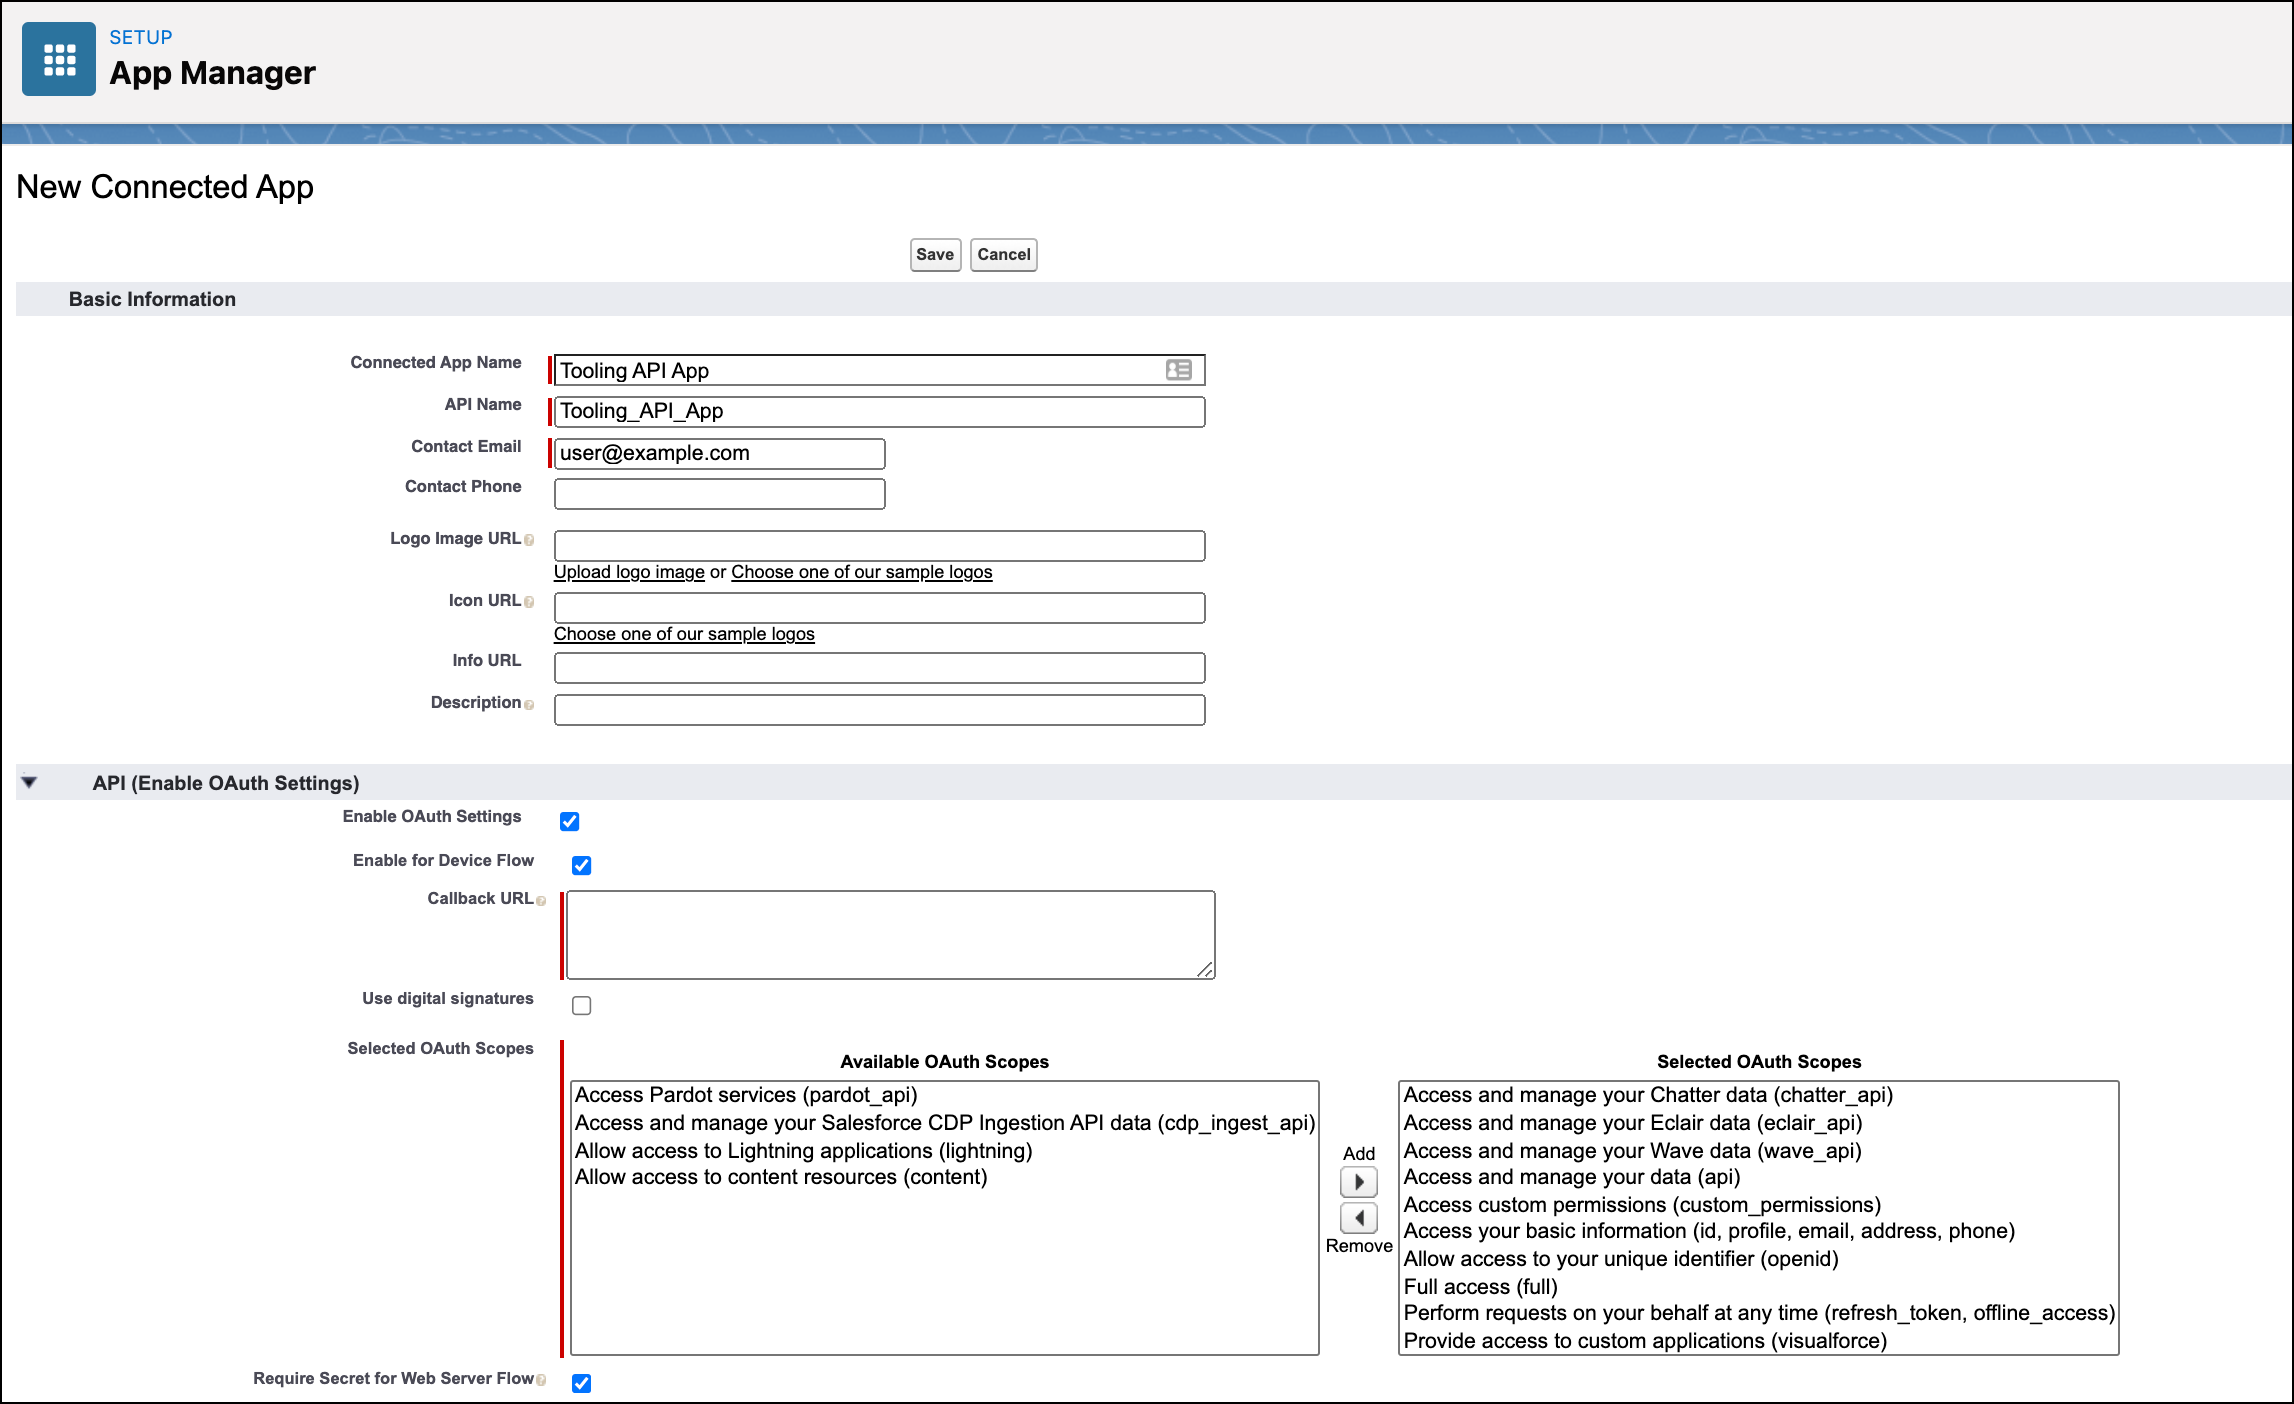
Step 1: Create a Connected App
- To begin, create a Connected App so that you can generate a Client Id and Secret used for the next step. In Setup, navigate to App Manager if you are in lightning. If you are in classic, navigate to Create → Apps
- In Lightning, click “New Connected App” at the top right corner. In Classic, click the “New” button in the Connected Apps related list.
- When making the Connected App, make sure the following are filled out:
- Name: [NAME]
- Developer Name: [DEVELOPER_NAME]
- Callback URL: [Auto generated url when you select ‘Enable OAuth Settings’]
- Selected OAuth Scopes: Select all the following OAuth Scopes:
- Access and manage your Chatter data (chatter_api)
- Access and manage your Eclair data (eclair_api)
- Access and manage your Wave data (wave_api)
- Access and manage your data (api)
- Access custom permissions (custom_permissions)
- Access your basic information (id, profile, email, address, phone)
- Allow access to your unique identifier (openid)
- Full access (full)
- Perform requests on your behalf at any time (refresh_token, offline_access)
- Provide access to custom applications (visualforce)
- Provide access to your data via the Web (web)
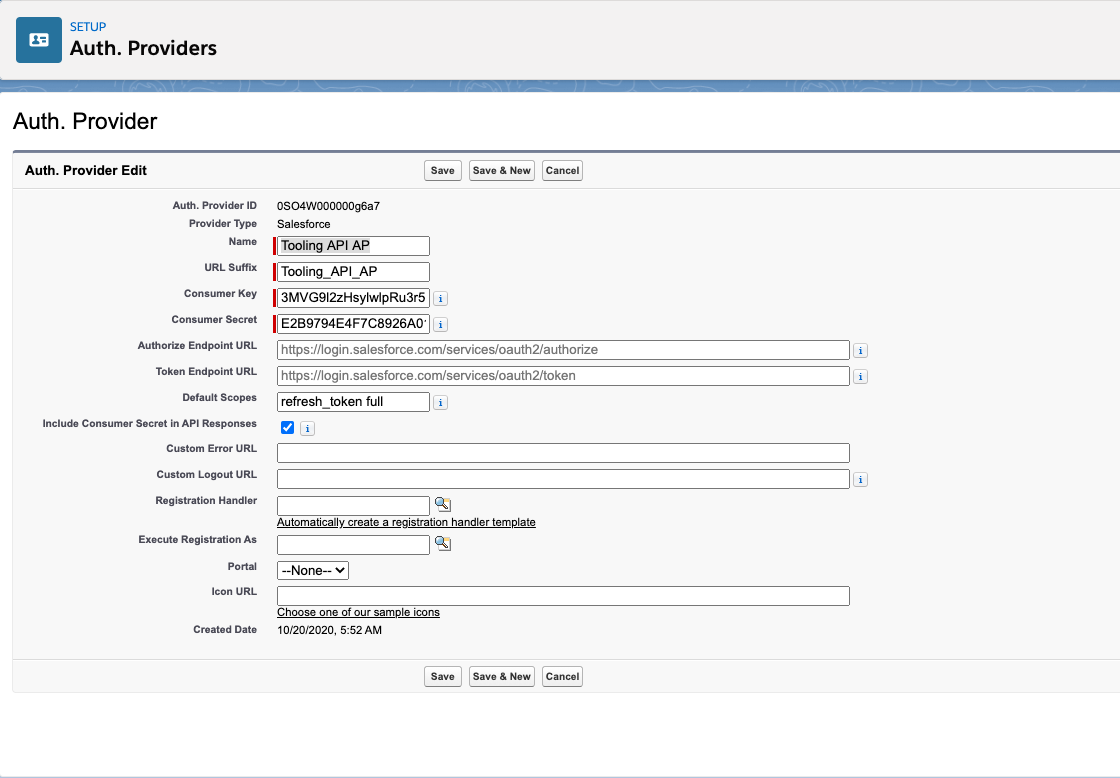
The authentication provider is utilized to facilitate the authentication with your Salesforce org.
- In Lightning, from Setup, navigate to Settings -> Identity -> Auth. Providers. In Classic, navigate to Security Controls -> Auth. Providers and click the “New” button in the related list.
- When making the Auth. Provider, make sure the following fields are filled out:
- Name: [NAME]
URL Suffix: [URLSUFFIX]
Consumer Key: [Paste in the Consumer Key from the connected app created above]. Consumer Secret: [Paste in the Consumer Secret from the connected app created above]. Default Scopes: refresh_token full
- Name: [NAME]
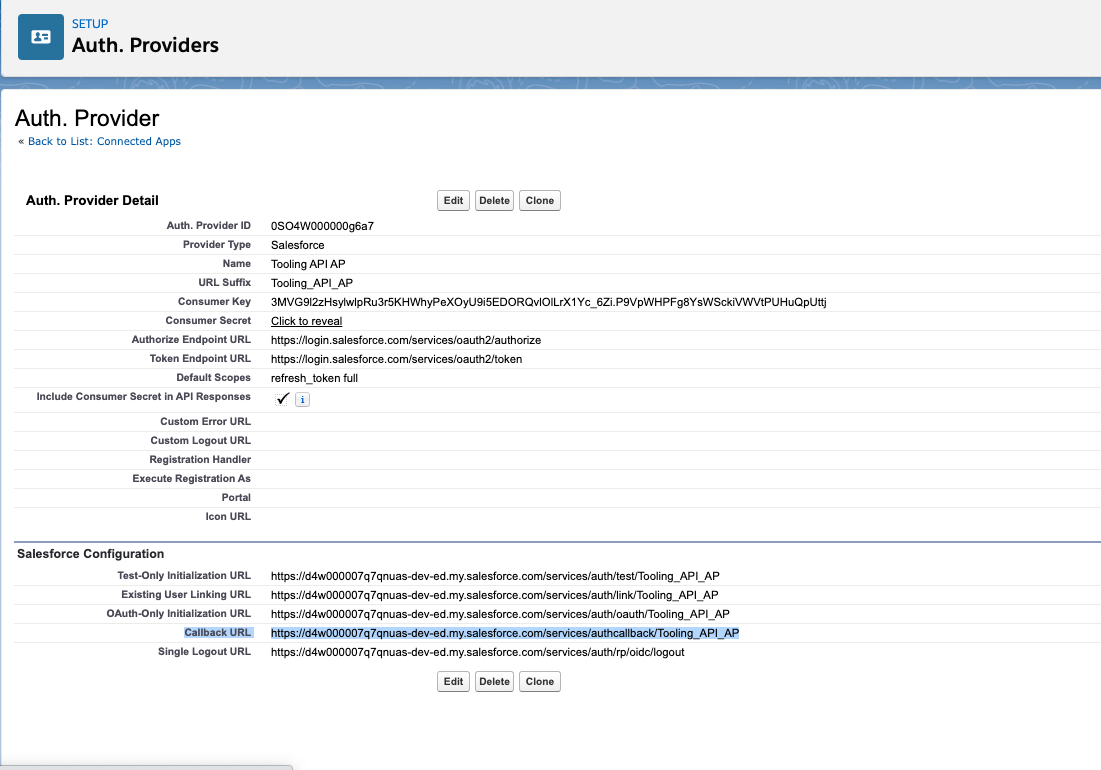
- The Callback URL has now been generated and is located under the Salesforce Configuration section. Copy the Callback URL and edit the Connected App we created earlier in Step 1, and paste in the Callback URL under the OAuth section.
- Save the Connected App. Salesforce should warn you about waiting a few minutes to allow the settings to take effect and propagate throughout Salesforce’s infrastructure.
Step 4: Create a Named Credential: ‘Tooling_API_Credential’
- In Lighting, from Setup, navigate to Settings -> Security -> Named Credentials. In classic, navigate to Security Controls -> Named Credentials and click the “New” button in the related list.
- When making the Named Credential, make sure the Label and Name fields are exactly as below and that the following fields are filled out:
- Label: Tooling API Credential
Name: Tooling_API_Credential
URL: Enter your org’s instance URL — this will be the URL for your instance (e.g. na1.salesforce.com), or if you are using My Domain, your fully qualified My Domain domain (e.g. mycompany.my.salesforce.com)
Identity Type: Named Principal
Authentication Protocol: Ouath 2.0
Authentication Provider: [Choose the Auth. Provider created in Step 2]
Scope: full refresh_token
Generate Authorization Header: Unchecked
Allow Merge Fields in HTTP Header: Unchecked
Allow Merge Fields in HTTP Body: Checked
- Label: Tooling API Credential
- You will be prompted to log in to your org. After you log in, you will see the connected app authorization screen. Click “Allow”.
- Allow access to this app. Once complete, you should be redirected back to the Named Credential screen and see that the status is now set to “Authenticated as….”

知識文章編號
000389001
此文章是否解決您的問題?
請讓我們知道,以便我們改進!