Выбрать организацию
Locked Cells in Quip Spreadsheets
Дата публикации: Aug 18, 2026
Описание
In Quip Spreadsheets, you can lock individual cells, an entire tab, or a whole spreadsheet to prevent accidental edits to important data. This article explains how to lock and unlock cells, tabs, and full spreadsheets, what locking restricts, and who has permission to lock or unlock content.
Решение
This article answers how to lock and unlock cells, tabs, or an entire Quip Spreadsheet, what a locked cell or tab prevents users from doing, and who is allowed to apply or remove a lock.
How to Lock or Unlock Individual Cells
Lock a cell when you want to protect specific data, like a header row or a running total, from accidental edits while other users continue working elsewhere in the sheet.
1) To lock a cell or cells on a spreadsheet, highlight the cell or cells you would like to lock.
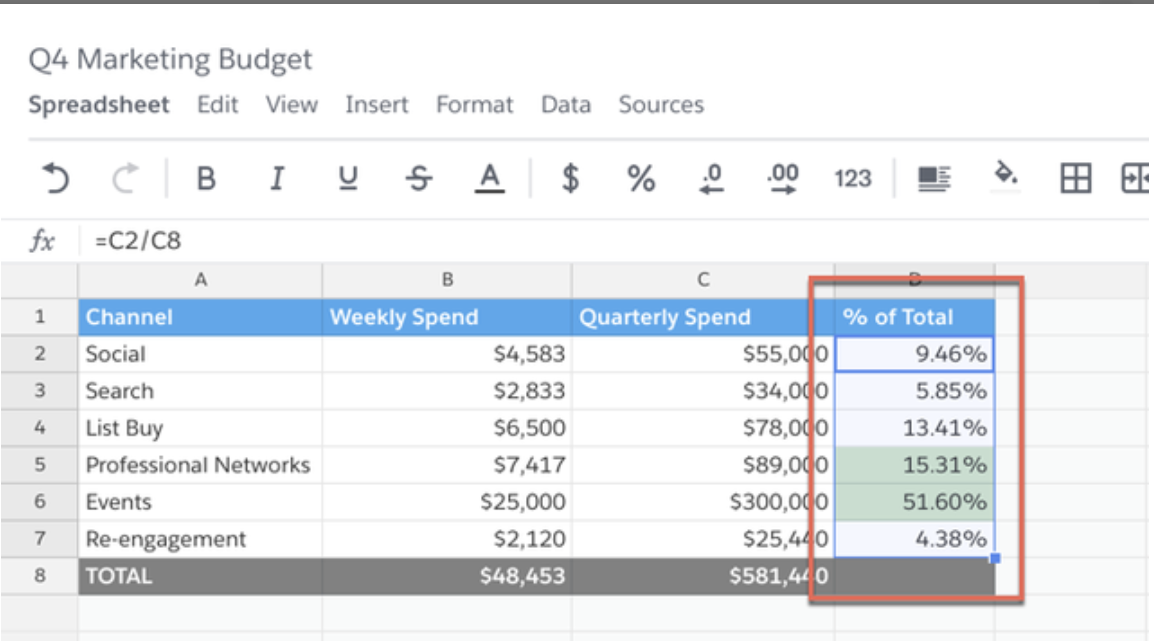
2) Next, right-click to open the spreadsheet menu > Lock/Unlock Cells > Lock Selection.
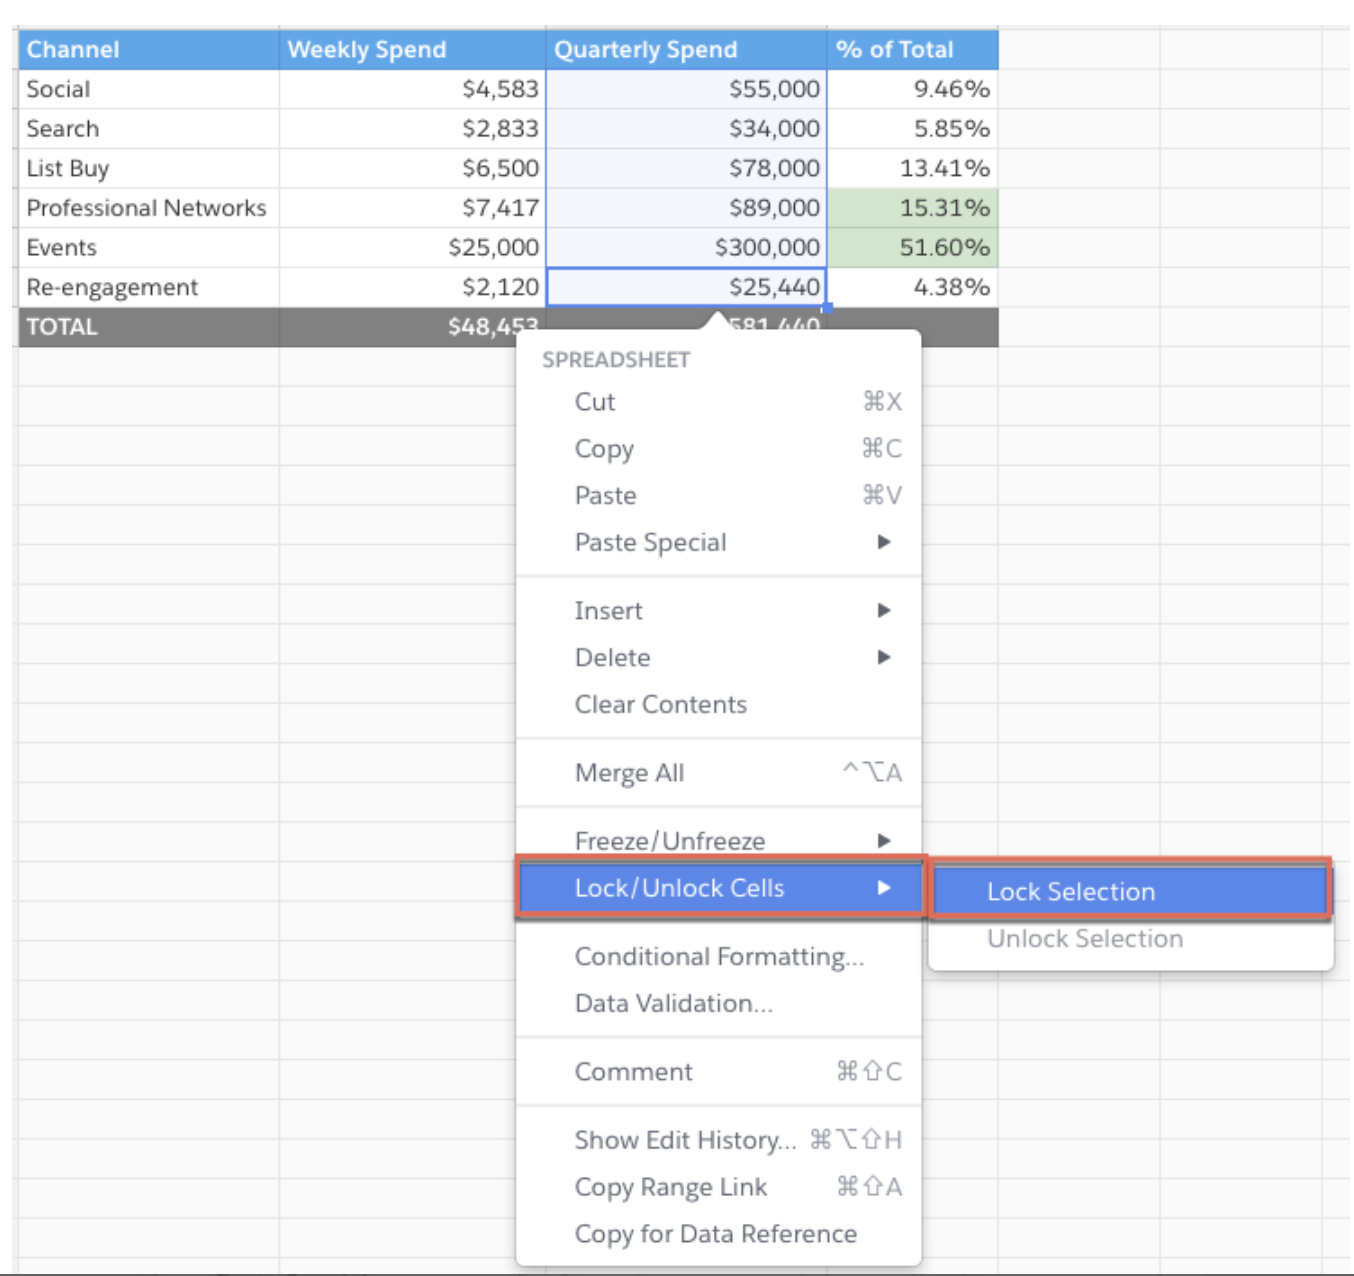
If you would like to unlock already locked cells, first highlight the cell or cells you would like to unlock. Then right-click to open the spreadsheet menu > Lock/Unlock Cells > Unlock Selection. You can also access Lock/Unlock Cells from the data menu in the format bar.
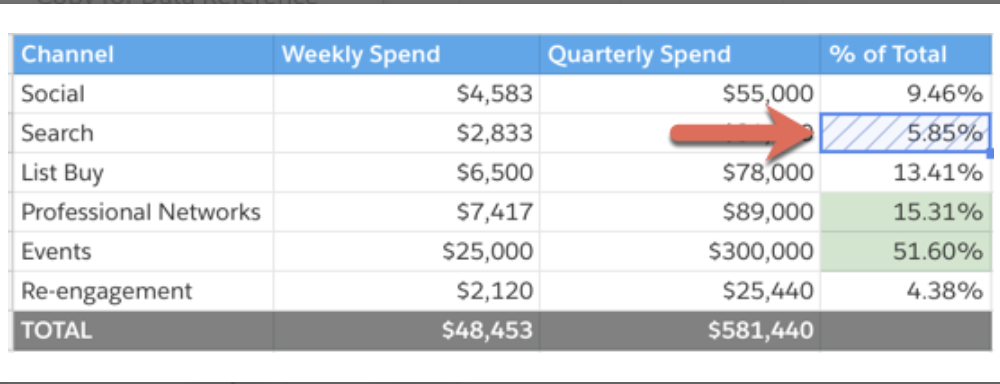
When you click into a locked cell, it will have blue lines to indicate the cell is locked and can't be edited.
What a Locked Cell Prevents
So what exactly does it mean for a cell to be "locked"? If a cell is locked, users will not be able to:
- Apply formatting to the locked cell (column width, row height, and cell borders can still be adjusted)
- Delete the locked cell
- Hide, unhide, freeze, or unfreeze a row/column that includes a locked cell
- Move a row/column that includes a locked cell
- Sort a range that includes a locked cell
- Apply a filter to a range that includes a locked cell — an error appears if attempted (Filter Views behave normally, as though all cells are unlocked)
How to Lock or Unlock an Entire Spreadsheet
Lock the whole spreadsheet, including every tab, when you need to freeze all data and prevent any edits at once.
1) Go to Spreadsheet > Advanced > Lock Edits.
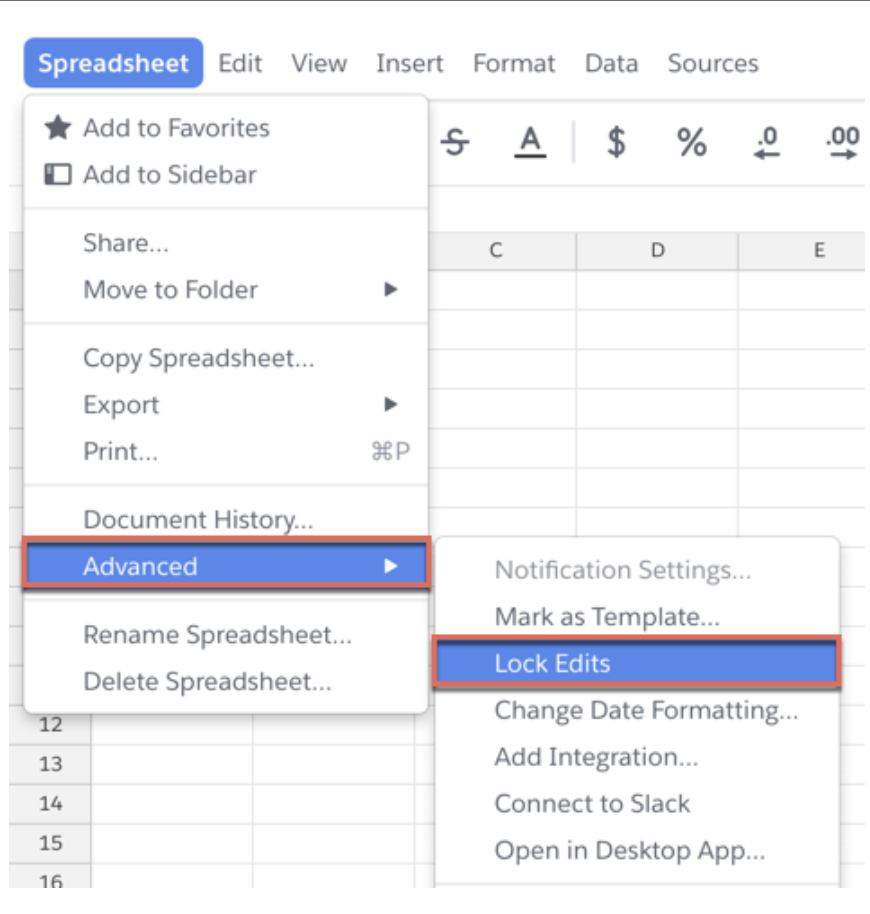
To unlock the spreadsheet, click Edits Disabled in the blue banner in the top left, then click Unlock Edits.
If a spreadsheet is locked, users will not be able to:
- Make edits of any kind (formatting, formulas, filters)
- Add or remove rows or columns
- Add or remove tabs
How to Lock or Unlock a Tab of a Spreadsheet
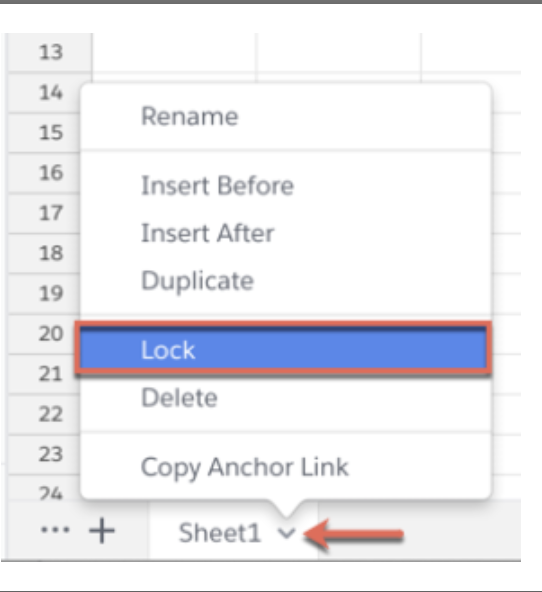
1) To lock a tab on a spreadsheet, click the arrow next to the sheet name, then select Lock.
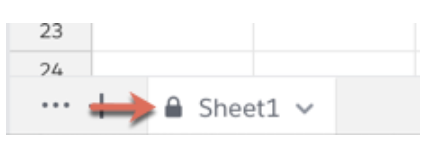
When an individual sheet is locked, you will see a lock symbol next to the sheet name.
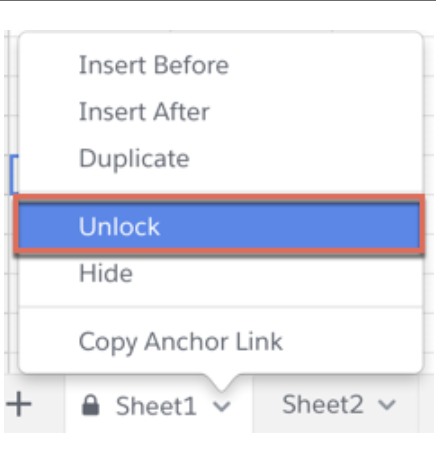
To unlock a locked tab, click the arrow and then select Unlock.
If a tab is locked, users will not be able to:
- Make edits of any kind to the locked tab (formatting, formulas, filters)
- Add or remove rows or columns on the locked tab
Who Can Lock or Unlock Cells
Anyone with full access or edit access on the spreadsheet or document can lock or unlock cells, regardless of who created the spreadsheet. To prevent any changes to the spreadsheet, you can adjust the sharing settings to Can Comment or Can View. For more information on sharing and granular permissions, see Share Documents and Folders in Quip.
Дополнительные ресурсы
Номер статьи базы знаний
000389437
Эта статья решила вашу проблему?
Оставьте свой отзыв, чтобы мы могли стать лучше!
