Valitse organisaatio
Bypass Salesforce Flow for a Specific User or Profile
Julkaisupäivä: Aug 18, 2026
Kuvaus
Learn how to create a custom permission, clone an existing Record-Triggered Flow, and use the custom permission to bypass that flow for specific users or profiles in Salesforce.
Ratkaisu
This article explains how to bypass a Record-Triggered Flow for a specific user or profile using a custom permission. This is useful when a system administrator or another user needs an exception to a flow's normal automation. Using Record-Triggered Flow, you'll need to complete four steps:
- Create a custom permission
- Assign the custom permission to the System Administrator profile
- Clone the existing flow
- Modify the decision element criteria
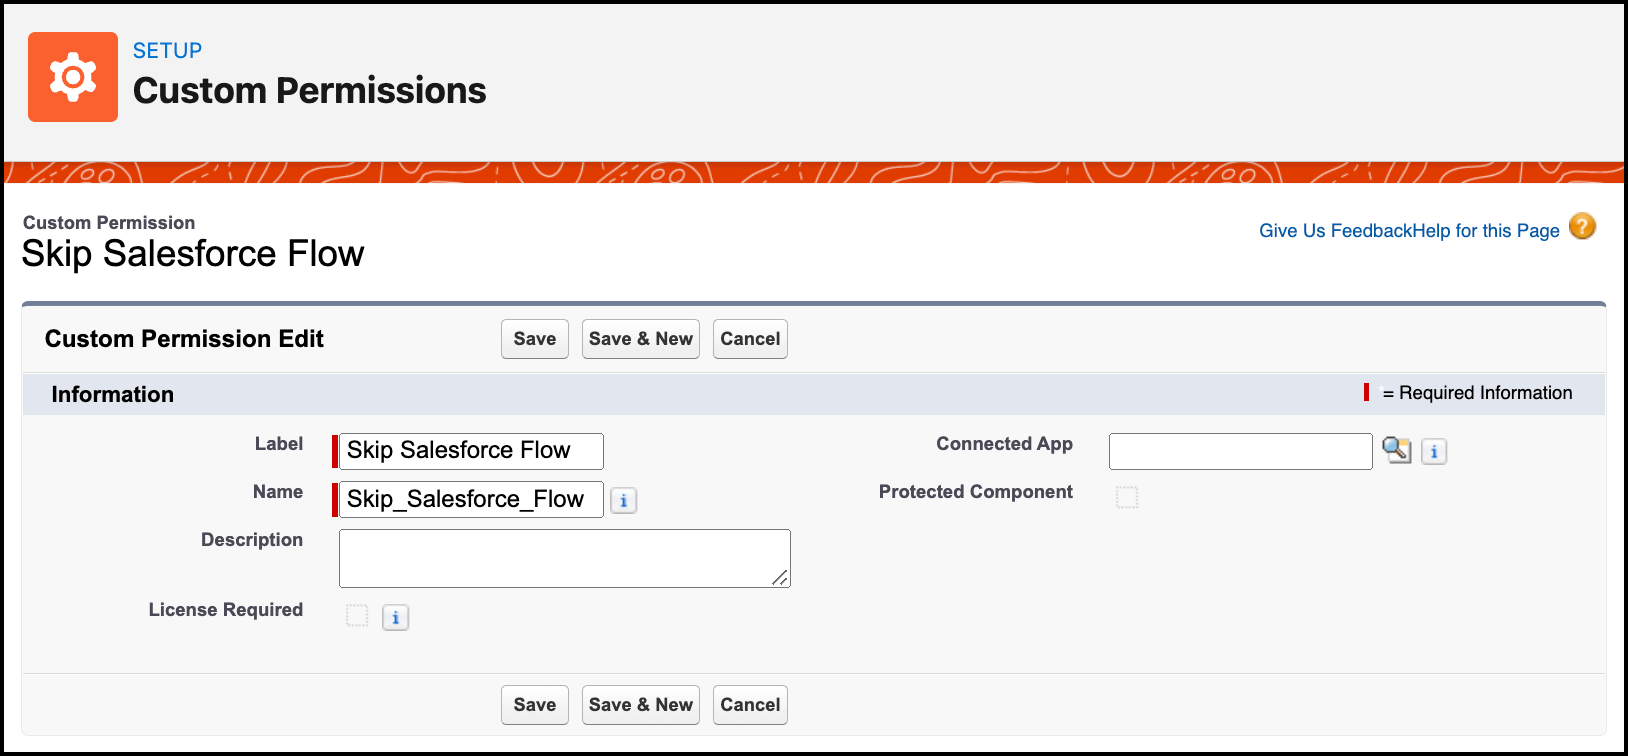
Step 1: Create a Custom Permission
Custom permissions let you grant users access to custom apps and let you check which users can access certain functionality. You can define access checks that are assigned to users via permission sets or profiles, the same way you assign other user permissions and access settings. You can even use a custom permission to bypass a validation rule or, in this case, a flow, for certain users or profiles.
- Click Setup
- In the Quick Find box, type Custom Permissions
- Click the New button
- Enter a Label — the Name auto-populates
- Click Save
Step 2: Assign the Custom Permission to the System Administrator Profile
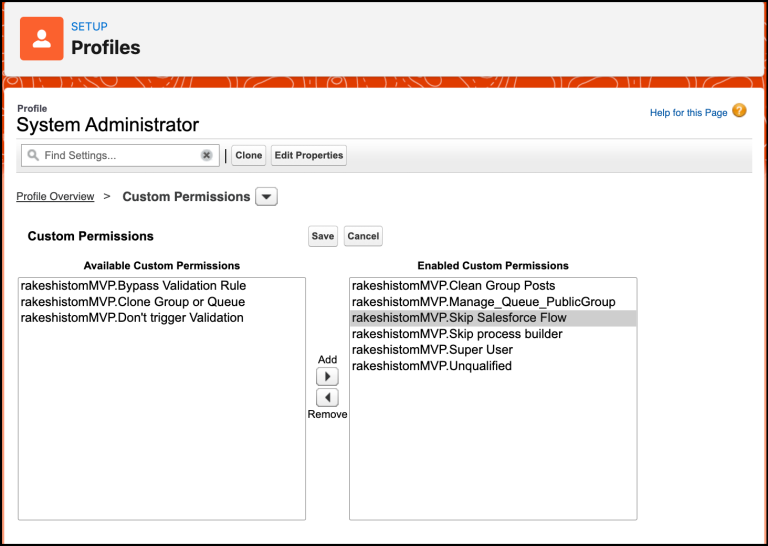
- Click Setup
- In the Quick Find box, type Profiles
- Open the System Administrator profile
- Navigate to Apps | Custom Permission and click Edit
- Assign the Skip Salesforce Flow custom permission to the profile
- Click Save
Step 3: Clone the Existing Flow
- Click Setup
- In the Quick Find box, type Flows
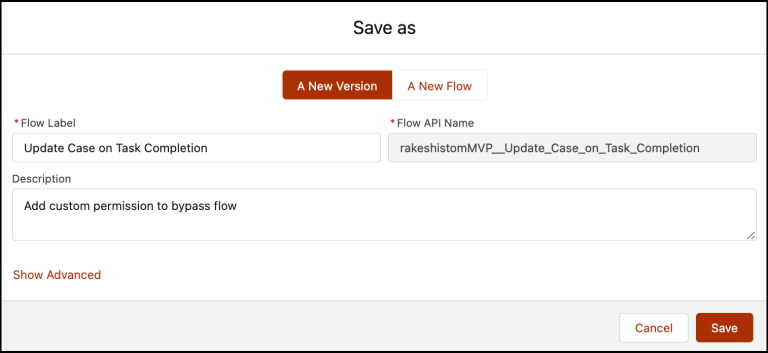
- Select Flows, then click the Flow Name to modify (in this example, Update Case on Task Completion)
- Click the Save As button at the top right of Flow Builder
- Click Save
Step 4: Modify Decision Element Criteria
Now modify the record-triggered flow to fit your business requirement. You'll add a condition to check whether the user has access to the Skip Salesforce Flow custom permission.
- In Flow Designer, modify the Task Related to Case Decision element
- Add another criterion to check the custom permission. Click the System Variable dialog, select Permission, then select the custom permission Skip Salesforce Flow
- Click Add Condition
- For Row 5, set:
- Resource: `{!$Permission.Skip_Salesforce_Flow}`
- Operator: Is Null
- Value: `{!$GlobalConstant.True}`
- Click Save
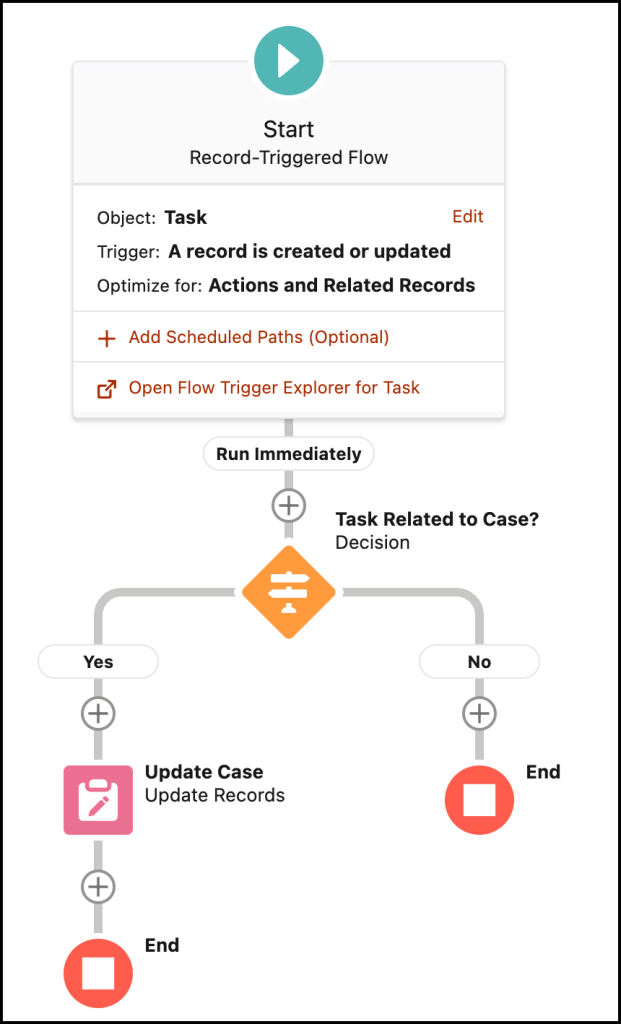
Once everything looks correct, click the Activate button.
Attribution
Written by: Rakesh Gupta, Salesforce MVP. Rakesh is a Senior Solution Architect, Salesforce MVP, and author, passionate about solution design and process automation.
Submissions reflect only the opinions of the user who made the submission available, not the opinions of Salesforce, regardless of whether the user is affiliated with Salesforce, and may contain third-party materials. Salesforce neither controls nor endorses, and is not responsible for, any third-party materials, including their accuracy, validity, timeliness, completeness, reliability, integrity, quality, legality, usefulness, or safety. Community submissions are for general knowledge only and should not be relied upon as answers to specific questions — always contact Salesforce Support for answers to your specific questions. For more community discussion, visit the Trailblazer Community feed.
Knowledge-artikkelin numero
000393835
Ratkaisiko tämä artikkeli ongelmasi?
Anna palautetta, jotta voimme kehittyä!
