Выбрать организацию
How to Make Salesforce Flow Screen Component Read-Only
Дата публикации: Apr 2, 2026
Описание
- First Name
- Last Name
- Mobile
Решение
We will use a Display Text element to solve the above use case.
Step 1. Define Flow Properties
a. From any page in Lightning, click on the Gear icon in the top right corner
b. Select Setup and in the Quick Find box, enter and click on Flows
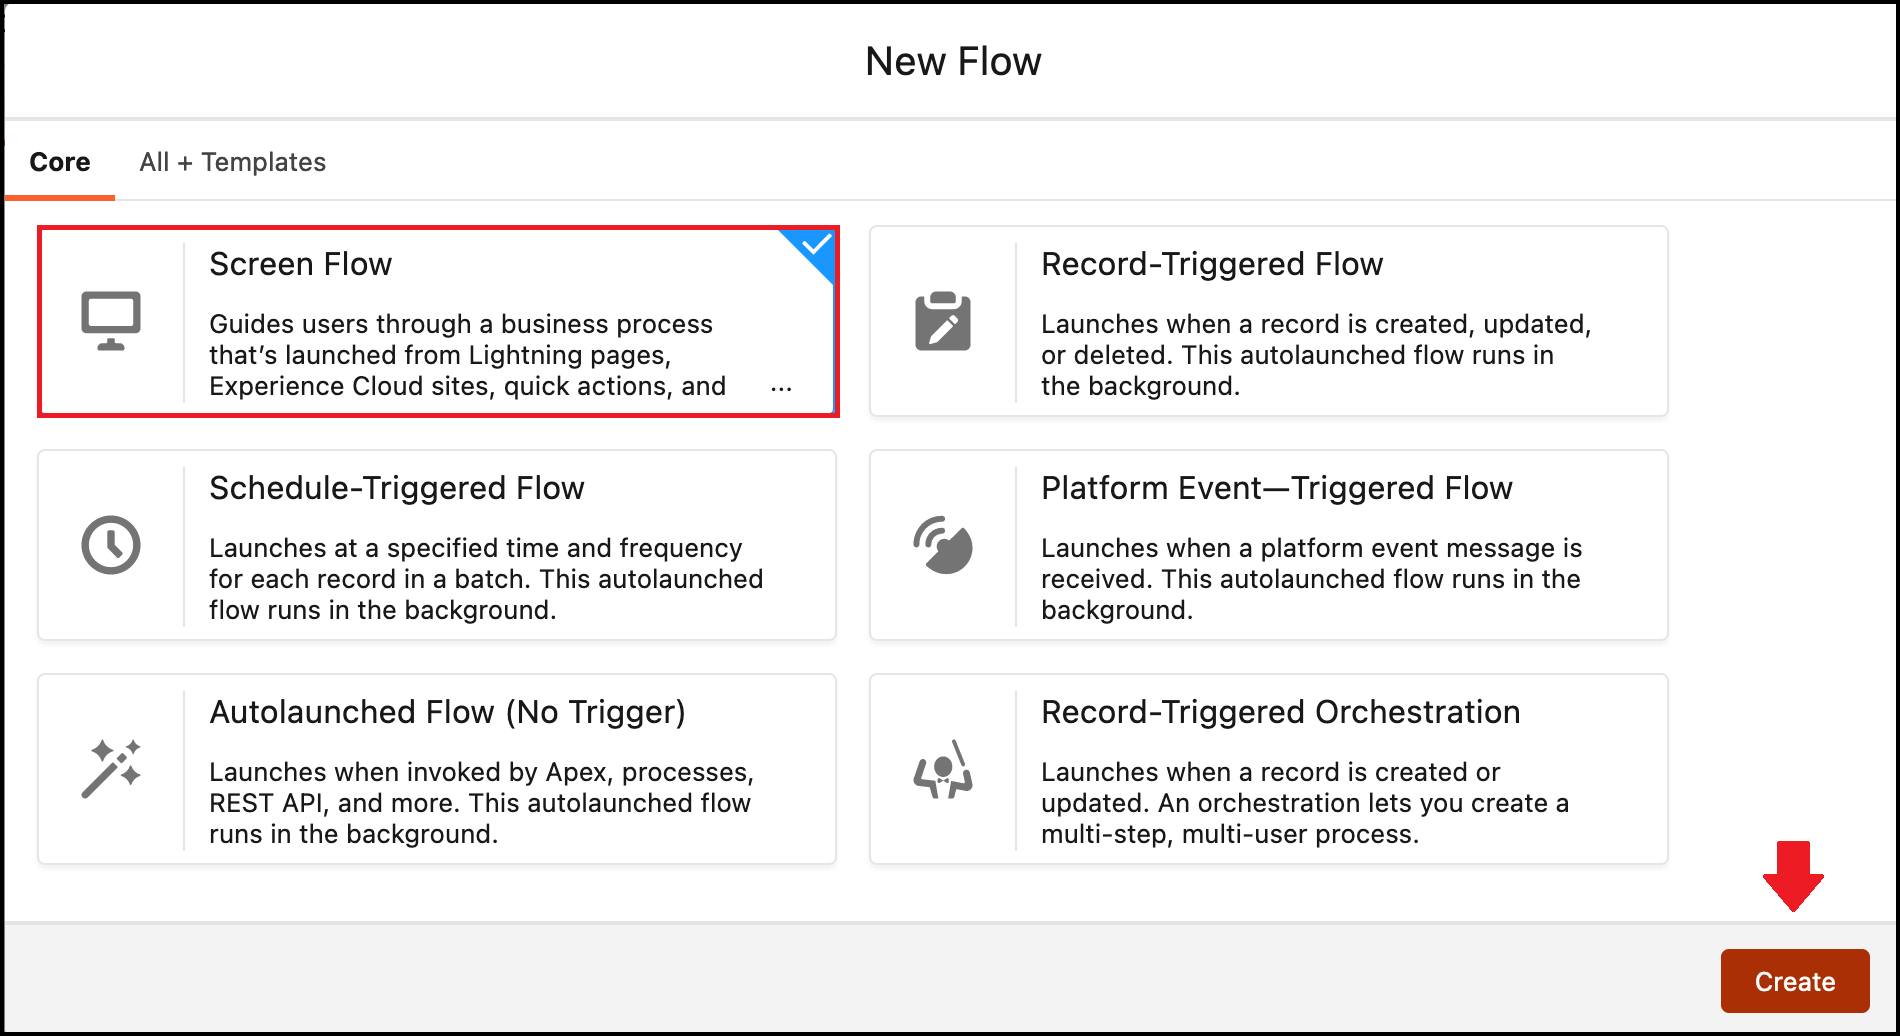
c. Click on the New Flow button
d. Select Screen Flow and click on Create button
b. Select Setup and in the Quick Find box, enter and click on Flows
c. Click on the New Flow button
d. Select Screen Flow and click on Create button
Step 2. Add the Screen element to display the fields in the Read Only Mode
a) On Flow Designer, click on the +icon and select the Screen element
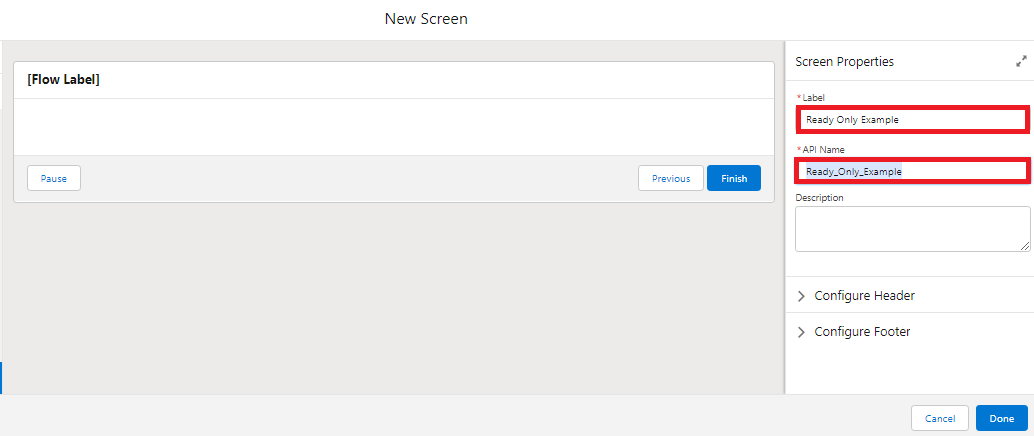
b) Configure Screen Properties:
b) Configure Screen Properties:
i. Enter Name in the Label field. API Name will be auto-populated
Step 3. Add the Section component to configure the column layout of your screen
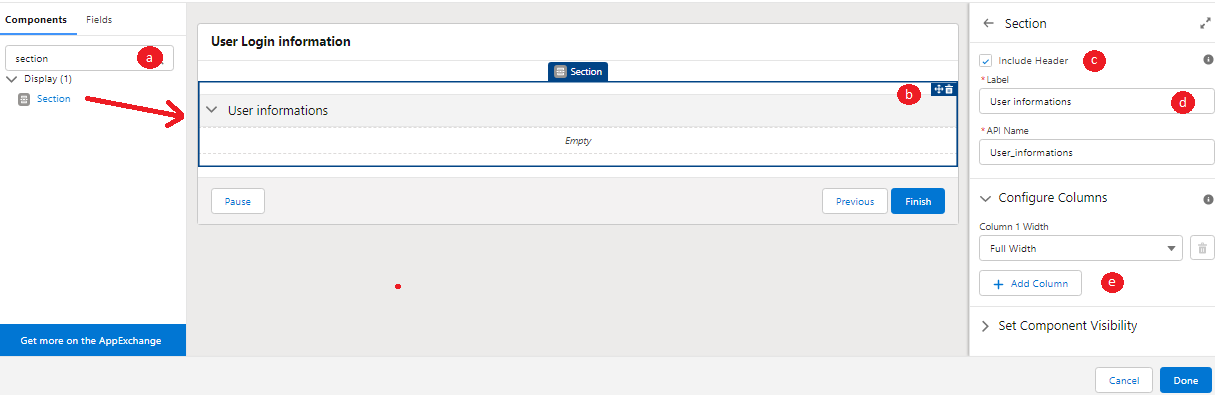
a) In the Screen element page, navigate to the Component tab and enter Section in the Component search field
b) Drag and drop the Section component onto the screen
c) Check the box for Include Header
d) Enter the desired Name for the Section into the Label field (e.g., User Login information). The API Name will be auto-populated
e) In the Configure Columns section, click on the Add Columns button to split the Section into two columns
Step 4. Add the Display Text component to show the Logged-In User Details
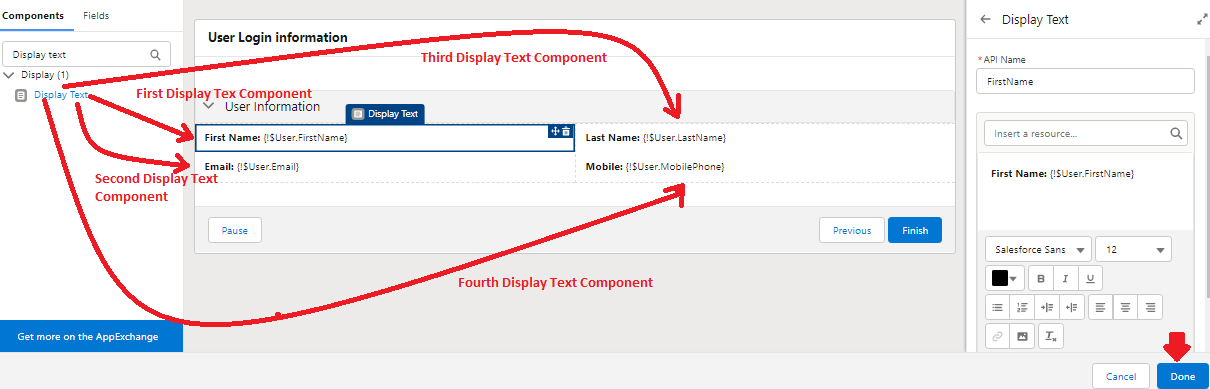
a) Navigate to the Component tab and search for Display Text in the search field
b) Drag and drop the Display Text component into the Section component. In this example, we will use four Display Text components and set them up as follows:
i. First Display Text component
- API Name: FirstName
- Text box: First Name: {!$User.FirstName}
ii. Second Display Text component
- API Name: LastName
- Text box: Last Name: {!$User.LastName}
iii. Third Display Text component
- API Name: Email
- Text box: Email: {!$User.Email}
iv. Fourth Display Text component
- API Name: Mobile
- Text box: Mobile: {!$User.MobilePhone}
c). Click on the Done button
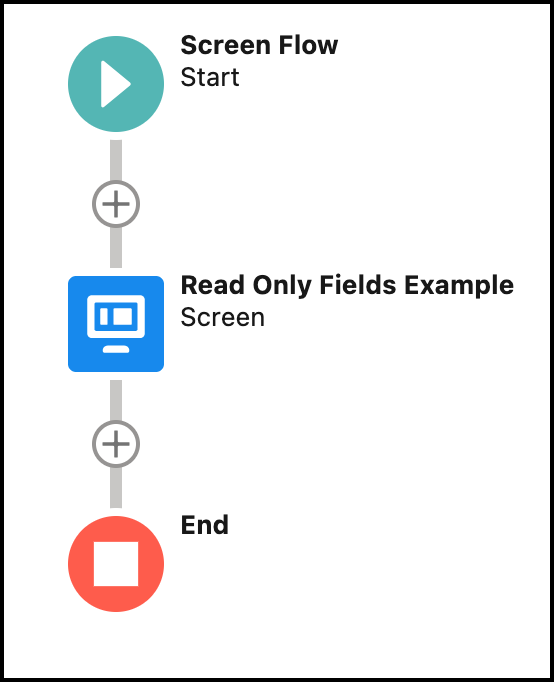
In the end, Flow will look like the following screenshot:
Step 5. Save and Activate your Flow
______________________________________
Written By: Rakesh Gupta | Salesforce MVP
Rakesh is Senior Solution Architect, Salesforce MVP, and Author. With a background in computer science, Rakesh is passionate about solution design and process automation.
Submissions reflect only the opinions of the user who made available the Submission and not the opinions of Salesforce, regardless of whether the user is affiliated with Salesforce, and may contain or constitute products, services, information, data, content, and other materials made available by or on behalf of third parties ("Third Party Materials). Salesforce neither controls nor endorses, nor is Salesforce responsible for, any Third Party Materials, including their accuracy, validity, timeliness, completeness, reliability, integrity, quality, legality, usefulness or safety, or any applicable intellectual property rights. Any Submissions made available through any message board or forum in response to posted questions, or that otherwise purport to answer any questions, including any questions about Salesforce or Programs, are made available for your general knowledge only and should never be relied upon as answers to your specific questions (even if an answer is marked as a “best” answer or with any similar qualifications). You should always contact Salesforce support for answers to your specific questions. Salesforce has no control over Submissions and is not responsible for any use or misuse (including any distribution) by any third party of Submissions.
If you have questions, tap into the wisdom of our entire Trailblazer Community here: https://trailhead.salesforce.com/trailblazer-community/feed
Номер статьи базы знаний
000395291
Эта статья решила вашу проблему?
Оставьте свой отзыв, чтобы мы могли стать лучше!