組織を選択
settings.xml と pom.xml の例で Enterprise Maven Repository の認証情報を使用する方法
公開日: Dec 10, 2025
タスク
目標
組み込みの Maven を使用して Enterprise Maven Repository の認証情報を設定し、Enterprise Repository でしか利用できない依存関係を参照および利用できるようにします。この設定は Enterprise ライセンスを持つ顧客のみに適用されます。また、settings.xml ファイルを更新した後に pom.xml の更新を促すメッセージが表示されます。
ステップ
Enterprise Maven の認証情報を取得したら、settings.xml ファイルと pom.xml file ファイルを更新する必要があります。通常、settings.xml ファイルはマシンの $USER_HOME/.m2/ ディレクトリにあります。settings.xml ファイルを更新すると、Enterprise Maven Repository に接続してリソースを取得できるようになります。マシンに Maven がインストールされている場合は、この settings.xml ファイルを追加または作成するだけで自動的に認識されます。ただし、このファイルに問題がある場合は、Studio 内でファイルを手動で参照して、埋め込みの Maven インストールがこのリポジトリに接続できるようにします。すべての手順を以下に示します。
次の手順は商用向けクラウドの設定手順です。 GovCloud の場合、次の手順の補足としてこちらの記事を使用することをお勧めします。 PCE の場合はこちらの記事を使用してください。
手順:
1.下の settings.xml テンプレートをコピーしてテキストエディターに貼り付け、settings.xml ファイルを見つけるか作成します。settings.xml ファイルの見つけ方がわからない場合は次の記事を参照してください。
Where is my settings.xml file? (settings.xml はどこにありますか?)
(詳細は Maven ドキュメントを参照してください)
2.settings.xml で次の変更を行います。
- タグで、「yourNexusID」と「yourMuleNexusPassword」を MuleSoft サポートから提供された認証情報に置き換えます (Nexus 認証情報をリクエストするにはチケットを作成してください)。これは MuleRepository へのログインです。
- Exchange Repository にアクセスするには、 タグ内の「yourAnypointPlatformUserName」と「yourAnypointPlatformPassword」を自分の Anypoint Platform 認証情報に置き換えます。
- Exchange リポジトリはコネクタの格納場所であり、カスタムポリシー、REST API、アプリケーション、アーティファクトなどのカスタム情報がアップロードされます。
- Nexus リポジトリは Mule アプリを構築するための maven リポジトリです。Mule アプリの構築に必要なライブラリ (Java ライブラリなど) を取得するには、Mule に Nexus リポジトリが必要です。
- プロキシがある場合は、上部の で タグを追加します。
- テンプレート:
<?xml version="1.0" encoding="UTF-8" standalone="no"?><settings xmlns="http://maven.apache.org/SETTINGS/1.0.0" xmlns:xsi="http://www.w3.org/2001/XMLSchema-instance" xsi:schemaLocation="http://maven.apache.org/SETTINGS/1.0.0 https://maven.apache.org/xsd/settings-1.0.0.xsd"> <servers> <server> <id>anypoint-exchange-v3</id> <username>yourAnypointPlatformUserName</username> <password>yourAnypointPlatformPassword</password> </server> <server> <id>MuleRepository</id> <username>yourMuleNexusID</username> <password>yourMuleNexusPassword</password> </server> </servers> <pluginGroups> <pluginGroup>org.mule.tools</pluginGroup> </pluginGroups> <profiles> <profile> <id>mule-extra-repos</id> <activation> <activeByDefault>true</activeByDefault> </activation> <repositories> <repository> <id>mule-public</id> <url>https://repository.mulesoft.org/nexus/content/repositories/public</url> </repository> </repositories> <pluginRepositories> <pluginRepository> <id>mule-public</id> <url>https://repository.mulesoft.org/nexus/content/repositories/public</url> </pluginRepository> </pluginRepositories> </profile> <profile> <id>Mule</id> <activation> <activeByDefault>true</activeByDefault> </activation> <repositories> <repository> <id>MuleRepository</id> <name>MuleRepository</name> <url>https://repository.mulesoft.org/nexus-ee/content/repositories/releases-ee/</url> <layout>default</layout> <releases> <enabled>true</enabled> </releases> <snapshots> <enabled>true</enabled> </snapshots> </repository> <repository> <id>MuleRepositoryPublic</id> <name>MuleRepositoryPublic</name> <url>https://repository.mulesoft.org/nexus/content/repositories/public</url> <layout>default</layout> <releases> <enabled>true</enabled> </releases> <snapshots> <enabled>true</enabled> </snapshots> </repository> </repositories> </profile> </profiles></settings>
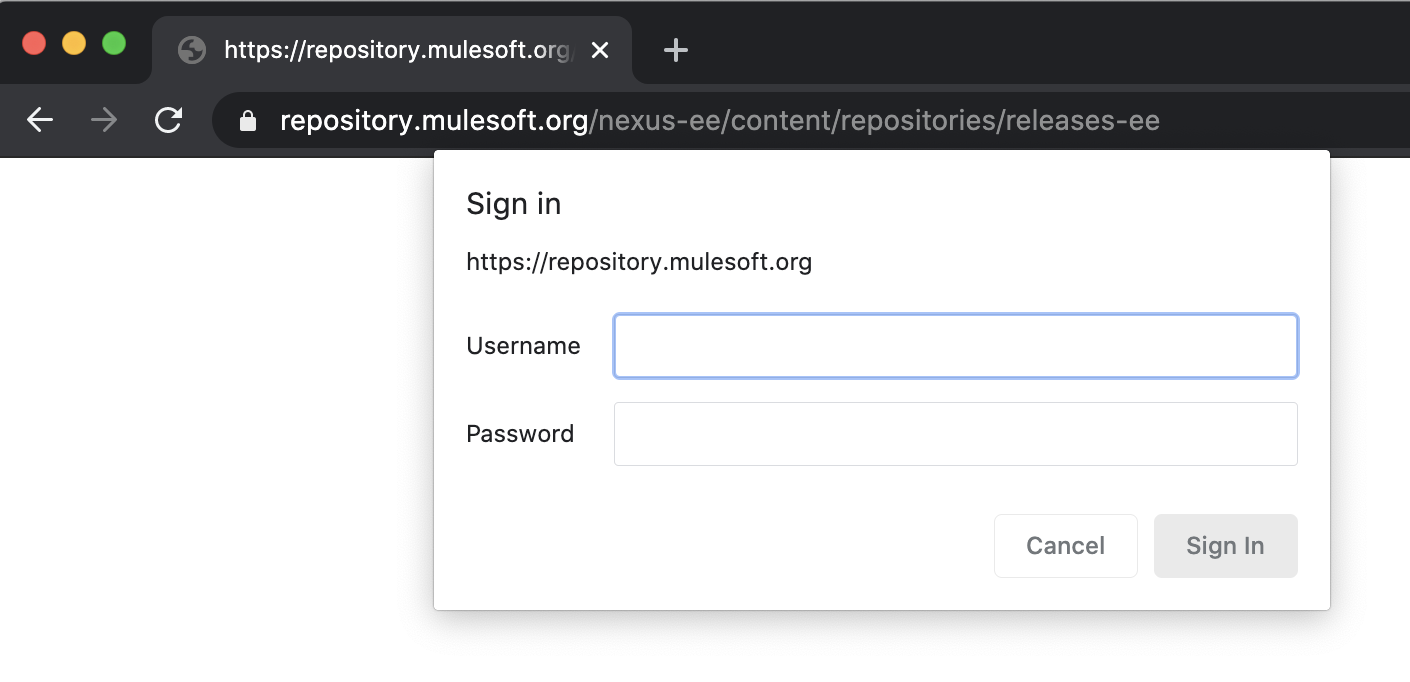
3.MuleRepository のパスワードが正しいことを確認するには、任意のブラウザーで https://repository.mulesoft.org/nexus-ee/content/repositories/releases-ee に移動し、settings.xml ファイルのこのセクションにある MuleRepository でユーザー名とパスワードを入力します。
MuleRepository
yourNexusID
yourMuleNexusPassword
正しくない場合は Anypoint 組織の管理者に確認を取り、新しいものが必要な場合はサポートにメールで連絡してください。
4.settings.xmlへの変更を保存し、このファイルが既知のパス (例: ${user.home}/.m2/settings.xml) に保存されていることを確認します (このパスを使用すると Anypoint Studio で自動的に ID の検出と入力が行われます)。
5.(任意) user settings.xml ファイルを別の場所に保存した場合、こちらの手順に従って Anypoint Studio を指定して使用できます。
6.(任意) 独自の Maven インストールを使用して Anypoint Studio にバンドルされている Maven を上書きするには、こちらに記載されている手順に従います。
7. pom.xml ファイルで以下を確認します。
- 以下をコピーおよびペーストしてテンプレートとして使用する
- REPLACEME を置き換える
- 固有の設定がある場合は に追加する
- mule.maven.plugin のバージョンを確認する
- pom.xml の の セクションには何があるか? 以下のテンプレートでは PrivateExchangeRepository と表示されている。
- settings.xml ファイルに移動する
- settings.xml で PrivateExchangeRepository が PrivateExchangeRepository に表示されていることを確認する
- リストアップの方法は上記のサンプル settings.xml を確認
- Maven は settings.xml 内のユーザー名とパスワードを照合するため、同じ名前であることが重要
4.0.0 ORGANIZATION_ID PROJECT-NAME 1.0.0-SNAPSHOT mule-application PROJECT-NAME UTF-8 UTF-8 4.4.0 3.8.7 org.apache.maven.plugins maven-clean-plugin 3.0.0 org.mule.tools.maven mule-maven-plugin ${mule.maven.plugin.version} true org.mule.connectors mule-http-connector 1.7.1 mule-plugin org.mule.connectors mule-sockets-connector 1.2.2 mule-plugin anypoint-exchange-v3 Anypoint Exchange https://maven.anypoint.mulesoft.com/api/v3/maven default mulesoft-releases MuleSoft Releases Repository https://repository.mulesoft.org/releases/ default PrivateExchangeRepository Private Exchange repository https://maven.anypoint.mulesoft.com/api/v3/organizations/ORGANIZATION_ID/maven default mulesoft-releases MuleSoft Releases Repository default https://repository.mulesoft.org/releases/ false PrivateExchangeRepository Private Exchange repository https://maven.anypoint.mulesoft.com/api/v3/organizations/ORGANIZATION_ID/maven default
8.動作の確認方法: プロジェクト上で右クリック -> プロパティ -> リソース -> プロジェクトの場所をコピー -> コマンドプロンプトを開く -> ディレクトリの場所を変更 -> mvn clean deploy -X を実行
-X コマンドを使用するとデバッグログが有効になり、HTTP ペイロードリクエスト、ヘッダー、レスポンスといった Maven がバックグラウンドで実行している内容が表示されます。
9.settings.xml の認証情報に付与されている権限を確認してください。多くの場合、認証情報には必須の権限がありません。pom.xml 内の組織 ID も確認してください。ロールが割り当てられていない別の組織 ID を使用すると、401 エラーが発生します。
10.上記の手順でうまくいかない場合は、 エントリを確認してください。下のエラーが表示されている場合は、ステップ 4 をもう一度お試しください。
[ERROR] Failed to execute goal org.mule.tools:mule-project-archetype:3.9.0:create (default-cli) on project abc-defg-api:Error creating from archetype:Error attempting to download archetype:Could not transfer artifact org.mule.tools:mule-project-archetype:jar:4 from/to MuleRepository (https://repository.mulesoft.org/nexus-ee/content/repositories/releases-ee/):Unauthorized (401)
ステップ 4 が成功した場合、その認証情報が settings.xml ファイルと pom.xml ファイルで正しいことを意味します。その他の類似するエラーについては、非公開リポジトリのアクセス権をシステム管理者に確認してください。
11.GovCloud の場合、次の記事を補足として使用することをお勧めします。
Step by step publishing Mule 4 custom policy to GovCloud Exchange (GovCloud Exchange への Mule 4 カスタムポリシーの段階的な公開)
12.PCE の場合はこちらの記事を参照してください。
How To Setup Maven on PCE (PCE での Maven の設定方法)
13.すべてを 1 つのソフトウェアで集中管理するために SSO を使用している場合は、この記事を参照して settings.xml を更新することをお勧めします (「Mule 3.9」と表示されていますが、すべてのバージョンに対応しているため無視してください)。
https://docs.mulesoft.com/exchange/to-publish-assets-maven#publish-and-consume-federated-assets
トークンを取得する手順 (トークンは有効期間が短く頻繁に変更する必要があります) は次を参照してください。
https://docs.mulesoft.com/access-management/saml-bearer-token
14. うまくいかない場合は、ステップ 9 の出力、pom.xml ファイル、settings.xml ファイルを添付してサポートケースを登録してください。
15.Mule 4 と Anypoint Studio 7.x には Maven が必須です。
16.こちらの サンプルリポジトリもチェックすることをお勧めします
ナレッジ記事番号
001114523
この記事で問題は解決されましたか?
ご意見をお待ちしております。