Seleziona un'organizzazione
How To Use Okta As The Authorization Server In The Exchange Mocking Service
Data pubblicazione: Aug 5, 2025
Operazione
GOAL
The mocking service in exchange is private by default. Integrating the mocking service with Okta OAuth 2.0 server provides a convenient way to test the API specification with the mocking service in Exchange.
Fasi
1. Set up an authorization server in Okta
Okta allows you to create multiple custom OAuth 2.0 authorization servers which can be used to protect your own resource servers. Within each authorization server, you can define your own OAuth 2.0 scopes, claims, and access policies. Following the online doc here at set-up-authz-server.2. Add a "customScope" scope
As shown in the screenshot below, add a "customScope" to the authorization server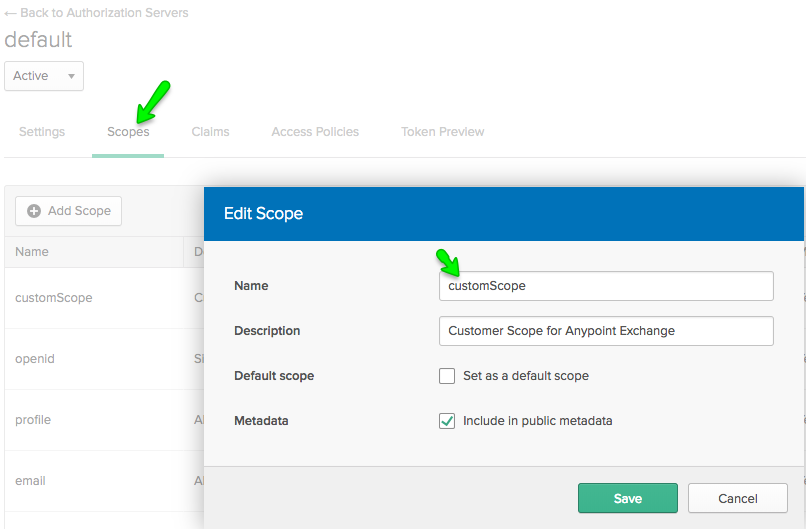
3. Get the configuration of the server
To verify that your server was created and has the expected configuration values, you can send an API request to the Server’s OpenID Connect Metadata URI: https://dev-xxxxxx.oktapreview.com/oauth2/${authServerId}/.well-known/openid-configuration using an HTTP client or by typing the URI inside of a browser. This will return information about the OpenID configuration of your authorization Server. If you use the default server, the URI would be https://dev-xxxxxx.oktapreview.com/oauth2/default/.well-known/openid-configuration. Please note dev-xxxxx is different in each account, replace it with your Dev account ID.
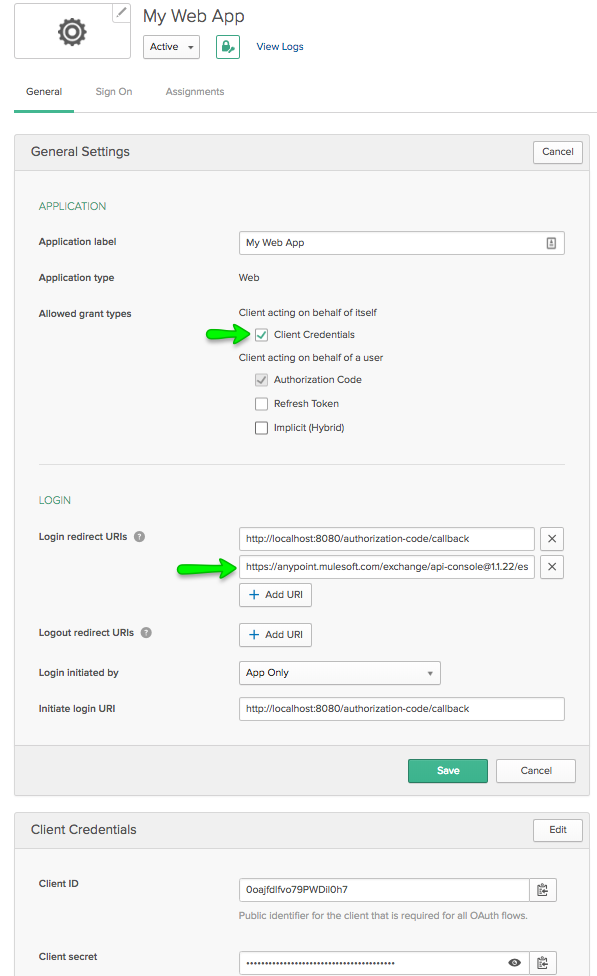
4. Create a "Web" application
Click Okta->Applications->Add Application to create a new application, choose the "Web" application and click "Next". Name the application and leave all the other settings as default now, click "Done" to complete creation. Edit the application just created. Tick "Client Credentials" and add a Login redirect URI as shown below. You will get the redirect URI from the Exchange. Grab the Client ID and Client Secret.
5. Add a securitySchemes in your RAML specification
Add the RAML snippet in your specification. Replace "authorizationUri" and "accessTokenUri" with the value of "authorization_endpoint" and "token_endpoint" in step 3 you got from the configuration endpoint.securedBy: oAuth2
securitySchemes:
oAuth2:
description: |
OAuth2 test.
type: OAuth 2.0
describedBy:
headers:
Authorization:
description: |
Used to send a valid OAuth 2 access token. Do not use
with the "access_token" query string parameter.
type: string
responses:
401:
description: |
Bad or expired token. This can happen if the user
revoked or expired an access token. To fix, re-authenticate
the user.
403:
description: |
Bad OAuth request (wrong consumer key, bad nonce, expired
timestamp...). Unfortunately, re-authenticating the user won't help here.
settings:
authorizationUri: https://dev-xxxxxx.oktapreview.com/oauth2/default/v1/authorize
accessTokenUri: https://dev-xxxxxx.oktapreview.com/oauth2/default/v1/token
authorizationGrants: [ client_credentials ]
scopes:
- customScope
A complete sample is attached ex-oauthz_sample.zip
6. Publish the RAML specification to Exchange
Publish to exchange and open the asset in exchange. You can't access the exchange mocking service at this stagecurl https://anypoint.mulesoft.com/mocking/api/v1/sources/exchange/assets/b2ee7923-e6c7-4ca3-86a0-6304559b935d/ex-oauthz_sample/1.0.0/m/products
{"code":"UNAUTHENTICATED_ACCESS_TO_RESOURCE","message":"Error trying to access to the resource
b2ee7923-e6c7-4ca3-86a0-6304559b935d:ex-oauthz_sample:1.0.0. Either the authorization is invalid or the session might have expired"}%
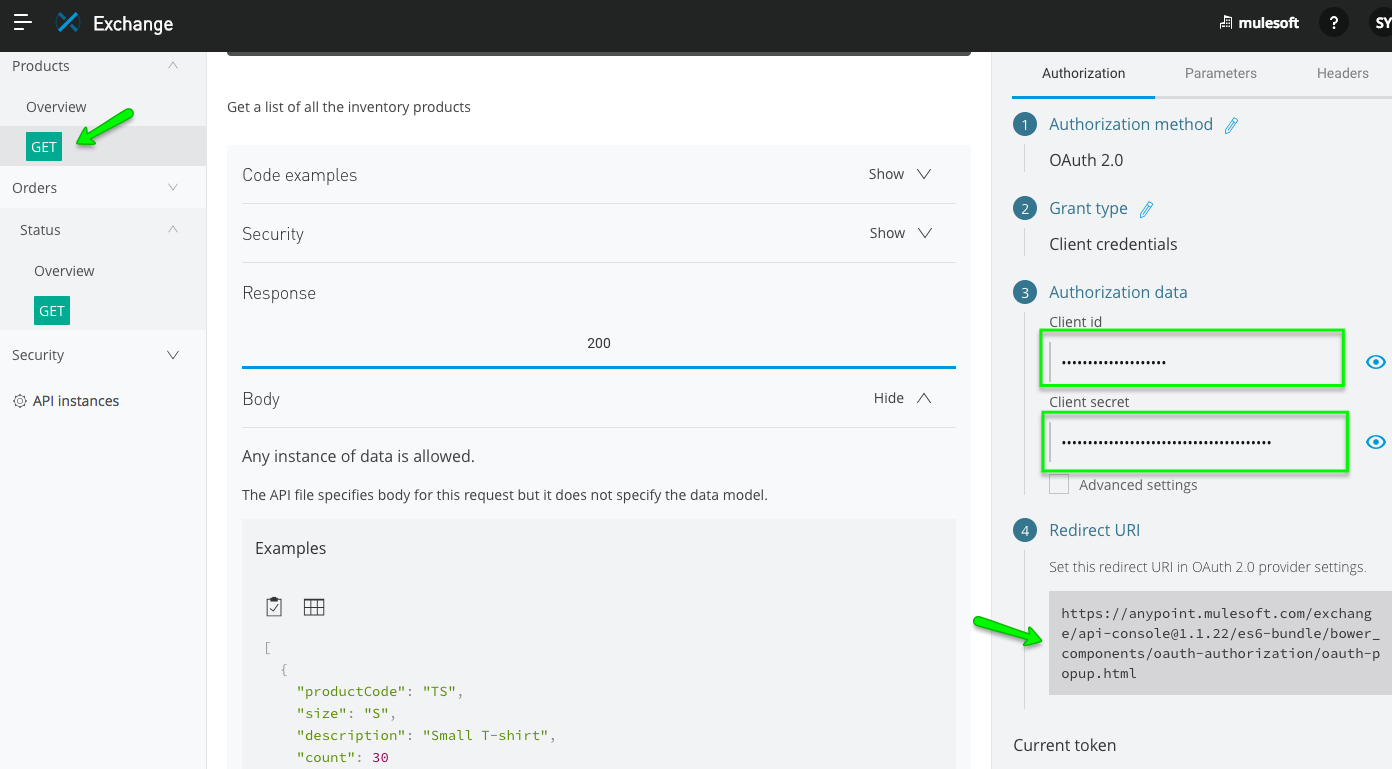
7. Get the Redirect URI and configure the client credentials
Test an API, in the Authorization tab, you will see the Redirect URL.Grab the URL and put into the application of Okta as in step 4. Grab the Client ID and Client Secret and put into the boxes in Exchange
8. Request the token and test
Click the "Request Token" button, you will get the token and then hit the send. You are able to test the API via the private exchange mocking endpoint now.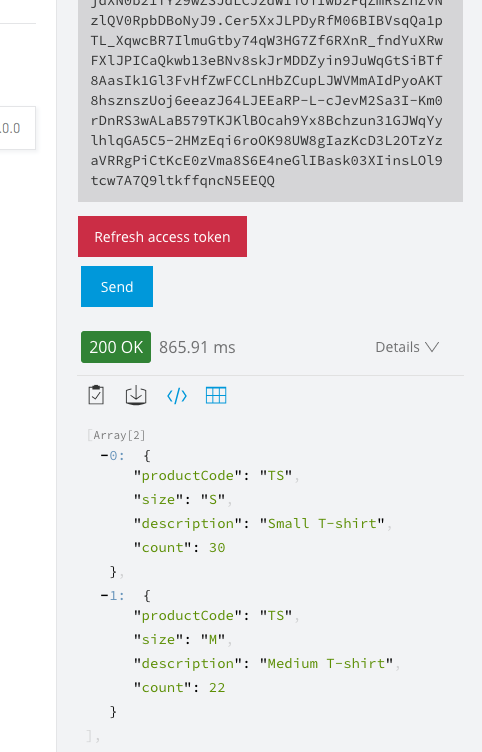
CAVEAT
There is a known issue when using Chrome browser to make the token request, which is described in this Okta article. You will see the below error message in Exchange API Console:
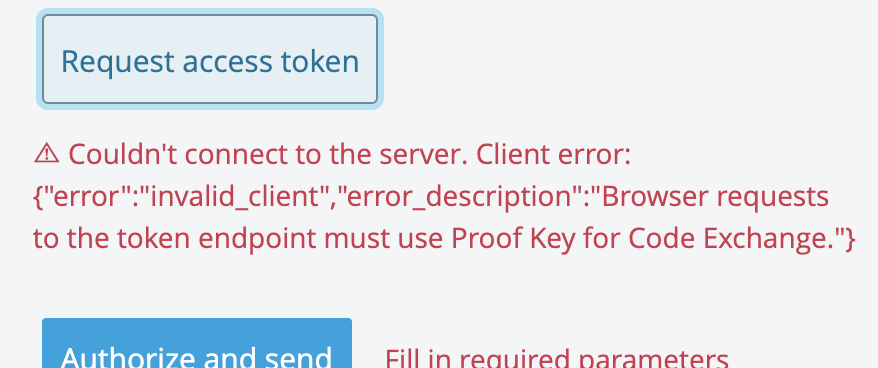
You can copy the request as a cURL command with the Developer Tools > Network tab, right-click on the failing call, "Copy as cURL", then remove the "Origin" header and run it in a command line terminal.
Numero articolo Knowledge
001114724
Questo articolo ha risolto il problema?
Facci sapere, così possiamo migliorare!