Vælg en organisation
Using a web browser and REST client to help understand API usage
Udgivelsesdato: Aug 5, 2025
Opgave
GOAL
When working with API's it is sometimes useful to identify a working example. In some scenarios, working examples are not forthcoming. This procedure demonstrates how to identify web request functionality and then import the request samples into a tool for further inspection.In the walkthrough, the example will demonstrate identifying a MuleSoft API call within the Anypoint Platform that allows us to inspect the application status. You will need to have access to view Runtime Manager for this example.
This example uses Google Chrome and Postman which are third-party products. MuleSoft does not provide technical support for these products.
Trin
- Open Google Chrome
- Navigate to https://anypoint.mulesoft.com and log in.
- Access Runtime Manager
- Open the Developer tools window in Google Chrome (View -> Developer -> Developer Tools)
- Select the "Network Tab" to show the web requests that are being displayed on the browser
- At this point, your window should look similar to this. You can change the window layout using the options provided in the menu (⋮)
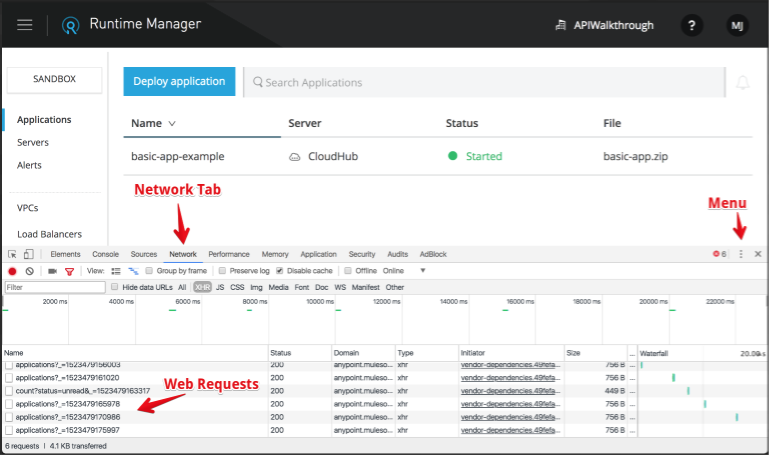
At this point, we can see that there are web requests being shown in the Console. We are interested in determining the API that shows the status of our applications.
- We can identify the correct request by looking at the name of the request. There are filtering and searching tools that can help with this process also.
- In this case, we are going to select the applications request and check the response contains the information we are after (which it does!)
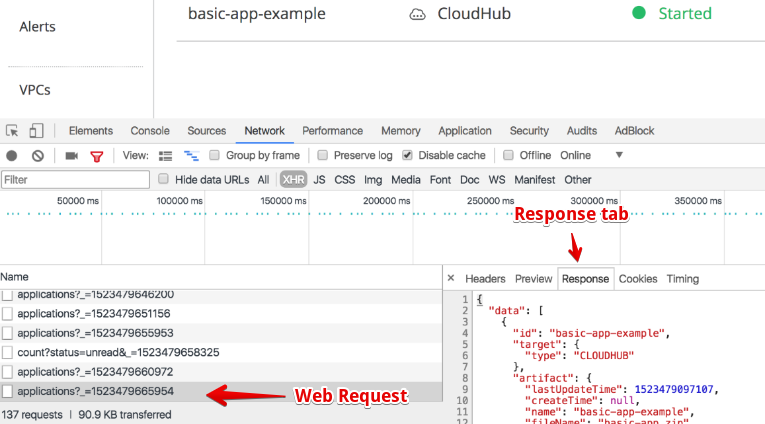
Now that we have successfully identified the web request, we need to export this request.
- Right click on the web request you wish to export.
- Select the "Copy" -> "Copy as cURL" (Note: Windows environments will show two options here, "cmd" and "bash", either are fine for this procedure)
- This procedure will copy the web request onto your system clipboard (Copy and Paste clipboard).
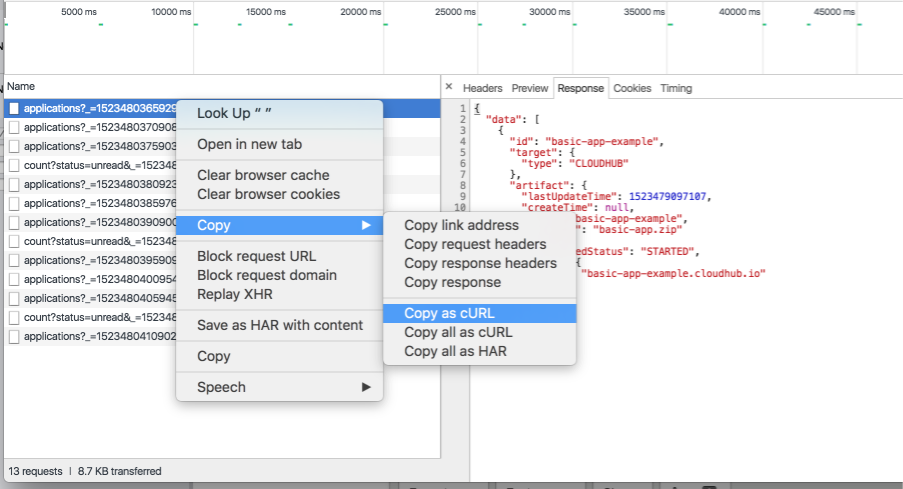
We can run what is available on our clipboard from the command line in systems that have the curl command installed and this is often a useful approach, however as you will see shortly, the browser request contains additional headers that are simply not required, or helpful for us when understanding how to use an API. At this stage, we can use Postman to provide a friendly GUI to work with the API.
- Open Postman
- Select the "Import" button from the main window. This will bring up the Import dialog.
- In the Import dialogue, select the "Paste as Raw Text" open, and paste the cURL request from the previous task.
- Once pasted, click the orange import button shown within the dialogue.
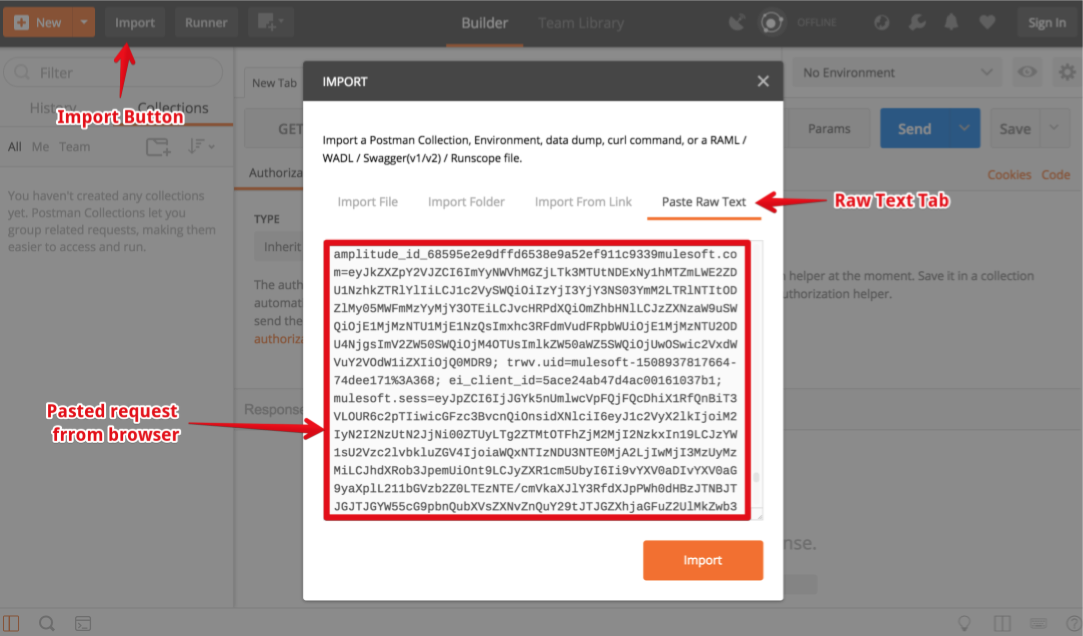
Once the cURL request is imported, you will be able to execute the request from Postman, an example is shown below, which shows the API result from calling the curl URL.
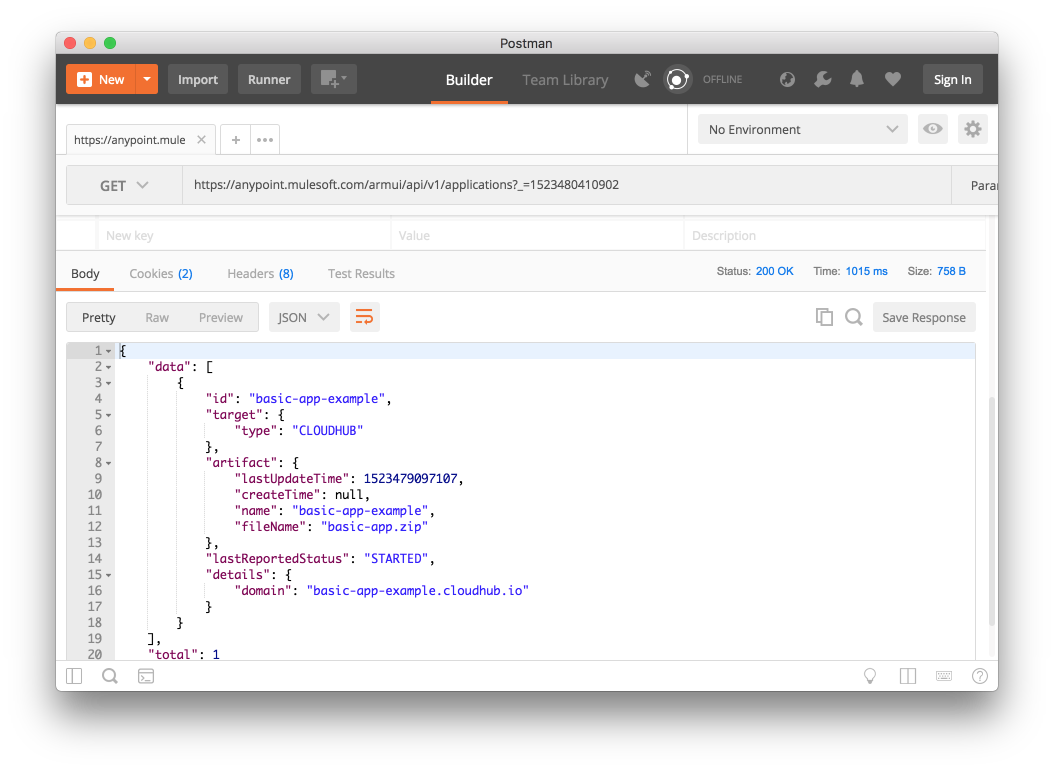
This procedure does not need to be limited to Anypoint API requests. We do recommend that only API's which are documented are used (to ensure that only publicized API's with a release management cycle are used). Additionally, some API's require authorisation. This example uses the existing token from the browser, however, these will expire. Review the How to generate your Authorization Bearer token for Anypoint Platform for guidance with this.
Vidensartikelnummer
001114991
Løste denne artikel dit problem?
Giv os besked, så vi kan forbedre os!
