選擇組織
Configuring Anypoint Platform as an Azure AD Service Provider (SP) using OIDC
發佈日期: Aug 5, 2025
工作
GOAL
To offer general guidelines on how to configure the Anypoint Platform as a Service Provider for Azure AD using OIDC.步驟
Azure AD Configuration
Step 1: Open your Azure Portal and Navigate to Azure Active Directory.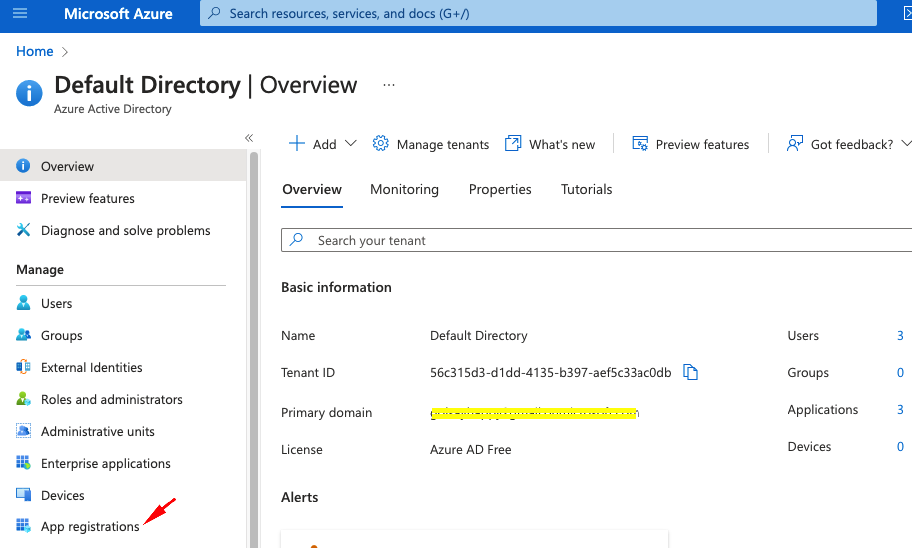
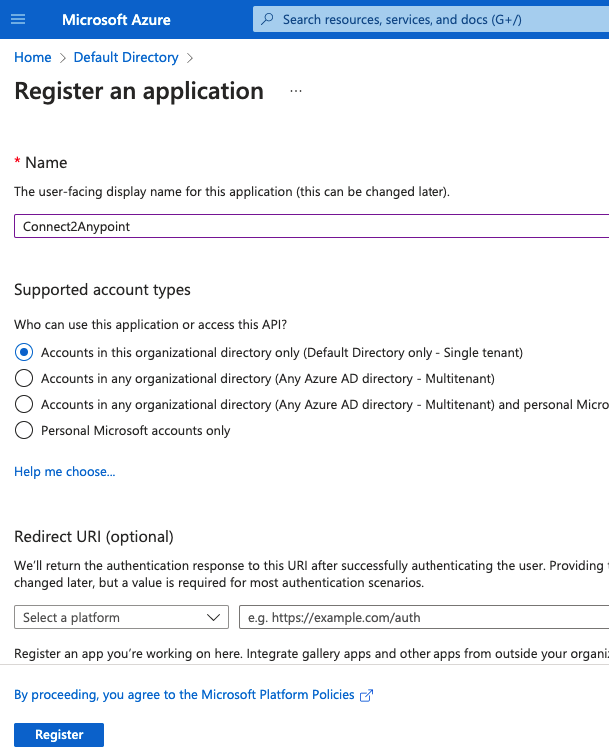
Step 2: Inside Azure Active Directory click on [App registrations], under the left Manage menu. Click + New registration to register an application. leave the Redirect URL as blank that we will set it later.
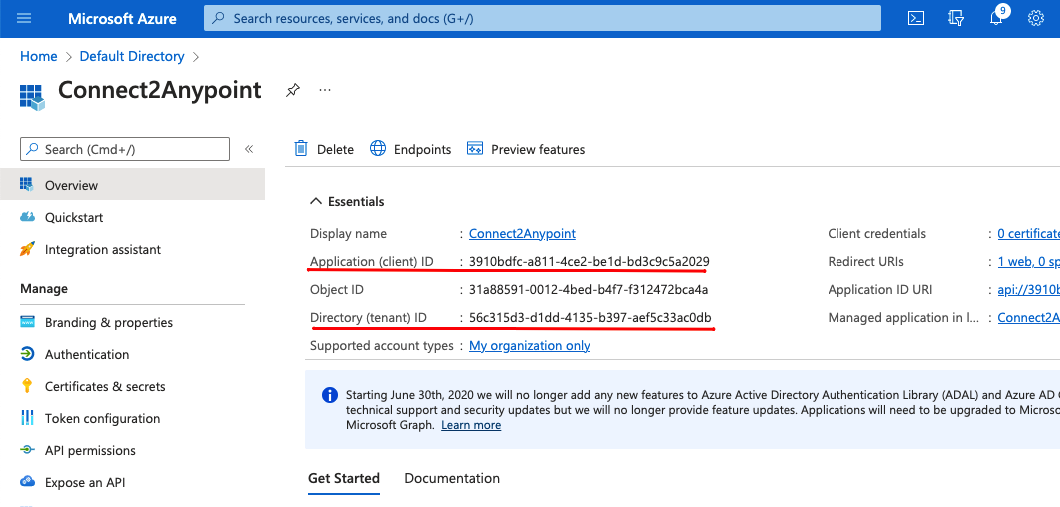
the registered application looks as below; take note value of "Application (client) ID" and "Directory (tenant) ID"
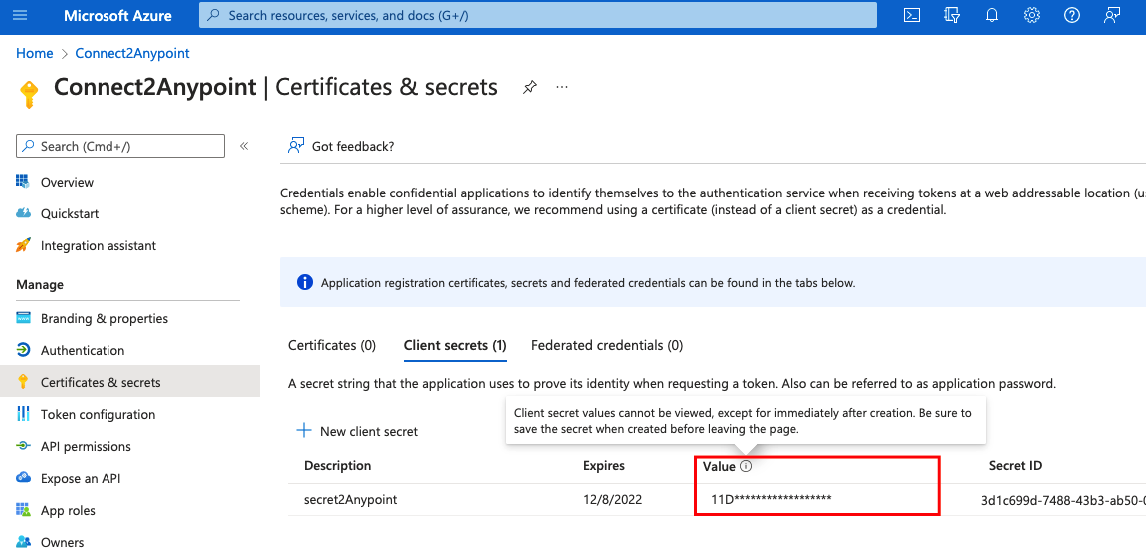
Step 3: Issue a client secret. Client secret values cannot be viewed, except for immediately after creation. Be sure to save the secret when created before leaving the page. Also note, use the value not the secret ID.
Step 4: Click on Expose an API
4-1. Add a scope
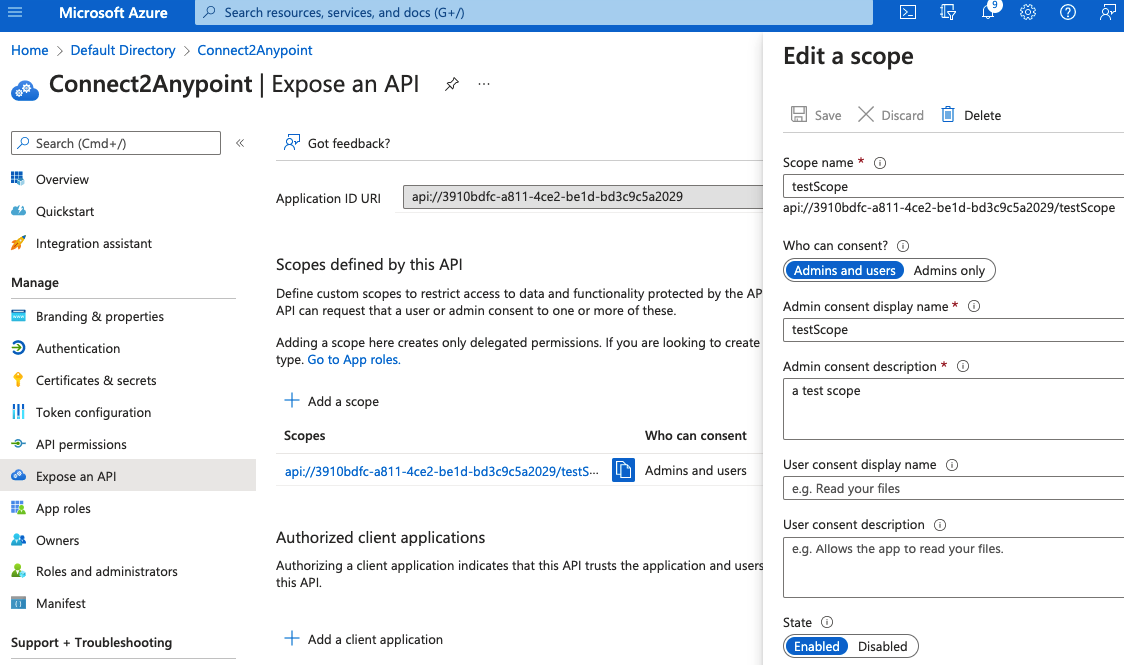
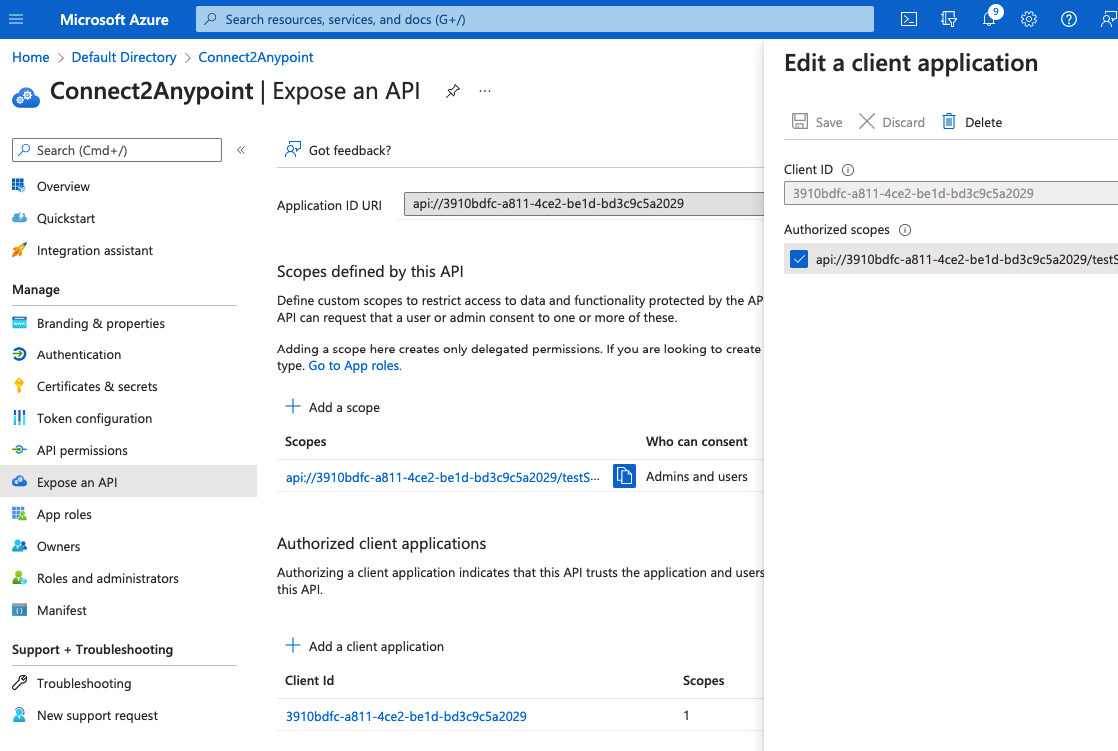
4-2. add a client application. Enter the client id as a value in step2.
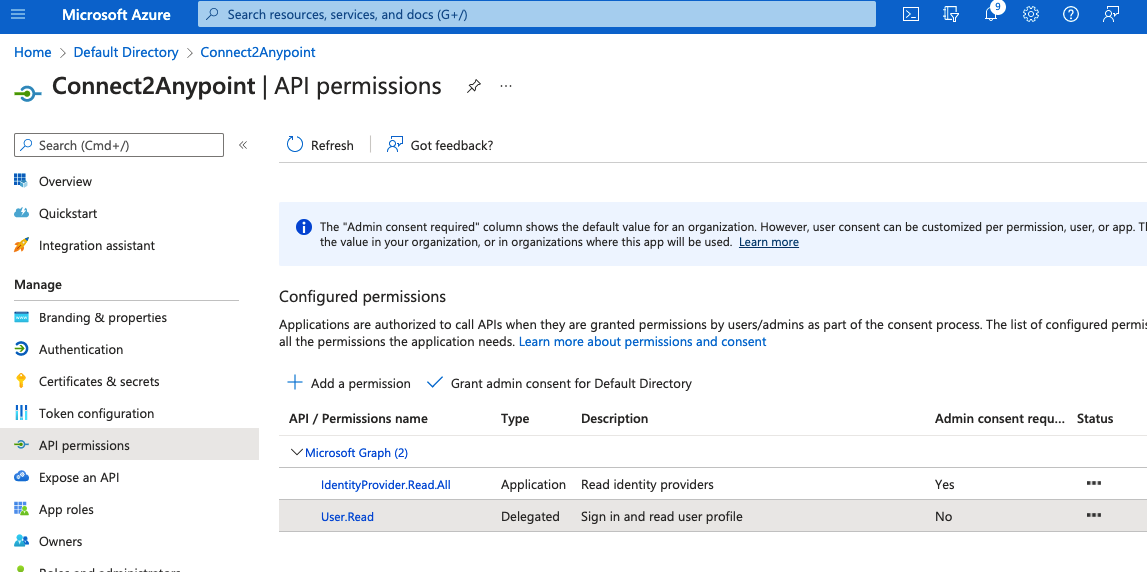
Step 5: Click on API permissions
select + Add a permission (either Delegated or Application permissions), grant permissions you want to set, then "Grant admin consent for Default Directory"
Anypoint Platform configuration
Step 1: Complete the required following fields on the Platform. You can use the following metadata captured previously. Replace "Directory (tenant) ID" with the value in Step2 above.https://login.microsoftonline.com/{Directory (tenant) ID}/.well-known/openid-configuration
e.g., https://login.microsoftonline.com/56c315d3-d1dd-4135-b397-aef5c33ac0db/.well-known/openid-configuration
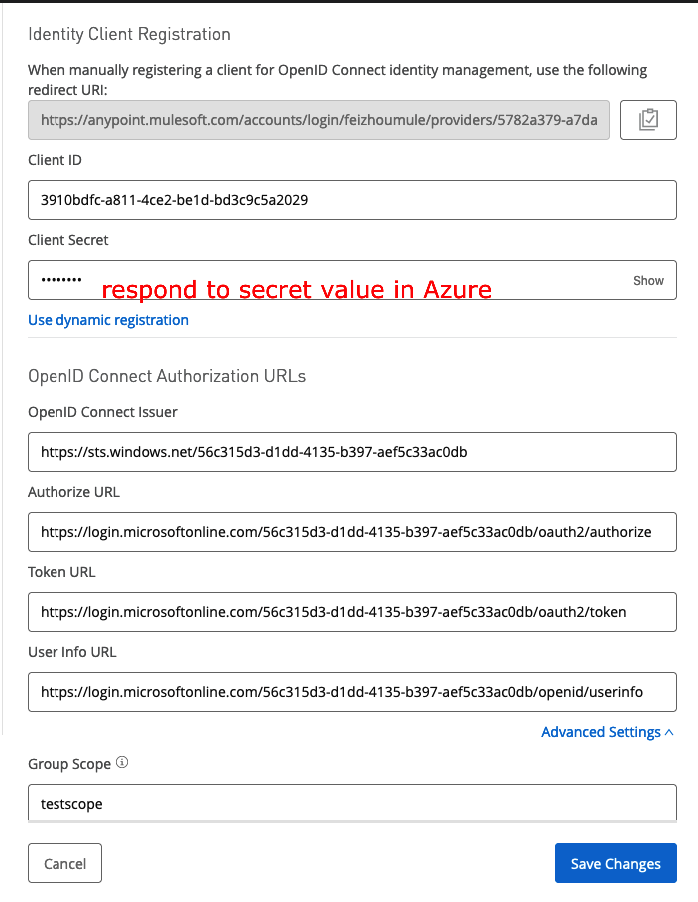
issuer : https://sts.windows.net/56c315d3-d1dd-4135-b397-aef5c33ac0db
authorization_endpoint : https://login.microsoftonline.com/56c315d3-d1dd-4135-b397-aef5c33ac0db/oauth2/authorize
token_endpoint: https://login.microsoftonline.com/56c315d3-d1dd-4135-b397-aef5c33ac0db/oauth2/token
userinfo_endpoint : https://login.microsoftonline.com/56c315d3-d1dd-4135-b397-aef5c33ac0db/openid/userinfo
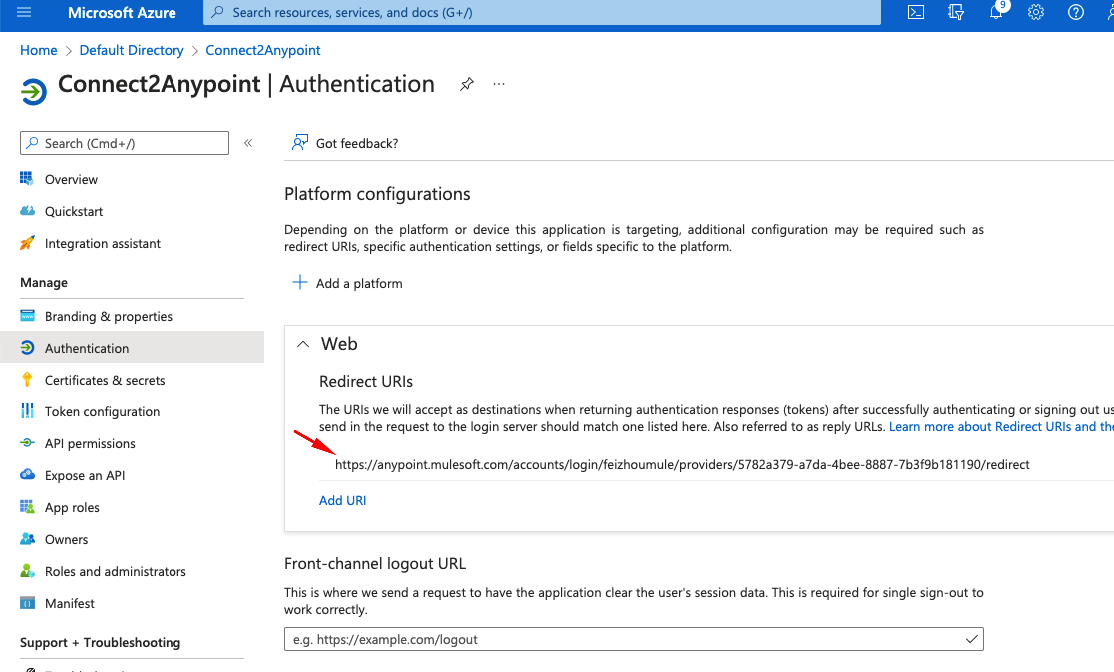
Step 2: Save the changes and copy redirect URL
Go back to Azure and the value into Web Redirect URIs
Finally test if OpenID is working
Test if you can login via domain url https://docs.mulesoft.com/access-management/test-external-identity-task
NOTES
Reference:OpenID Connect authentication with Azure Active Directory
Quickstart: Register an application with the Microsoft identity platform
You can reach out to Microsoft support team for any further queries.
知識文章編號
001115216
此文章是否解決您的問題?
請讓我們知道,以便我們改進!
