Sélectionner une organisation
Custom ACM API Approval
Date de publication: Aug 4, 2025
Tâche
GOAL
While the Anypoint Platform already allows a simple email-based approval process when a user requests access to an API, some customers have more complex requirements. This example illustrates how the approval process for APIs accessible through API Community Manager (ACM) can be customized, using the Salesforce Core Platform features available in Salesforce Community Manager.
Note: This is an example and is NOT part of the ACM product or supported by the ACM product team
Étapes
Overview of Example
This example uses a Custom Object, Lightning Components, Flows, Apex Classes, and an Approval Process to orchestrate the approval process. These can all be installed as an unmanaged Salesforce package, which means you can customize and extend them yourselves, to suit your customer's particular requirements. However, since they have been built against the latest version of ACM (as of 31/01/2020), you will not be able to install them on older releases.
Prerequisite
- A version 1.39 release or later of ACM installed and linked to the Anypoint Platform
- A published API that you can request access to. See here for the criteria an API must satisfy
- Set Up a Community User as well as yourself as Administrator. You can use your work email address for both of these or use your Salesforce email address for one and MuleSoft email addresses for the other. Then setup the Administrator as the Manager of the Community User - for the approval process to work
Installation Steps
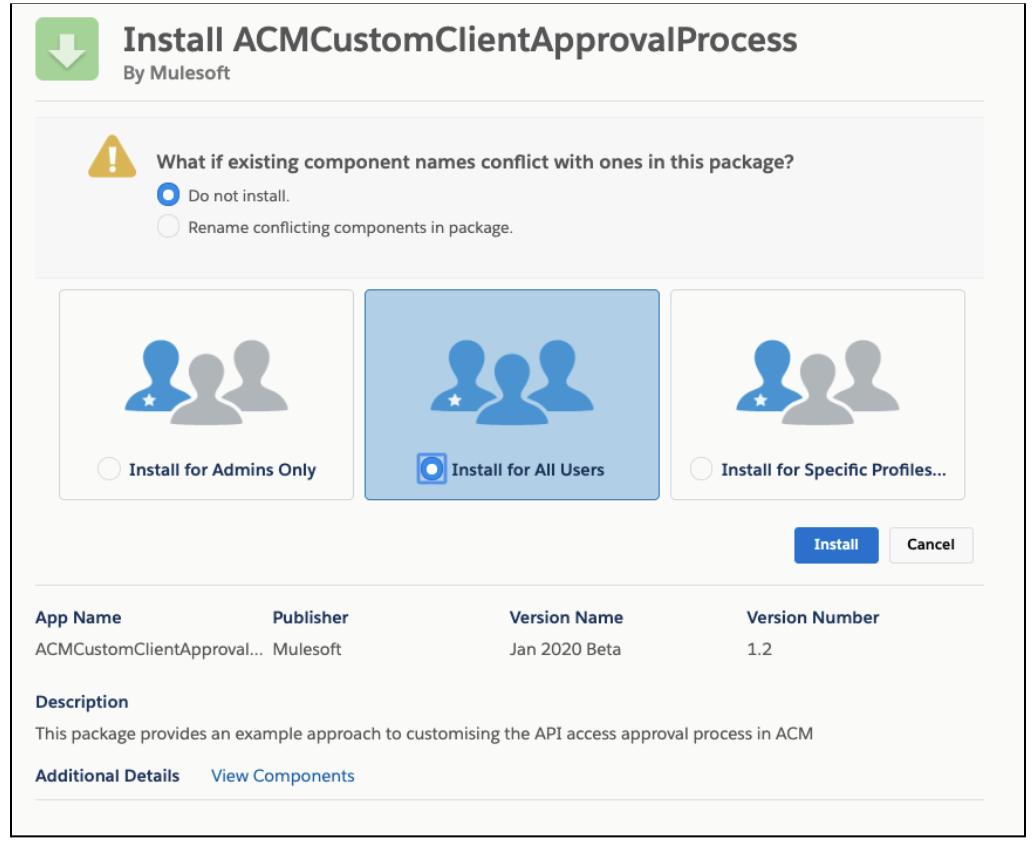
- Log in to your instance of ACM and in another tab, go to one of the links below. This will open a page asking if you want to install the package example (please ignore the slight name difference in the images)
ExampleACMCustomClientApprovalProcess
Version 1.5
Use this URL to install the package into any organization:
The package may vary from version to version.
https://login.salesforce.com/packaging/installPackage.apexp?p0=04t3z0000010SDd
Note: If you are installing into a sandbox organization you must replace the initial portion of the URL with http://test.salesforce.com
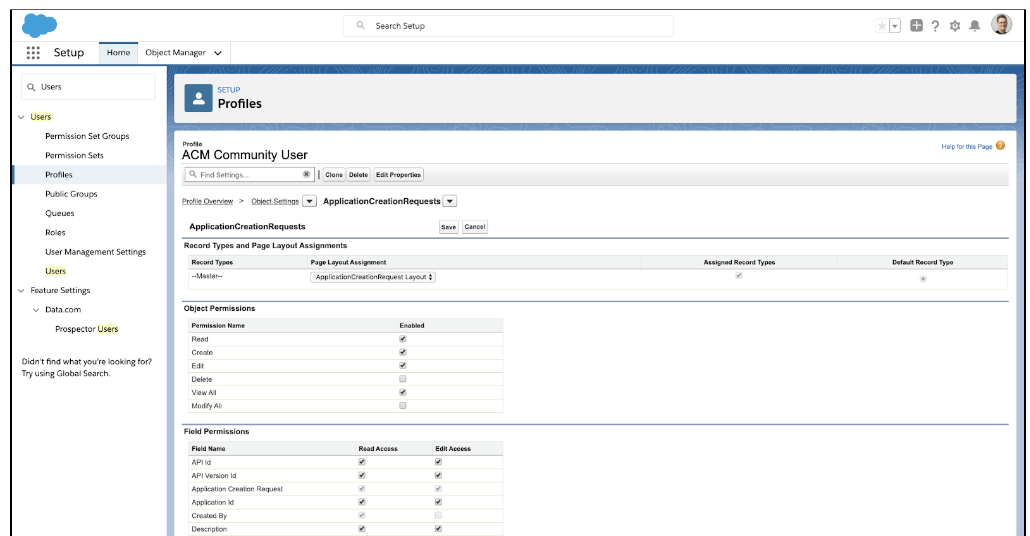
2. Set up permissions so that the administrator and all users can use the components. Open ACM console and in Setup navigate to Users > Profiles > ACM Community User, and edit the Object Permissions for the ApplicationCreationRequests object, to give users Read, Create, View All and Edit permissions. Then enable access for editing all the Field Permissions
Setup
1. Part of the custom approval process involves calling a Salesforce Approval Process. In the example, it's called Access_Approval_Process, though the name can be renamed in the Capture API Request Flow. However, Salesforce Approval Processes cannot be added to a package, they can only be exported and imported between Salesforce Orgs. For this reason, you will need to define a new approval process when you set up the example. The steps to do this are outlined here, but there are a few assumptions about the approval process you create;
- Its name will match that specified in the Capture API Request Flow
- It will automatically be assigned, e.g. to the manager of whoever calls it. For instance, if its an external user then someone must be assigned as the approver
- After an accepted or rejected email has been sent the Status field of the ApplicationCreationRequest passed to the approval process must be set to Approved or Rejected, depending on the outcome
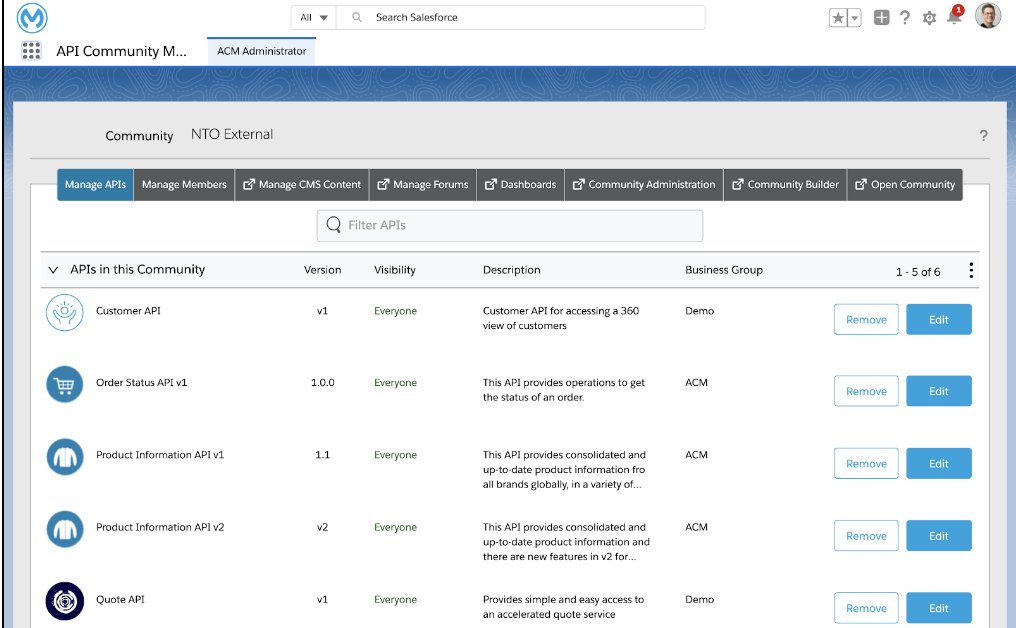
2. Login to ACM as an administrator and go to the NTO Community page
3. Select Community Builder
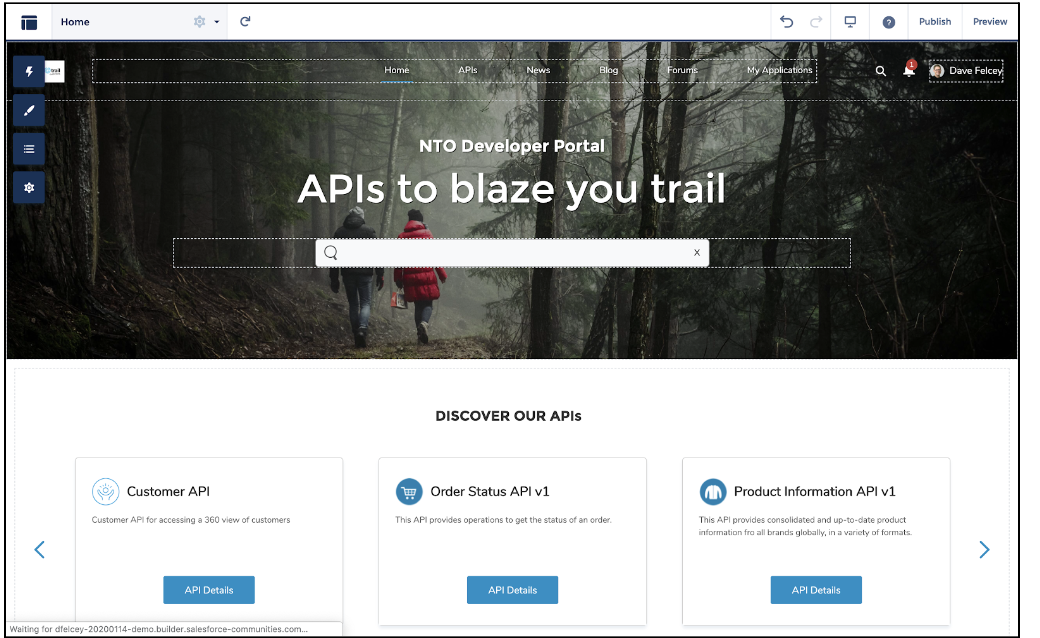
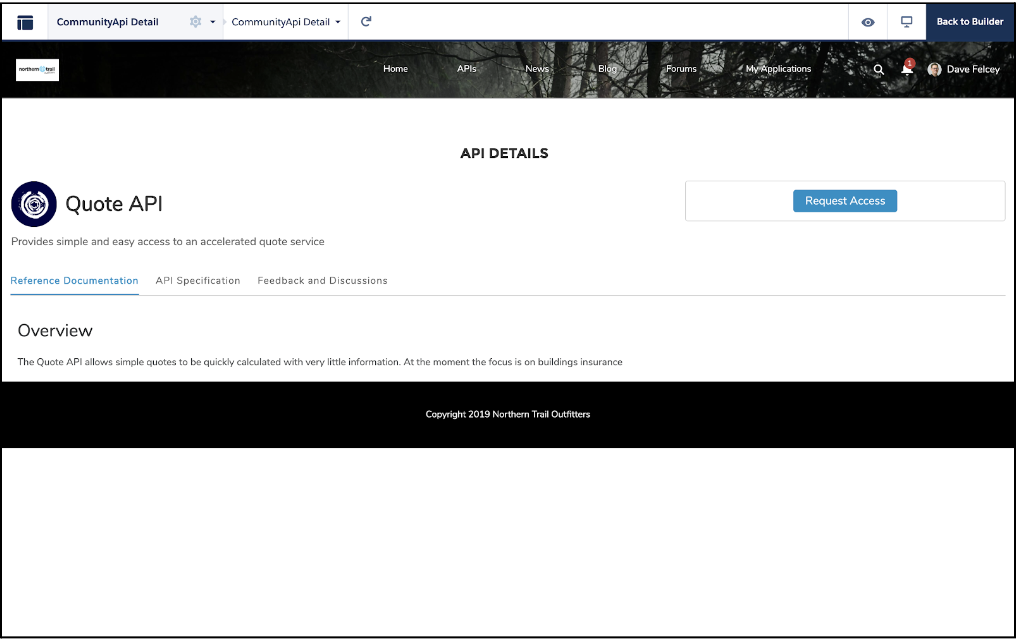
4. Switch to Preview mode (top right) and then navigate to the page where your API is (your view will look different)
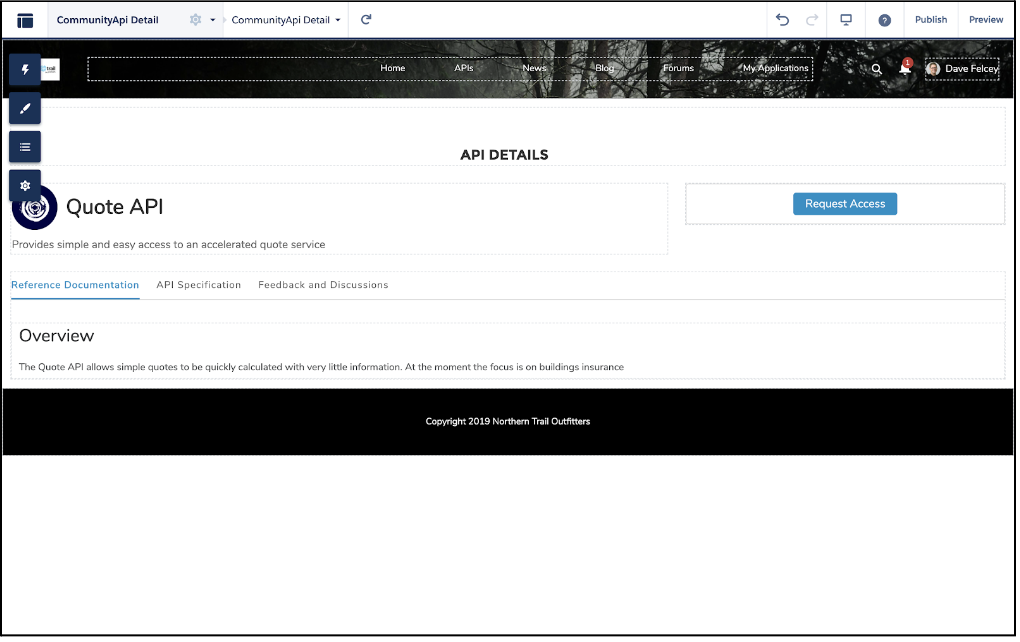
5. Switch back to Builder mode (top right button)
6. Select the “Custom Request Access Button” from the lightning components palette and drag it below the standard “API Access Requester” button
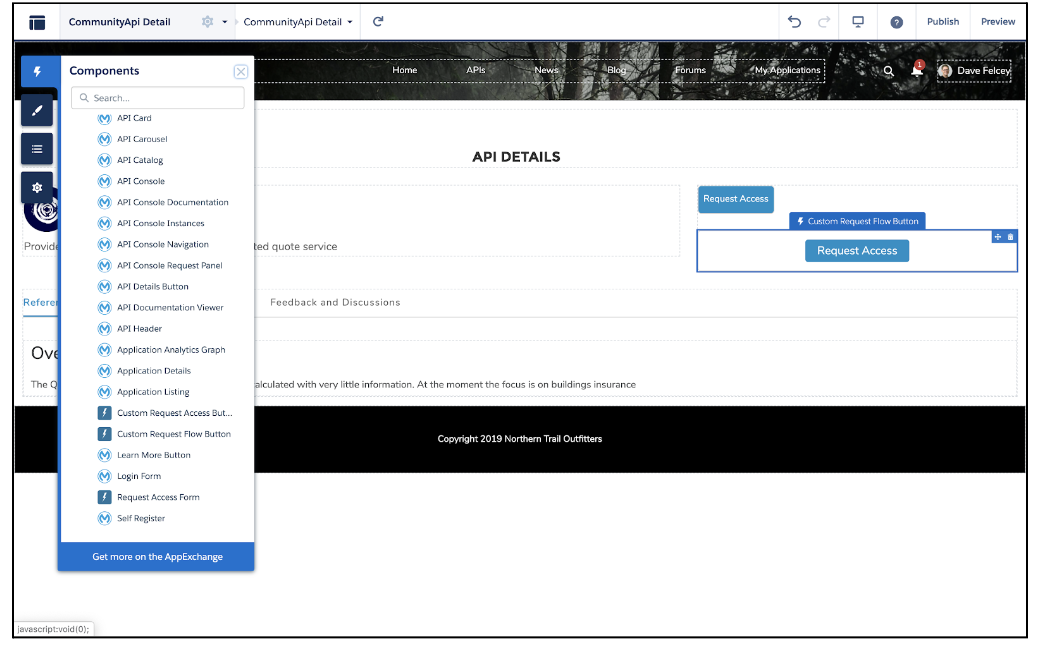
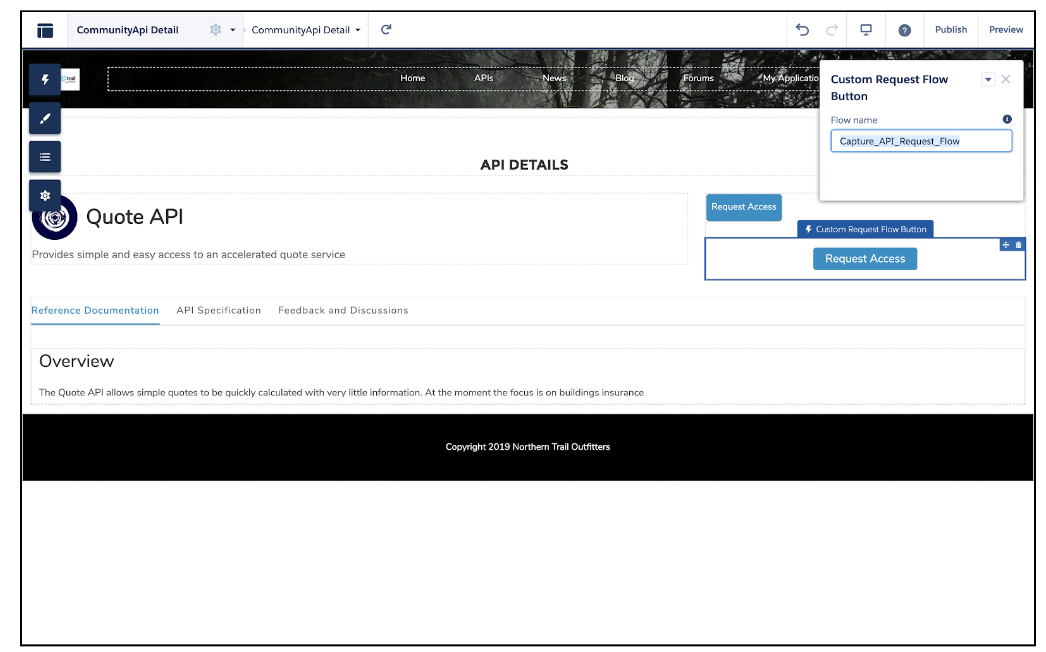
7. Then remove the “API Access Requester” button (or leave it if you want) and enter the name of the Flow that the new button will invoke. It should be Capture_API_Request_Flow
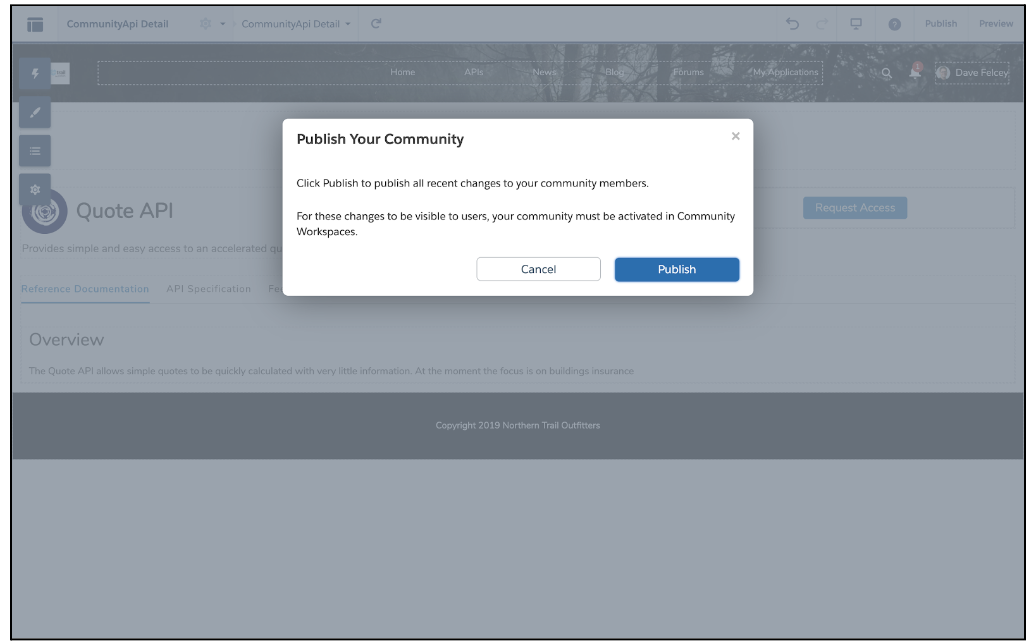
8. Then click on the Publish button (top right) to save and publish your changes
NOTE: The UI might vary from version to version, but the functionality will remain the same.
3. Select Community Builder
4. Switch to Preview mode (top right) and then navigate to the page where your API is (your view will look different)
5. Switch back to Builder mode (top right button)
6. Select the “Custom Request Access Button” from the lightning components palette and drag it below the standard “API Access Requester” button
7. Then remove the “API Access Requester” button (or leave it if you want) and enter the name of the Flow that the new button will invoke. It should be Capture_API_Request_Flow
8. Then click on the Publish button (top right) to save and publish your changes
NOTE: The UI might vary from version to version, but the functionality will remain the same.
Numéro d’article de la base de connaissances
001115253
Cet article a-t-il résolu votre problème ?
Dites-nous ce que nous pouvons améliorer !