Organisation auswählen
How to Use Okta as OAuth provider for Mule APIs
Veröffentlichungsdatum: Mar 2, 2024
Schritte
How to Use Okta as OAuth provider for Mule APIs
- This document gives the overview of enabling security on MuleSoft APIs with OAuth, and follow by an Use Case that demonstrates end to end OAuth flow
OAuth 2.0 Access Token Enforcement
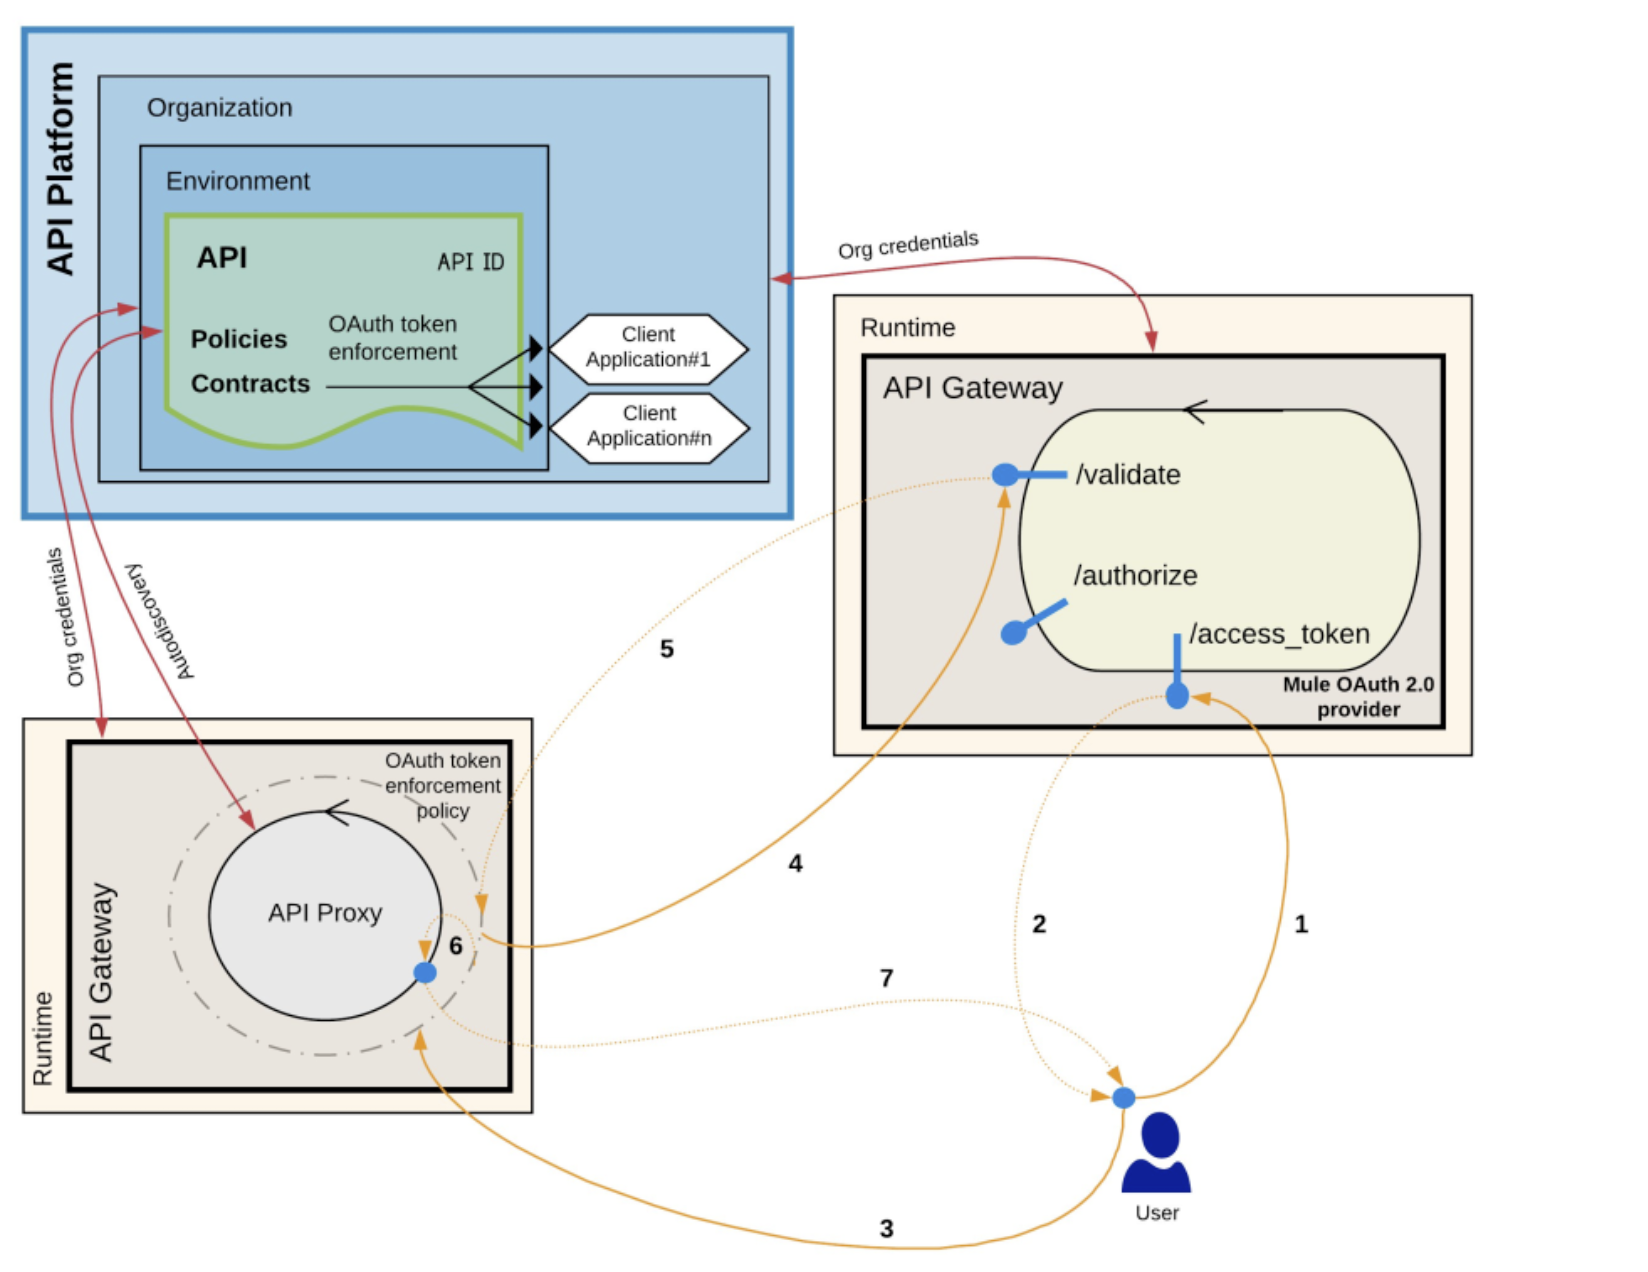
- A token request is sent to the provider, specifying client application credentials as needed.
- The credentials correspond to a client ID and secret generated by Anypoint Platform.
- The Mule OAuth 2.0 provider returns a token.
- An HTTP request is performed against the protected resource to which the OAuth 2.0 Access Token Enforcement policy is applied.
- The protected resource must be linked with the API definition through Autodiscovery.
- The OAuth 2.0 Access Token Enforcement policy intercepts this request and communicates with the provider to validate the token.
- If the token is correctly validated:
- The token is whitelisted and kept on the record until it expires. Any further request that contains this token is not validated against the OAuth provider.
- The associated client ID of the client application credentials is verified to ensure that the application has an active contract with the API. This is not applicable to OpenAM providers.
- The request is then forwarded to the resource.
- An HTTP response is generated.
Use Case
As mentioned in above diagram, we are going to implement an API with 2 endpoints (/resources - get and /resources - post). Get endpoint is secured by ReadScope and POST endpoint will be secured by WriteScope. Please refer following RAML file for more details.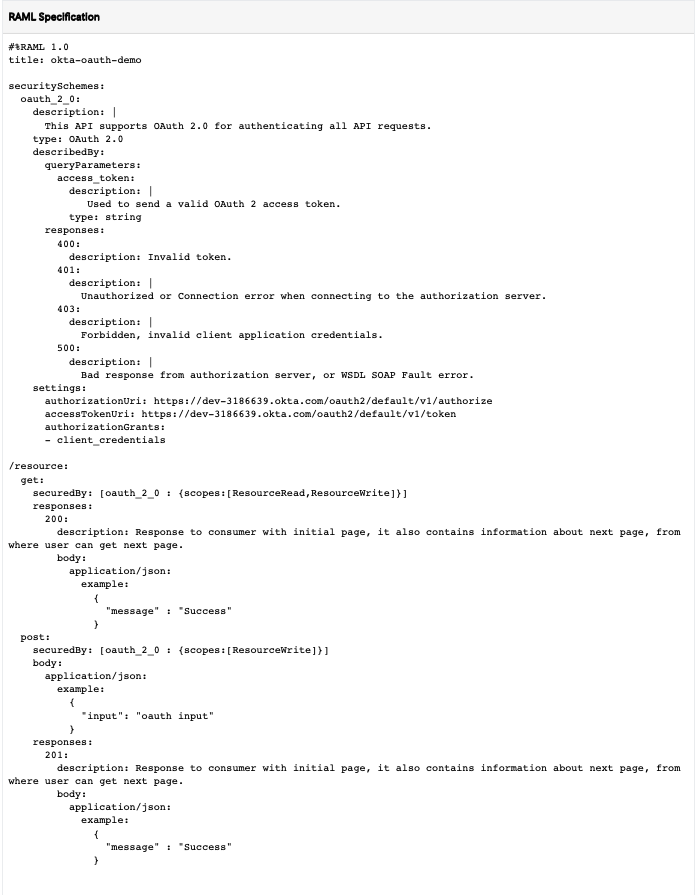
Setup Okta
- Create a trail account in Okta developer portal
- https://developer.okta.com/signup/
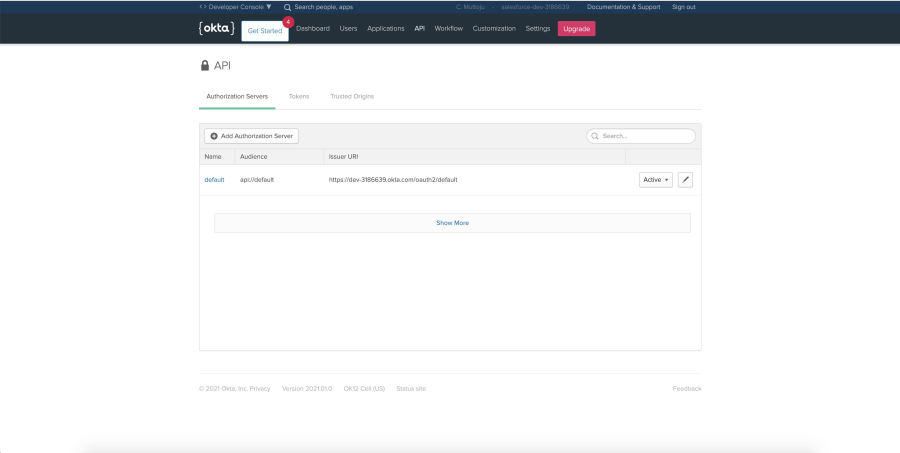
- By default you can see default oAuth server is created. API → Authorization Servers
- Get the metadata for oAuth server. (This metadata will be used to configure in Anypoint platform)
- Click on default server
- Open Metadata URI
- API → Authorization Servers → default → Settings
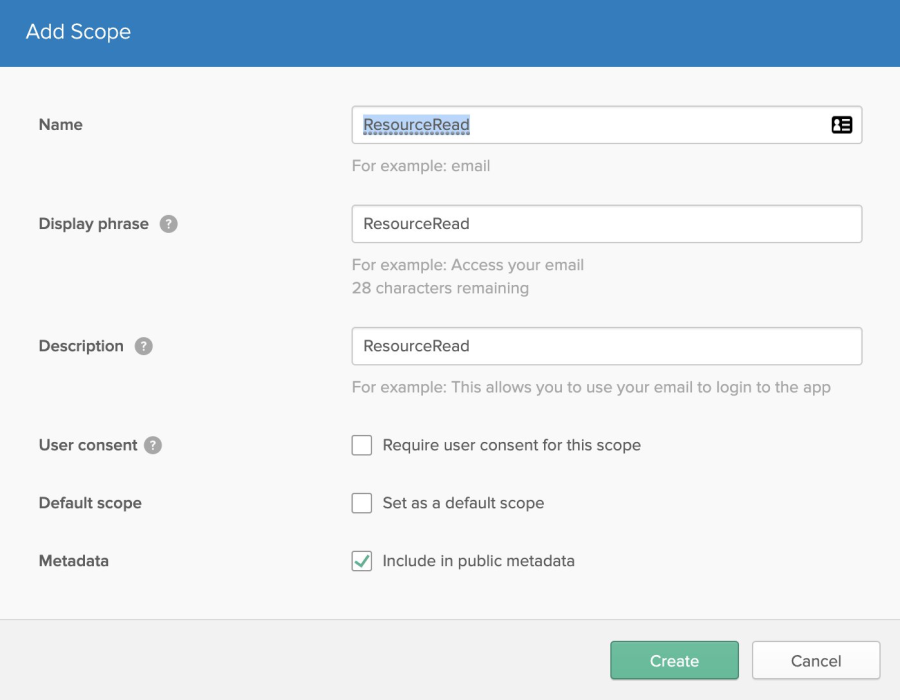
- Create required two scopes ResourceRead and ResourceWrite
- Navigate to API → Authorization Servers → default → Scopes → Add Scope
- Navigate to API → Authorization Servers → default → Scopes → Add Scope
- Access Policies will be created once we created the client applications
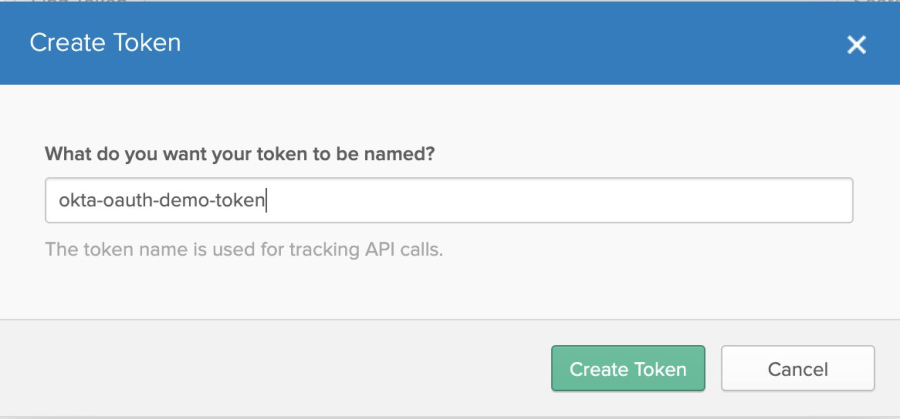
- Create a Token to provide access to client provider in Anypoint Access Manager
- API → Tokens → Create Token
- API → Tokens → Create Token
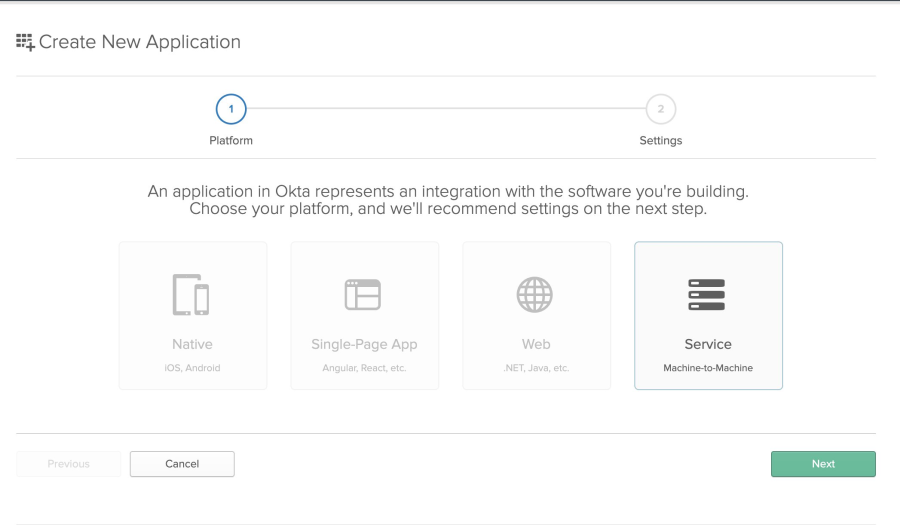
- Create client application to provide access to client provider in Anypoint Access Manager
- Applications → Add Application → Create Token
-
- In the initial screen select Service(Machine-to-Machine) → Next
- APPLICATION SETTINGS screen give proper application name
- Once you created the client application successfully you you get Client ID and Client Secret (This client id and secret will be used for configuring client provider in Okta
- Applications → Add Application → Create Token
Setting up In Anypoint Platform Access Manager
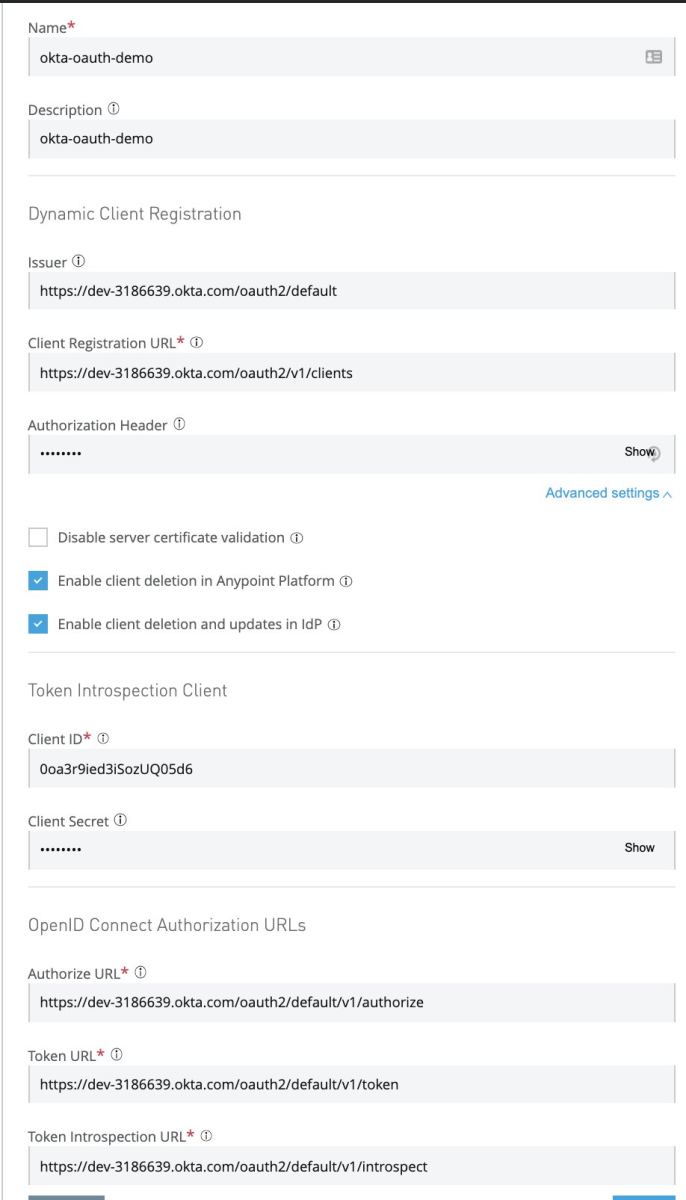
- Navigate to Access Management → Client Providers → Add Client Provider → OpenID Connect Dynamic Client Registration
- Name : Relevant Name for client provider
- Description: Proper description for client provider
- Issuer: This can get it from step 3 under Setup Okta
- Client Registration URL: This can get it from step 3 under Setup Okta
- Authorization Header: Token created in step 6 under Setup Okta
- Note: This value should be prefixed with SSWS, e.g., SSWS $TOKEN
- Client ID: You can get it from step 7 under Setup Okta
- Client Secret: You can get it from step 7 under Setup Okta
- Authorize URL, Token URL and Token Introspection URL: You can get it from step 3 under Setup Okta
- Create
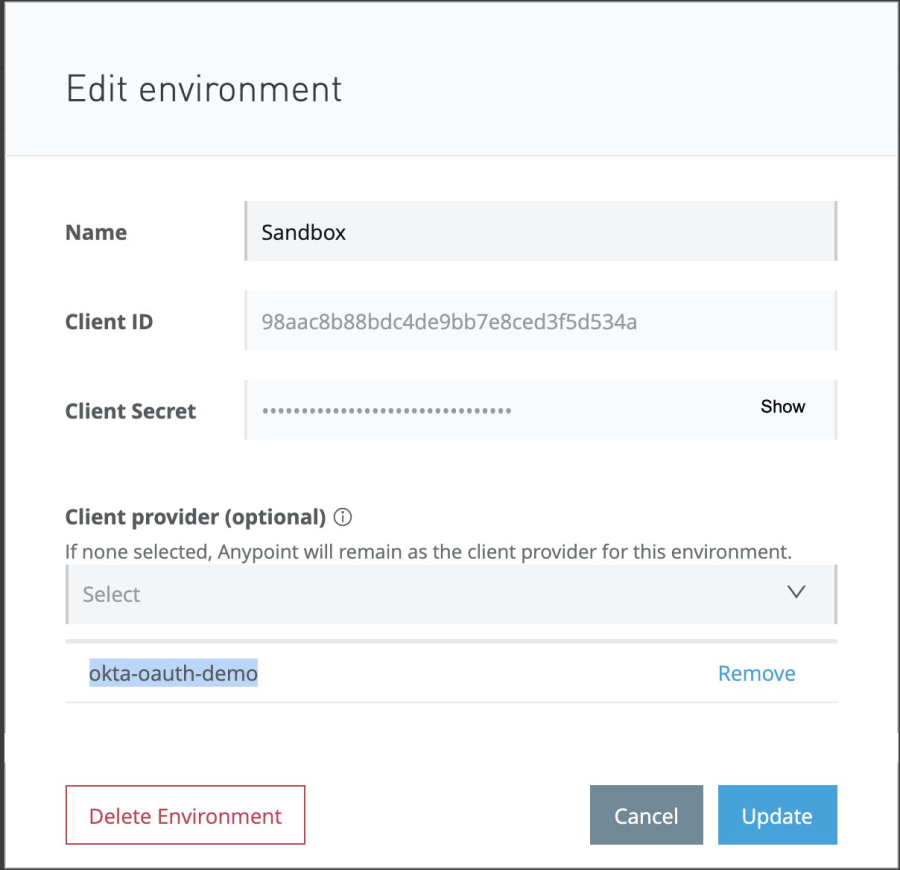
- Assign this client provider to desired environment
- Access Management → Environments → <<Environment>>
- Select appropriate value under Client provider dropdown.
Deploy API and Apply Policy
- Create API specification with RAML mentioned in Use Case section through Design Centre: Refer to API Designer For more information how to create API specifications
- Publish it to exchange
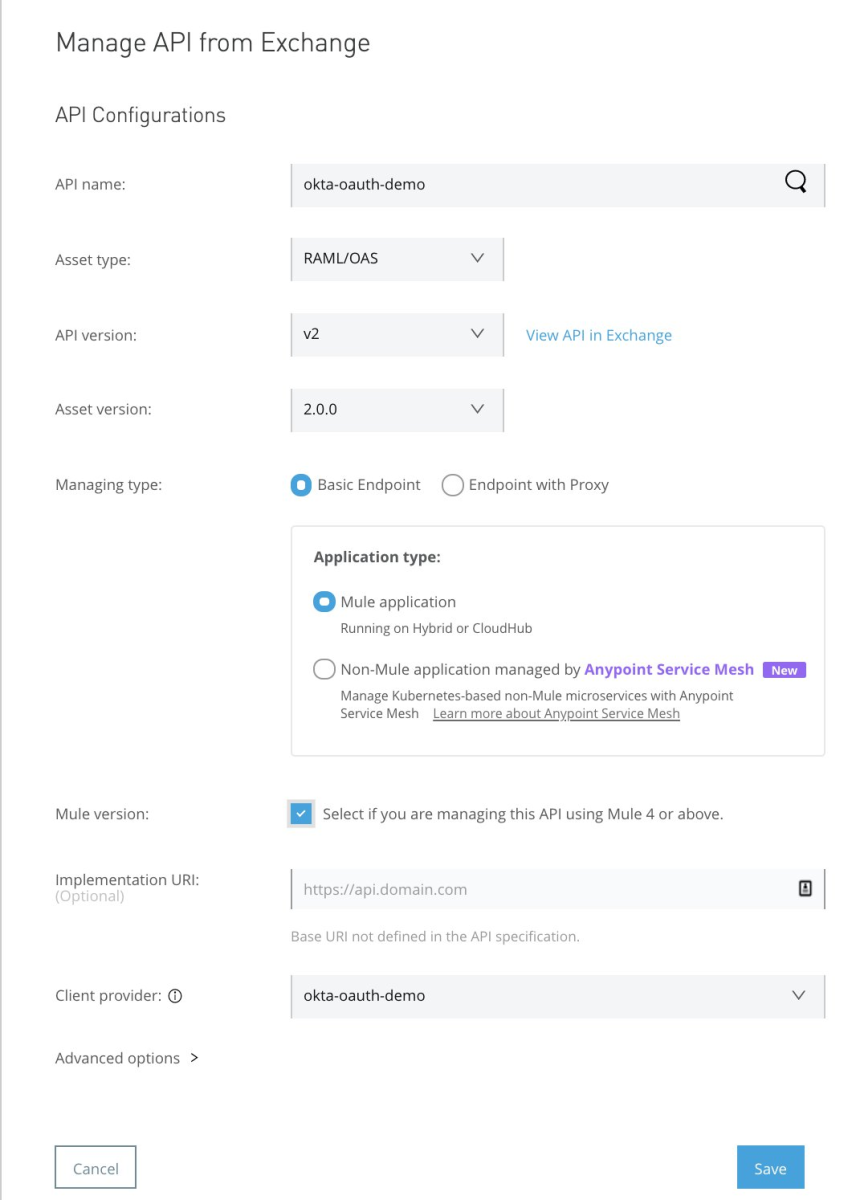
- Make an entry in API Manager
- API Manager → Manage API from Exchange → Select the API published to exchange
- Along with other details, select Client Provider that is created in previous section
- Apply the policies
- Policy for Get Request
- API Manager → Open API Created → Policies → Apply New Policy
- Select latest version of OpenId Connect access token enforcement
- Scopes: ResourceRead ResourceWrite
- Select Apply configurations to specific methods & resources
- Under Methods and resources, Methods: GET ; URI template regex: /resource
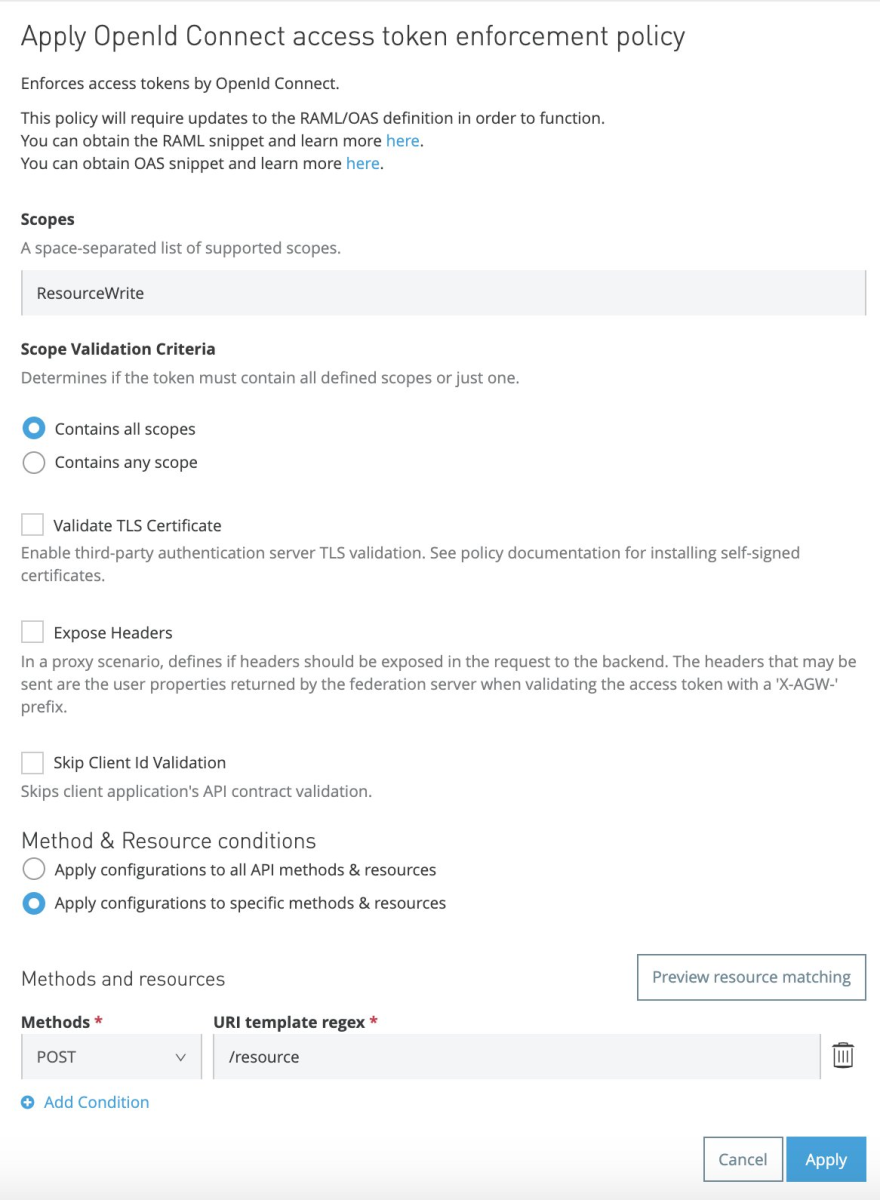
- Policy for POST Request
- API Manager → Open API Created → Policies → Apply New Policy
- Select latest version of OpenId Connect access token enforcement
- Scopes: ResourceWrite
- Select Apply configurations to specific methods & resources
- Under Methods and resources, Methods: POST; URI template regex: /resource
- Policy for Get Request
- Setup SLAs as required

Request Application Access and Applying policy rules in Okta
- Go to exchange and find the application published
- Request access
- API Instance: Select Appropriate API instance
- Application: Create a new application
- Application Name: okta-oauth-read-demo
- OAuth 2.0 Grant type: Check Authorization Code Grant
- OAuth 2.0 redirect URIs: http://localhost:8080/callback
- Create
- Select SLA tier if created one
- Repeat the same process for writer client application
- API Instance: Select Appropriate API instance
- Application: Create a new application
- Application Name: okta-oauth-write-demo
- OAuth 2.0 Grant type: Check Authorization Code Grant
- OAuth 2.0 redirect URIs: http://localhost:8080/callback
- Create
- Select SLA tier if created one
- If you navigate to Okta → Applications you see 2 new application are created corresponds to client applications created in Anypoint exchange
- Open each Application and select Client Credentials under Allowed grant types section
- Copy Client ID and Secret for each app, these details will be used to generate access_token
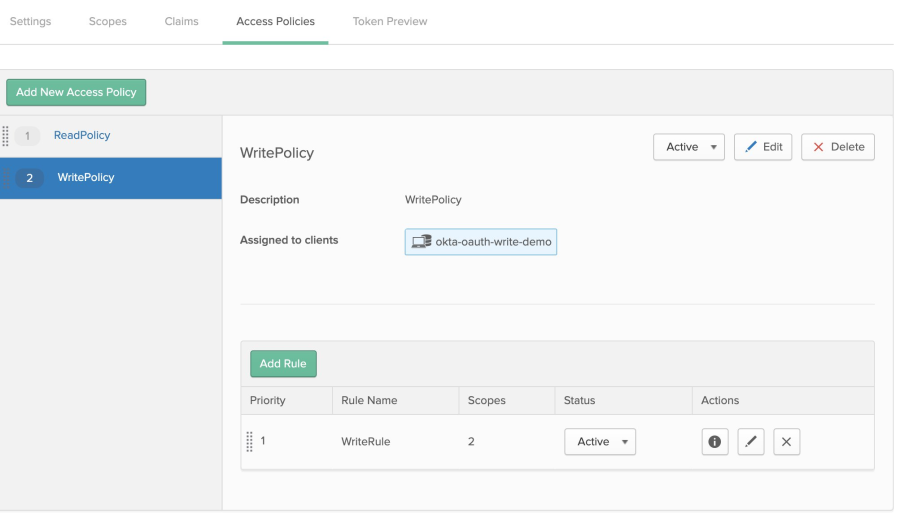
- Navigate to API → Authorization Servers → default → Access Policies for updating access policies
- Delete the default policy
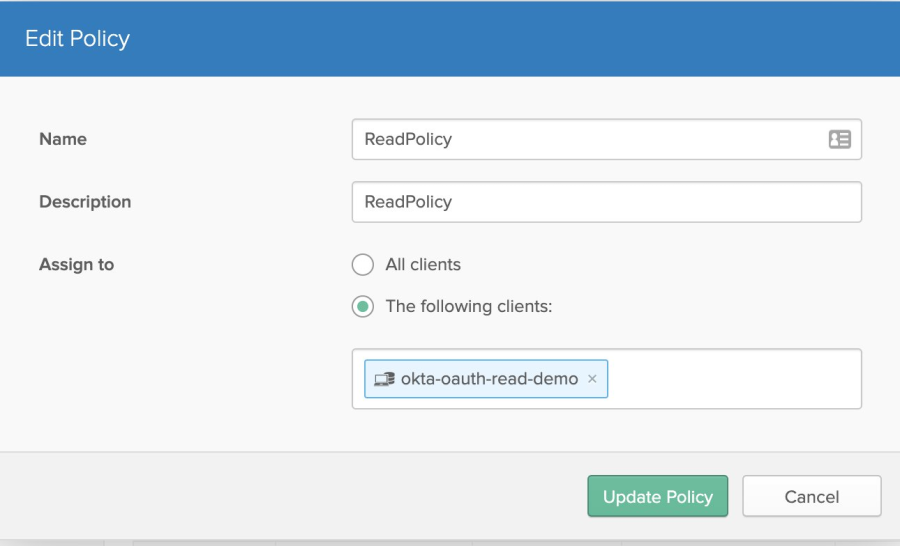
- Create Read Policy
- API → Authorization Servers → default → Access Policies → Add New Access Policy
- Name: ReadPolicy
- Description: ReadPolicy
- Assign to: The following clients: → okta-oauth-read-demo
- API → Authorization Servers → default → Access Policies → Add New Access Policy
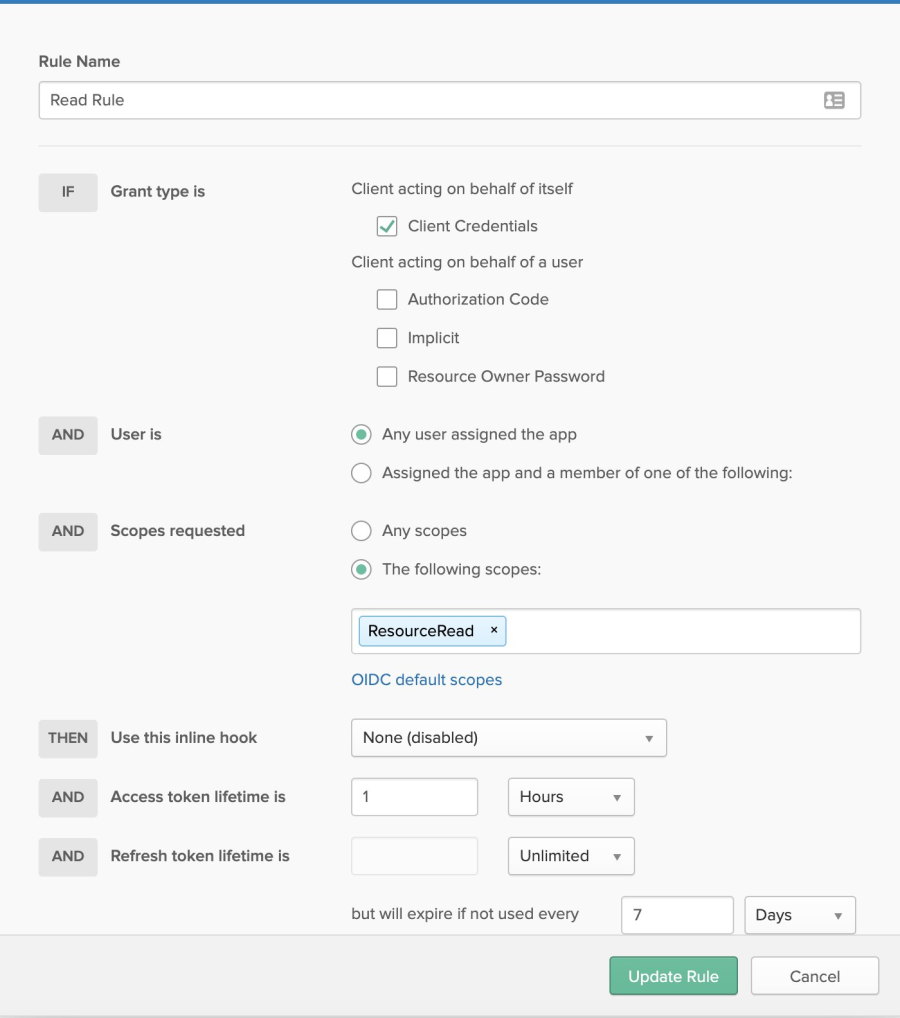
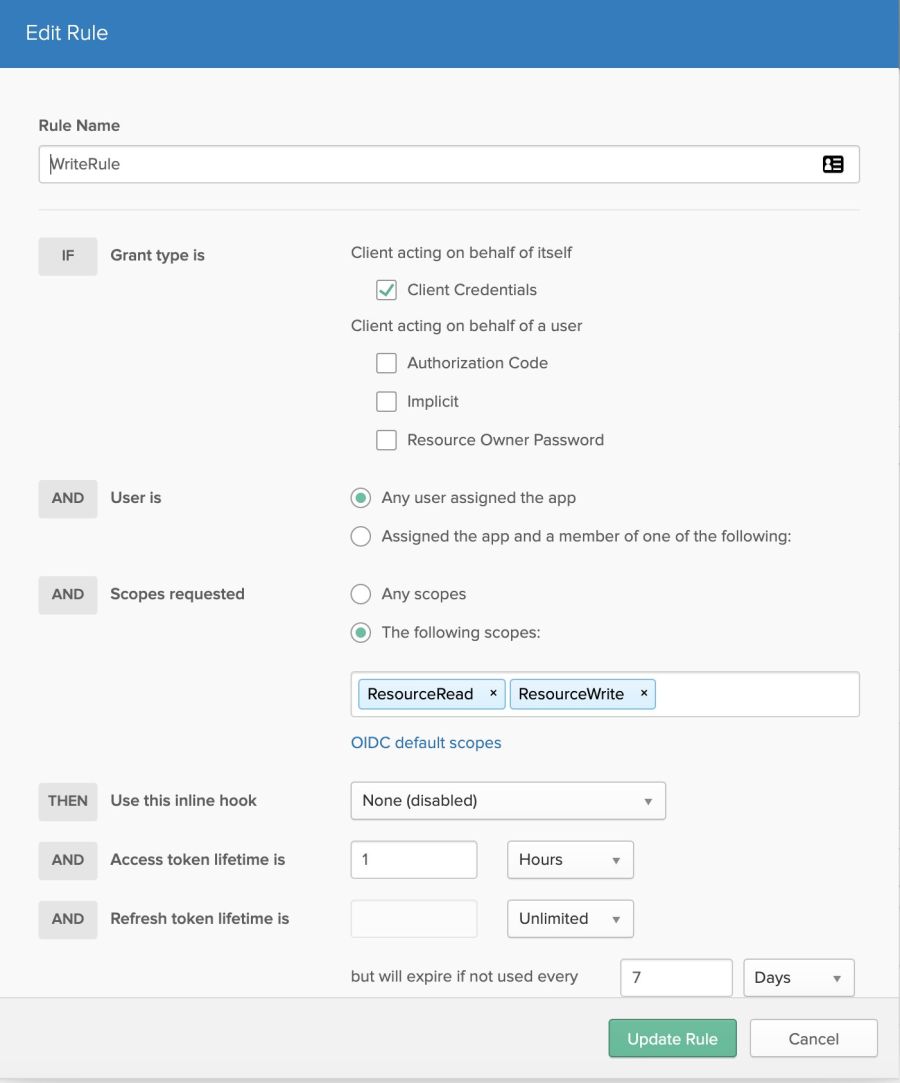
- Now Click on Add Rule
- Create Rule as shown in screenshot
- Create Rule as shown in screenshot
- Repeat the same for Write policy
Nummer des Knowledge-Artikels
001115610
Konnten Sie Ihr Problem mithilfe dieses Artikels lösen?
Geben Sie uns Feedback, damit wir uns verbessern können.