Välj en organisation
How to Configure Anypoint SSO With Salesforce OpenID Connect
Publiceringsdatum: Mar 2, 2024
Uppgift
GOAL
Configure an External Identity Provider in Anypoint using Salesforce OpenID Connect.Steg
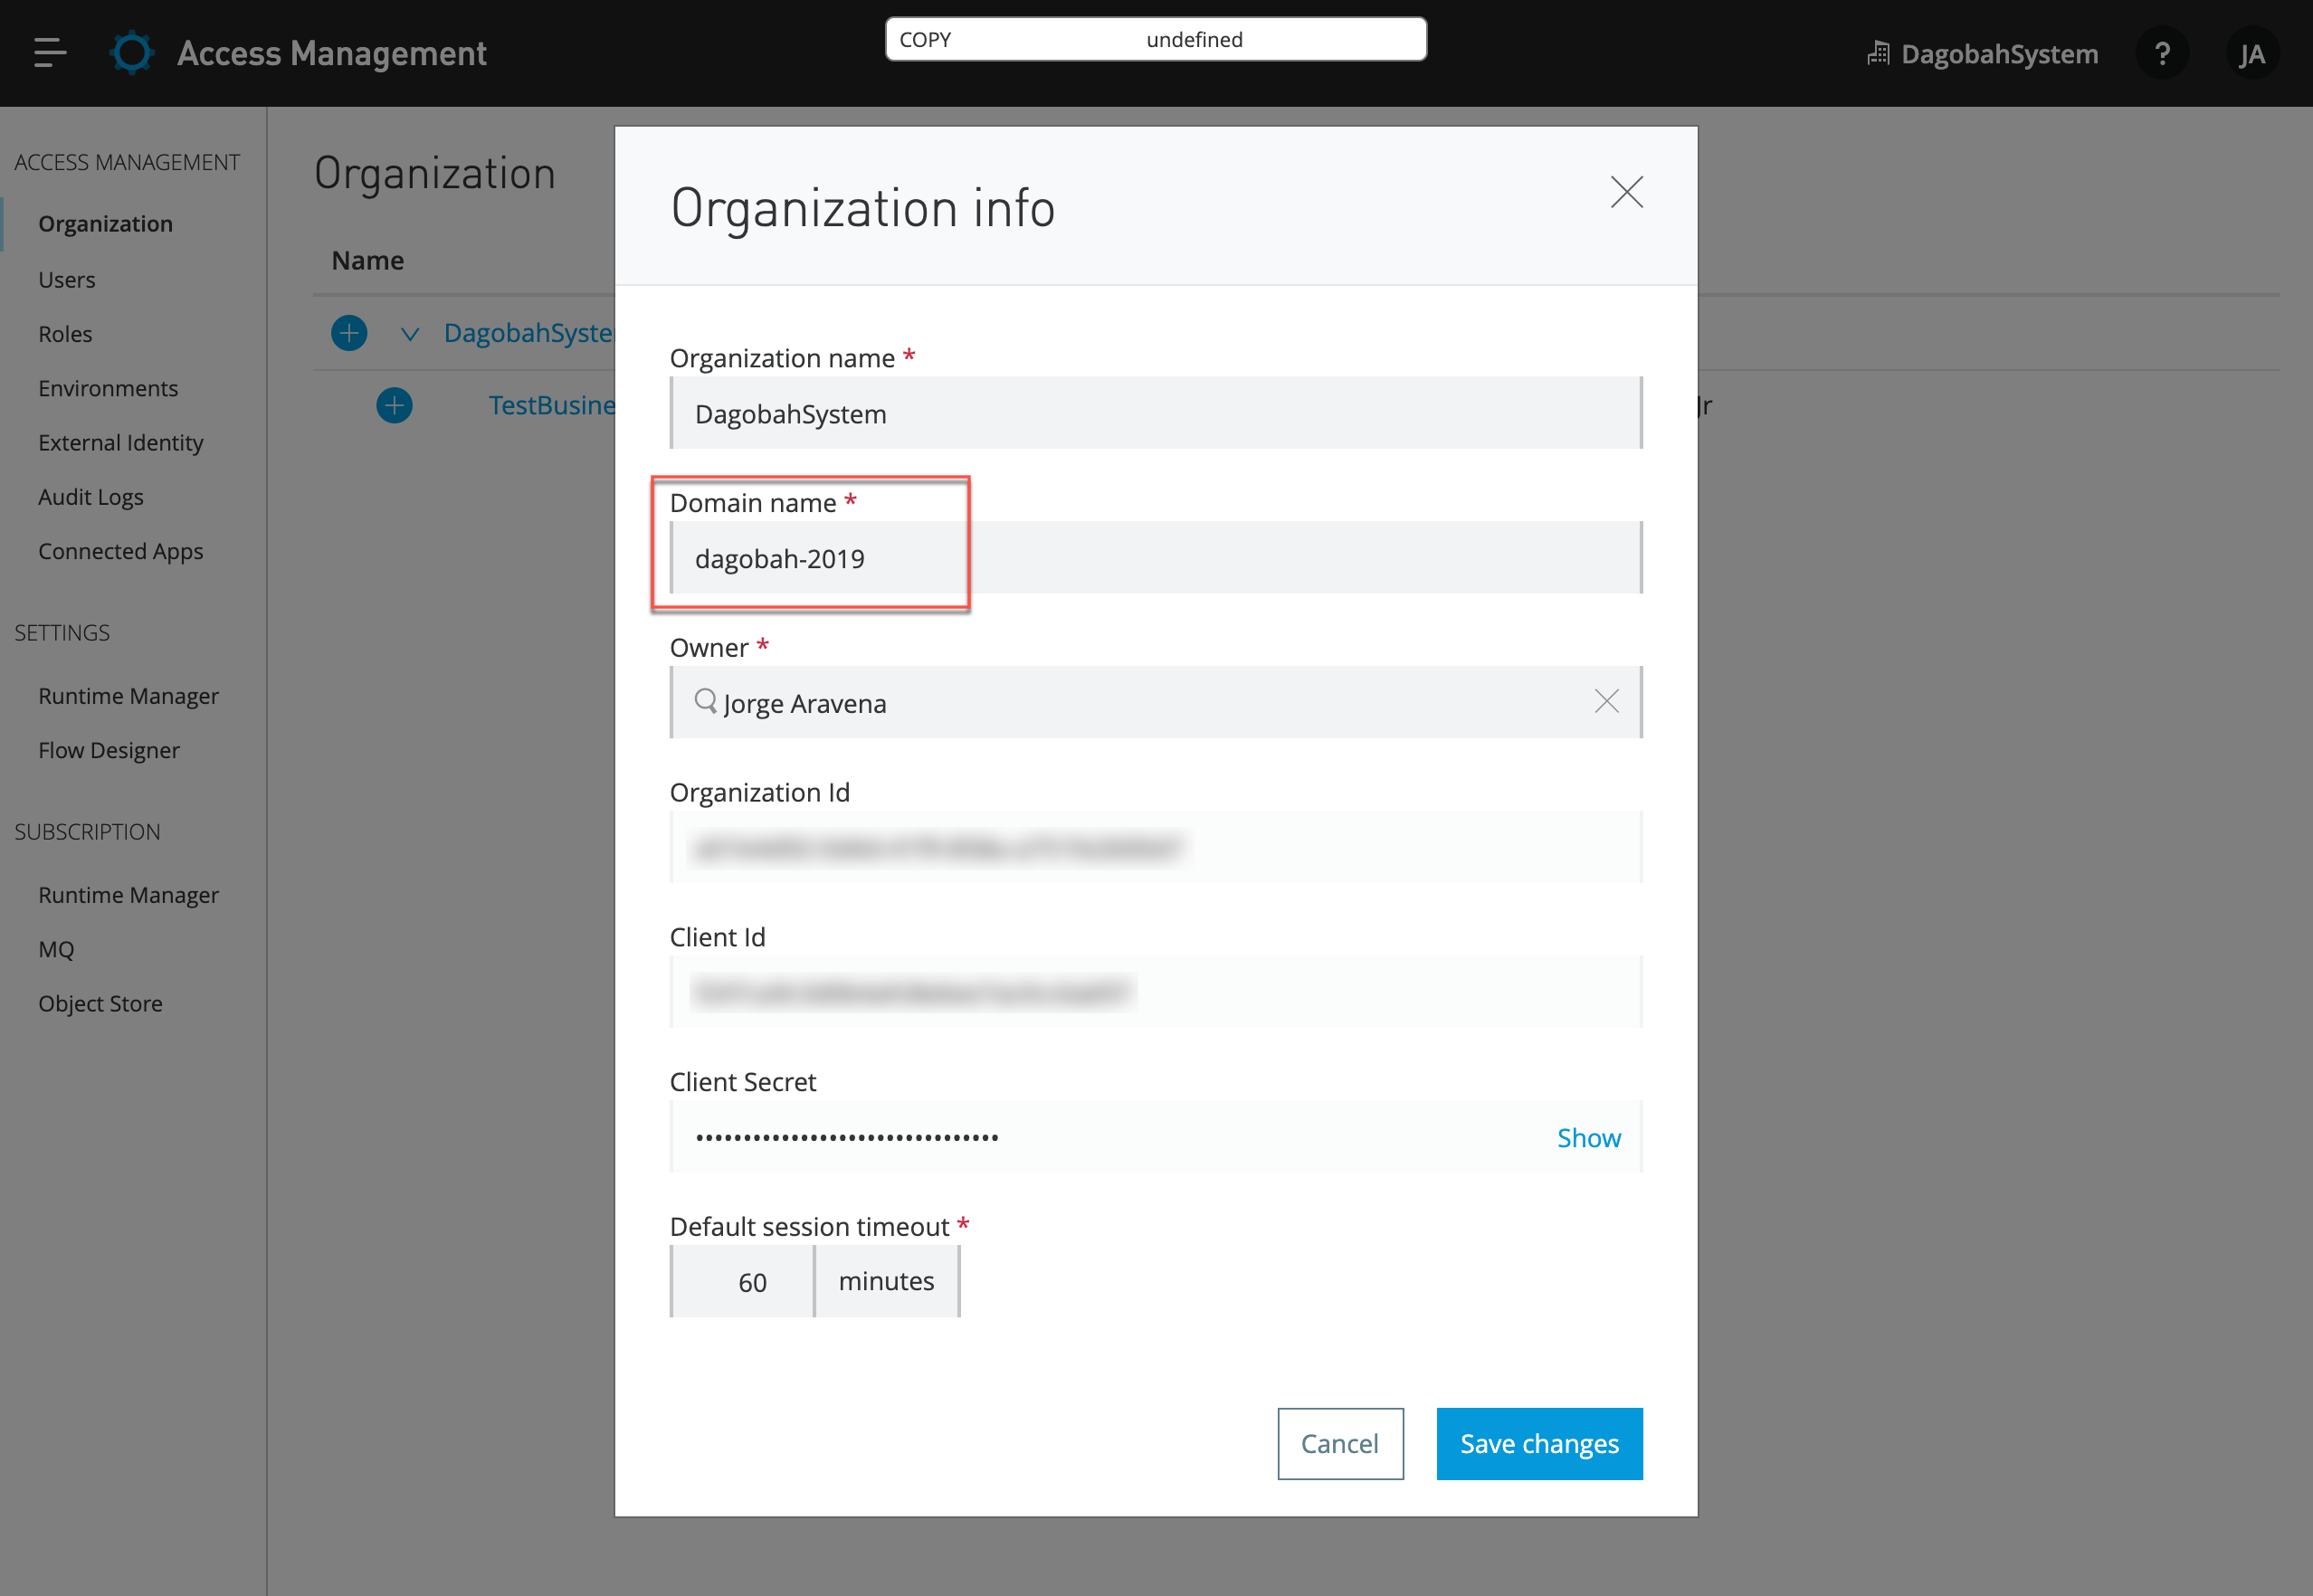
Find Your Anypoint Organization Domain Name
Before you begin the configuration, you will first need to obtain your Organization Domain Name:
- In your Anypoint Platform account, navigate to Access Management > Organization, and click on the organization name for which you want to create the Single-Sign-On access.
- Take note of the Domain name that will be used in a later section of this guide.
Create the Salesforce Connected App that will be used for OpenID Connect
The options mentioned in this guide are for a basic integration with Anypoint.A detailed explanation of all available configurations for OpenID Connect in Salesforce can be found here: Configure an Authentication Provider Using OpenID Connect.
Further questions or issues with the Connected App configuration should be directed to Salesforce Support.
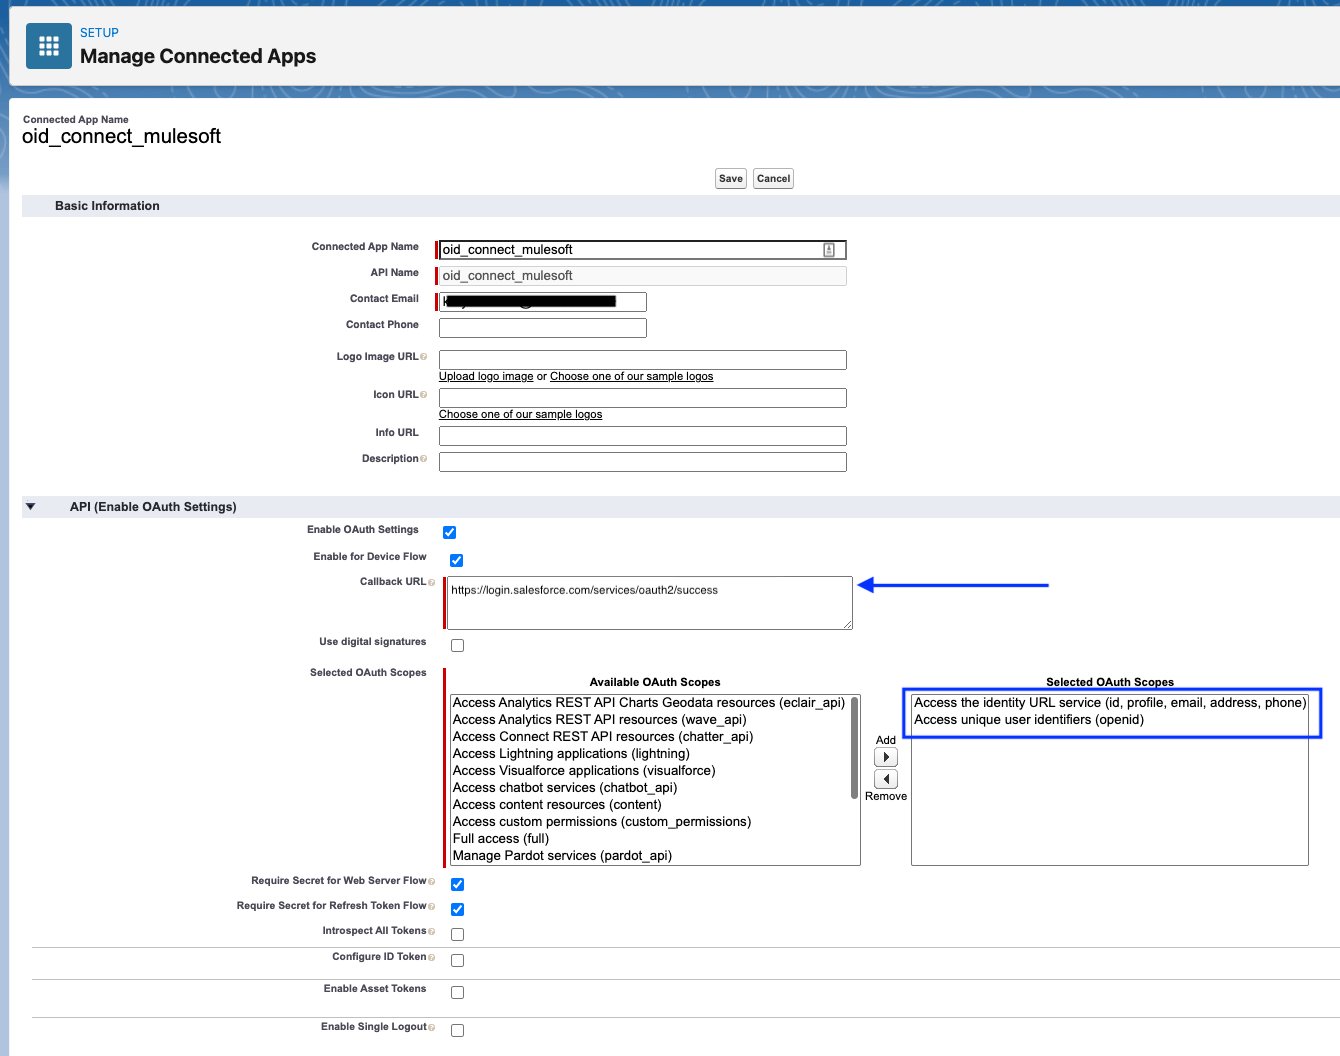
- In Salesforce, navigate to Setup > Platform Tools > Apps > App Manager and click New Connected App.
- Create an App Name, and any other required fields, then click to enable the checkbox for OAuth Settings.
- Click to enable the checkbox for Enable for Device Flow.
- For Callback URL, this can be left as the default "https://login.salesforce.com/services/oauth2/success" for now. If you will be using Manual Registration (described in further sections) this will be updated afterwards.
- For OAuth Scopes, add the scopes that include openid, profile, and email.
- Click Save.
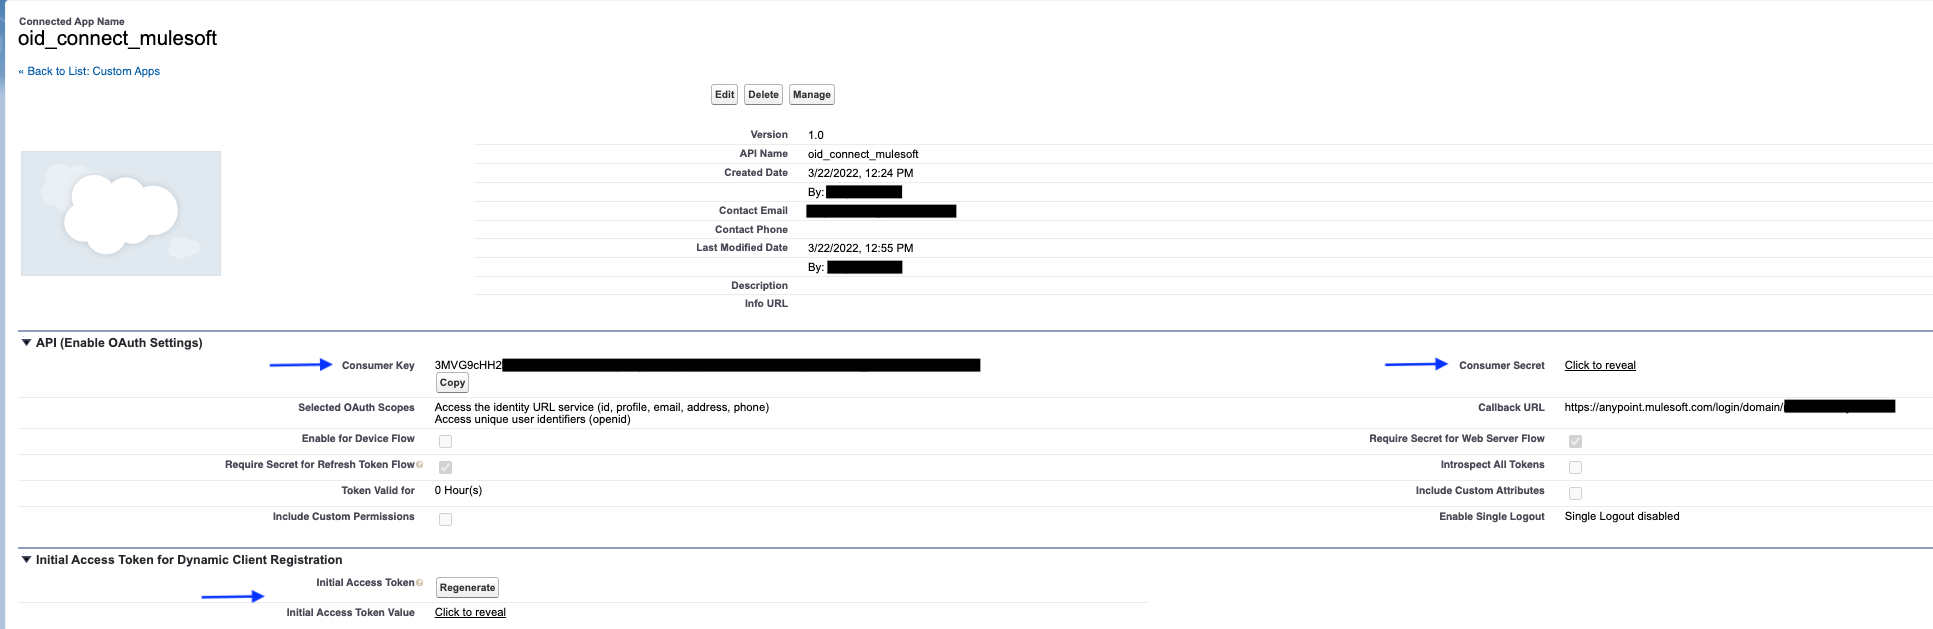
Get the Registration Credentials from Salesforce
In later steps, you may use Manual or Dynamic Registration. Both are functional, it is merely your preference of if you wish to use a Consumer Key and Secret or Initial Access Token.- If you wish to use Manual Registration, collect your Consumer Key and Consumer Secret.
- If you wish to use Dynamic Registration, generate and collect your Initial Access Token.
Enabling External Identity in Anypoint
In this final section, you will enable External Identity with Open ID Connect (OIDC) to allow SSO from your Salesforce IDP.
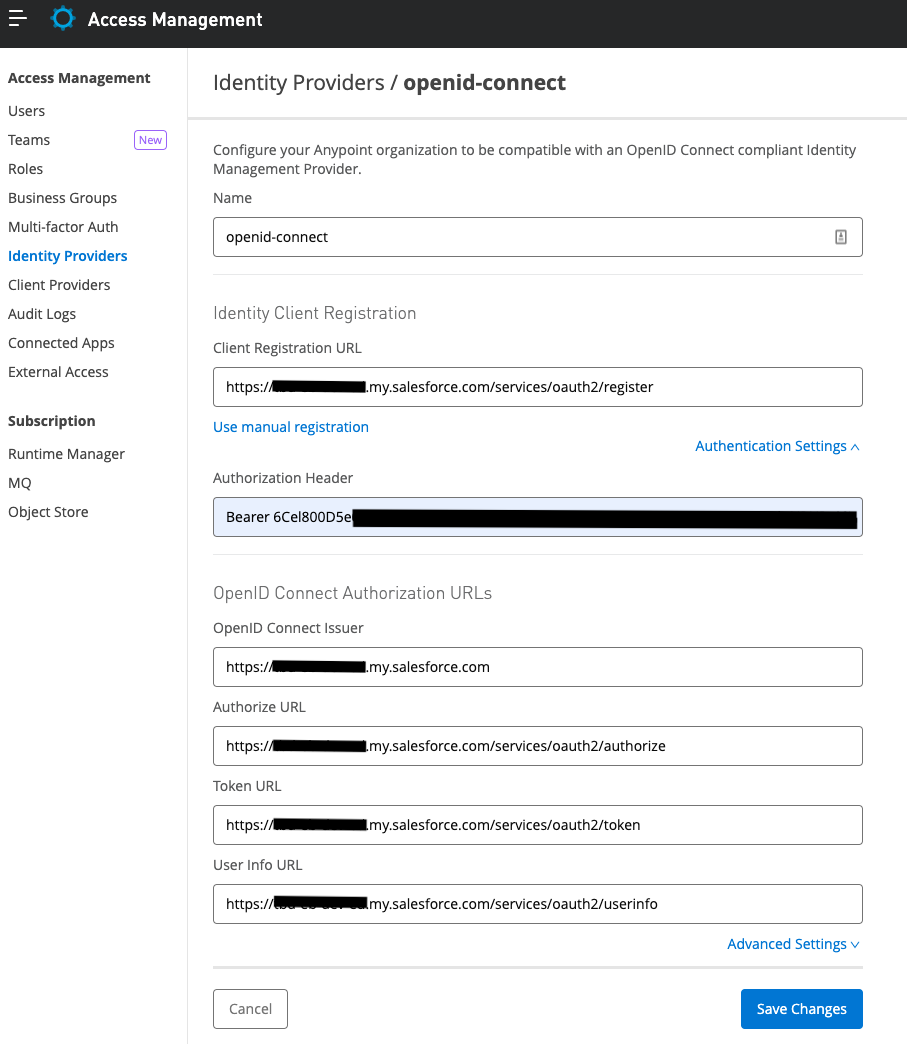
- Go back to Anypoint Platform and navigate to Access Management > External Identity.
- Click Add Identity Provider and select OpenID Connect.
- For the following form, you can obtain the URLs in JSON format directly from Salesforce by navigating to: https://xxxx.my.salesforce.com/.well-known/openid-configuration where xxxx is the beginning of your Salesforce Domain.
- If using Manual Registration, enter your Client ID and Secret (Consumer ID and Consumer Secret) from the previous section and click Save.
- Further, if using Manual Registration, you will see a redirect URI after pressing save. Copy this and replace the Callback URL mentioned in the section where you set up the connected app in Salesforce.
-
If using Dynamic Registration, enter the Authorization Header as Bearer xxxx where xxxx is your Initial Access Token from the previous section and click Save.

Sign In with the now Enabled SSO
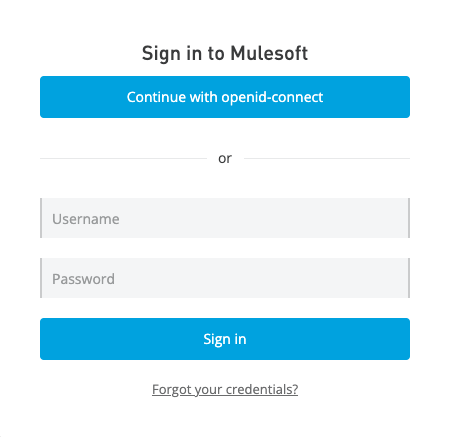
If all of the previous steps were configured correctly, you are now ready to try logging into SSO. There are two options to choose from here.- Login using the URL https://anypoint.mulesoft.com/login/domain/xxxx where xxxx is the domain mentioned in the first section of this guide. With this option, you will be presented with a screen where you may log in manually or select your OpenID SSO option. You will then be redirected to sign in to Salesforce and prompted to authorize if this is the first connection attempt.
- If you want to create a shortcut that skips this click and always goes straight through SSO, you may navigate in Anypoint to your list of Identity Providers and click the ellipsis, then "Copy Direct Link". This link may be used as a bookmark/shortcut to login via SSO without landing on the page mentioned in the previous step. You will then be redirected to sign in to Salesforce and prompted to authorize if this is the first connection attempt.

DISCLAIMER
Further questions or issues with the Salesforce Connected App configuration should be directed to Salesforce Support.Related Articles
MuleSoft Documentation: Configure OpenID Connect
MuleSoft KB Article: SSO using OpenID Connect Troubleshooting Guide
Knowledge-artikelnummer
001115673
Löste denna artikel ditt problem?
Berätta för oss vad vi kan förbättra!