Seleziona un'organizzazione
Mule Application Migration Between Business Groups
Data pubblicazione: Aug 6, 2025
Operazione
GOAL
The objective of this document is to help facilitate the migration of Mule deployments across Business Groups within Anypoint Platform, without impacting or introducing any changes to the API clients.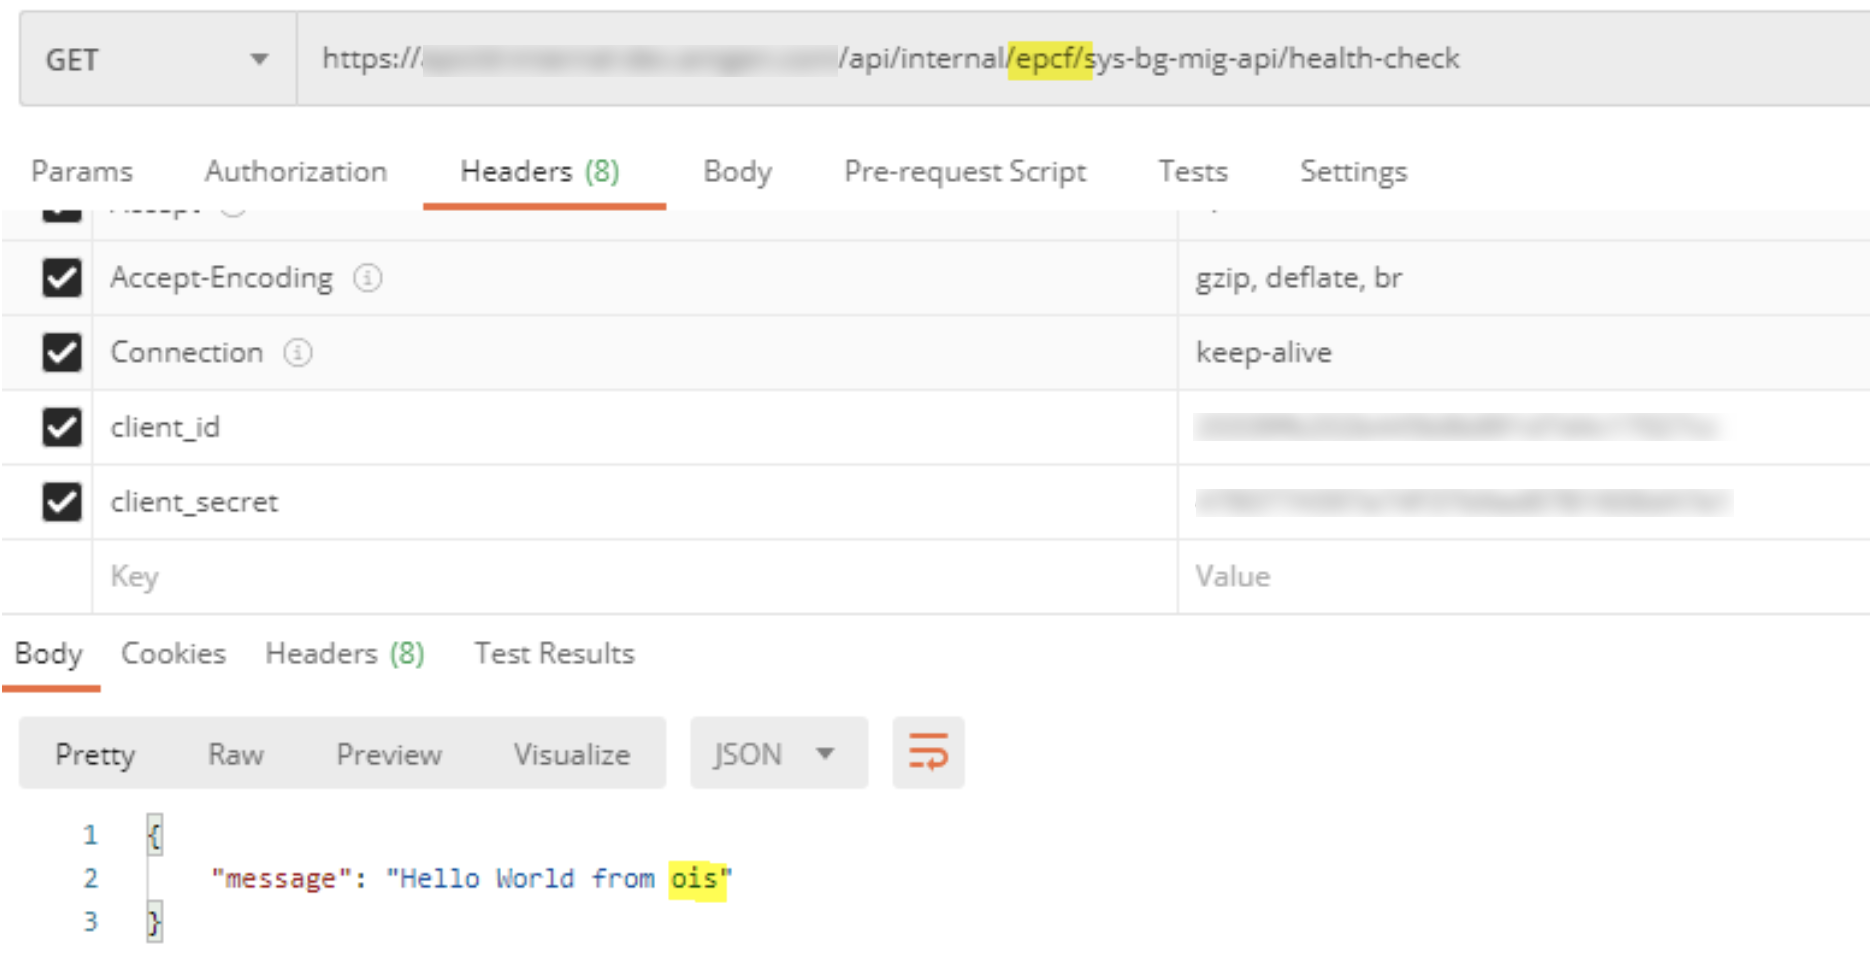
Postman request execution for a sample migration of API from Source BG (EPCF) to Target BG (OIS).
Fasi
1. Pre-Migration Steps
2.1 Source BG
2.1.1 Design Center – Export API Specification
1. Login into Anypoint Platform.
2. Navigate to Design Center.
3. Open the API specification of the API to migrate.
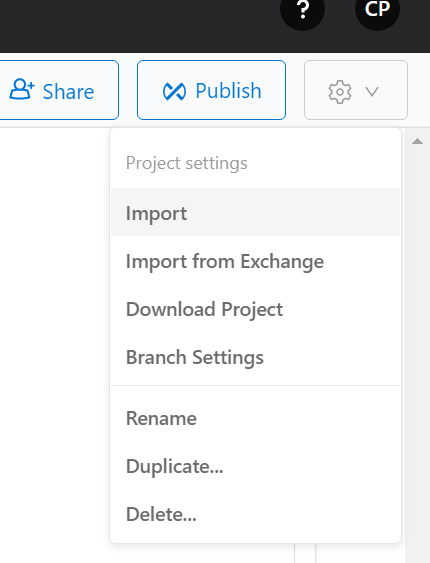
4. Click on “Settings” and select “Download Project”.
2. Navigate to Design Center.
3. Open the API specification of the API to migrate.
4. Click on “Settings” and select “Download Project”.
2.1.2 API Manager – Export API & Note Client Applications
1. Navigate to Management Center > API Manager.
2. Select the API to be migrated.
3. Click on “Actions” and select “Export API”.
2. Select the API to be migrated.
3. Click on “Actions” and select “Export API”.

4. Open the exported API file and edit the contents to make changes to group_id, asset_id, asset_name, URIs, etc. to reflect the target BG and API asset details.
5. Save changes made to the file.
6. Click on API “Contracts”.
5. Save changes made to the file.
6. Click on API “Contracts”.
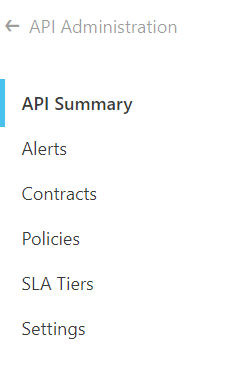
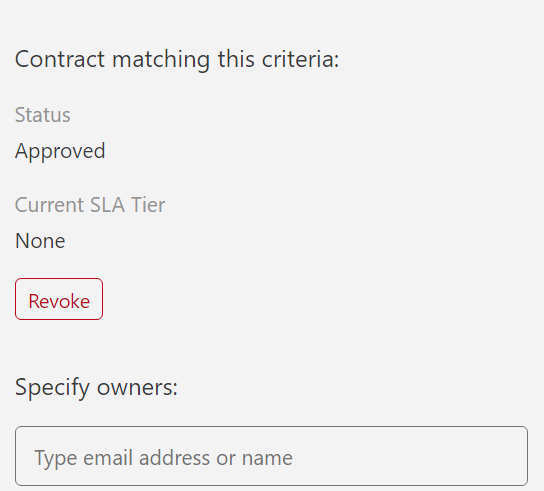
7. Make note of all the Client Application and Contracts to verify the clients post API Migration.
Note: Ensure the user account performing the migration activities has Client Application ownership, so they can be visible in the drop down menu during “Request Access” step in the target BG.
8. Client Application ownership can be transferred by navigating to Management Center > API Manager > Client Applications. Search for the required Client Application and click on the same. Then add the email account performing the API migration into the “Specify Owners” field.
2.1.3 Runtime Manager – Export Application & Note Associated Properties
1. Navigate to Management Center > Runtime Manager.
2. Click on the application to migrate.
3. Download the application JAR file from application “Settings” page.
2. Click on the application to migrate.
3. Download the application JAR file from application “Settings” page.

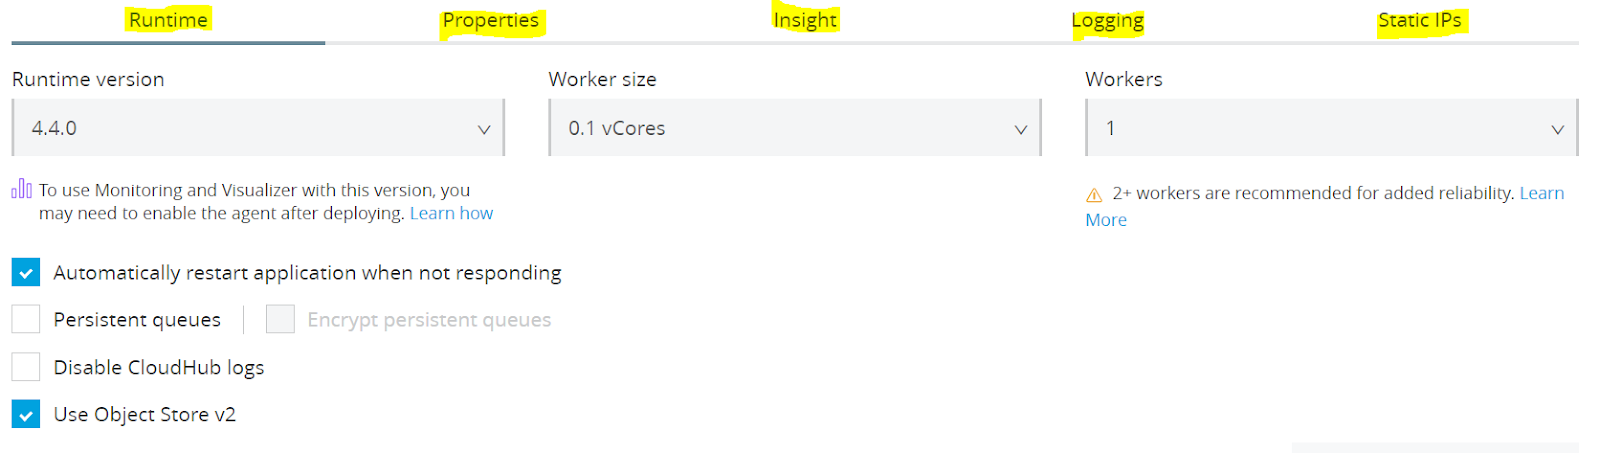
4. Ensure to make note of all the Application details (Workers Size, Workers, Properties, Logging, etc.). Please note that you will need to have access to see the values of the masked properties to ensure the same values are applied onto the migrated application properties.
2.2 Target BG
2.2.1 Design Center – Import API Specification
1. Login into Anypoint Platform.
2. Navigate to Design Center.
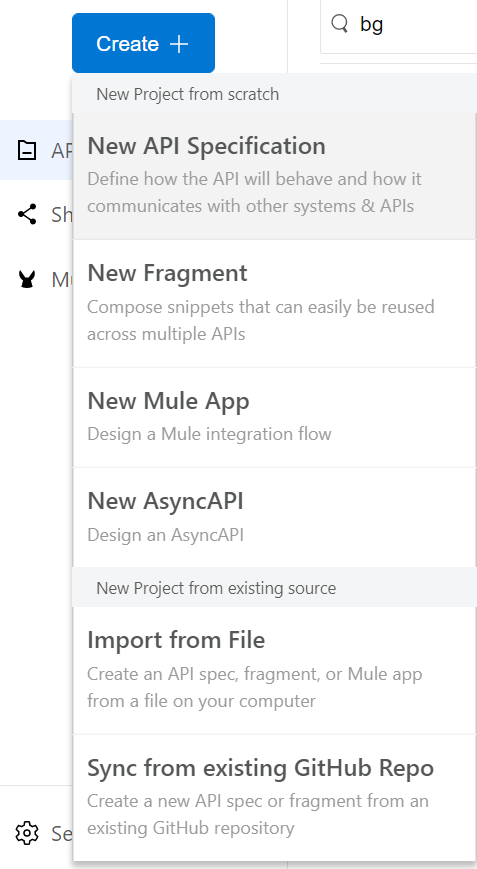
3. Click on “Create” and select “Import from File”.
2. Navigate to Design Center.
3. Click on “Create” and select “Import from File”.
4. Select the file exported from the step “2.2.1 Design Center – Export API Specification”.
5. Replace the source BG name with target BG name in the API specification asset name.
6. Save the RAML and publish asset to Anypoint Exchange.
5. Replace the source BG name with target BG name in the API specification asset name.
6. Save the RAML and publish asset to Anypoint Exchange.
2.2.2 API Manager – Import API
1. Navigate to Management Center > API Manager.
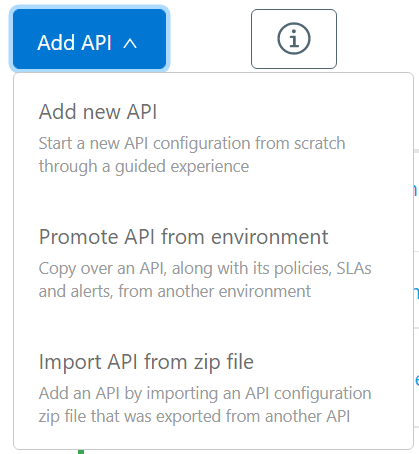
2. Click on “Add API” and select “Import API from ZIP File” from the step "2.1.2 API Manager – Export API & Note Client Applications".
2. Click on “Add API” and select “Import API from ZIP File” from the step "2.1.2 API Manager – Export API & Note Client Applications".
3. Save the changes.
2.2.3 Exchange – Add Client Applications
1. Navigate to Anypoint Exchange.
2. Select the newly imported API asset in the target BG.
3. Click on the “Request Access” from the API asset page.
2. Select the newly imported API asset in the target BG.
3. Click on the “Request Access” from the API asset page.

4. Add all the Client Applications noted from the API in the source BG during the step #7 of “2.1.2 API Manager – Export API & Note Client Applications”.
2.2.4 API Manager – Client Application Approval
1. Navigate to Management Center > API Manager.
2. Click on the migrated API.
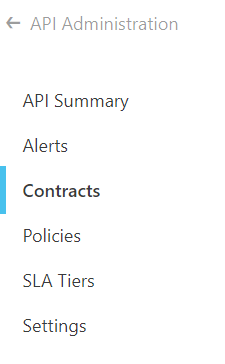
3. Navigate to “Contracts” under API settings page.
2. Click on the migrated API.
3. Navigate to “Contracts” under API settings page.
4. Approve any “Pending” Client Applications requests.
5. Verify all the Client Applications are added.
6. Note the new API Id.
5. Verify all the Client Applications are added.
6. Note the new API Id.
2.2.5 Runtime Manager – Import Application
1. Navigate to Management Center > Runtime Manager.
2. Click on “Deploy Application”.
3. Enter the new application name and deploy the application jar exported from the source BG as part of the step "2.1.3 Runtime Manager – Export Application & Note Associated Properties".
4. Set the relevant application properties, new application id, Anypoint Platform client_id/secret and any other relevant application configurations.
5. Deploy the app.
6. (Optional) Existing Alerts/Monitoring Dashboards need to be reconfigured to point the new deployment. APIs that have custom policies need to be replicated into target BG as well.
2.2.6 Sanity Check
Verify the below items:
- API in Active State (API Manager)
- Application in Started State (Runtime Manager)
- API Instances visible in Exchange
- All Contracts/Client Applications are present
2.2.7 Load Balancer
1. Navigate to Management Center > Runtime Manager of the root organization.
2. Navigate to “Load Balancers”.
2. Navigate to “Load Balancers”.

3. Select the required DLB.
4. Add routing rules to the load balancer to ensure existing URL are routed to the new API in the target BG and DO NOT apply the changes to the load balancer at this step.
5. Ensure priority of the added rule is higher/ before the dynamic routing rule if any.
6. Verify added routing rule.
4. Add routing rules to the load balancer to ensure existing URL are routed to the new API in the target BG and DO NOT apply the changes to the load balancer at this step.
5. Ensure priority of the added rule is higher/ before the dynamic routing rule if any.
6. Verify added routing rule.
3. Migration Steps
3.1 Load Balancer
1. Restart the DLB by updating the change added as part of the previous step.
2. Wait till the DLB is in “Started” state.
4. Post-Migration Steps
4.1 Target BG
1. Verify if requests are flowing to new API by checking the application logs from navigating to the corresponding application in “Runtime Manager”
4.2 Source BG
1. Stop the application by navigating to the corresponding application in Runtime Manager.
5. Risks
1. Applications that have “Static IPs” associated may impact clients due to BG change.
2. 1:1 routing rule addition for every application migrated until the end of the migration.
3. Monitoring applications may have impact due to change in application names.
4. Email notification BG vs. actual BG mismatch.
5. Clients using internal-API URLs of APIs.
Disclaimers:
This example is provided as a reference for your own usage and is not to be considered a MuleSoft product. This example should be considered as a custom solution. The custom solution is not a supported MuleSoft product.
This article involves products and technologies which do not form part of the MuleSoft product set. Technical assistance for such products is limited to this article.
This solution provides a suggestion that should be considered in conjunction with your specific use-case and requirements and does not represent a complete solution for all circumstances.
Numero articolo Knowledge
001116058
Questo articolo ha risolto il problema?
Facci sapere, così possiamo migliorare!