Velg en organisasjon
How to configure OpenID SSO using a free developer OKTA account
Publiseringsdato: Jul 25, 2025
Trinn
Get the information from your Anypoint Organization
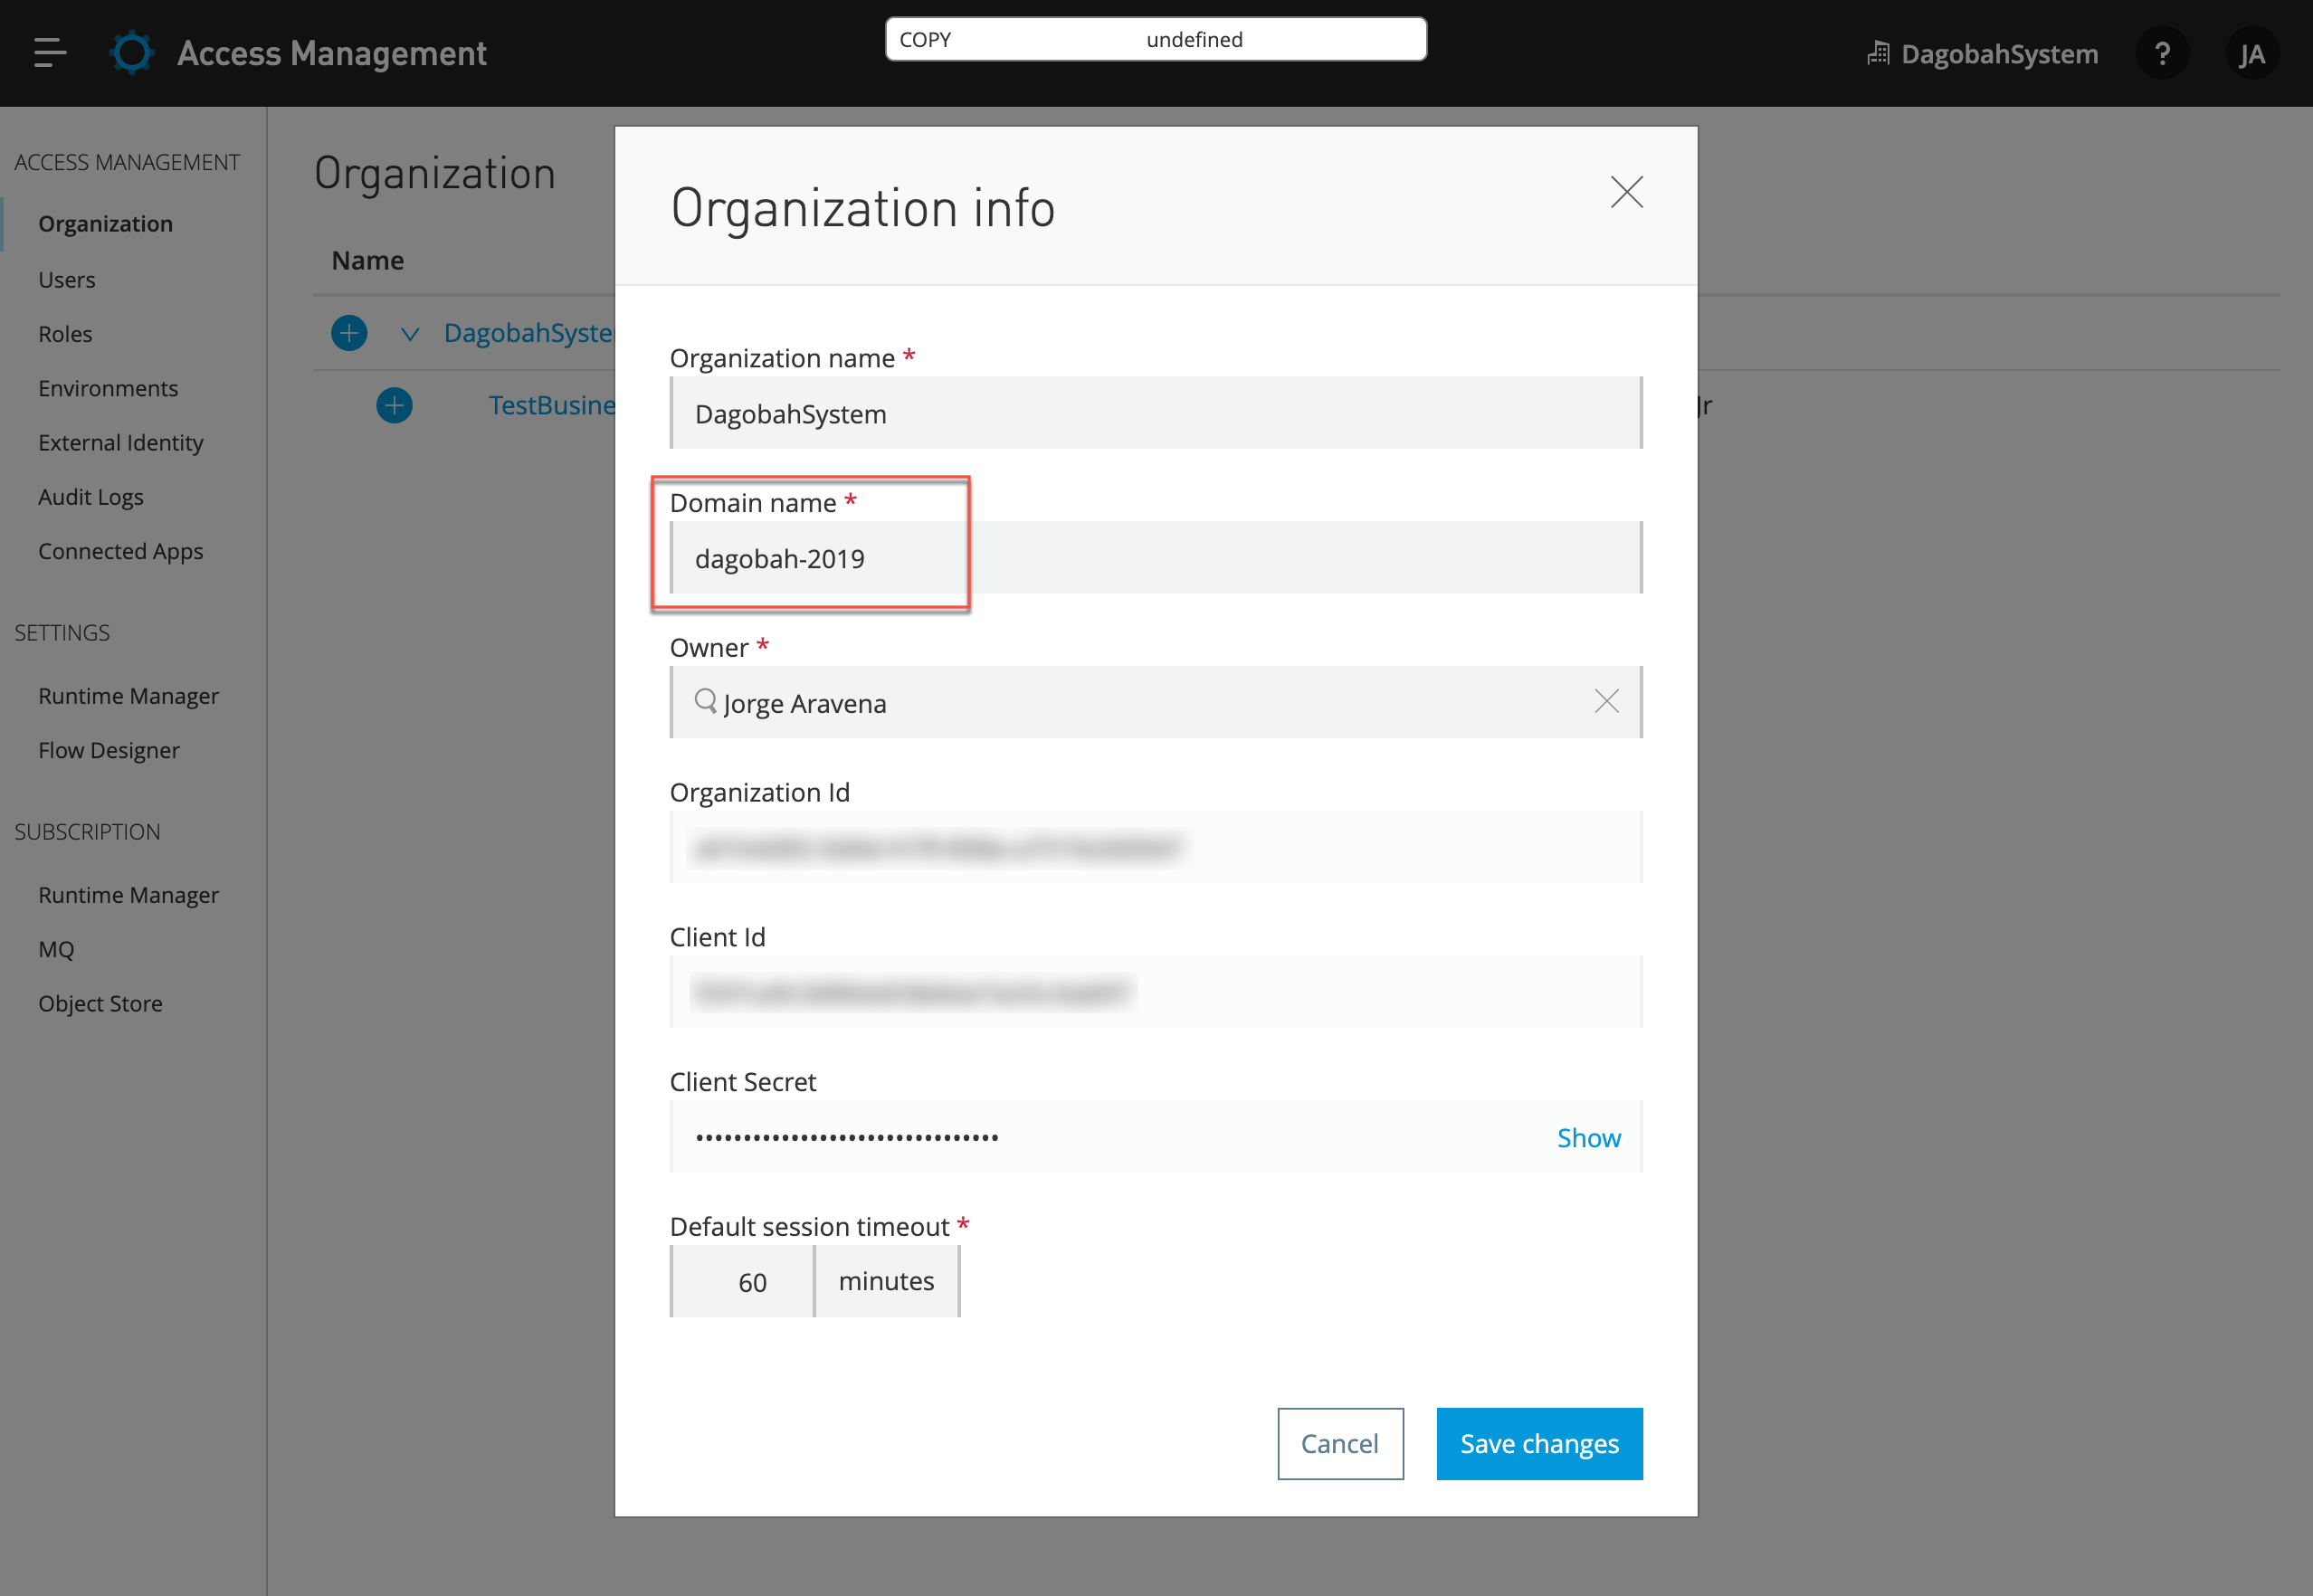
You will need to grab the Organization Domain Name:
- Go to your Anypoint Platform account, go to Access Management > Organization, and click on the organization name you want to create the Single-Sign-On access.
- Take note of the Domain name that will be used in the Login redirect URIs down below.
Create and configure OKTA account
These are the steps to create a free developer account in OKTA:
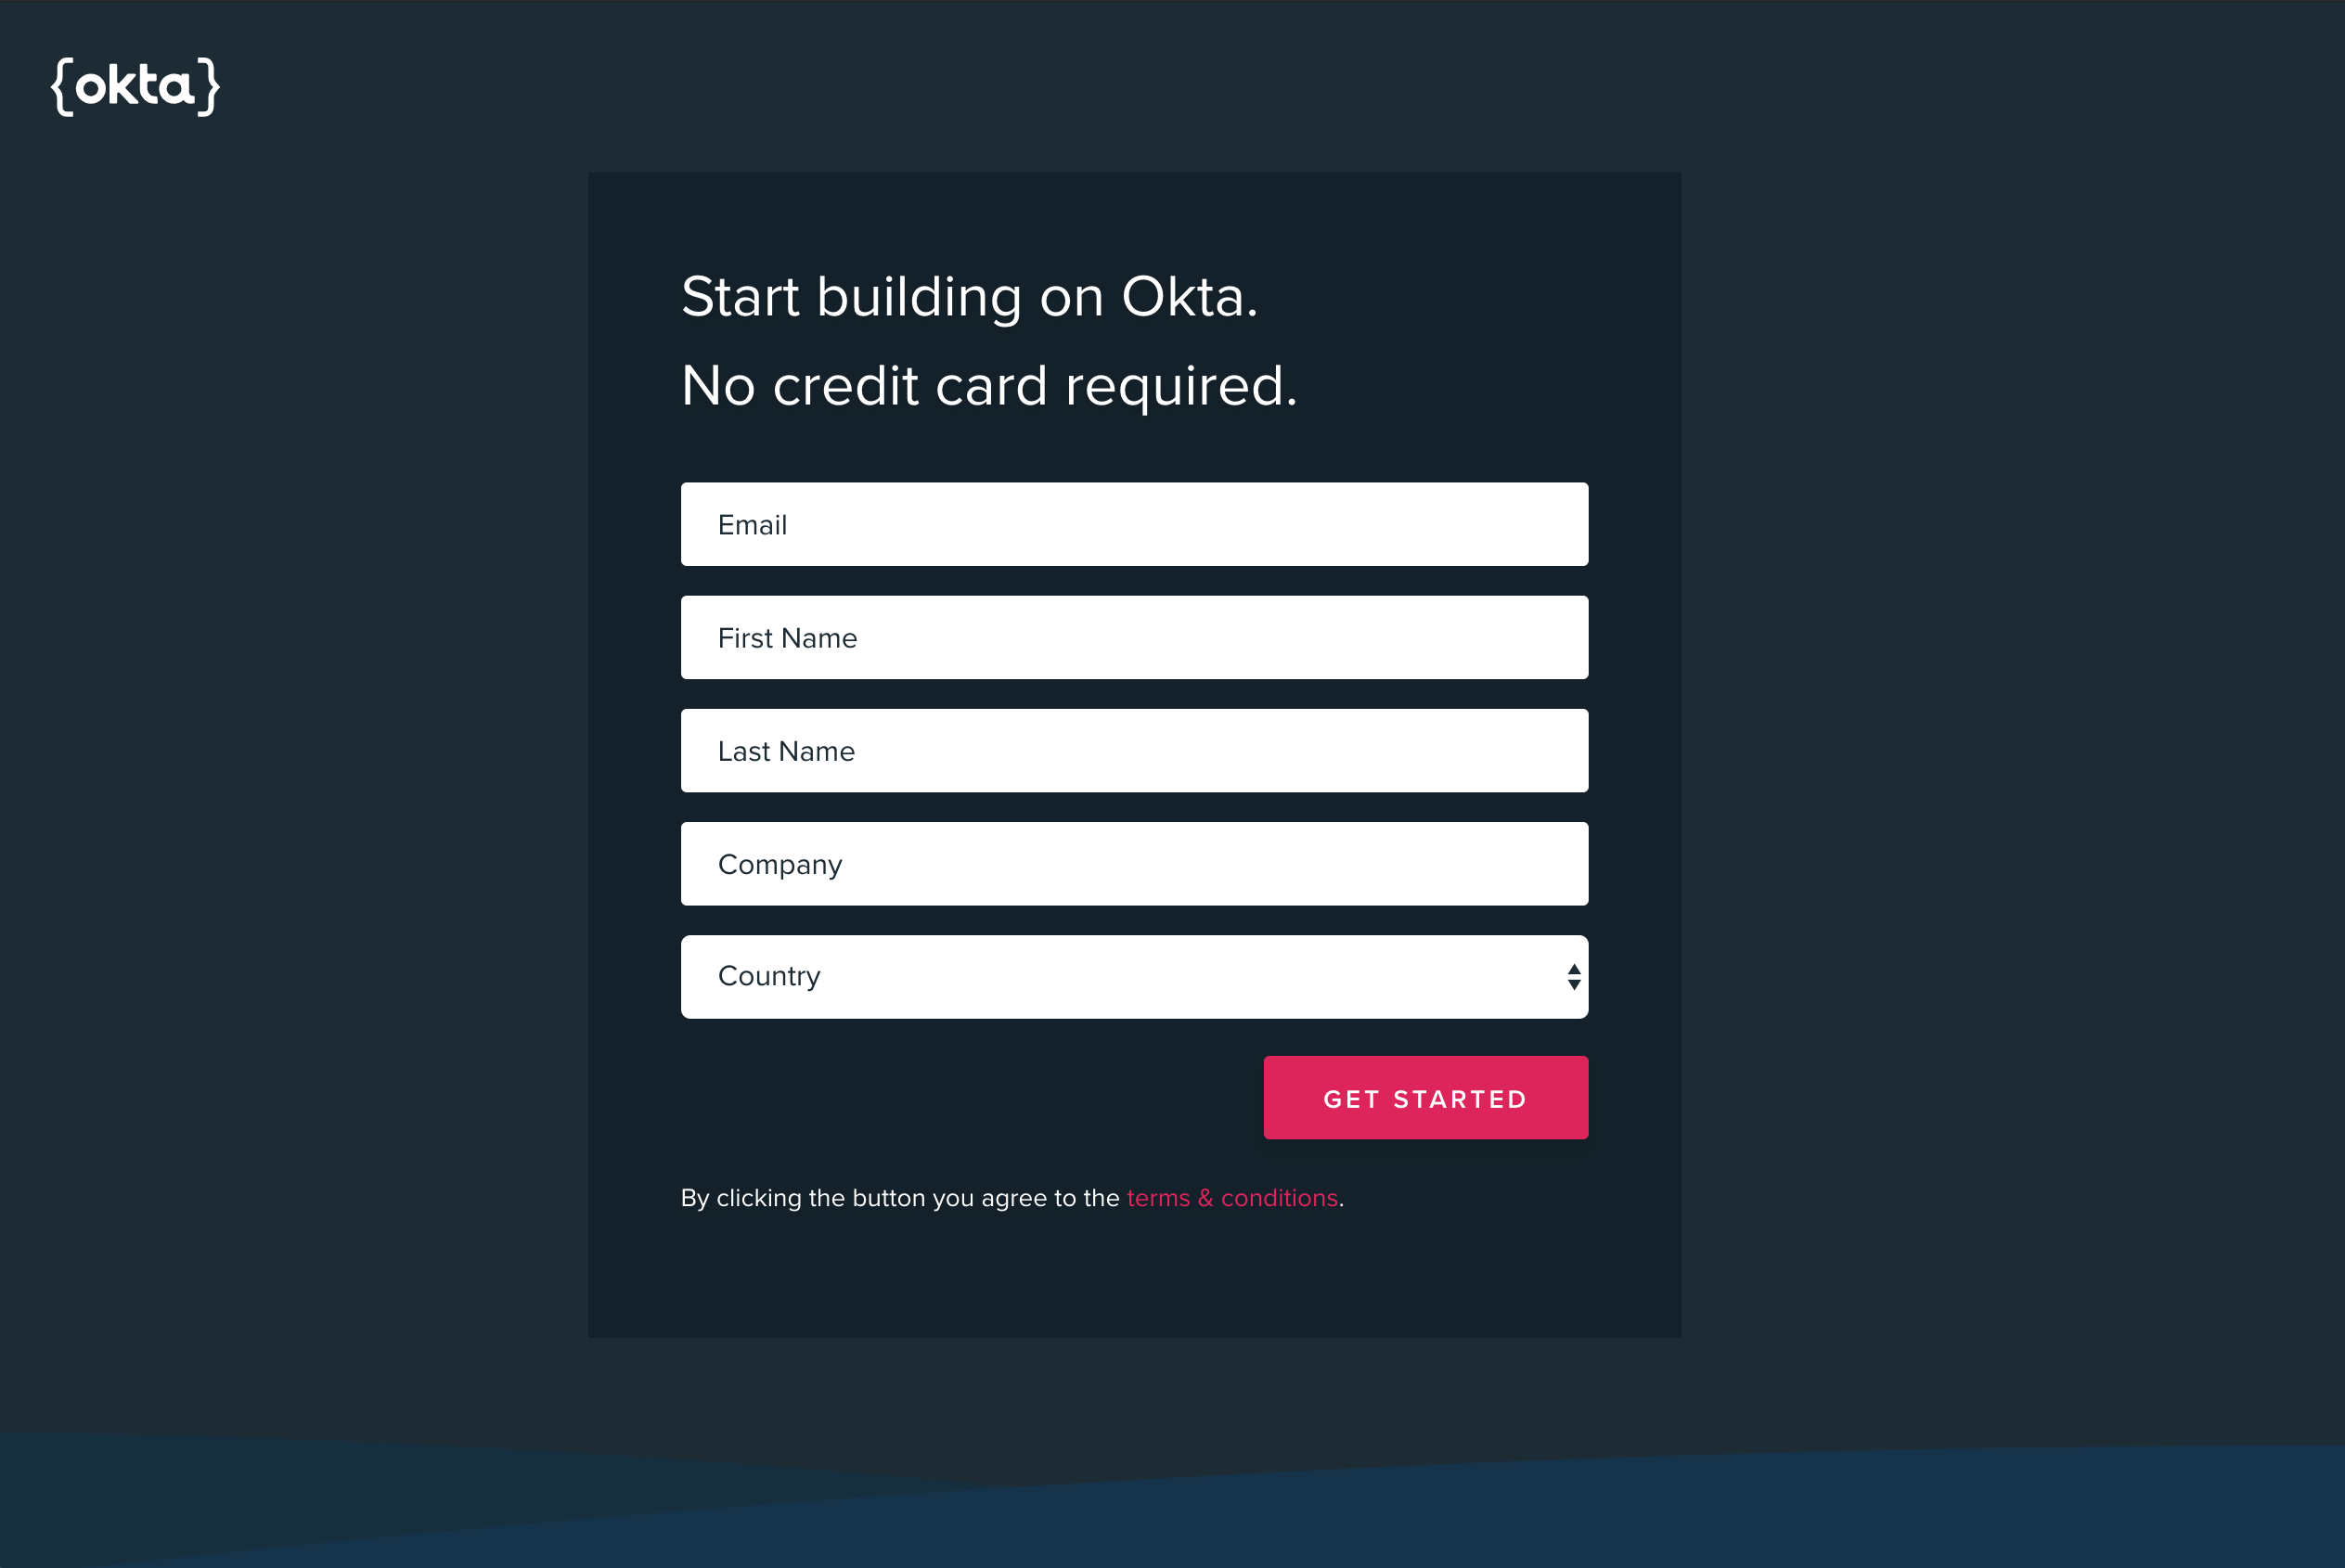
- Go to https://developer.okta.com/signup and fill up the account creation form.
- Once in your admin dashboard, go to Applications and click on Add application.
- In the following screen select Web and click Next.
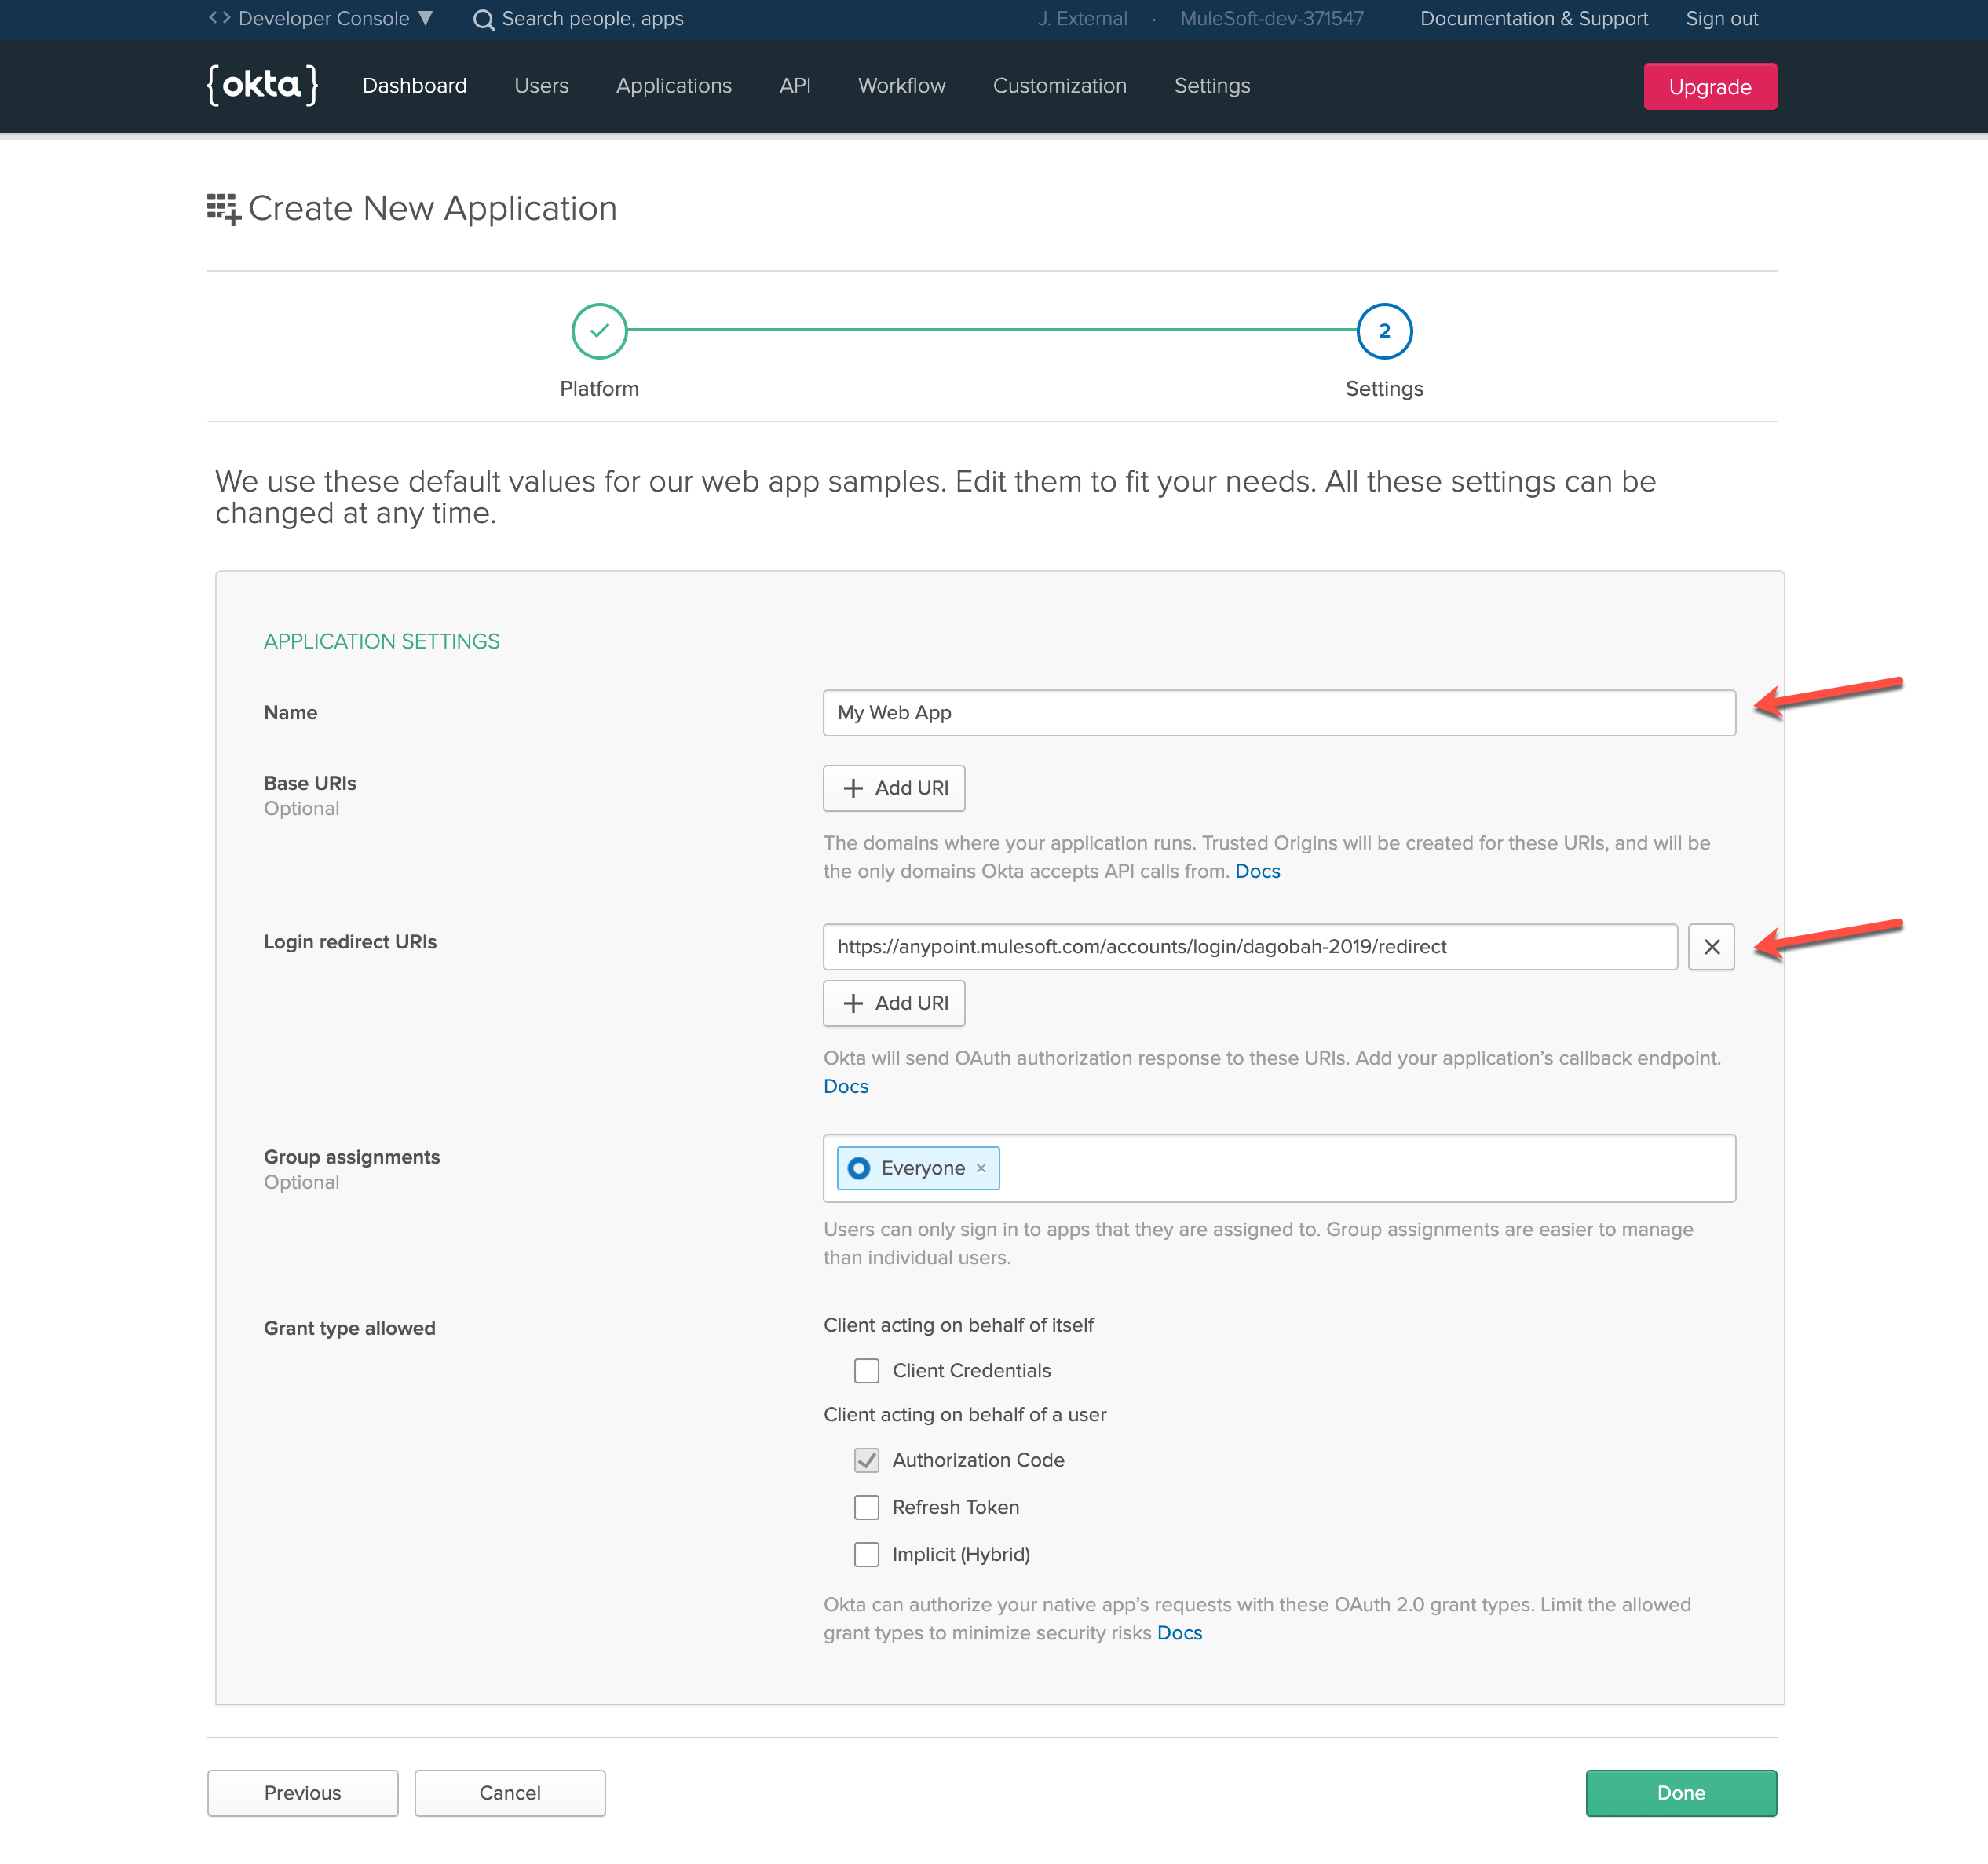
- Fill out the Application Settings form with the following information:
- Name: <ANY-NAME>
- Base URIs: (blank)
- Login redirect URIs: https://anypoint.mulesoft.com/accounts/login/<YOUR-ORG-DOMAIN-NAME>/redirect
- Group assignments: (can be left to "Everyone")
- Grant type allowed: (can be left to "Authorization Code")
- Click on Done to create the application.
- Now in the General tab of your Application settings, take note of the Client ID and Client secret under the Client Credentials section at the bottom.
Enabling External Identity in Anypoint
In this final section, you will enable External Identity with Open ID Connect (OIDC) to allow SSO automatically.
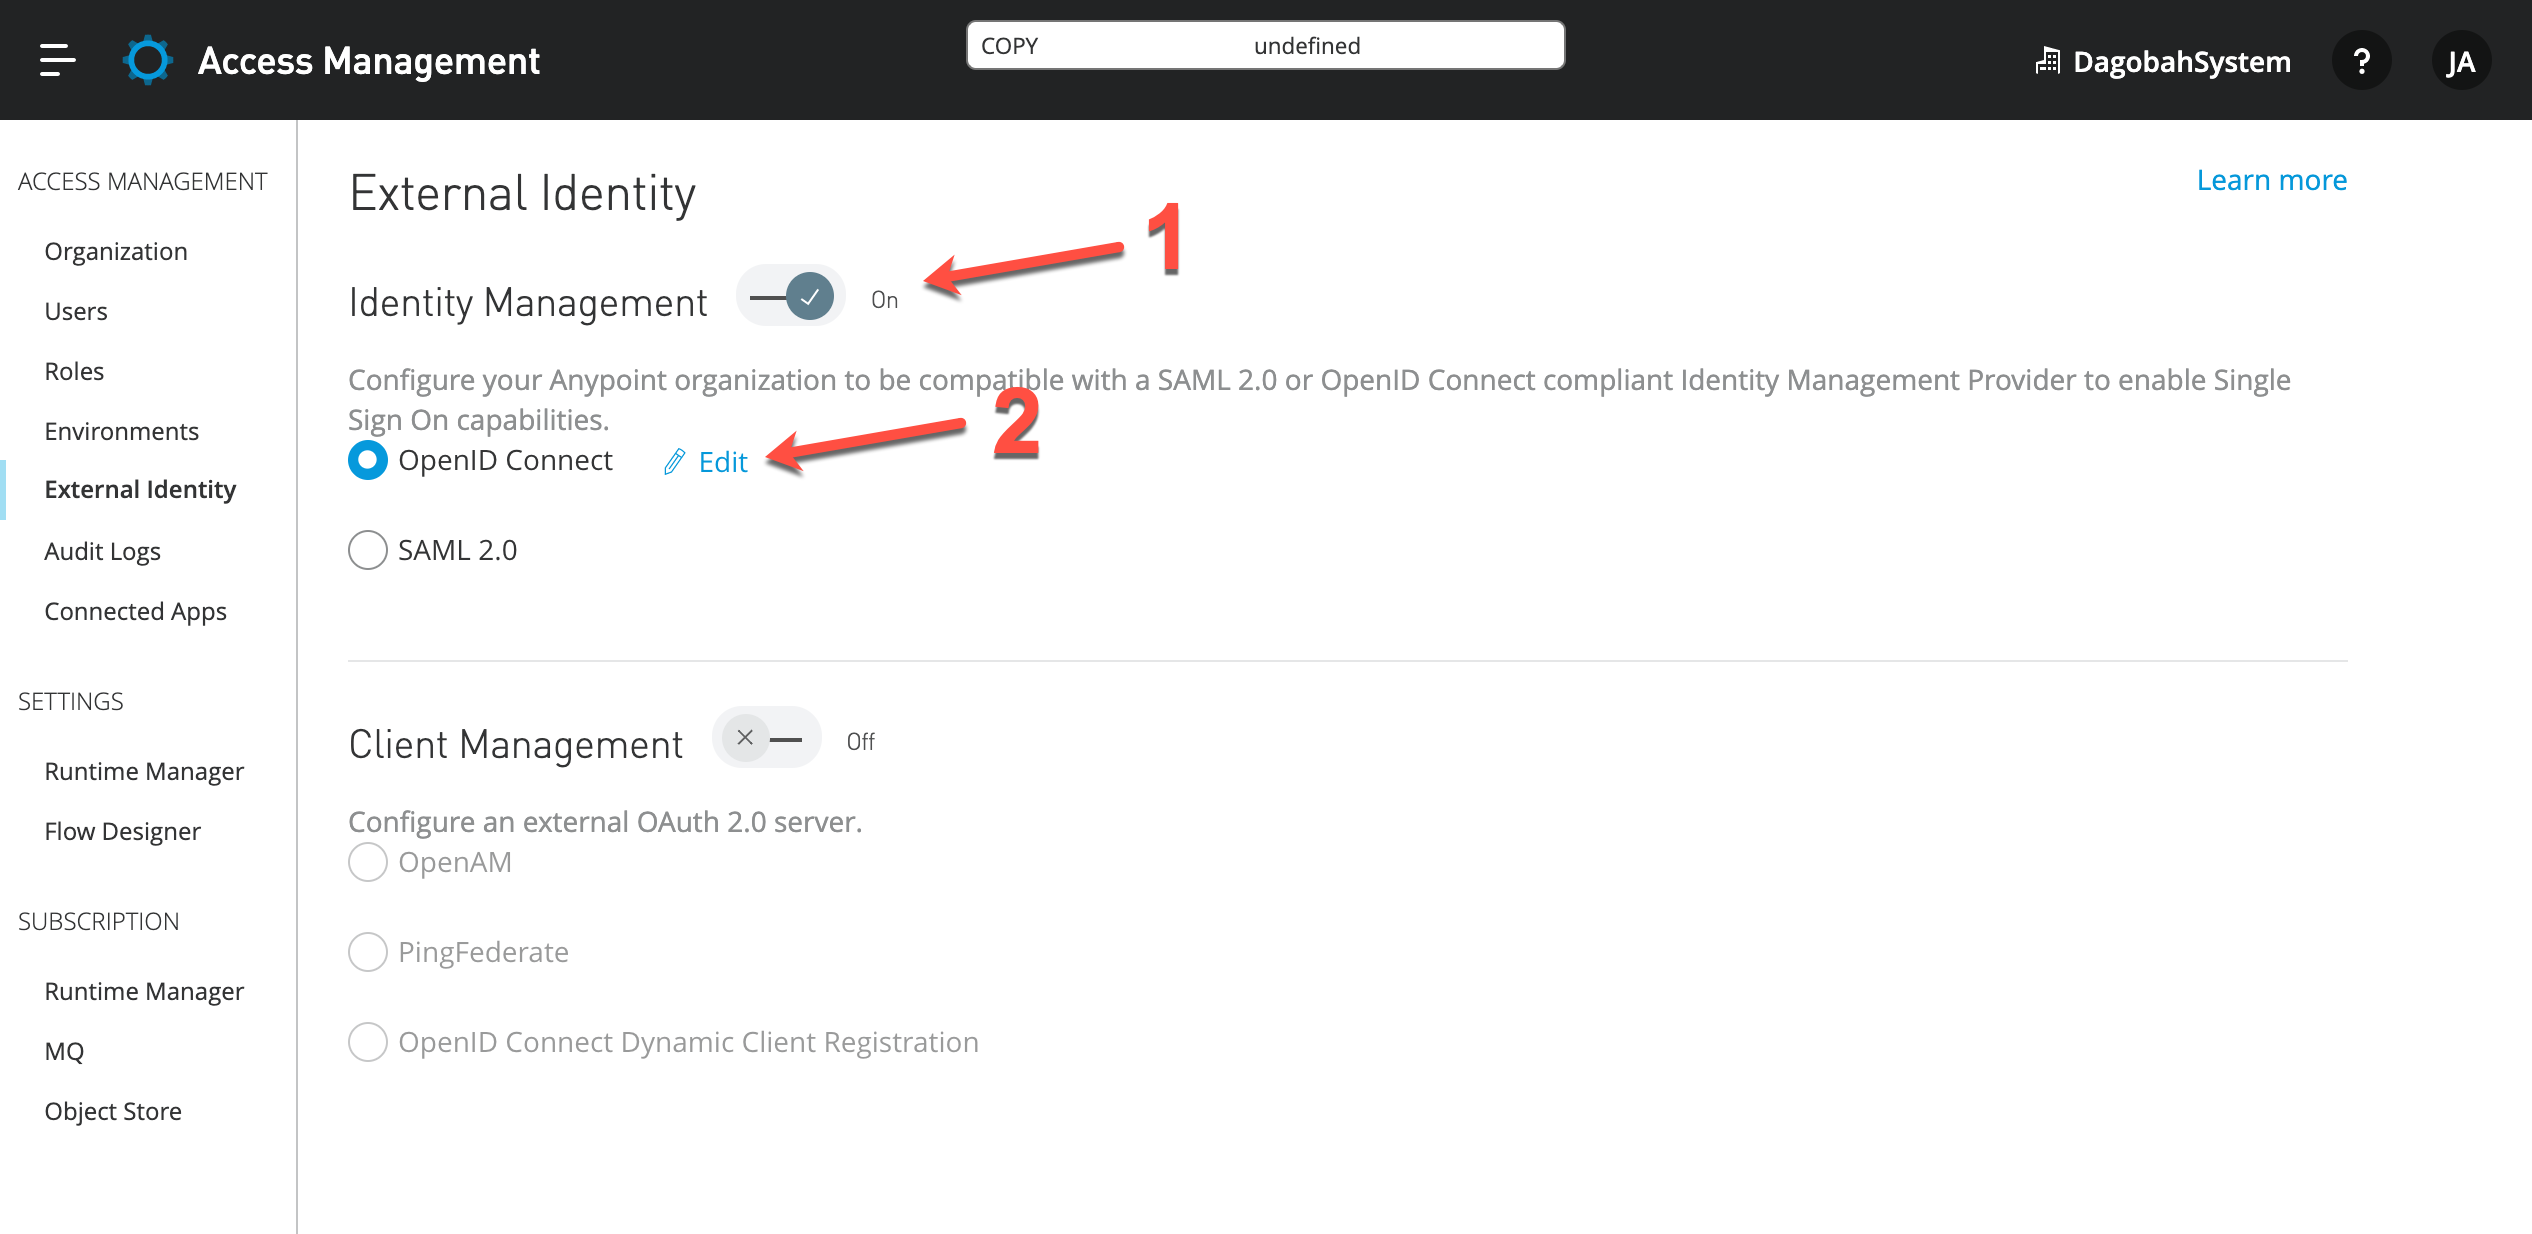
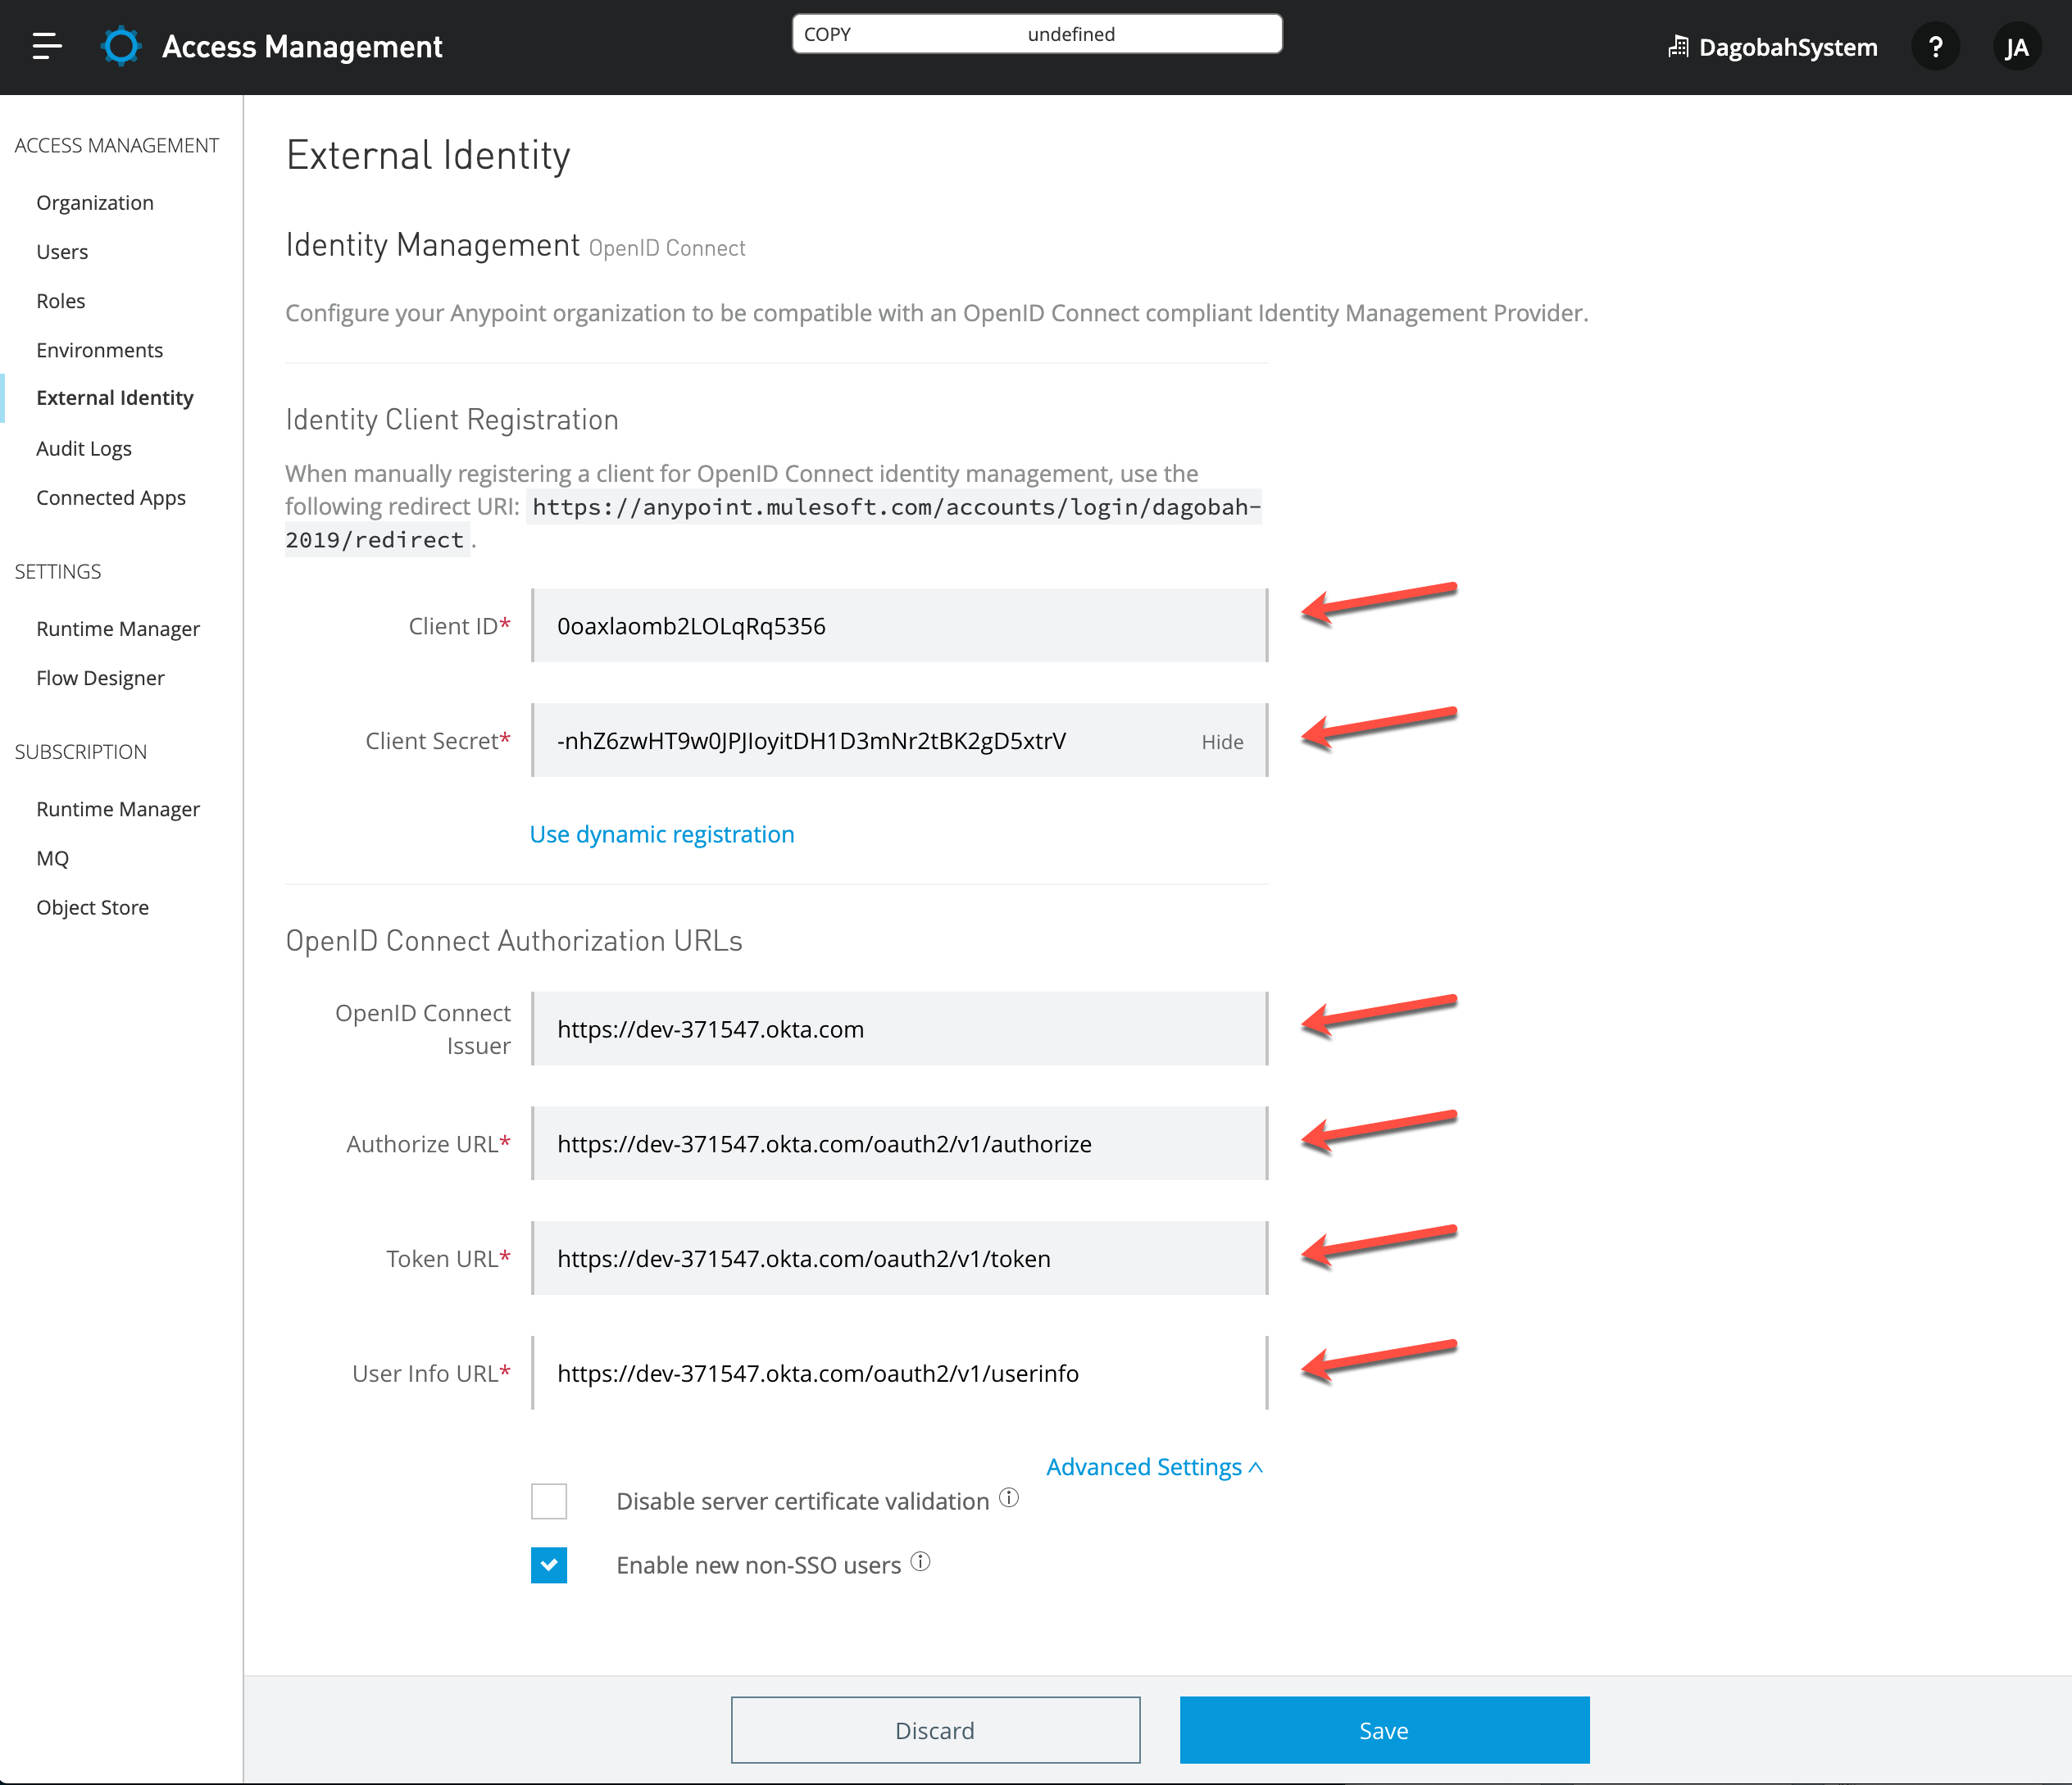
- Go back to the Anypoint Platform, click Access Management > External Identity.
- Select OpenID Connect and click on the Edit link to access the OIDC settings.
-
For the following form, you can fetch the information in JSON format directly from your OKTA account by going to: https://dev-XXXXXX.okta.com/.well-known/openid-configuration
The XXXXXX is the six-digit number from your OKTA domain account, you can get it from the URL when logged in.
- Click on Manual Registration.
- Enter the Client ID and Client secret from the previous section.
- Issuer: https://dev-XXXXXX.okta.com
- Authorize URL: https://dev-XXXXXX.okta.com/oauth2/v1/authorize
- Token URL: https://dev-XXXXXX.okta.com/oauth2/v1/token
- User info URL: https://dev-XXXXXX.okta.com/oauth2/v1/userinfo -
Click on Save and test the SSO login by opening the following URL in an incognito browser window (in Chrome - 'Private mode' in Firefox), and you will be requested the OKTA credentials and then redirected to your private Exchange portal:
- https://anypoint.mulesoft.com/accounts/login/<YOUR-ORG-DOMAIN-NAME>
Once again you should replace <YOUR-ORG-DOMAIN-NAME> with the Domain name obtained from the first section at the top.
Related articles
MuleSoft Documentation: Configure OpenID Connect
MuleSoft KB Article: SSO using OpenID Connect Troubleshooting Guide
OKTA Documentation: OAuth 2.0 Overview
Knowledge-artikkelnummer
001116199
Hjalp denne artikkelen med å løse problemet ditt?
La oss få vite det slik at vi kan forbedre!
