Seleziona un'organizzazione
JWT Token Validation Policy Walkthrough using Azure AD
Data pubblicazione: Aug 6, 2025
Fasi
STEPS TO FOLLOW
Part 1: Configuring Azure1.) Create Azure account here: https://portal.azure.com/#home
2.) Once created, go to "Azure Active Directory" option.
3.) On the left bar, go to App Registration --> New Registration
4.) I have inputted name as “Mule Application” and left the default option for “Who can use this application or access this API?” with single tenant. In actual project, it will vary based on the requirements.
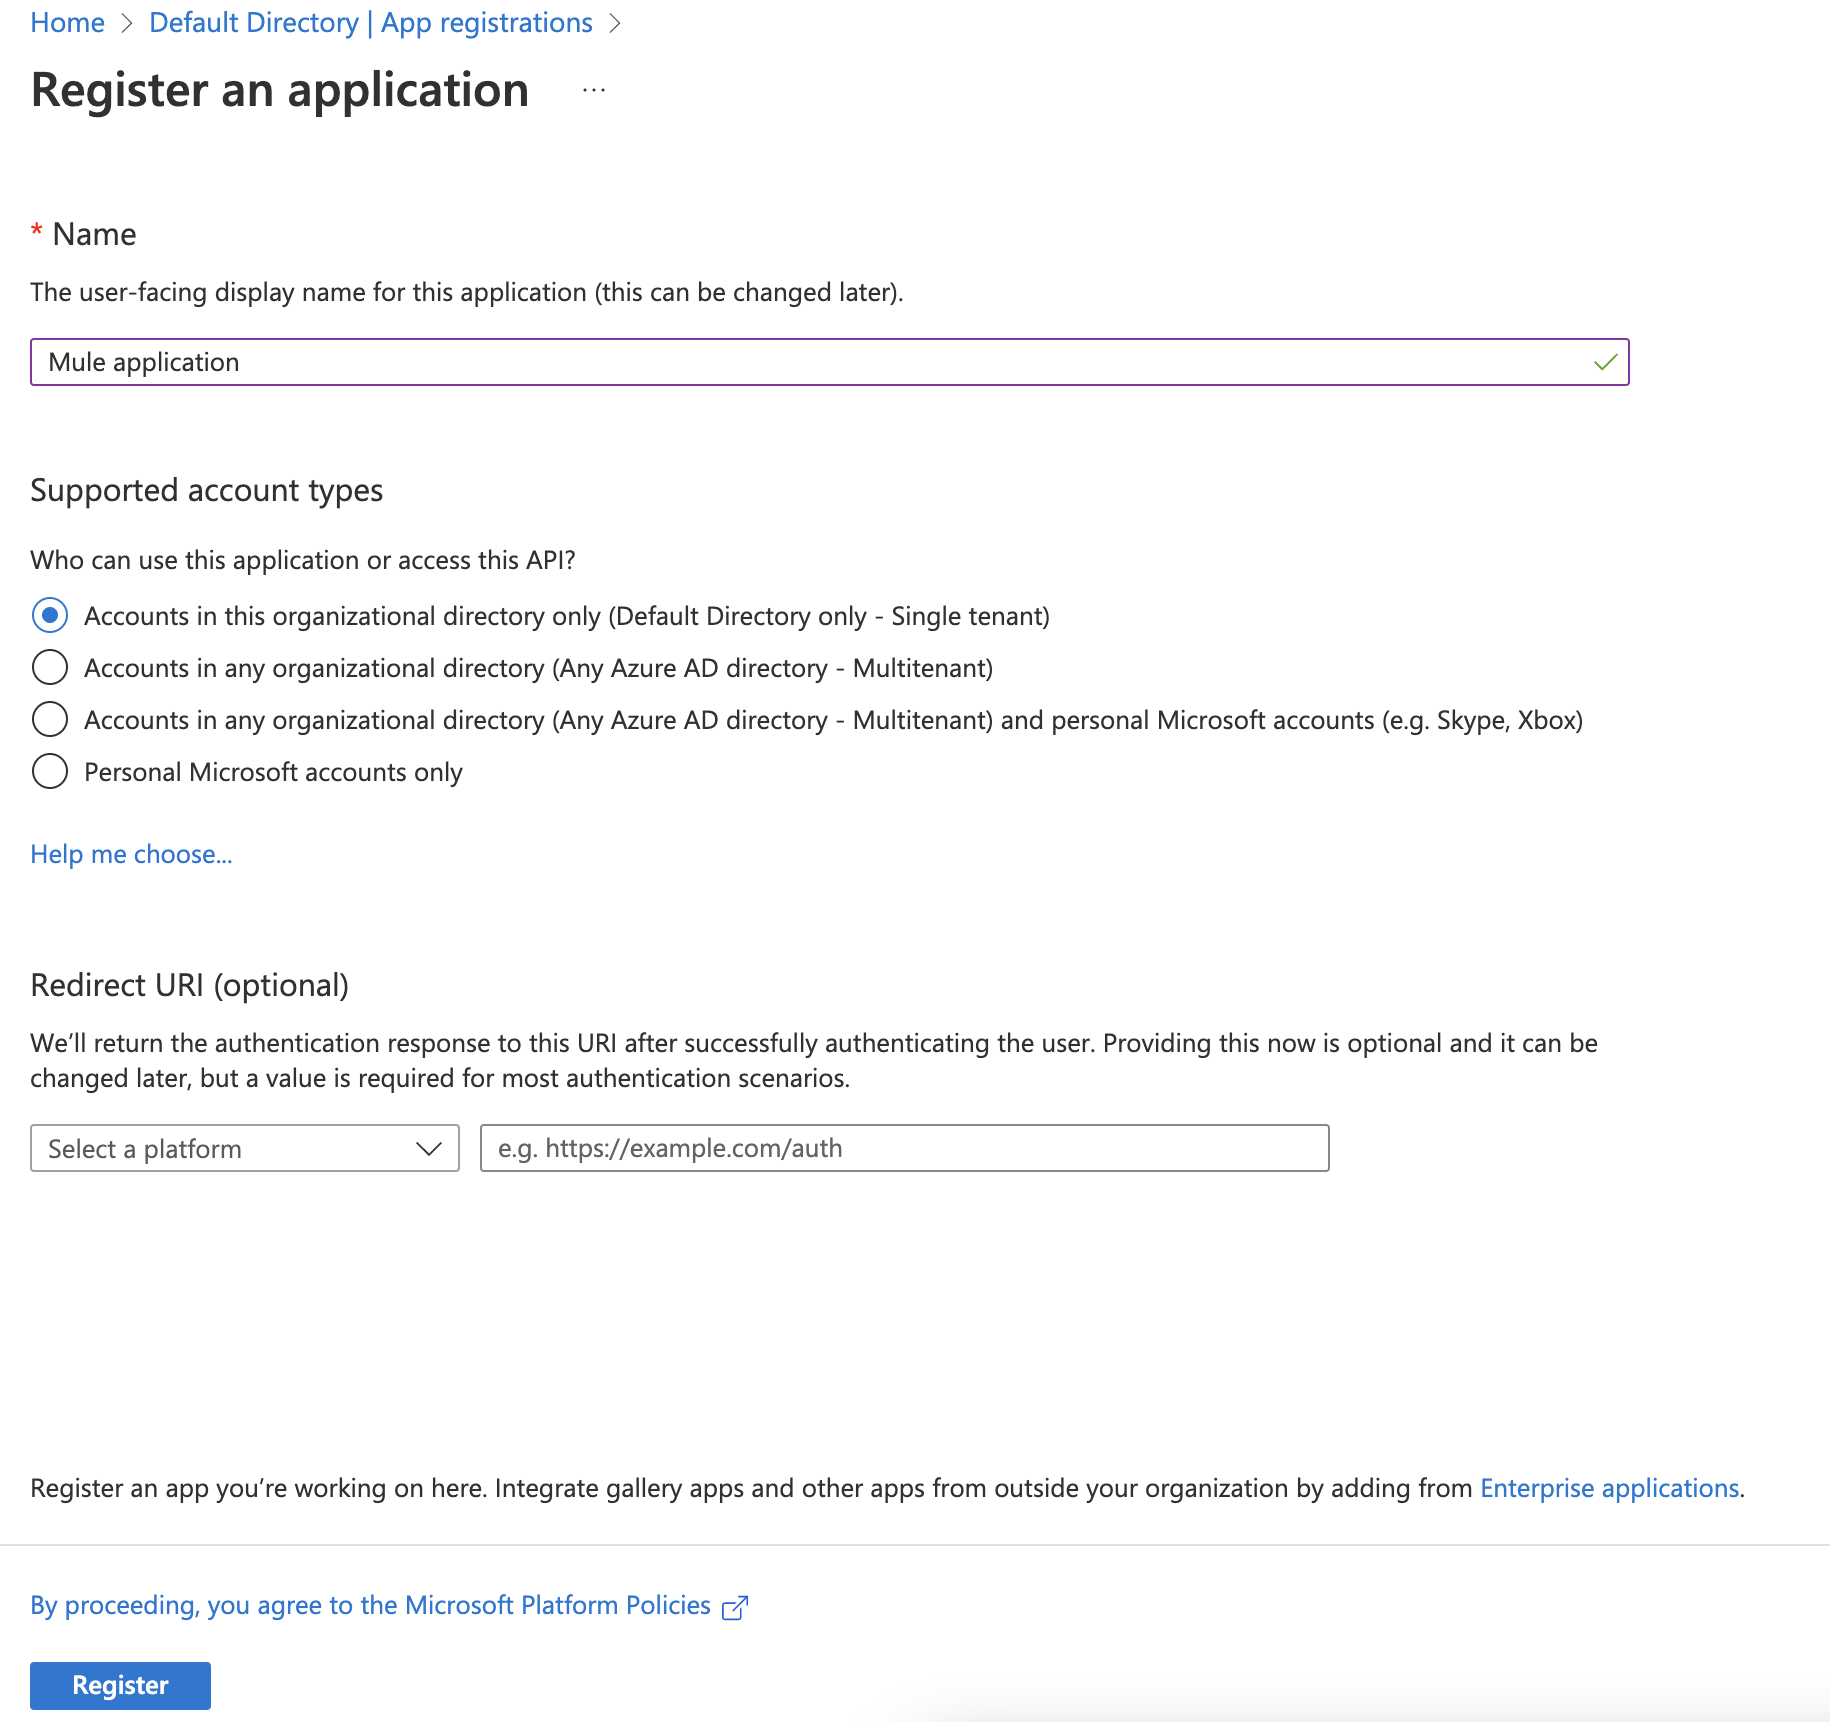
5.) Once the application is registered, you should see the details of the Application in the Application page. Here there are couple of information we need to capture so that we use while hitting the endpoint after we have added JWT validation policy.

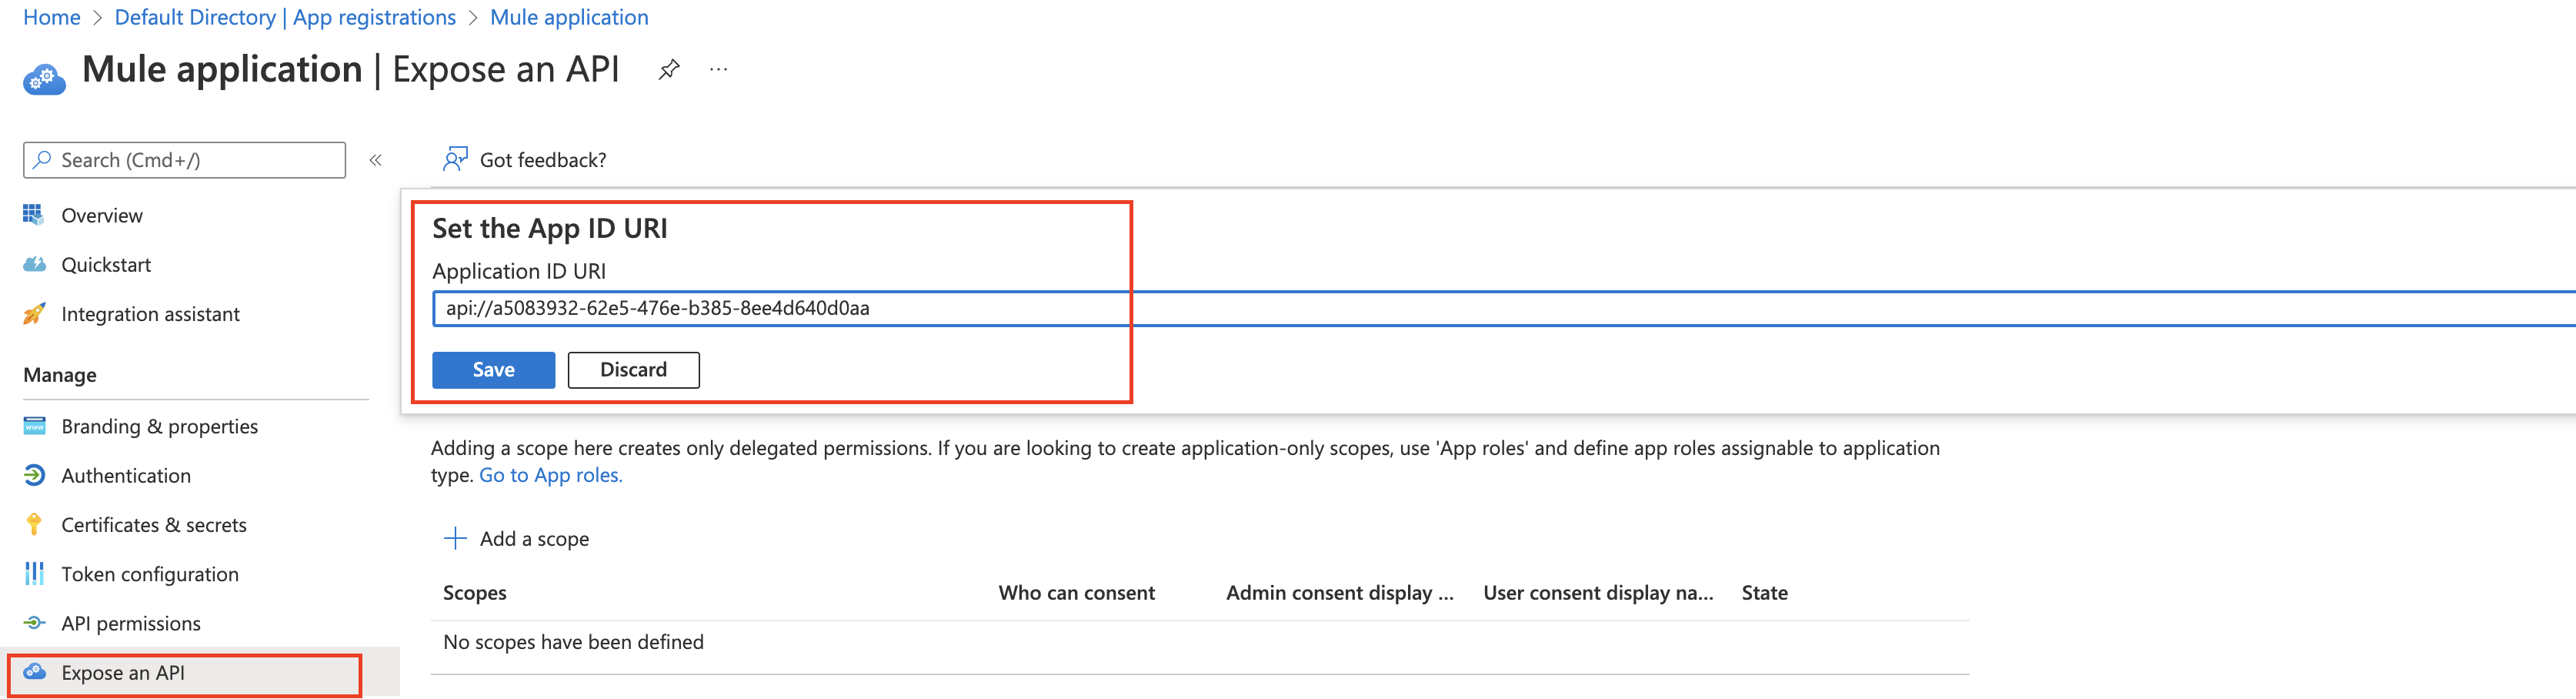
6.) Note down the Application Client ID and store it in a notepad. We’ll need in next steps. Now click on “Expose an API” in the “Manage” section.
Now click on the “Set” to set the Application ID URI. Click “Save” after Application ID URI is populated. Note down the URI.
7.) Now next step is to set the Client Secret. Click “Certificates & secrets” in the “Manage” section.
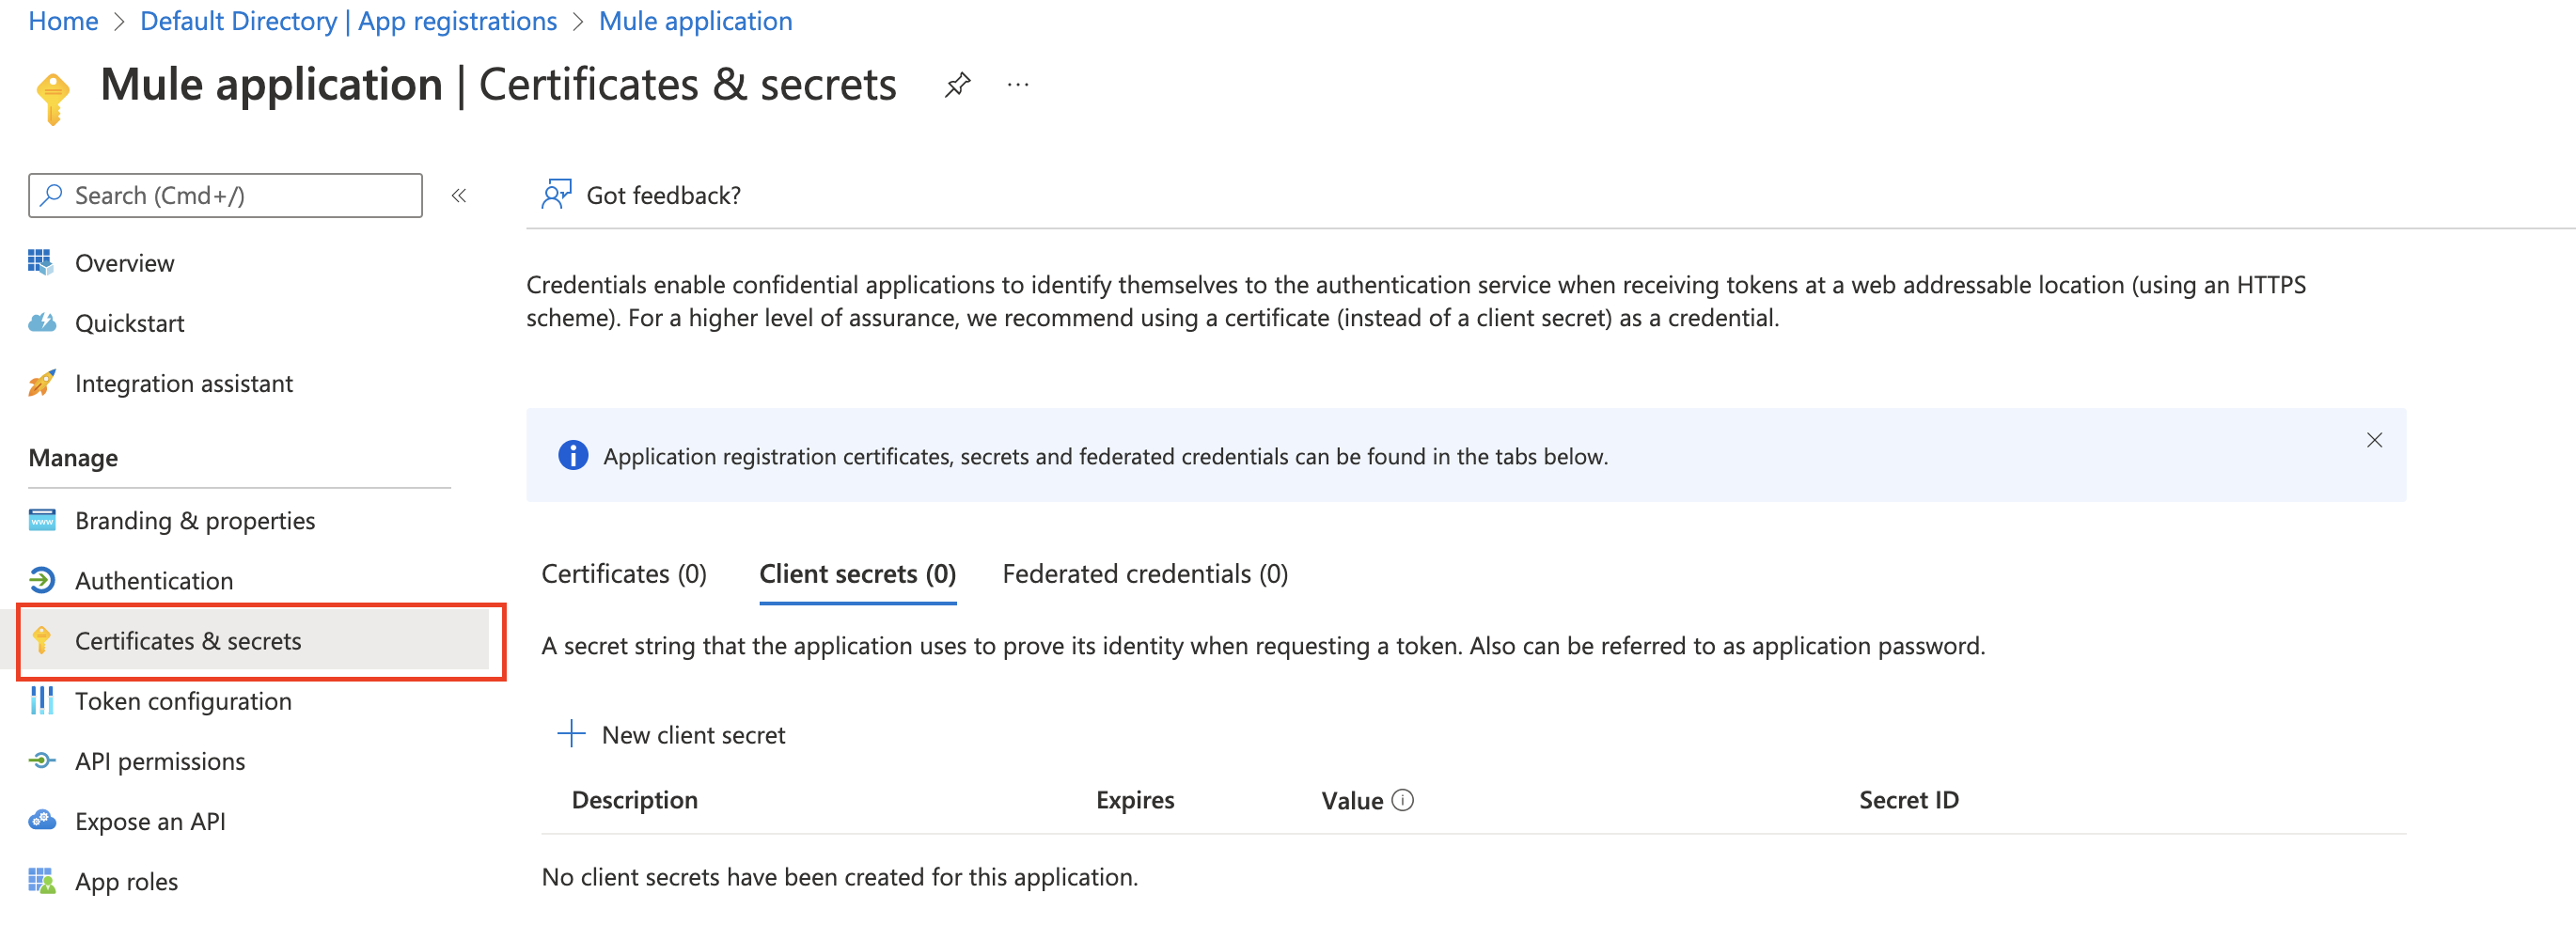
8.) Now click “+ New Client Secret” in the “Client secrets” section. Now add a description and set when the secret expires. Click “Add” button at the bottom of the page.
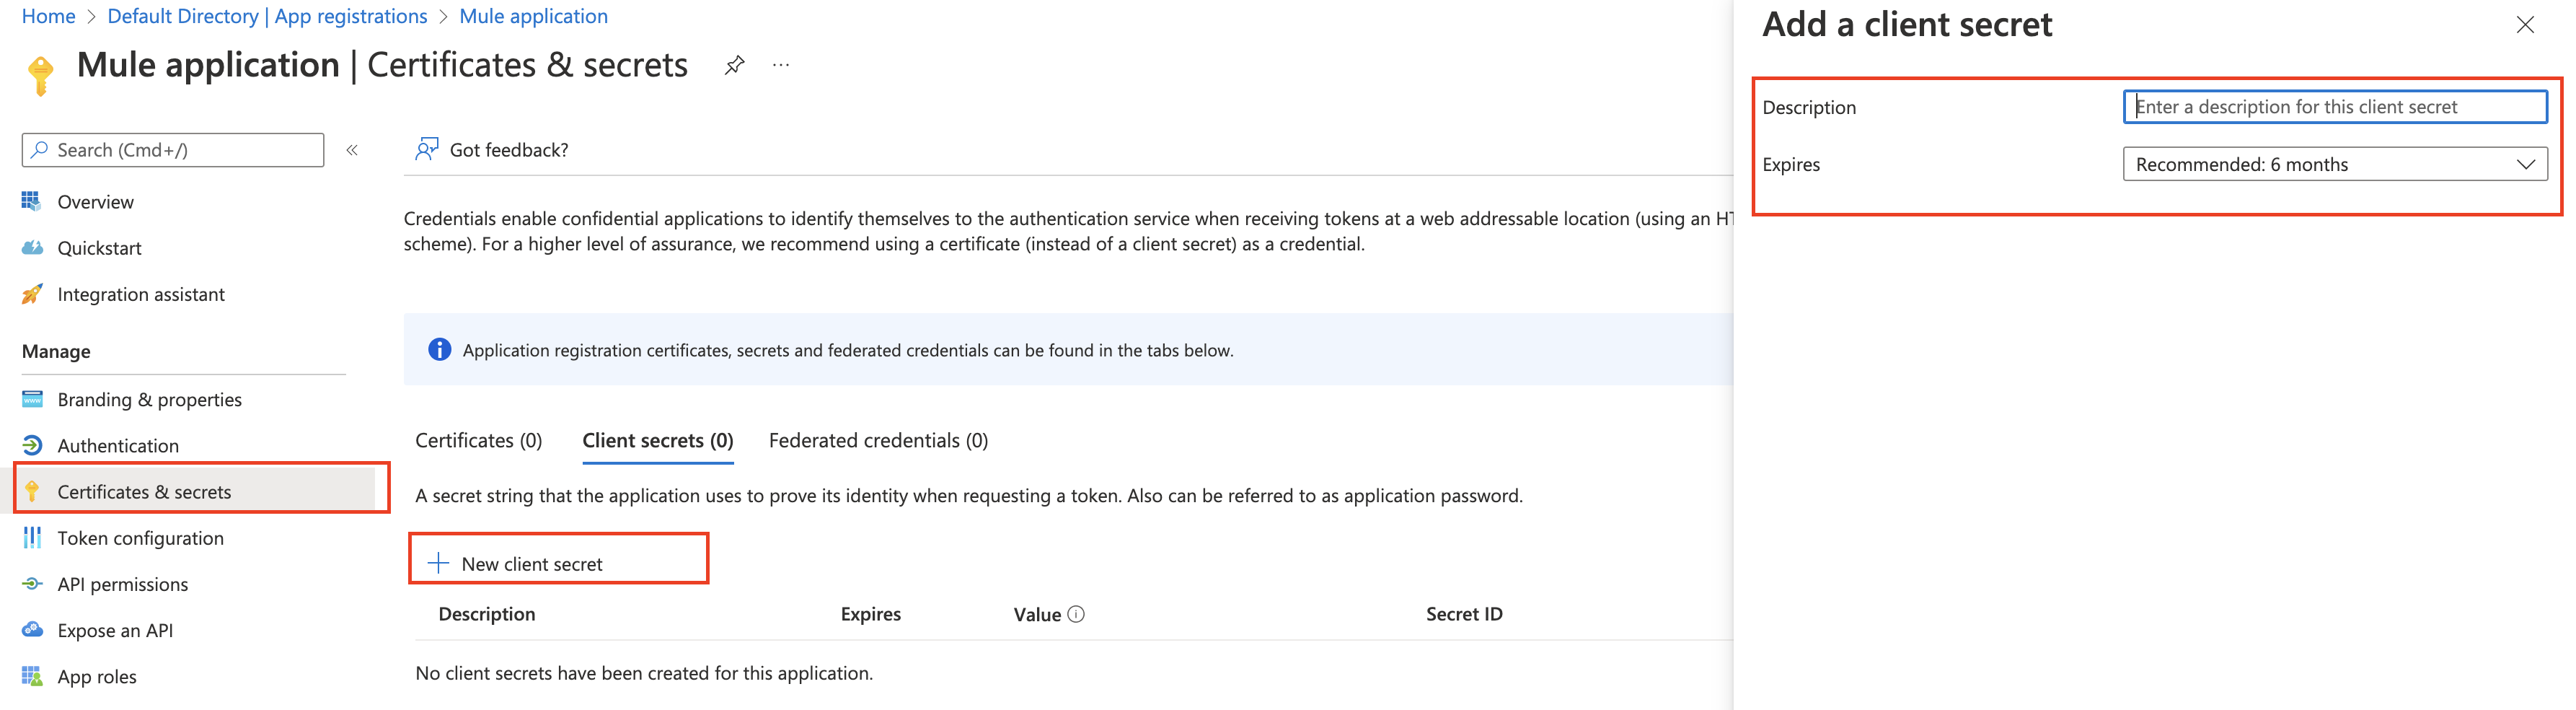
9.) Now copy the value and store it so that we can use it later when requesting the token.

This completes our configuration on the Azure side. Next step is to configure the validation policy for the proxy api in the Anypoint Platform.
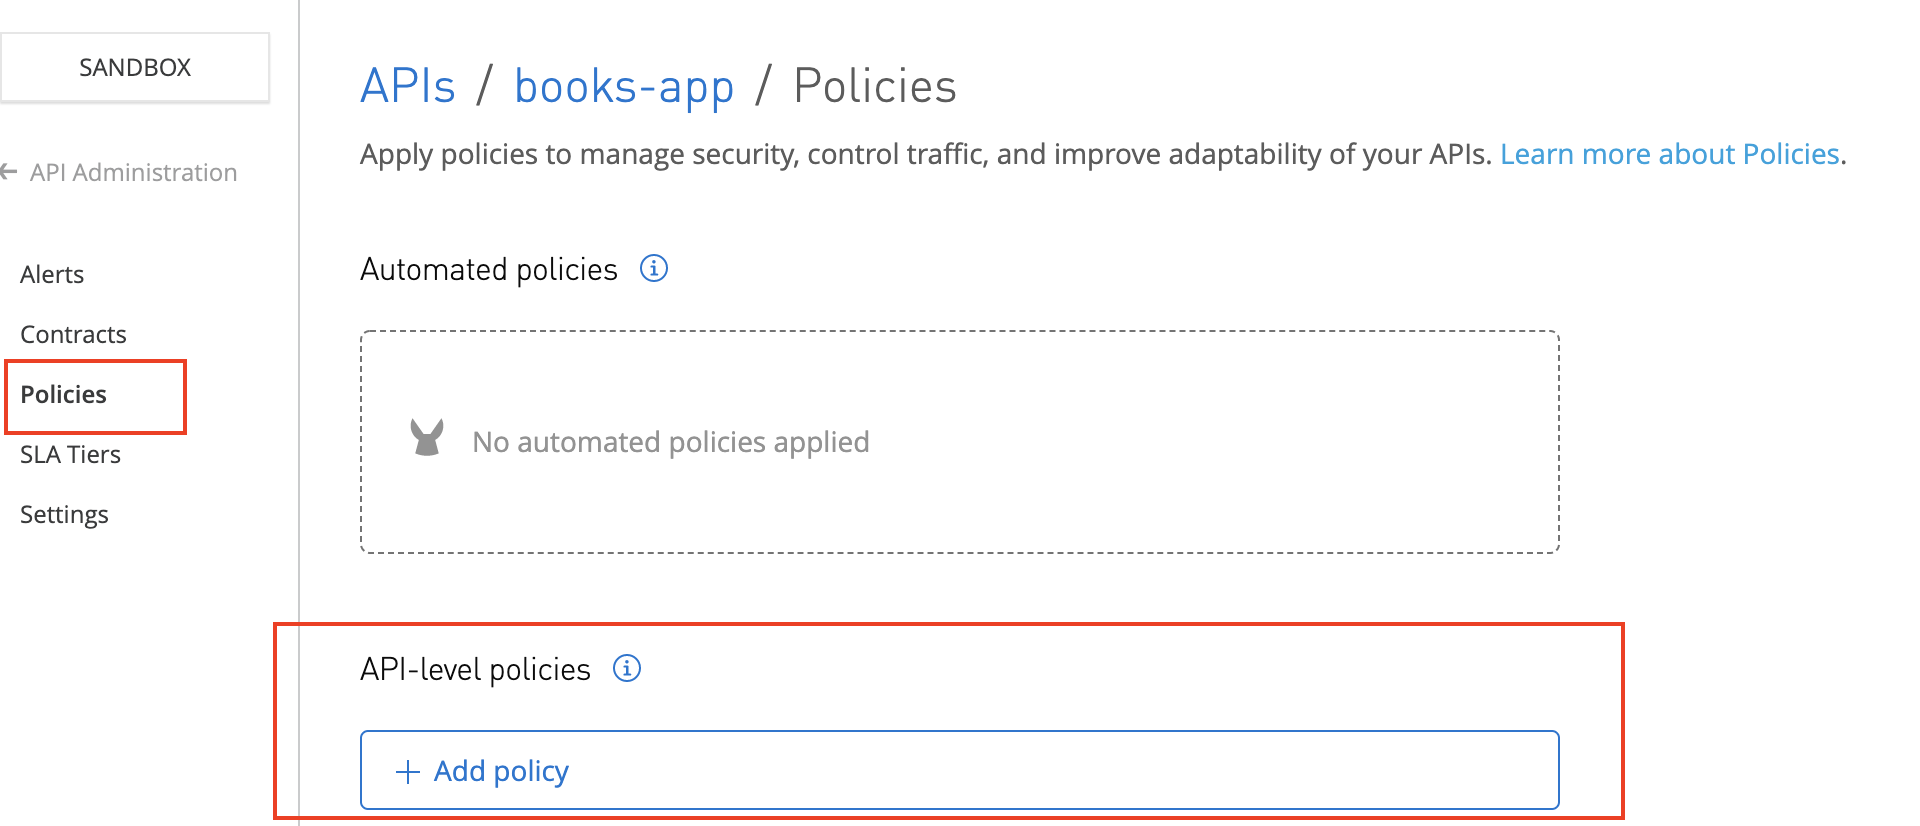
Apply policy from API Manager
Now let’s get back to API Manager in the Anypoint Platform and click on the “Bank Accounts” API URL which should take us to Settings page.
10.) Let’s add a new policy by clicking the button “API level policies” and selecting “JWT Validation” from the available in the Security Validation.
| Policy Property | Value |
|---|---|
| JWT origin | HTTP Bearer Authentication Header |
| JWT Signing Method | RSA |
| JWT Signing Key Length | 256 (Look out for checking the supporting key length and other information here) Hit this link in the Postman or any of your favorite tool https://login.microsoftonline.com/common/v2.0/.well-known/openid-configuration and you should see the following in the response: “id_token_signing_alg_values_supported”: [ “RS256” ] |
| JWT Key origin | JWKS |
| JWKS Url | You can find the URL from the response from https://login.microsoftonline.com/common/v2.0/.well-known/openid-configuration that you hit earlier to find out the JWT Signing Key Length jwks_uri”: “https://login.microsoftonline.com/common/discovery/v2.0/keys“ |
| JWKS Caching TTL (minutes) | 60 |
| JWKS Connection Timeout (milliseconds) | 10000 |
| Skip Client Id Validation | checked |
| Validate Audience Claim | checked |
| Audience Claim Values | Provide the application URI that we generated during application registration in Azure. In my case it is api://cad5e6b1-5482-4a53-90fd-5db00f6bc76f |
12.) Apply JWT Validation Policy (configuration)
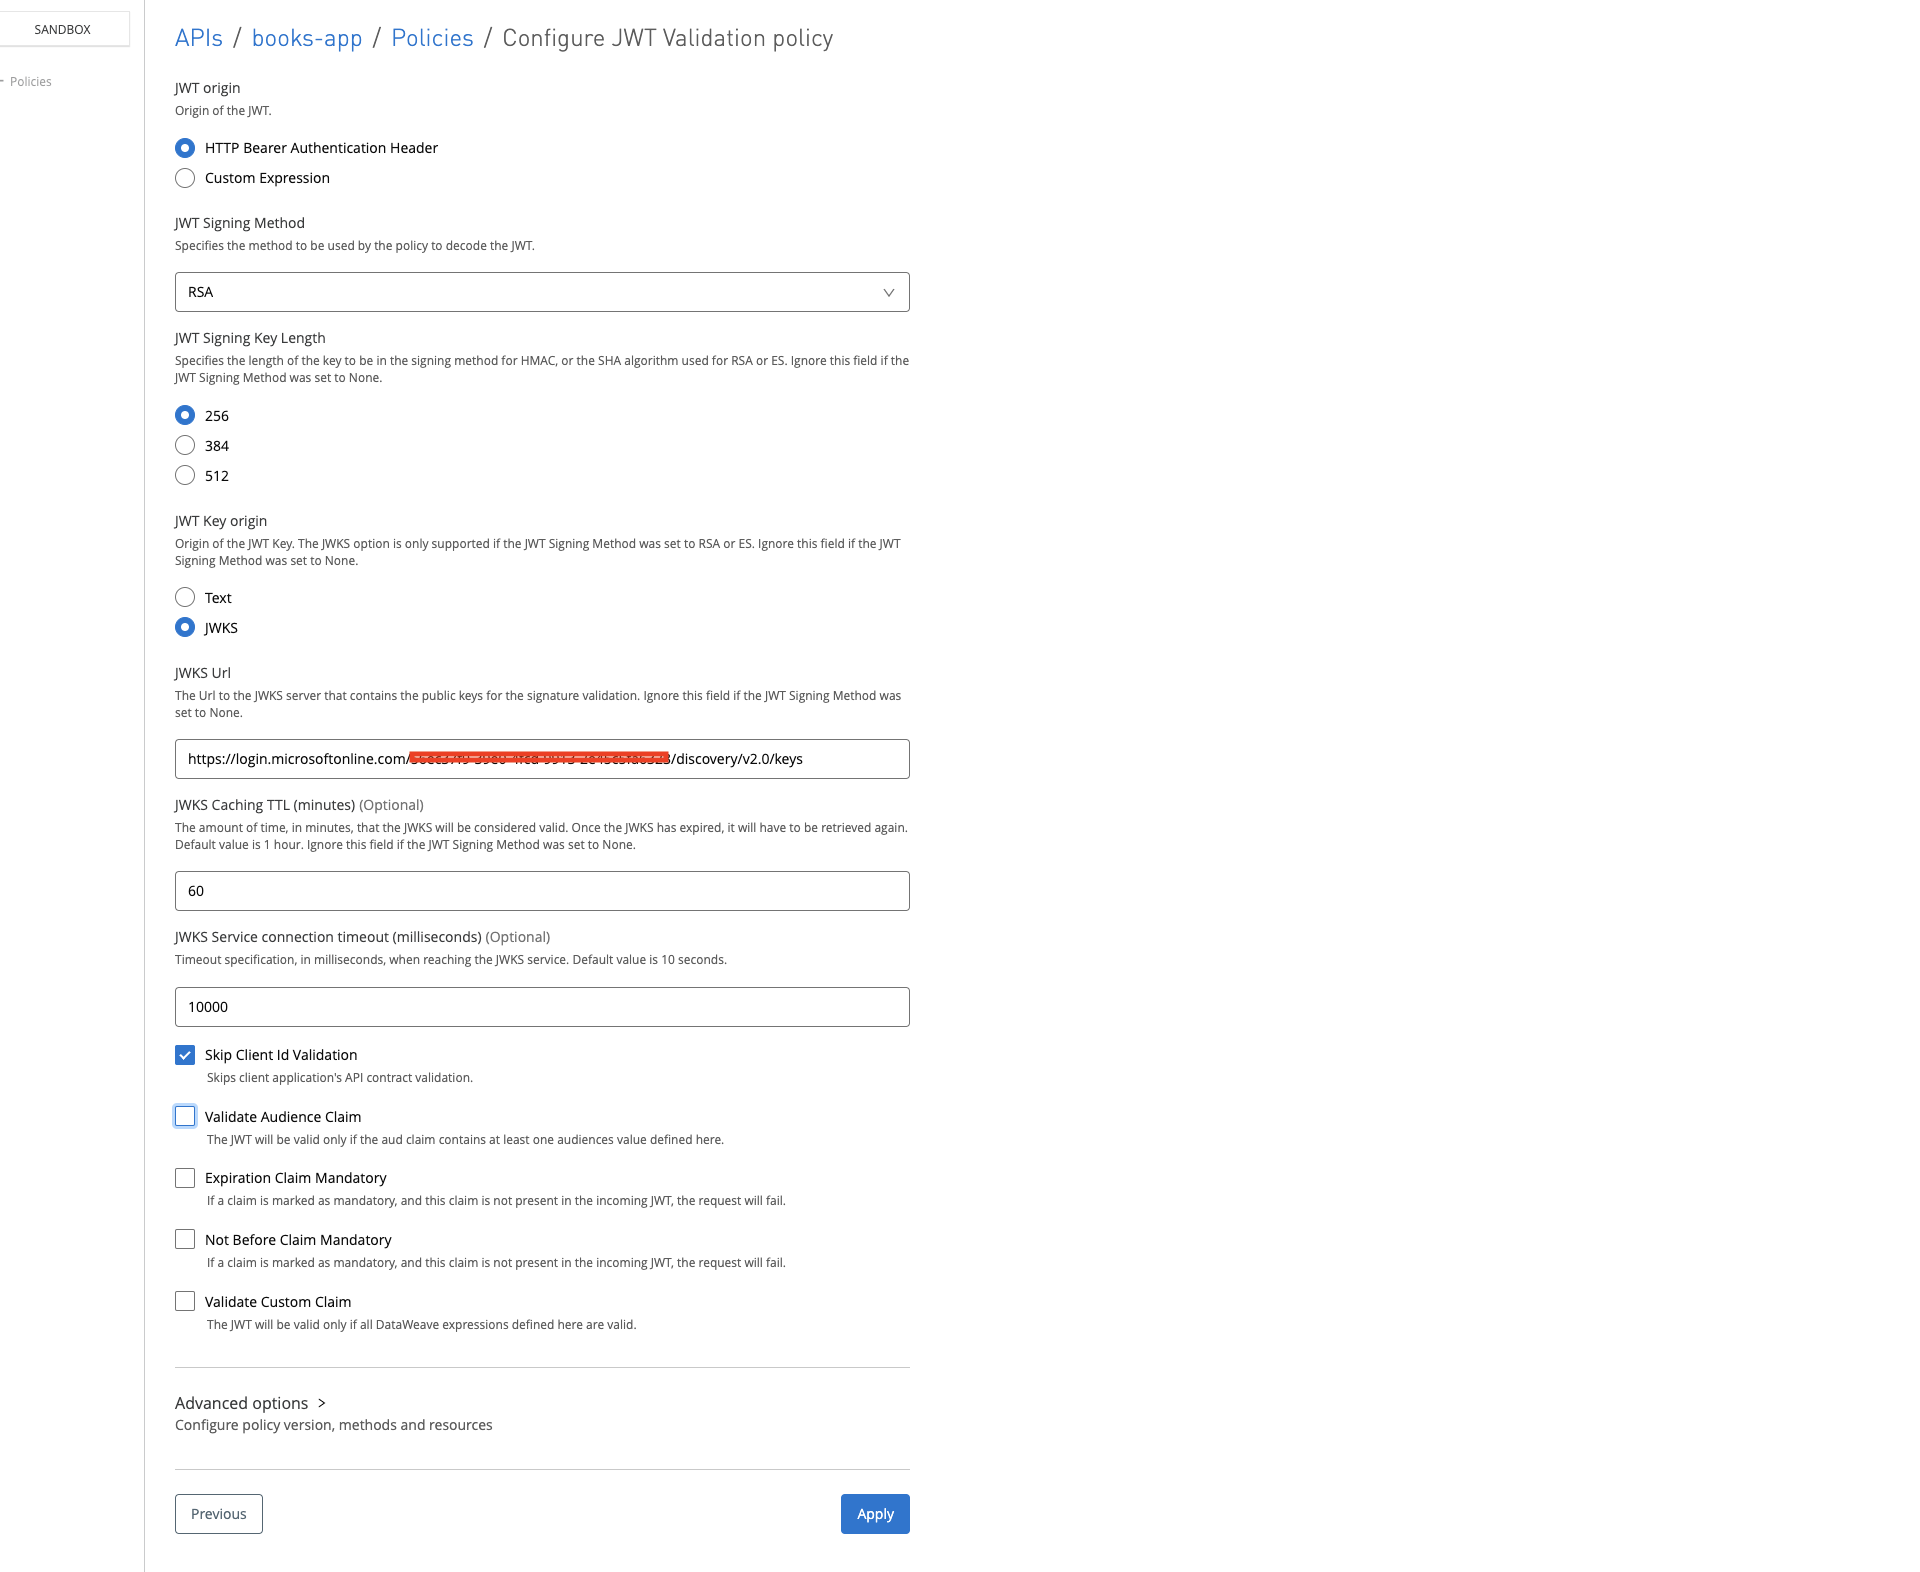
Note in the Anypoint platform, the policies are applied to proxy if you have set up proxy with option “Endpoint with Proxy” while deploying the API. Otherwise, policies are applied to the application itself.
Run the JWT validation tests
Let’s test the policy by hitting the application and the proxy. We should see still we should be able to hit the application endpoint without any issue, but for proxy it should throw error.
13.) Hitting Application endpoint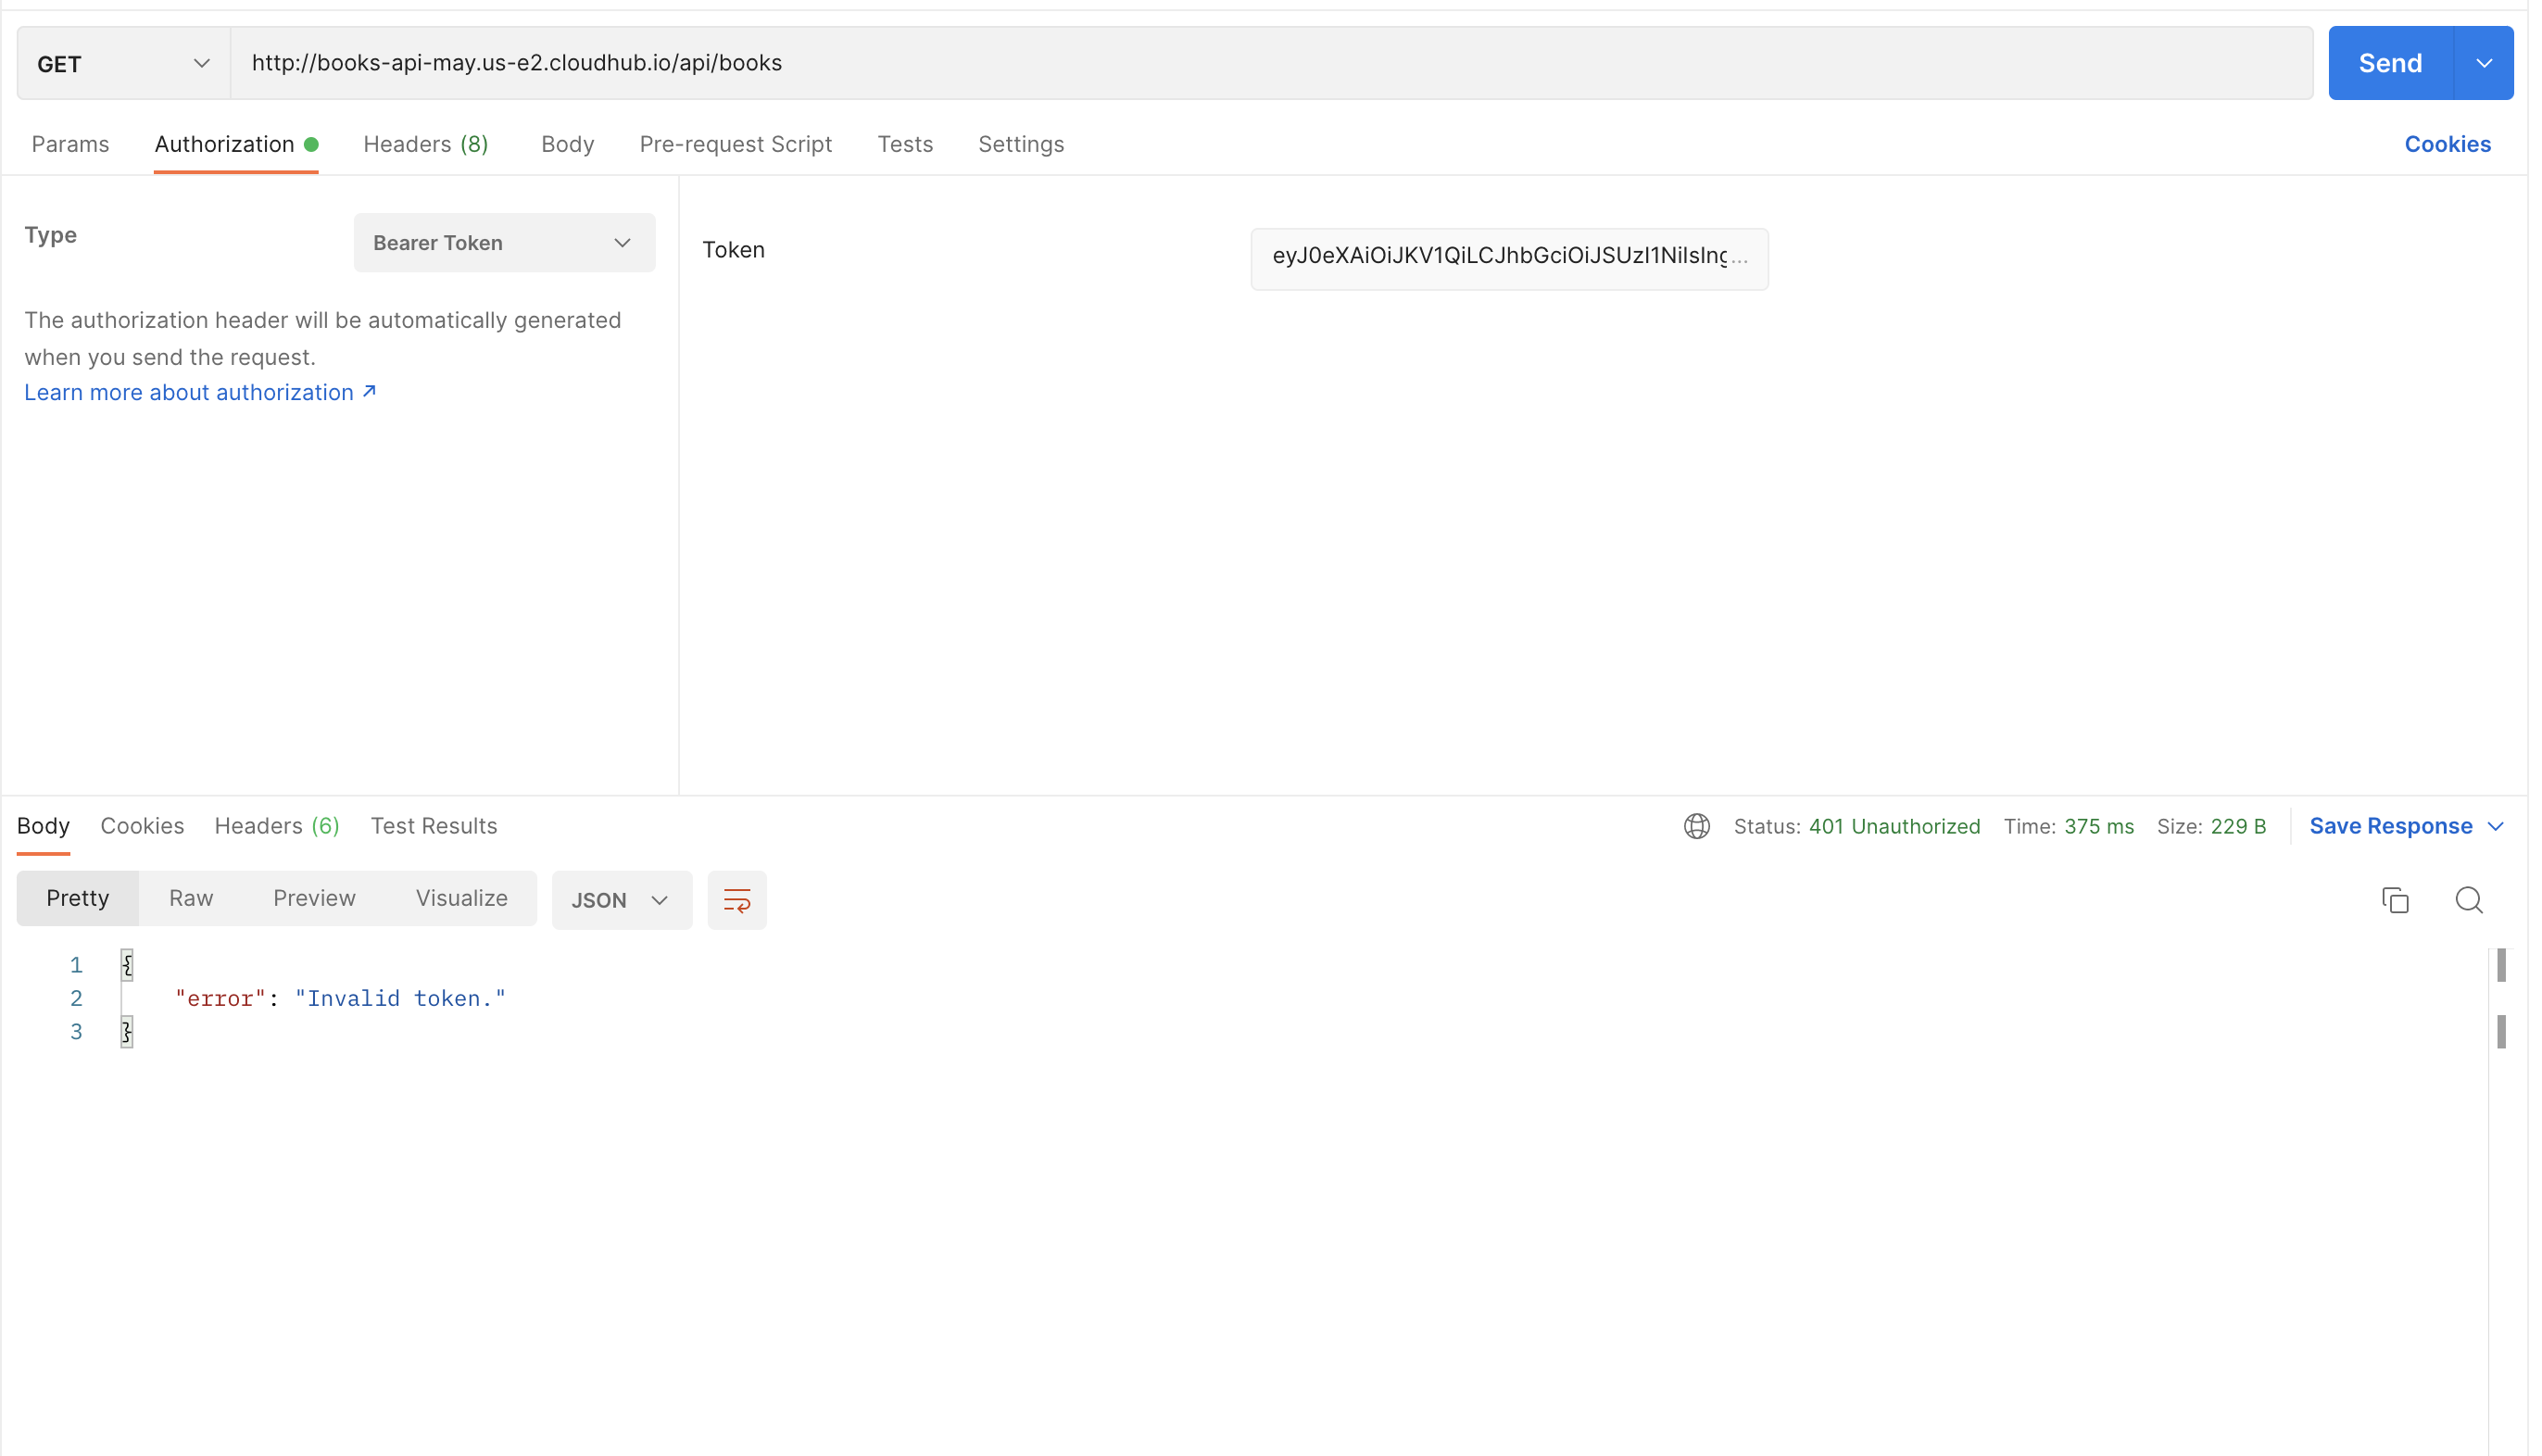
Notice in the above screenshot, hitting the endpoint has thrown back 401 status. In order to fix this, now we need to provide JWT token.
14.) In order to get the JWT token, we need to first hit the azure /token by providing the client credentials. Go back to Azure Portal and click on the application name that we registered in the Azure AD and in the overview screen, click “Endpoints“.
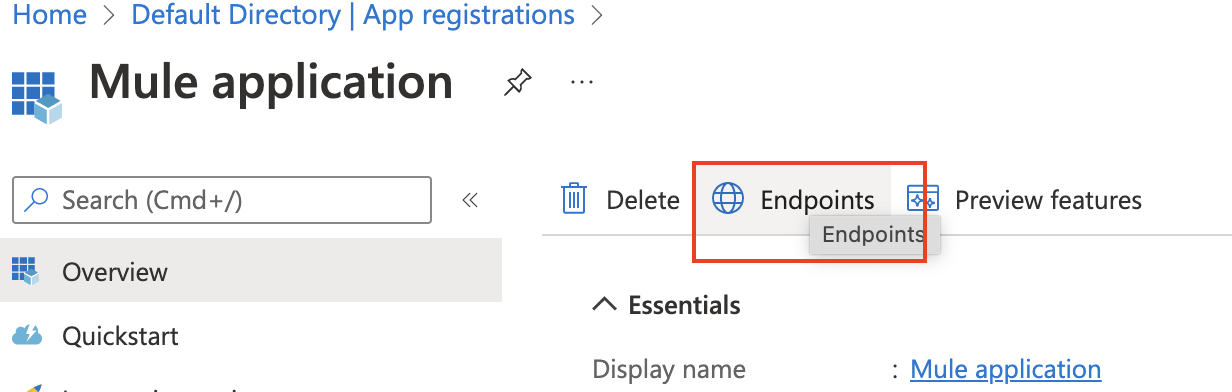
15.) You should see the list of supported endpoints and we are interested in OAuth 2.0 token endpoint(v2) and so copy the URL from there.
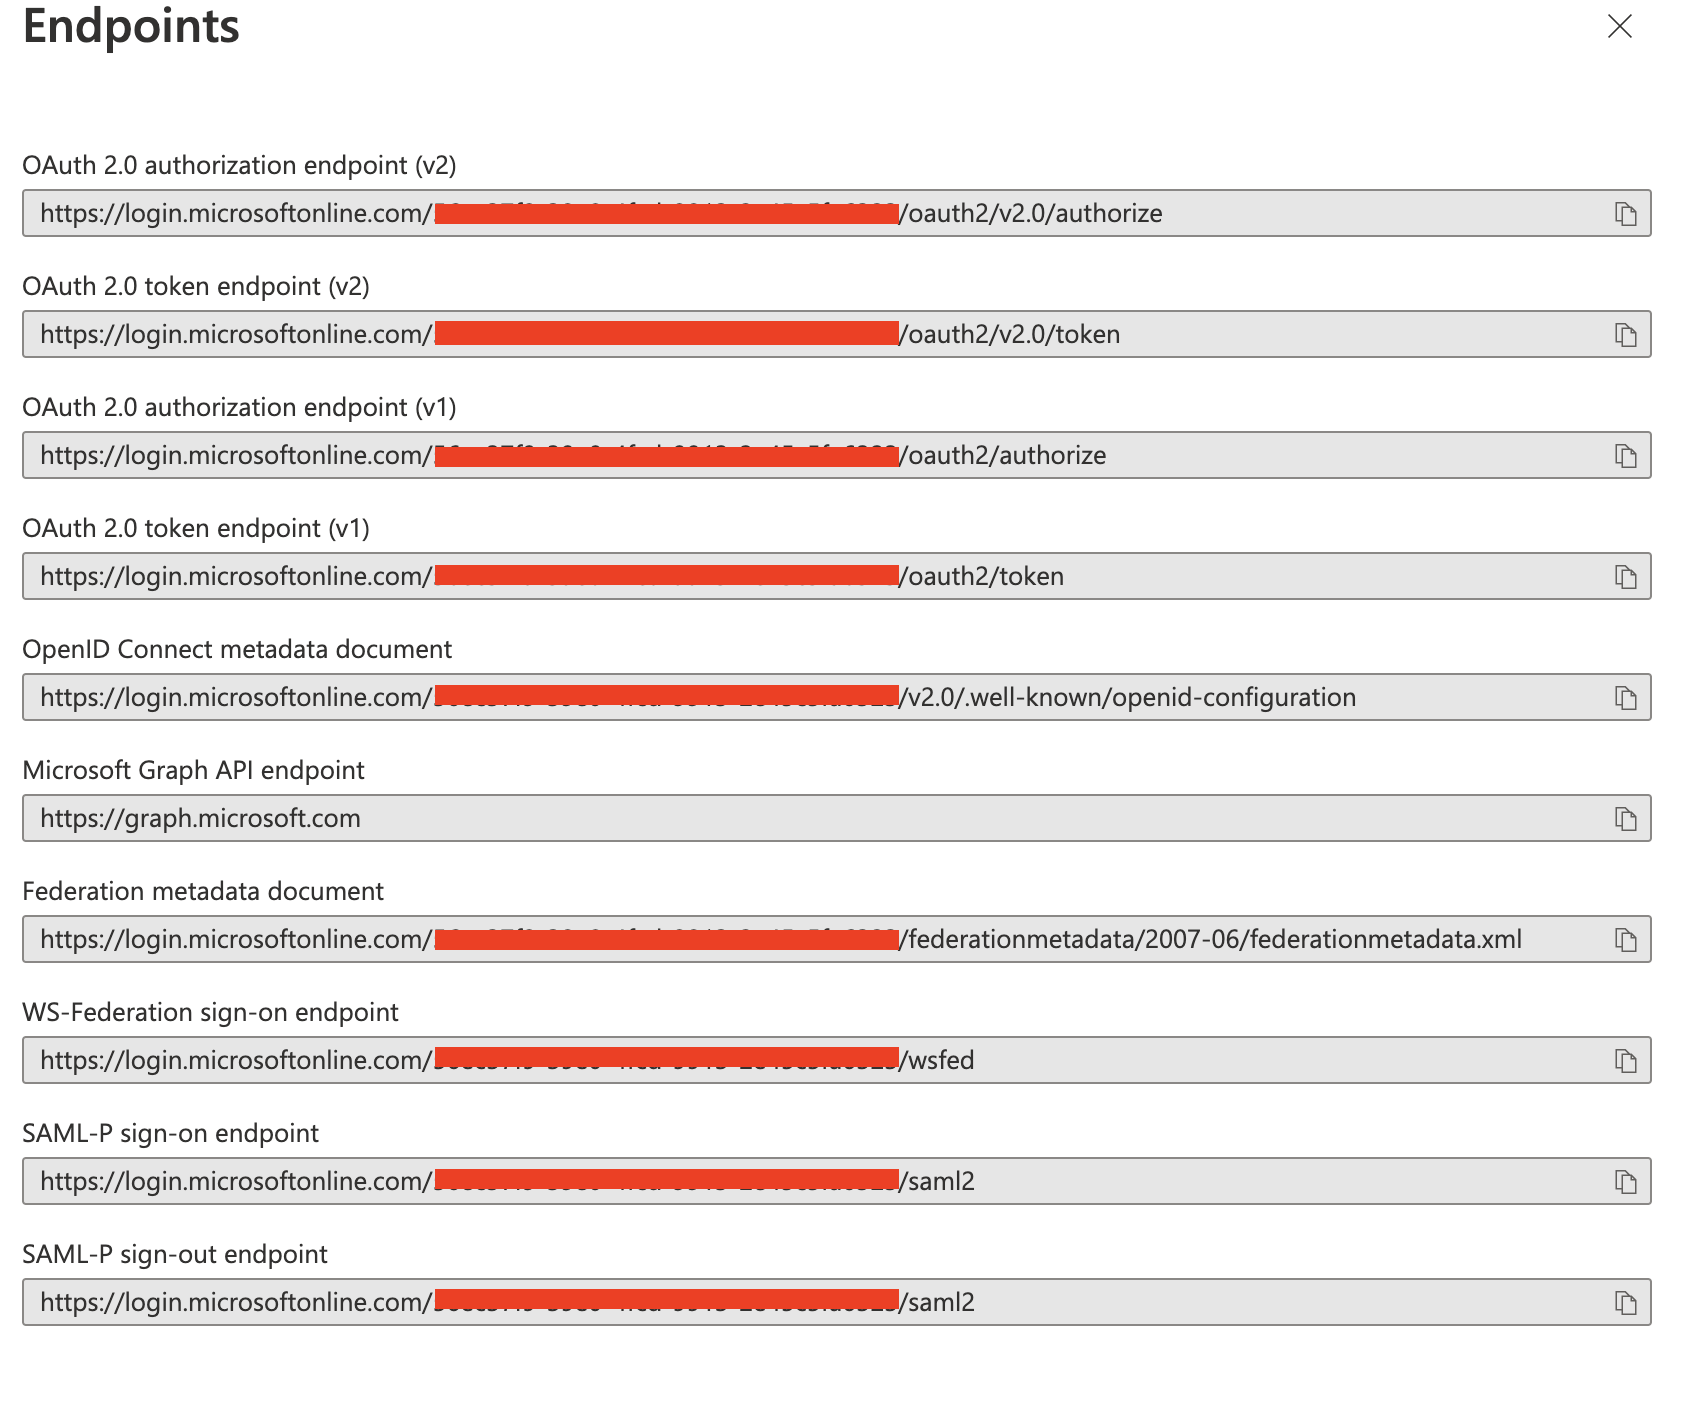
16.) Now hit the URL copied in the Postman and provide body with the following values and copy the access_token value in the response:
| grant_type | client_credentials |
| client_id | client_id copied from the azure portal (application id) |
| client_secret | Secret value copied from the azure portal |
| scope | api://cad5e6b1-5482-4a53-90fd-5db00f6bc76f/.default |

17.) Add the “Authorization” in the Header key and value as “Bearer <access_token_copied>” and hit the proxy endpoint that we hit before. This time, instead of 401 status should return 200 with the response that we expected.
18.) The other option is to generate the token via "Auth" Go to Postman and open a new request tab. Click on Authentication and select OAuth 2.0
19.) Under Configure New Token, use the following values:
Token Name: Token
Grant Type: Authorization Code
Callback URL: configured in your Azure application under "Redirect URIs"
Auth URL: https://login.microsoftonline.com/{{tenant_id}}/oauth2/v2.0/authorize
Access Token URL: https://login.microsoftonline.com/{{tenant_id}}/oauth2/v2.0/token
Client ID: Insert Client ID copied from Azure earlier
Client Secret: Insert Client Secret copied from Azure earlier
Scope: api://cad5e6b1-5482-4a53-90fd-5db00f6bc76f/.default
Client Authentication: Send client credentials in body
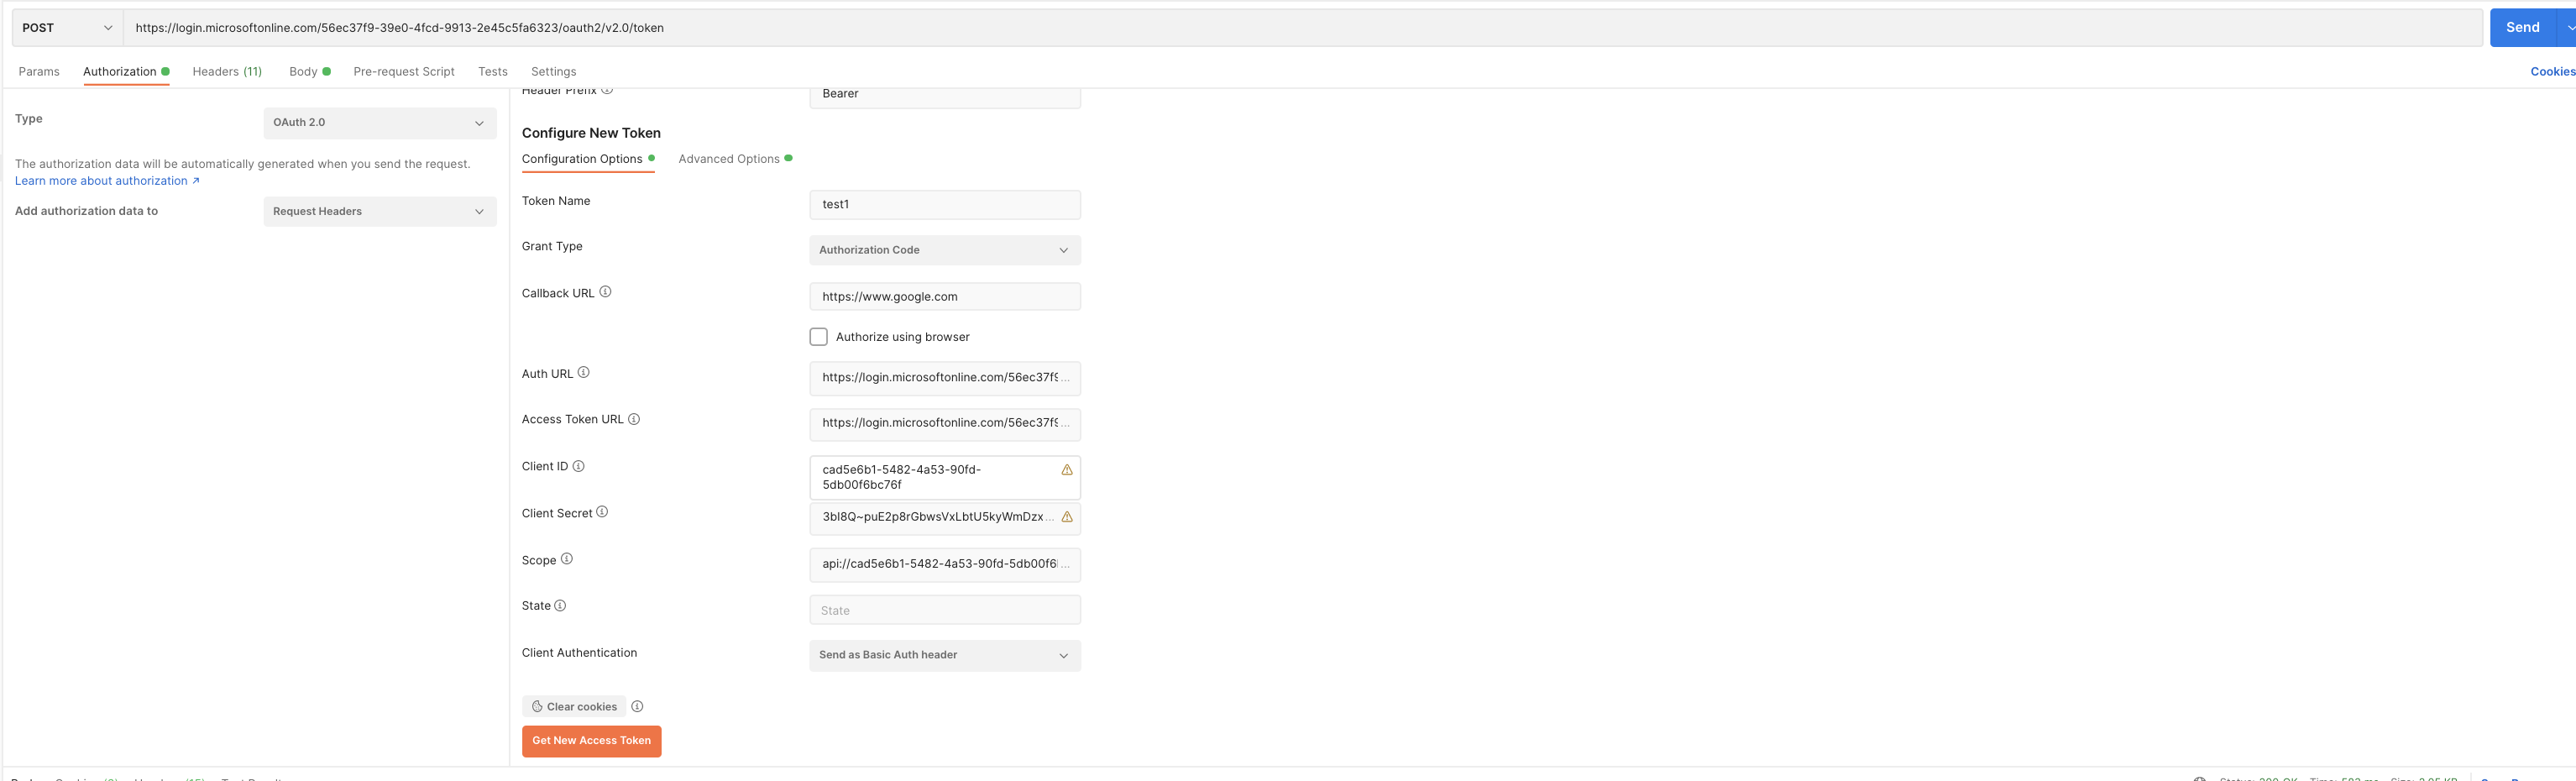
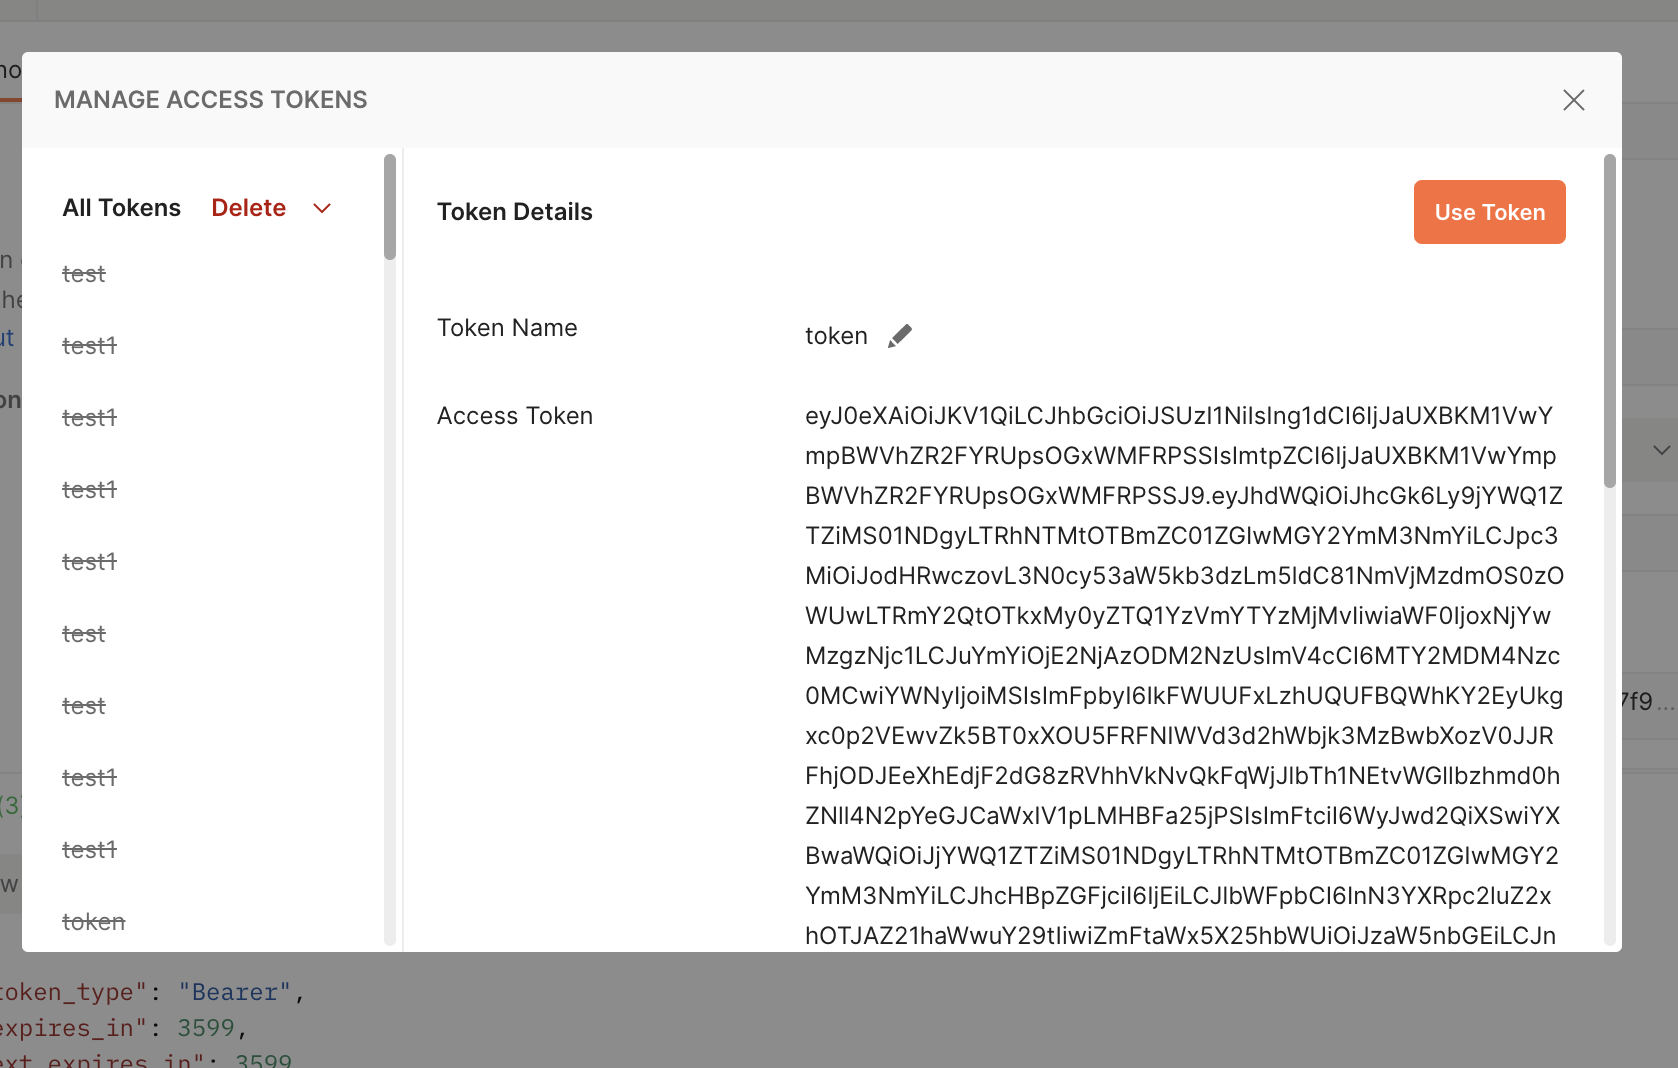
20.) Now click Get New Access Token (note: when you click this, a pop-up window may show up asking to login to Azure. Just login and go back to Postman).
21.) If it works, you should get a token fetched from Azure. Copy this token as we will use it next.
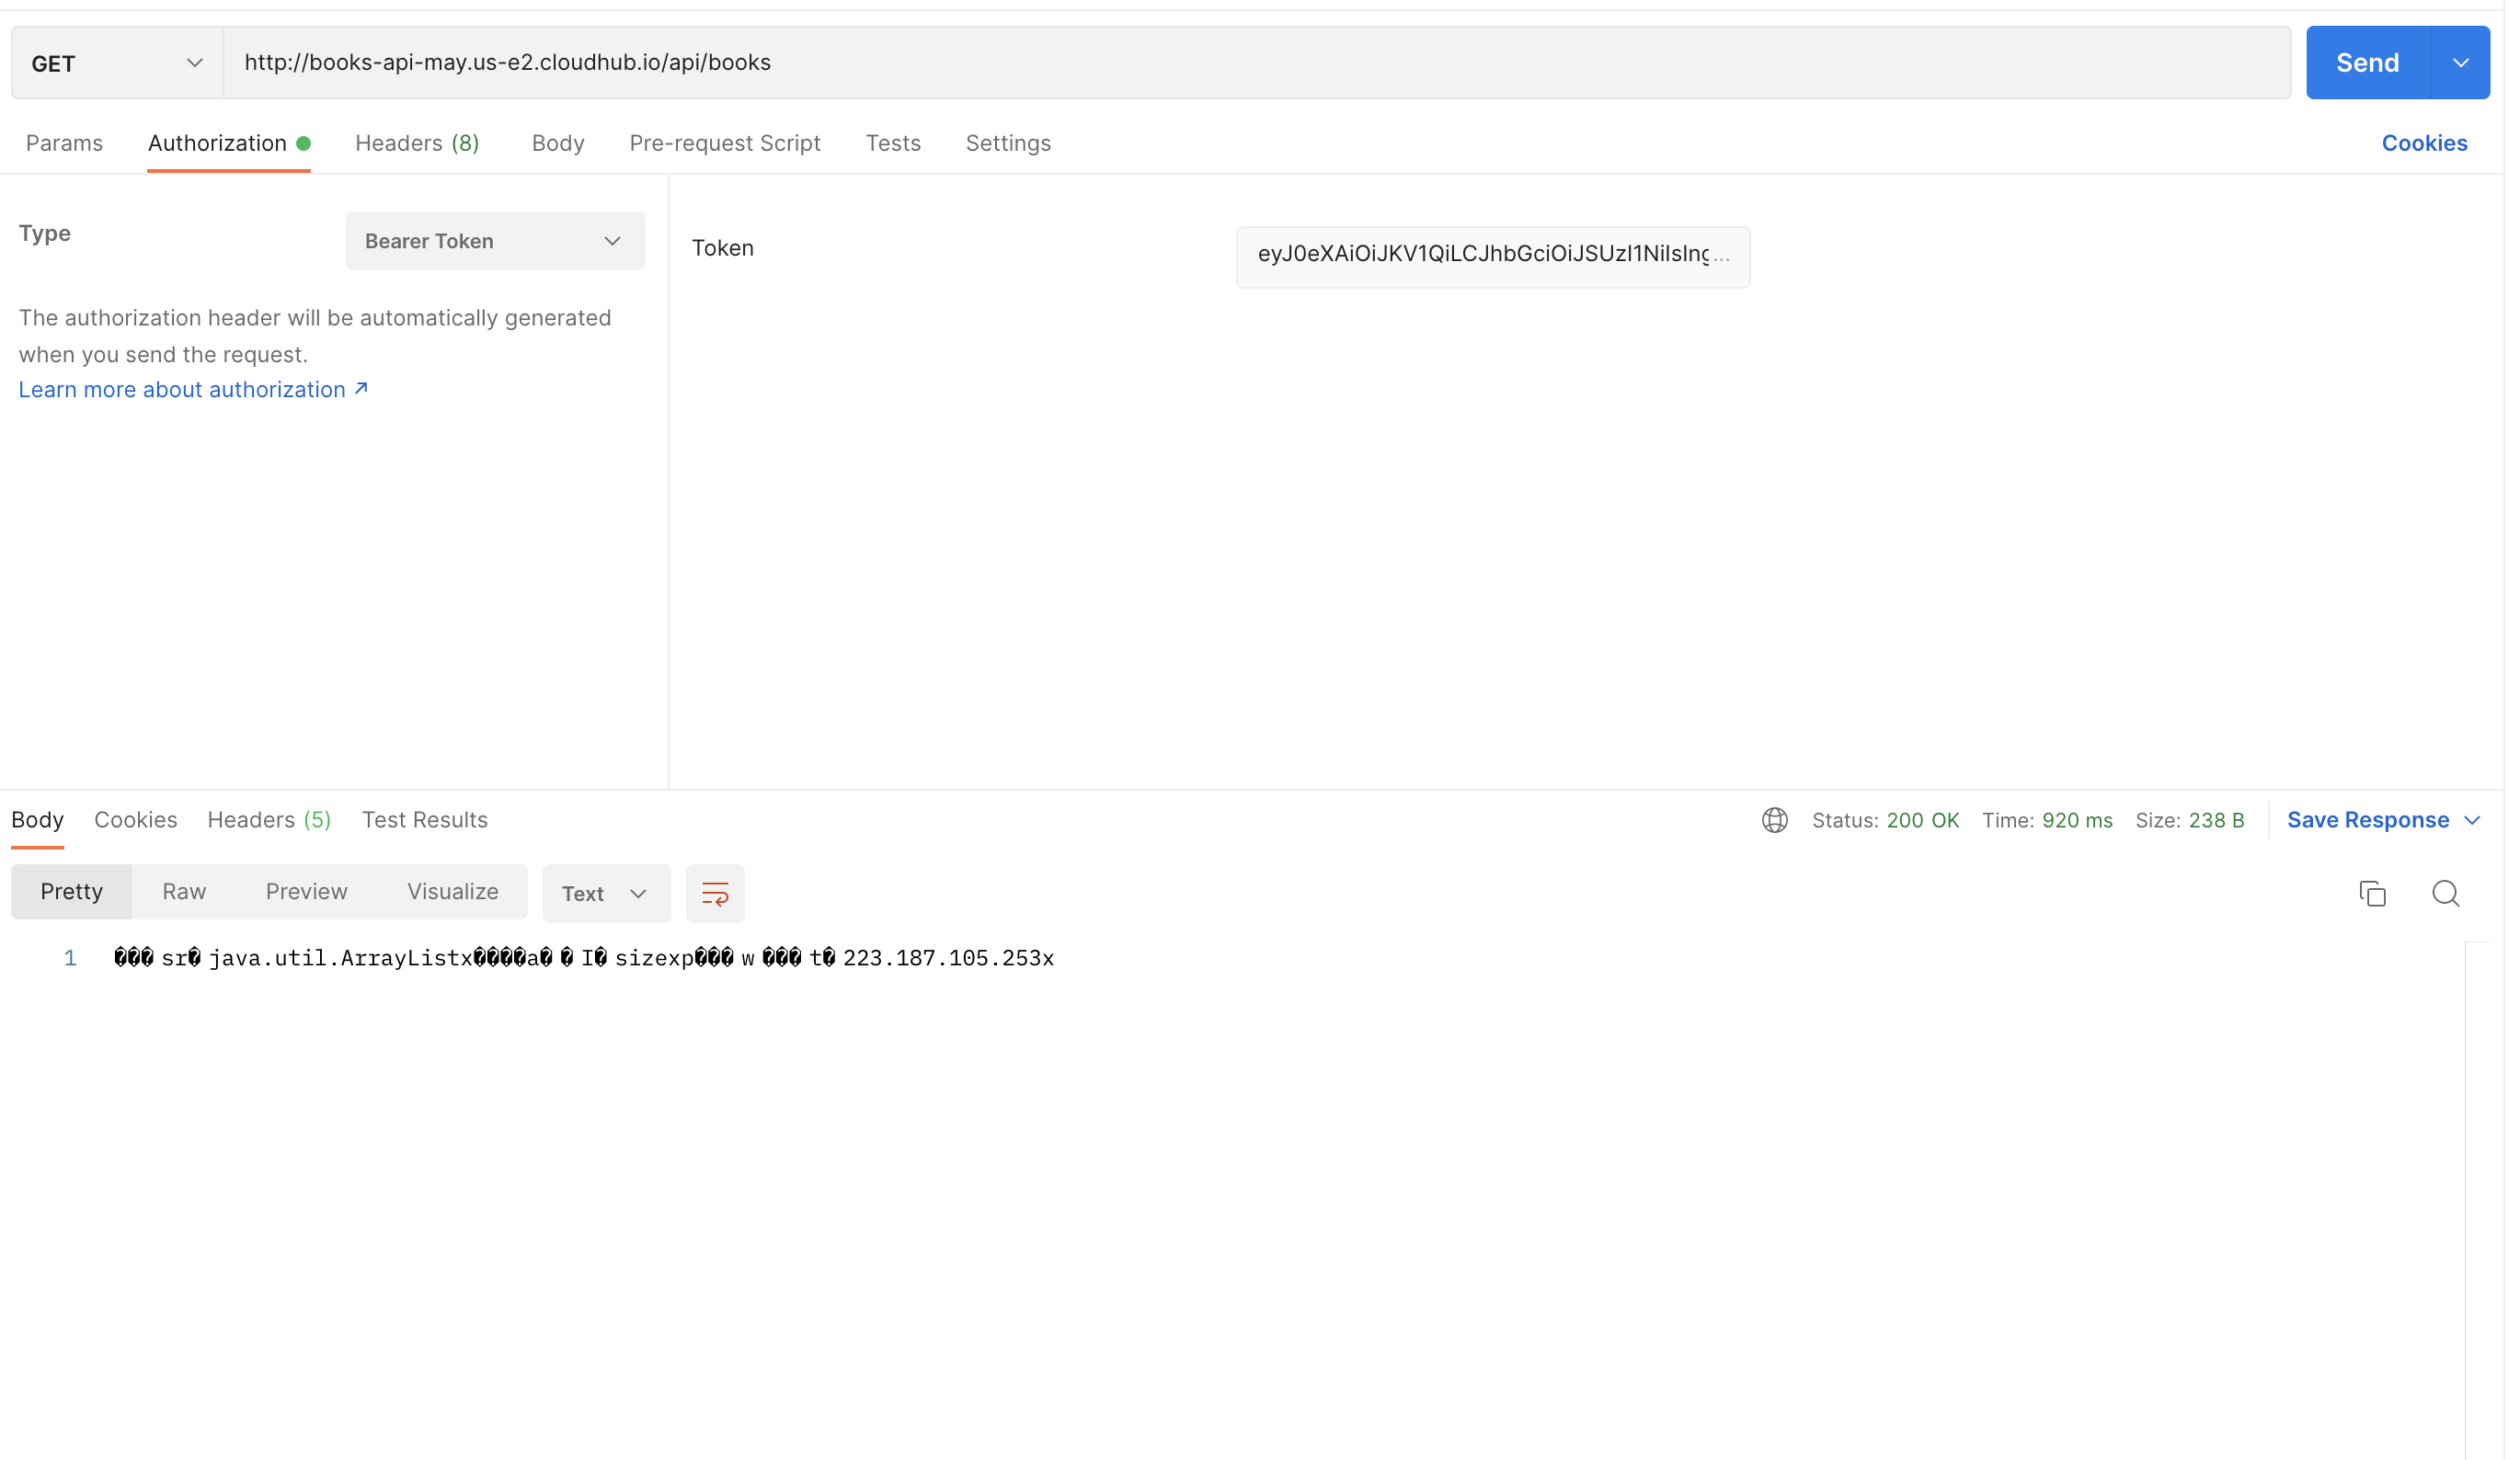
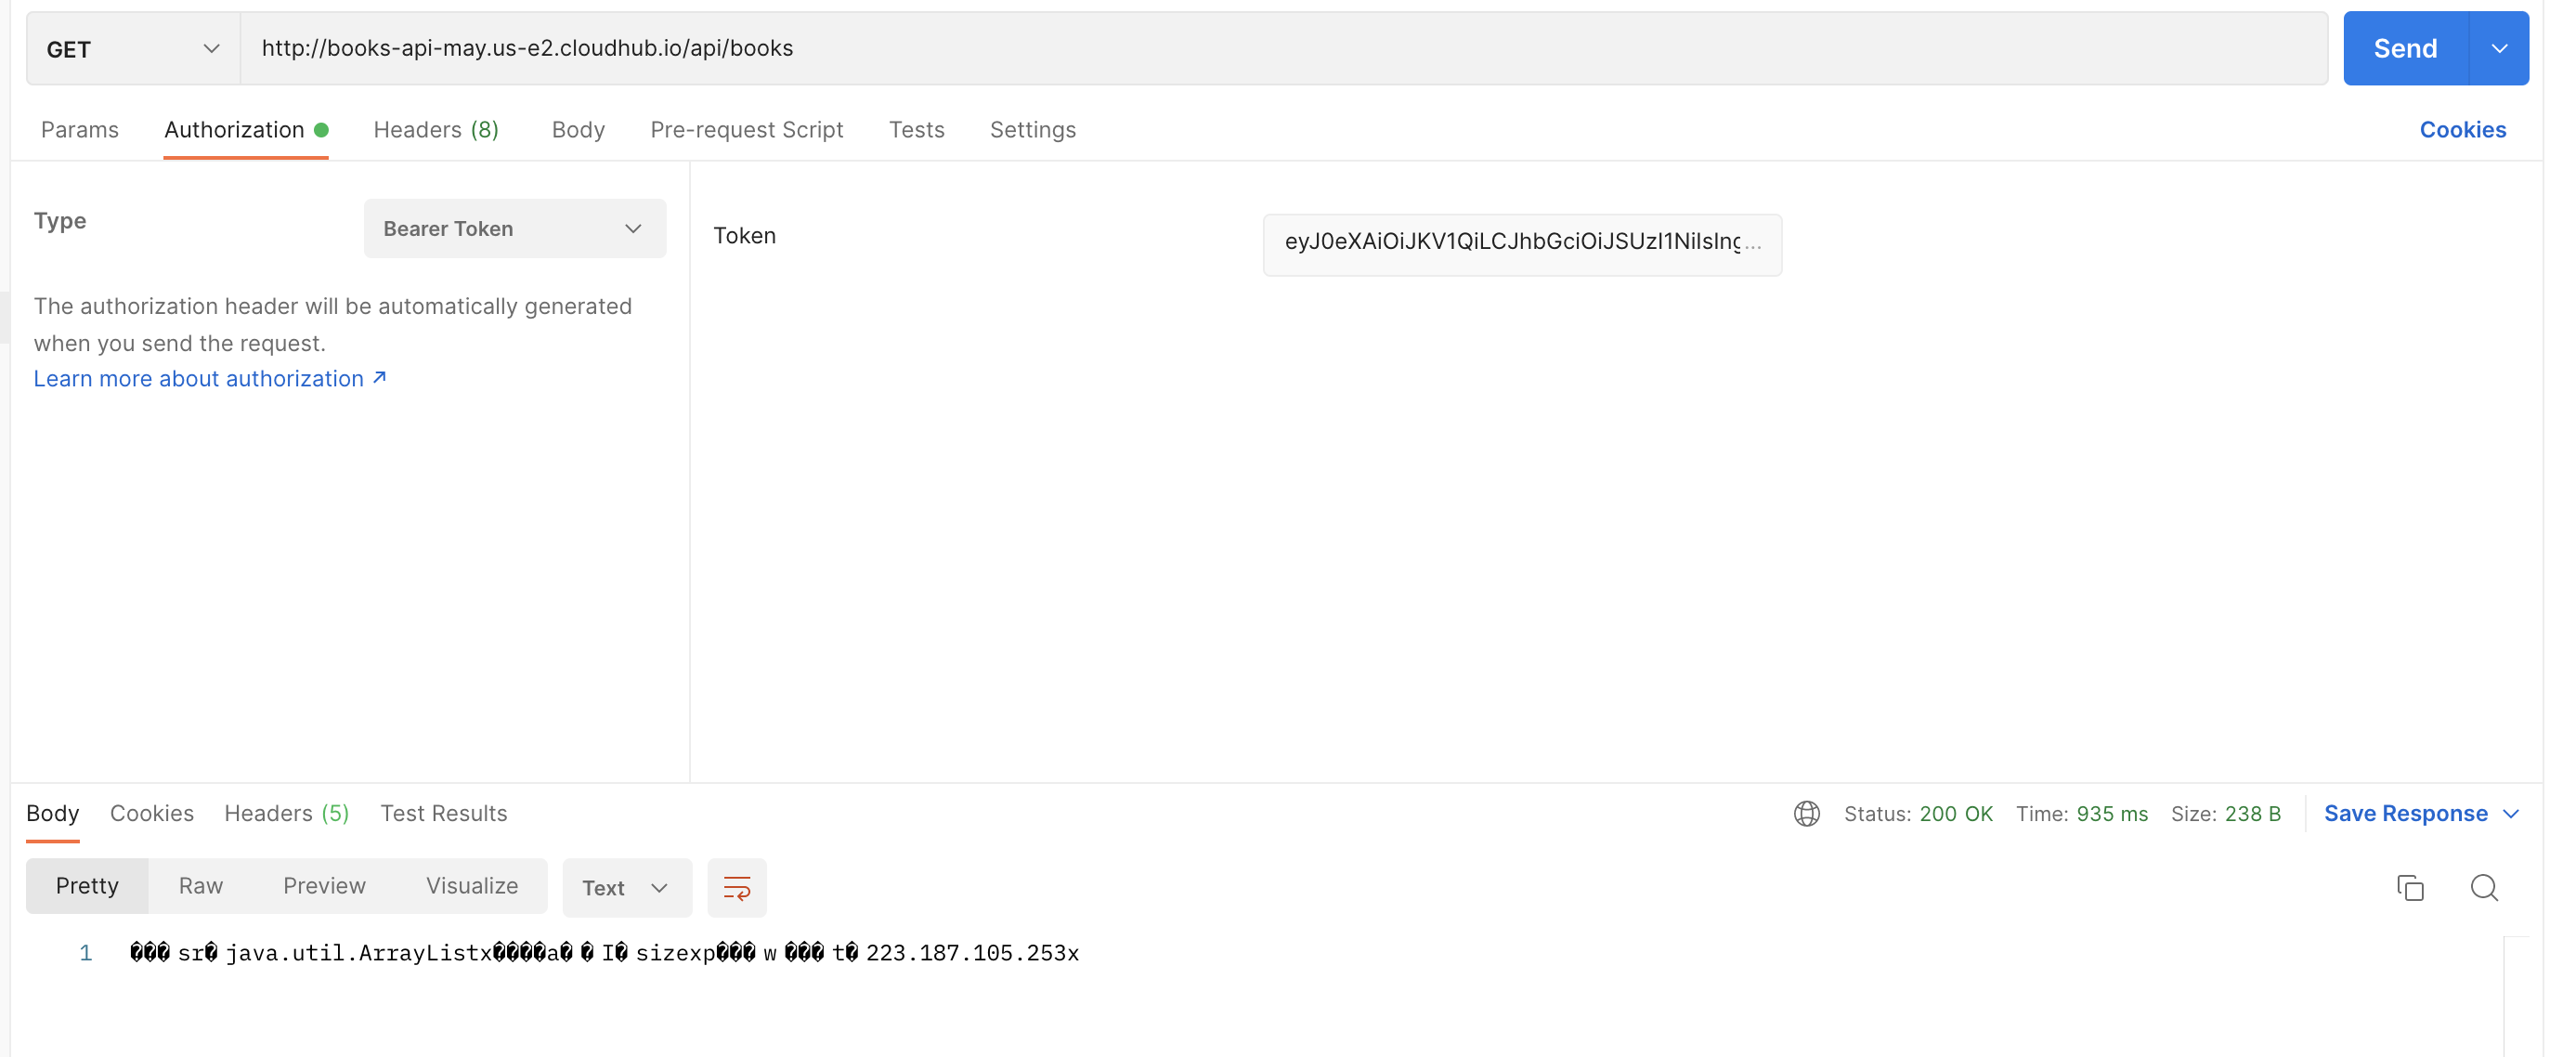
22.) Open a new request tab in Postman and send a GET request to your application (if you send the request without the token, it will give a 401 response). Click the Authorization tab and select Bearer Token and copy the token fetched from the last step in the Token box.
Numero articolo Knowledge
001116448
Questo articolo ha risolto il problema?
Facci sapere, così possiamo migliorare!