Organisation auswählen
How to create a local CA with XCA for a DLB
Veröffentlichungsdatum: Mar 2, 2024
Aufgabe
GOAL
Create a local Certification Authority (CA) using the XCA application. Uploading the resulting certificate to a Dedicated Load Balancer (DLB) for mutual authentication, will allow you to:
- Create new certificates (to allow new clients to connect to the DLB)
- Revoke existing certificates (to deny client connections)
- Renew expired certificates
- Generate a Certificate Revocation List (CRL)
DISCLAIMER
- This article involves products and technologies which do not form part of the MuleSoft product set. Technical assistance for such products is limited to this article.
- Be mindful of your client configuration when enabling client verification, some configurations may produce unwanted successful authentications. MuleSoft is not responsible for such misconfigurations.
Schritte
1. Create a CA
a) Launch the XCA application > go to File > New Database > create an empty database.In this example the database name is example-ca.xdb.
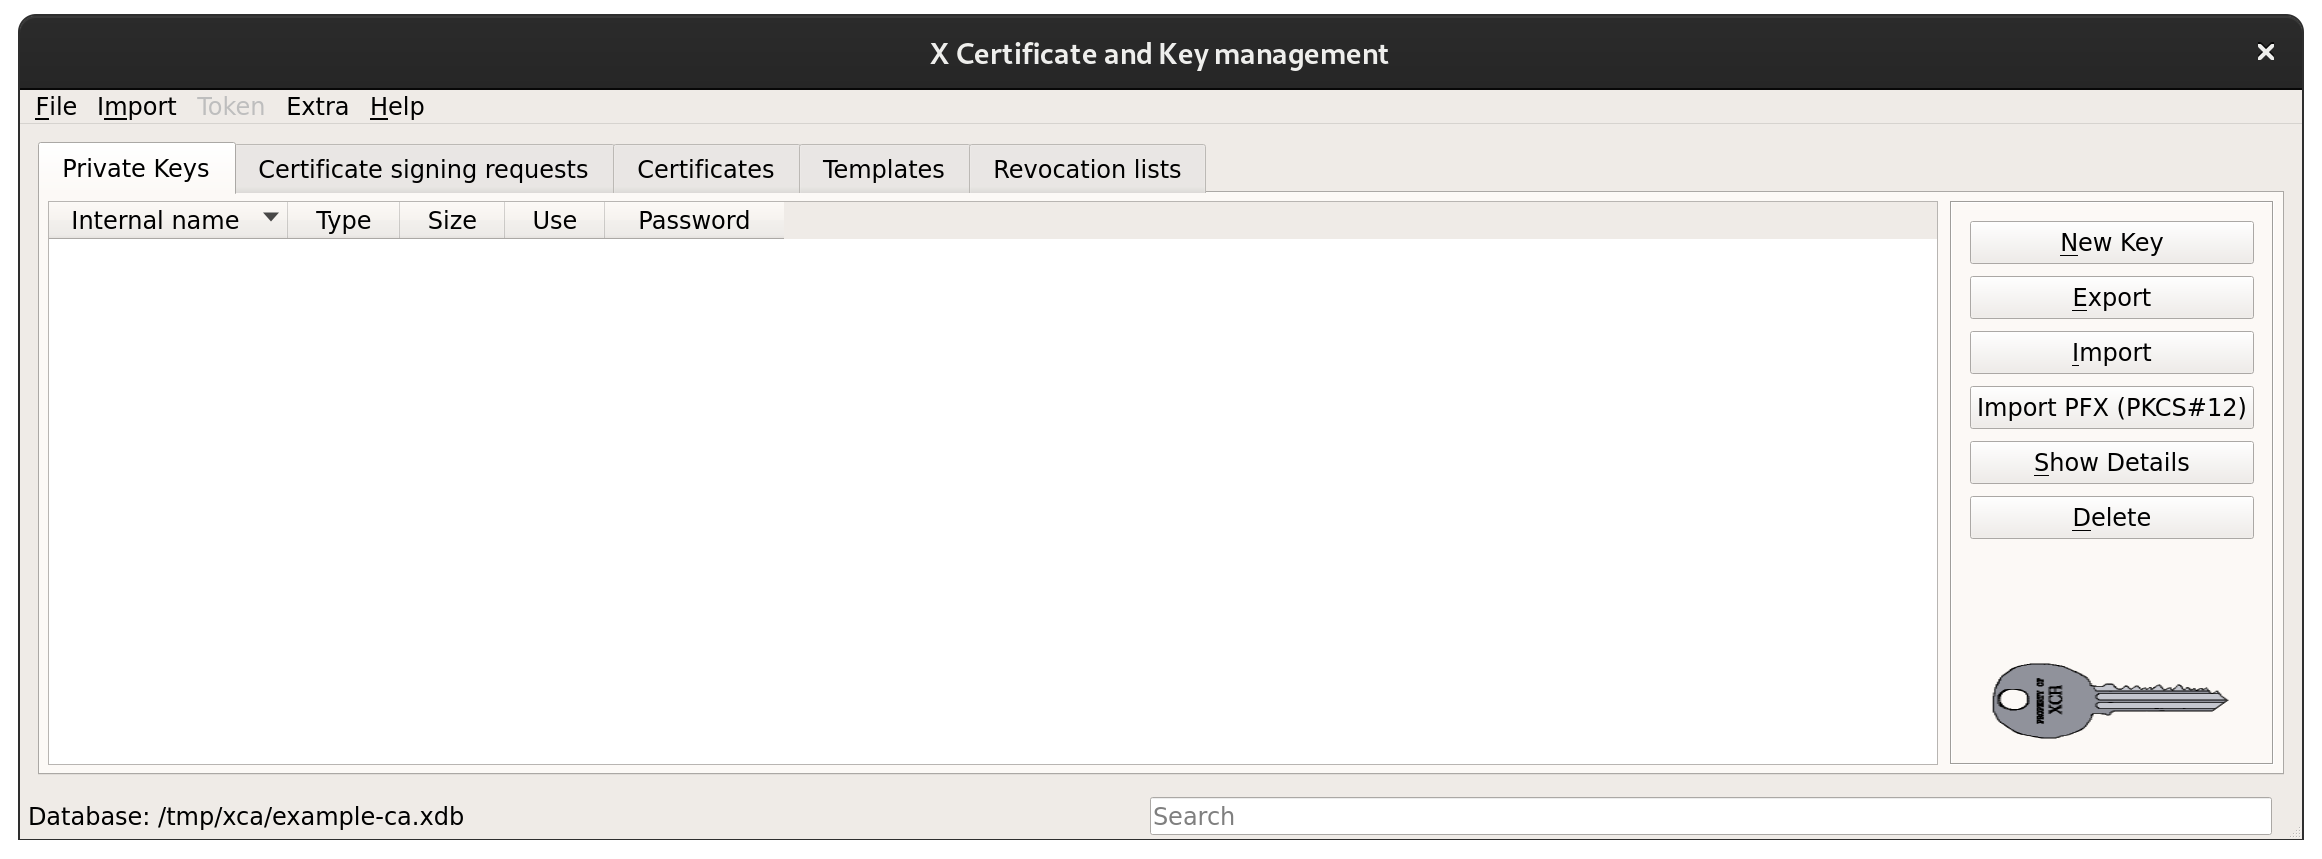
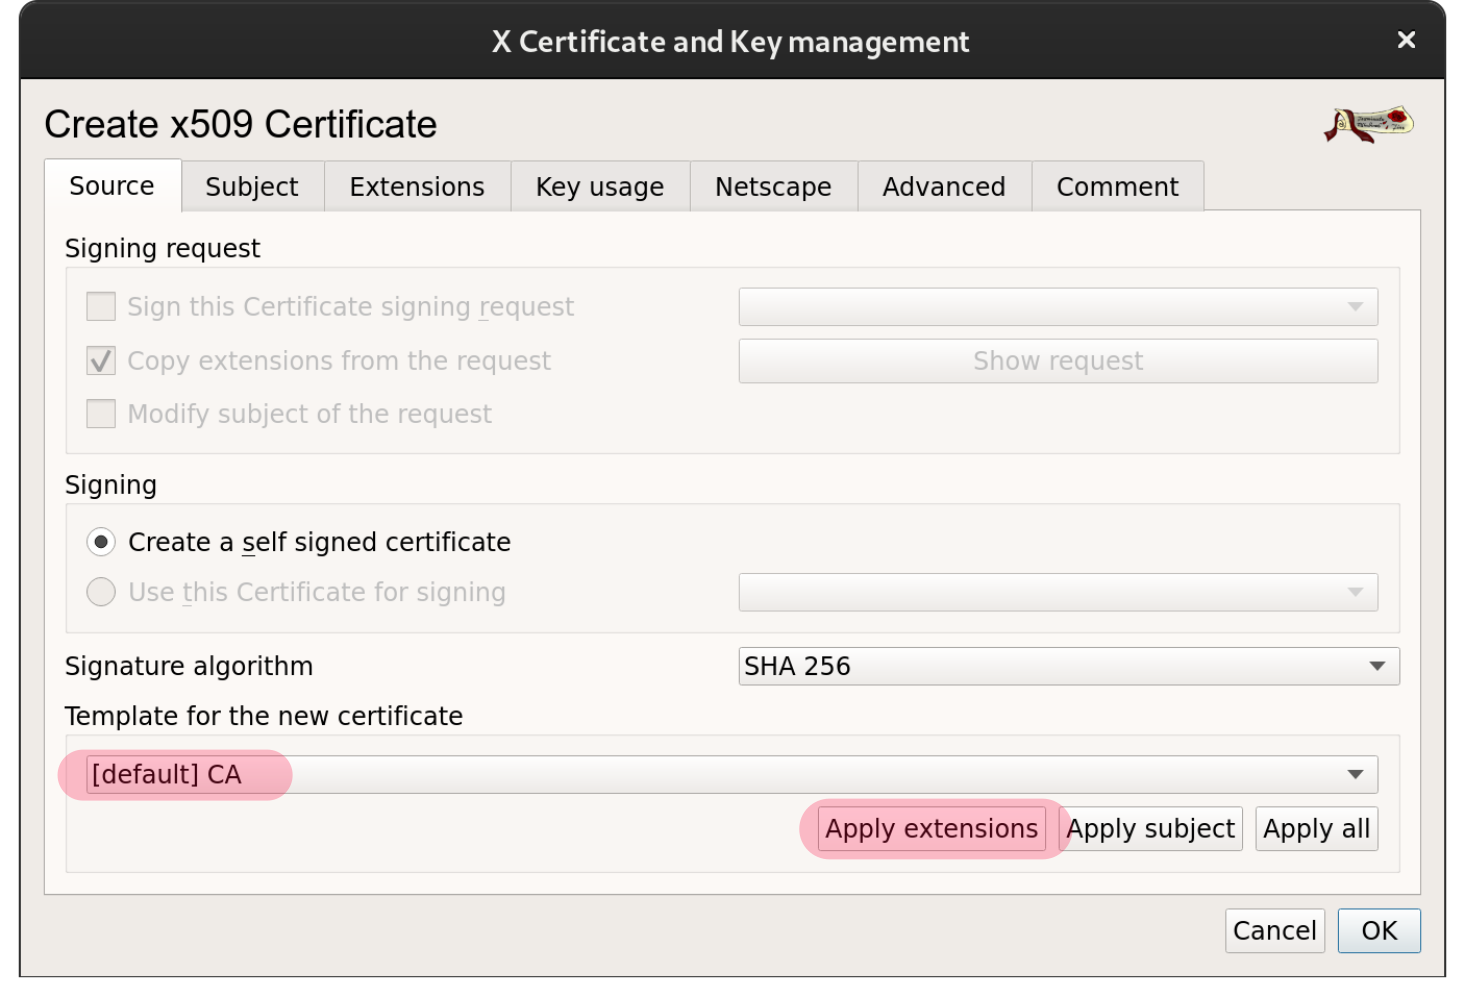
b) Go to the Certificates tab:
- Click New Certificate
- Set Template for the certificate to [default] CA
- Click Apply extensions
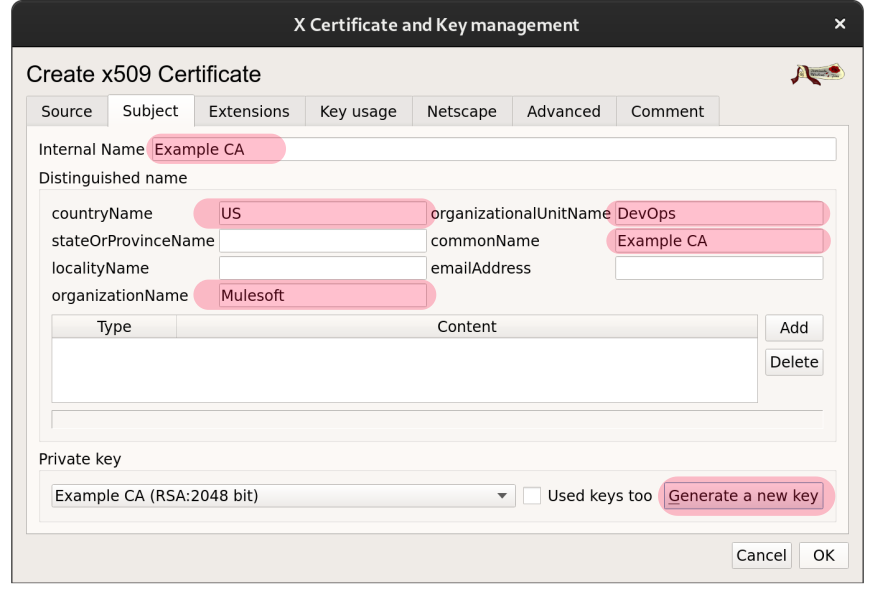
c) Go to the Subject tab:
- Update the fields highlighted below
- Click Generate a new key and enter a name
- Click OK to confirm the settings and create the certificate
- Click Export and save the public certificate file
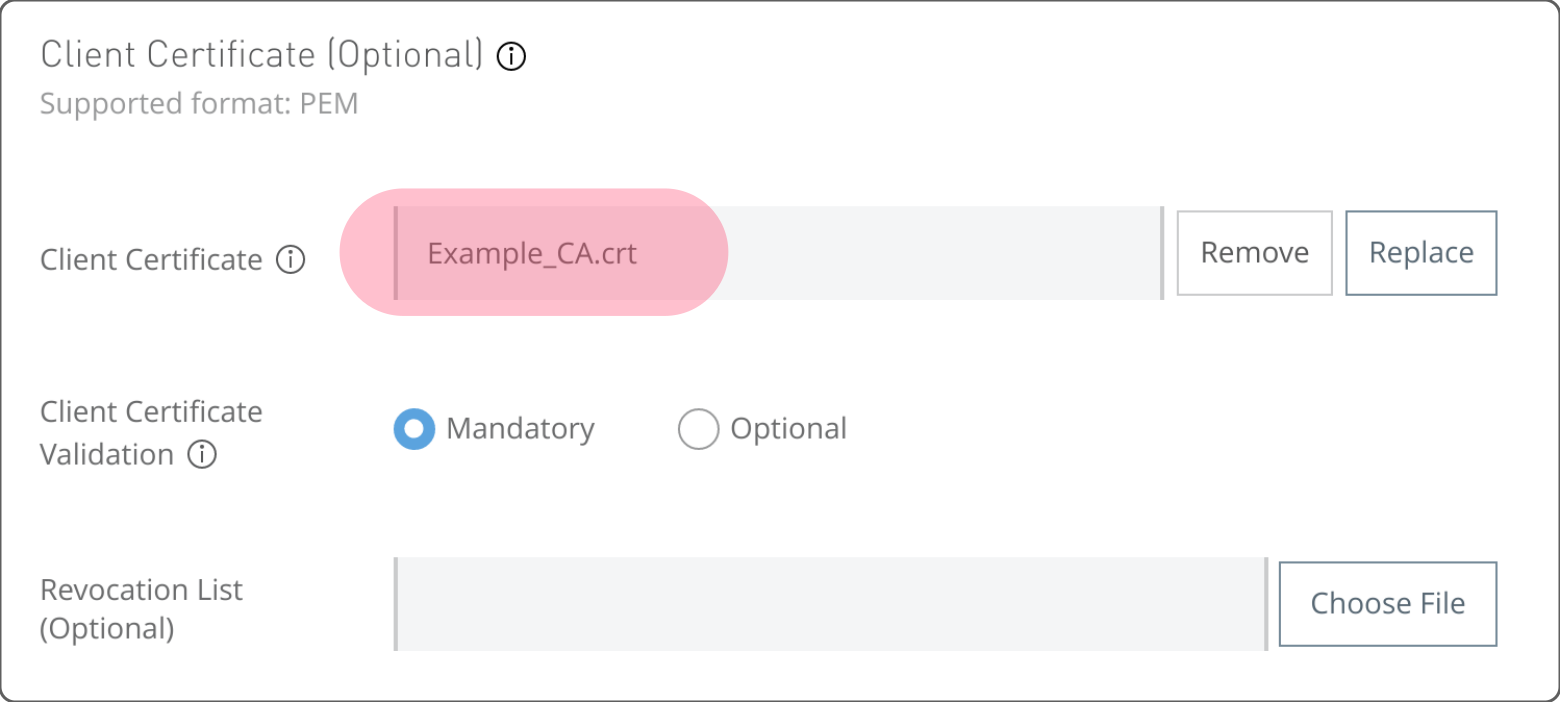
d) Add the certificate file to the DLB under the Client Certificate field.
Note: This is the only Client Certificate file required for mutual authentication.
You may now accept Certificate Signing Requests (CSRs), and provided signed certificates to allow clients to authenticate with your DLB.
2. Create a new CSR (to be done by the client)
a) To create a child certificate in the CA, the client must to provide a CSR.
This example uses openssl to create the CSR.
$ openssl genrsa -out first-client.key 2048
$ openssl req -new -key first-client.key -out first-client.csr
These commands generate two files:
- first-client.key: This is the private key of the client.
- first-client.csr: This is the actual CSR that customer will send to the CA (that is, to us).
Important: Clients must not share the private key with anyone else. This may result in unauthorised access to the DLB.
3. Sign the CSR and Provide a Certificate
a) Launch the XCA application > go to the Certificate signing request tab > click Import > select the first-client.csr file.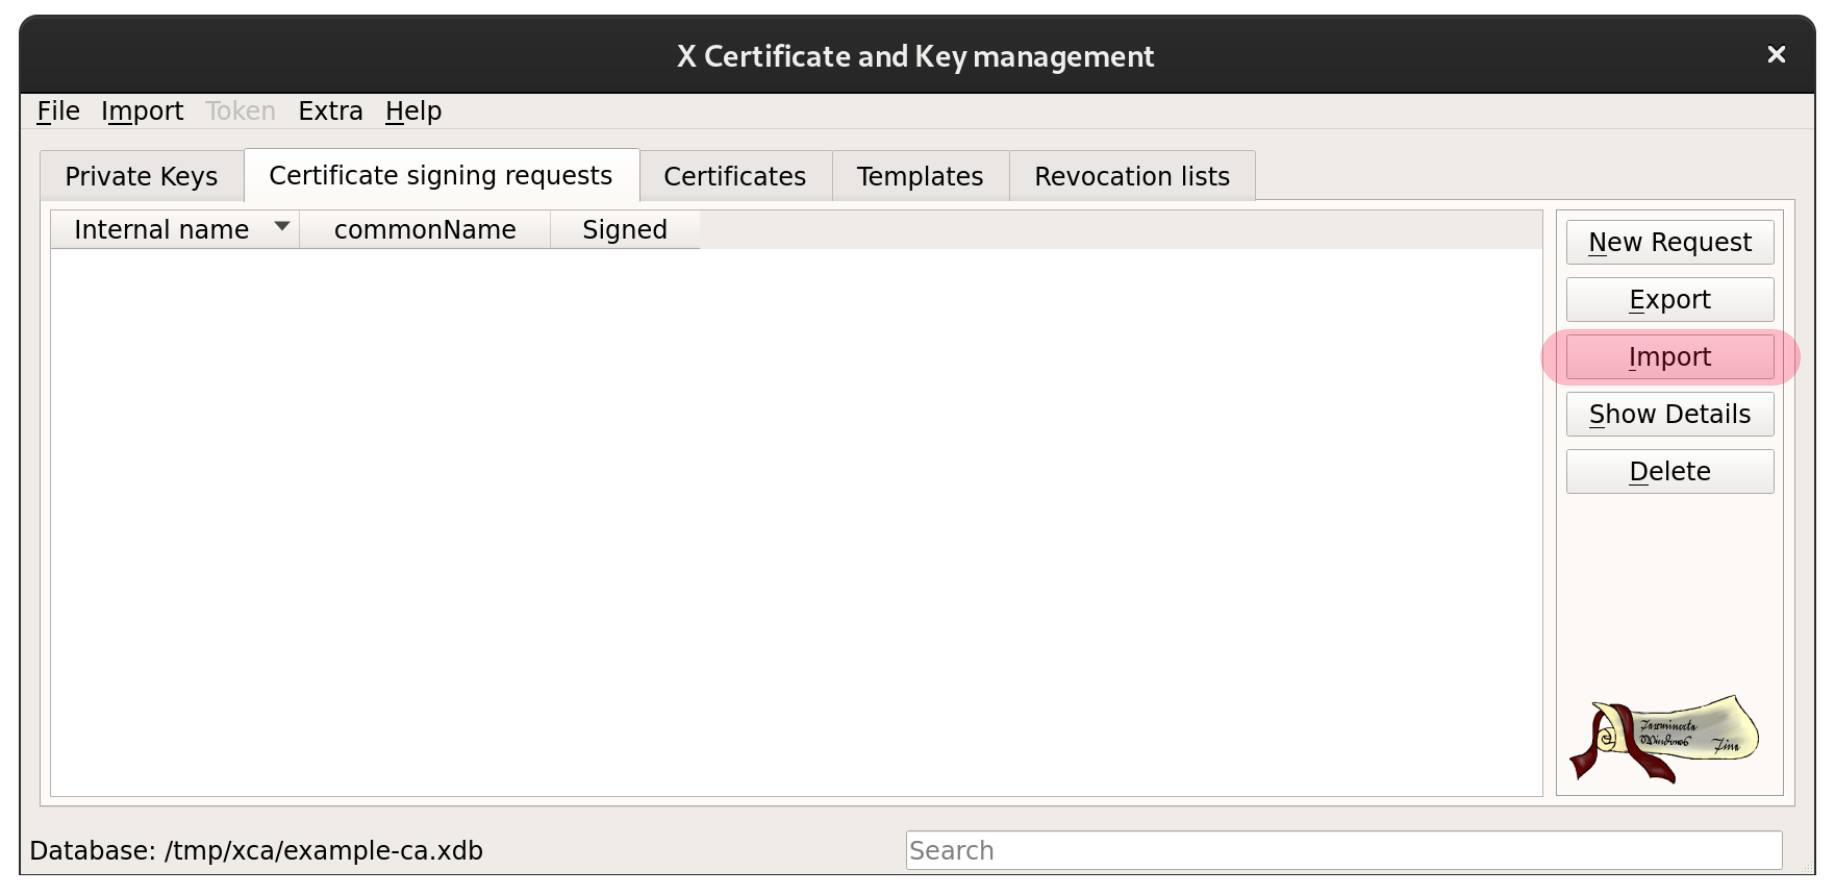
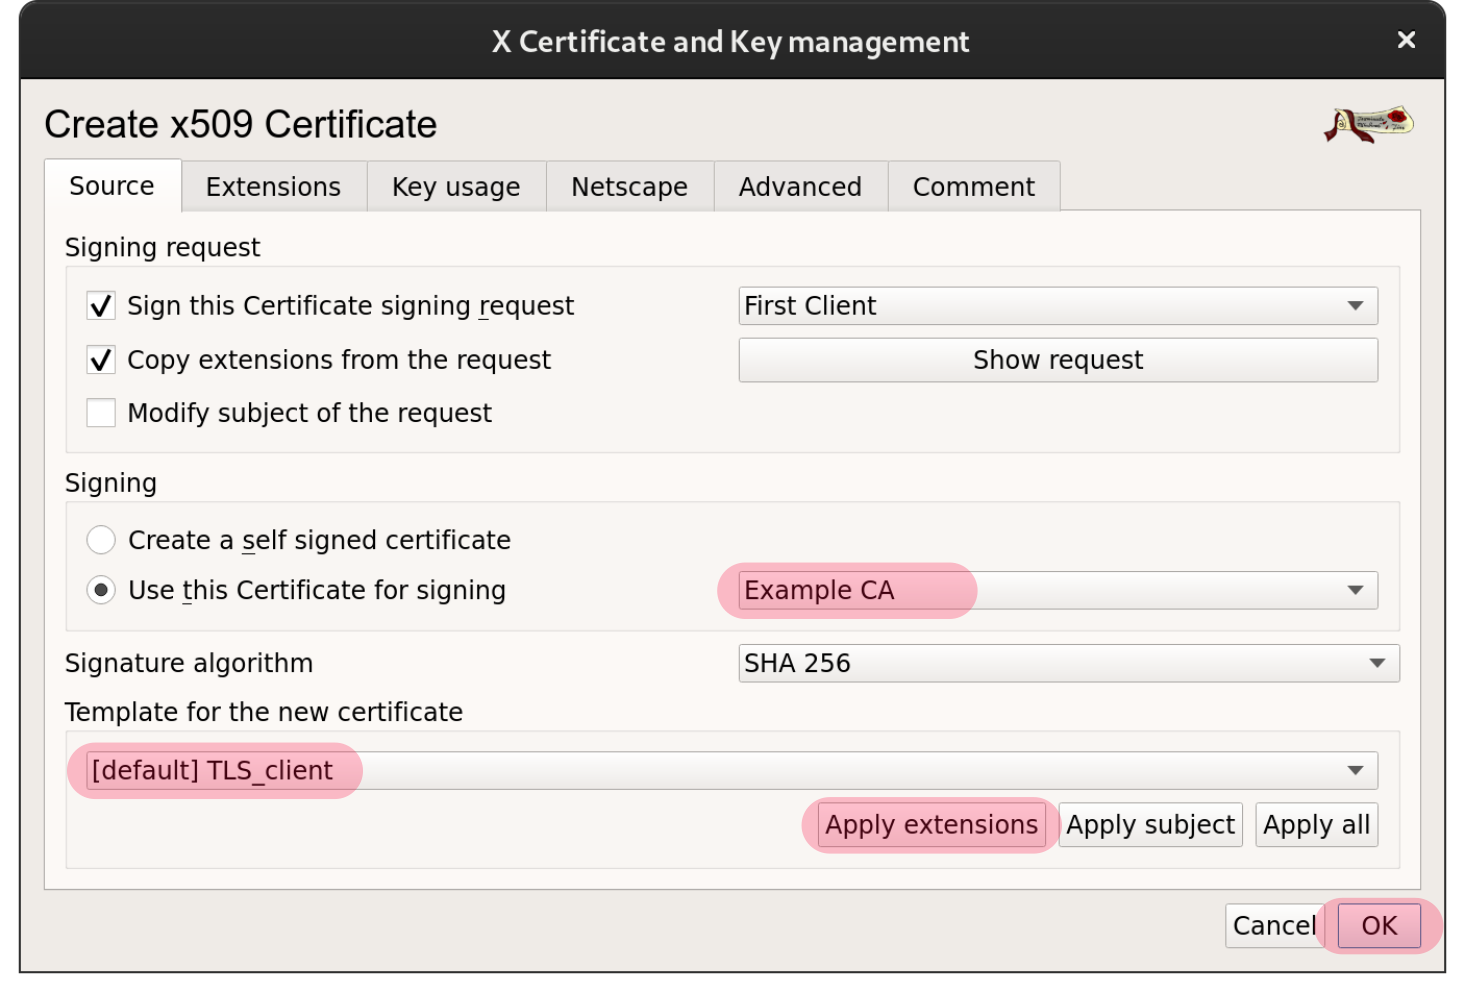
b) Right-click on the CSR and select Sign. Then, under the Source tab, sign the CSR using the settings highlighted below.
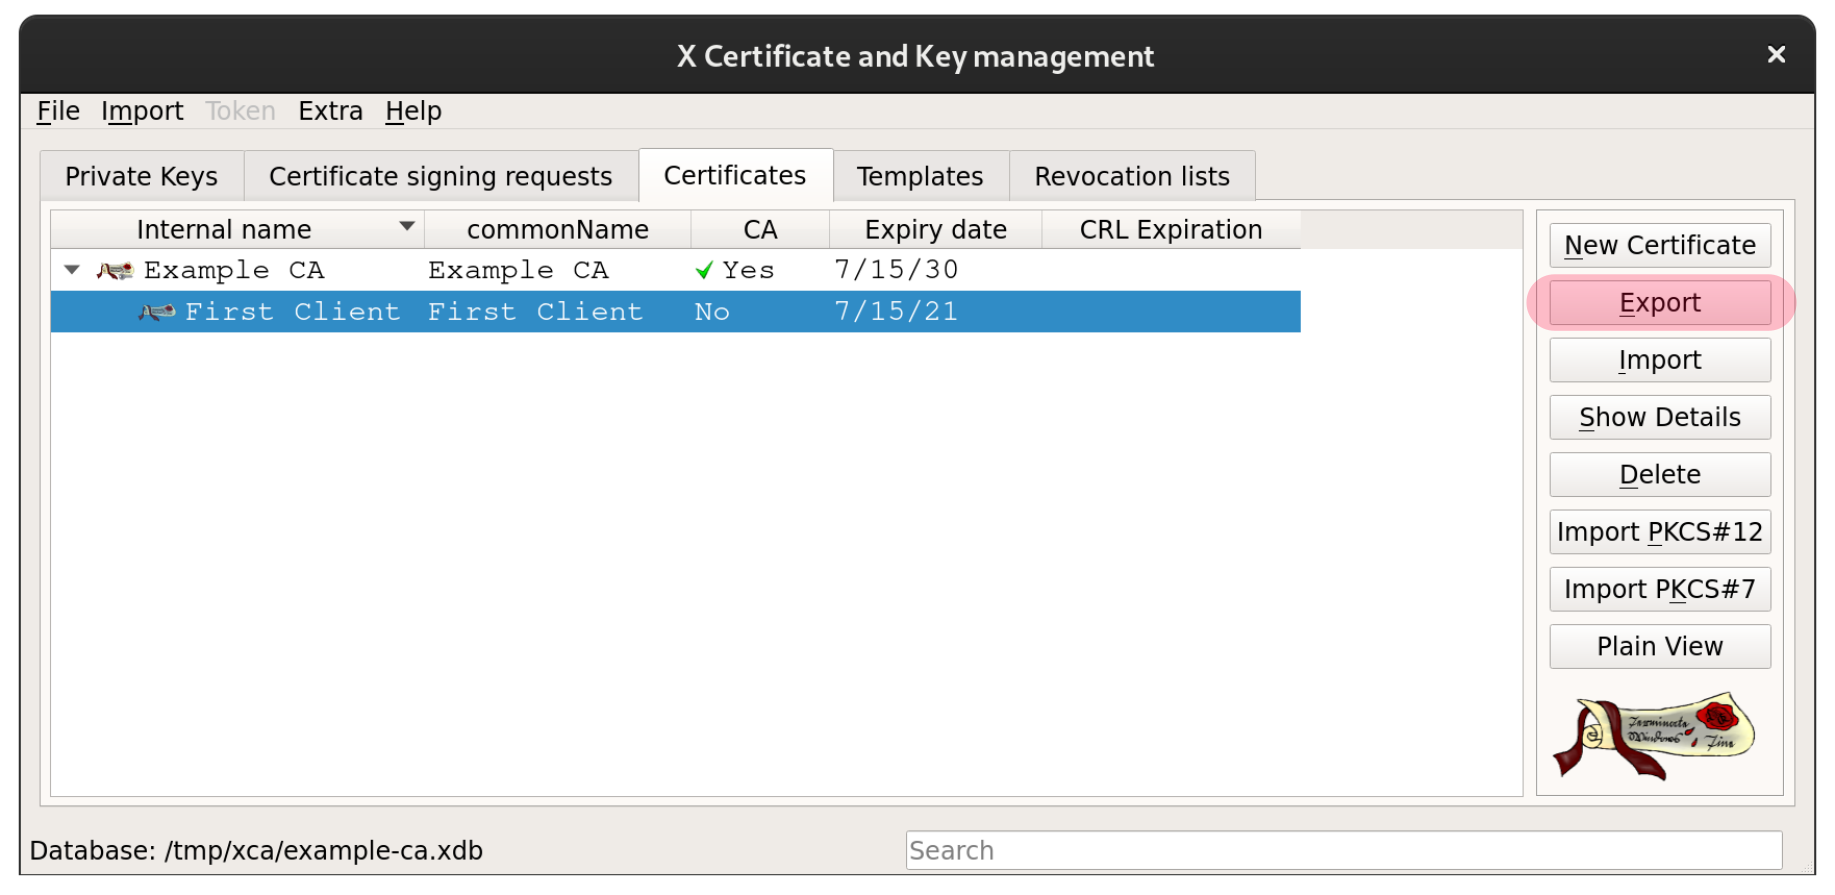
c) The signed certificate is now present under the Certificates tab > select the certificate > click Export and send the resulting file to the client.
4. Revoke an Existing Certificate (optional)
This action will prevent the client from authenticating with the DLB anymore.- Launch the XCA application
- Go to the Certificates tab
- Right-click on the certificate and select Revoke
5. Renew an Expired Certificate (optional)
Expired certificates cannot be used to authenticate with the DLB. When a certificate is going to expire, or it's expired, there are several ways to proceed:- Use this option when the CA administrator has the original CSR, and can identify the matching expired certificate
- Right-click on the expired certificate > Select Renewal
- Send the new certificate file to the client
- Use this option when the CA administrator does not have the original CSR
- Request a new CSR from the client
- Follow the steps in section #3 above to generate a new certificate
- Send the new certificate file to the client
6. Generate a Certificate Revocation List (CRL)
Optionally, maintain a CRL so the DLB knows which certificates are valid, and denies access when a client attempts access with an invalid certificate.Follow these steps every time a certificate is revoked.
a) Launch the XCA application > go to the Certificates tab > right-click on the certificate> select Revoke. Another box will show up asking for some trivial questions
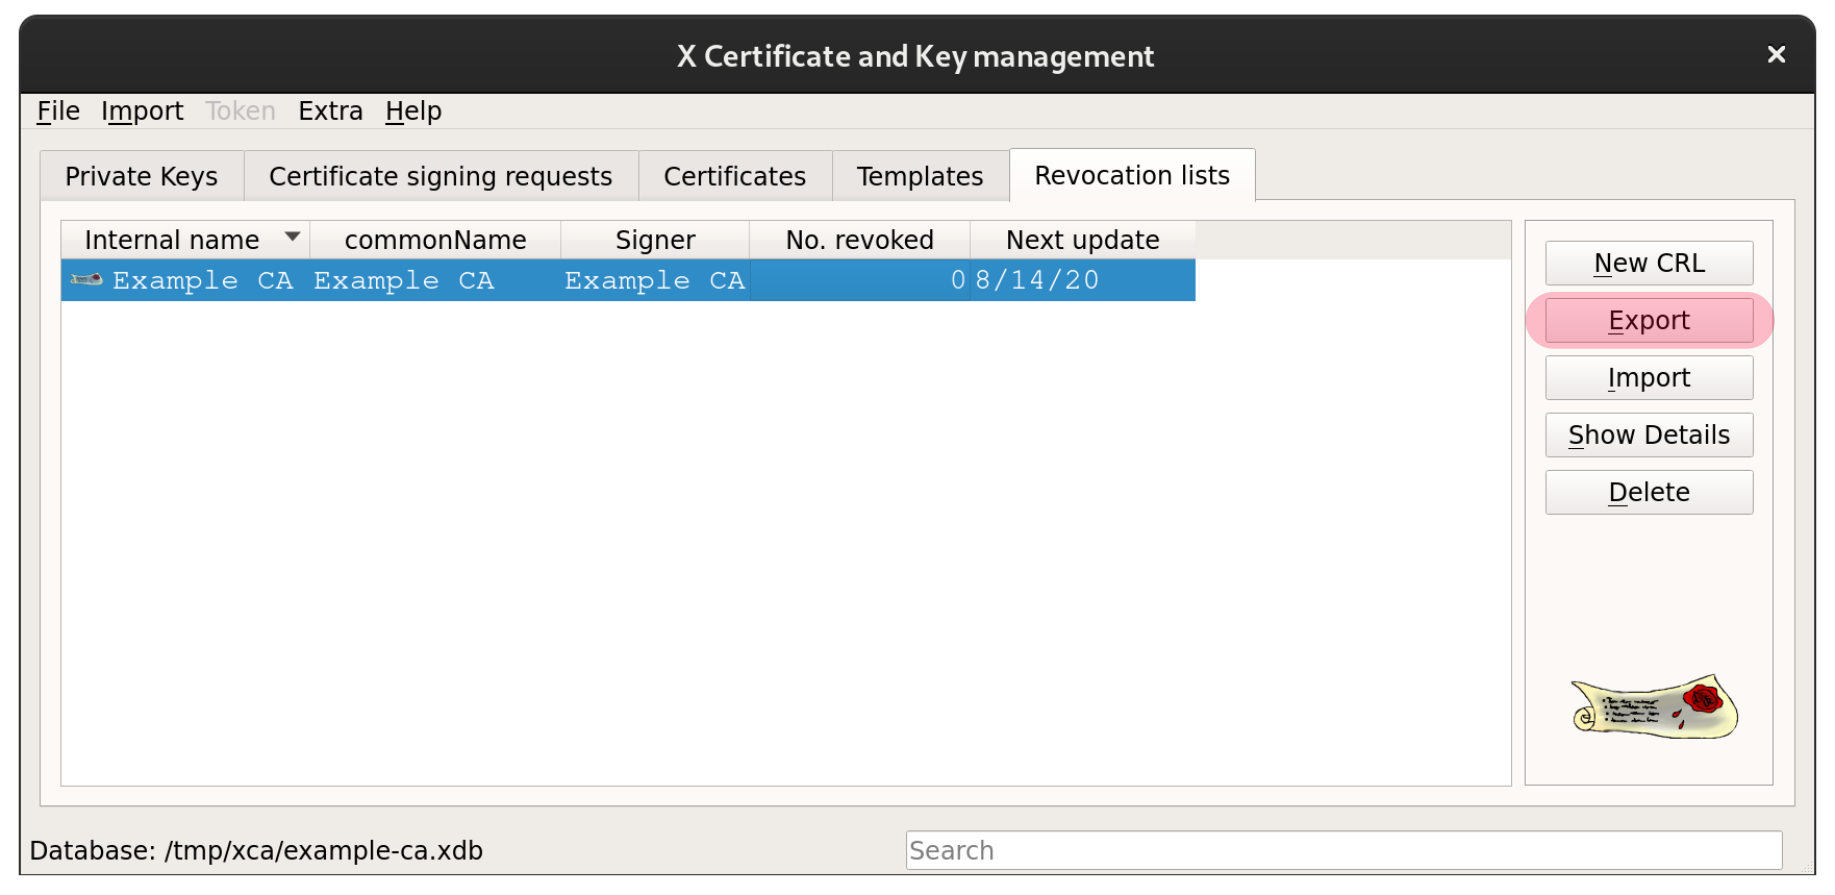
b) Go to the Revocation lists tab > click on New CRL > complete the mandatory fields to create the CRL.
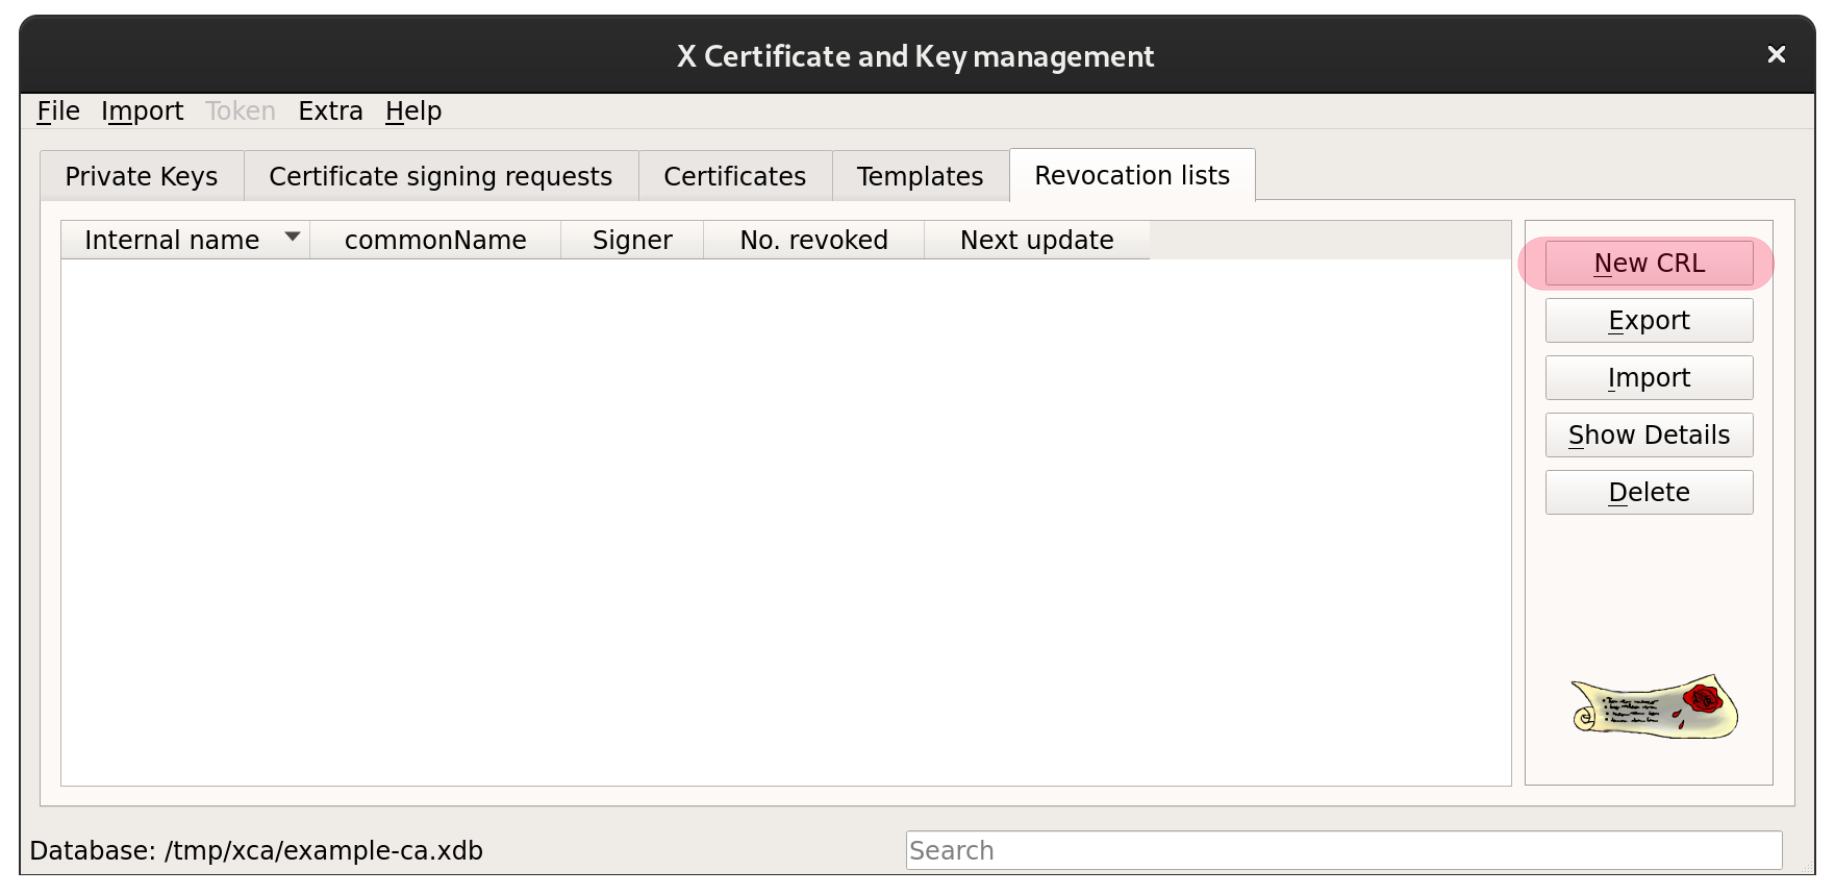
c) Click on Export and save the CRL.
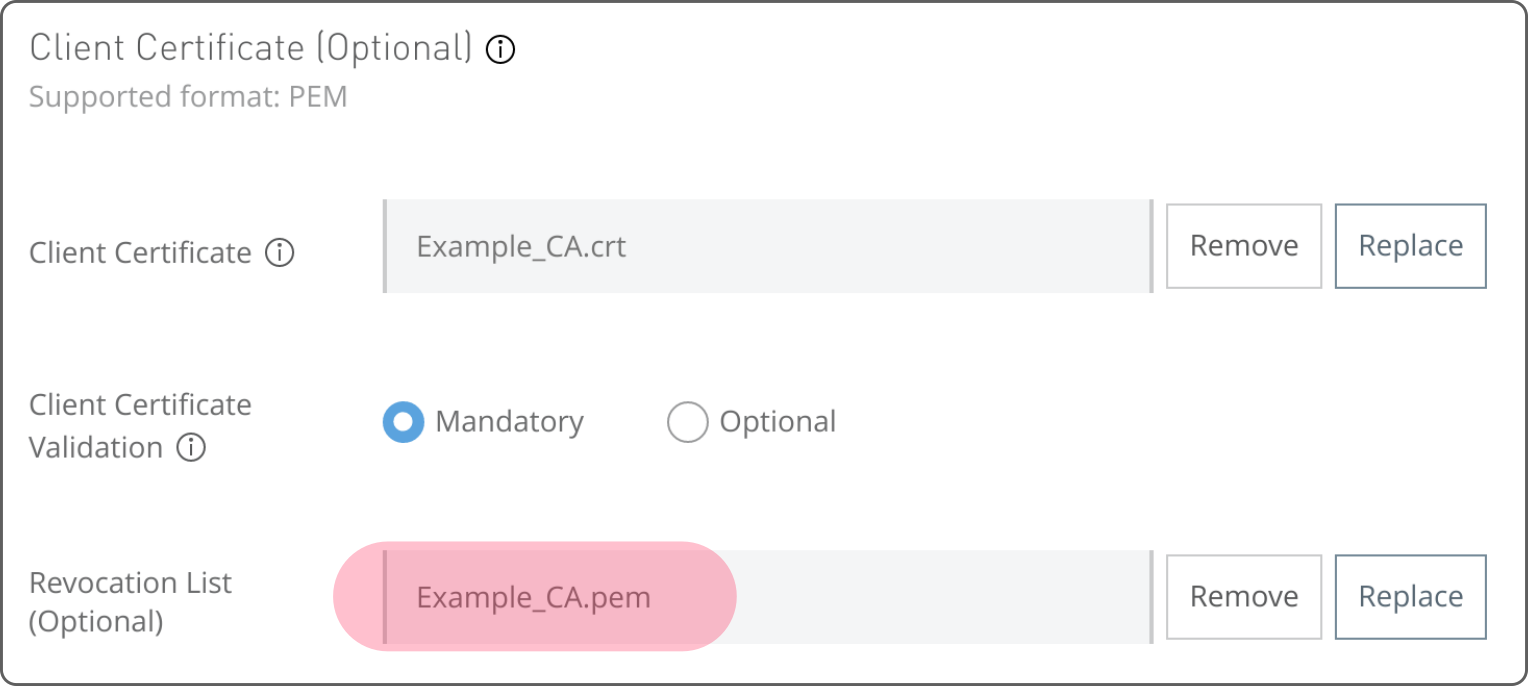
d) Upload the CRL to the DLB
Frequently Asked Questions
-
Is it safe to upload a self-signed certificate to the DLB?
The DLB would be considered insecure when using a self-signed Server Certificate. That's why a Server Certificate should always be signed by a trusted public CA. However, when using a Client Certificate for mutual authentication, signing your local CA by a trusted public CA is not mandatory (although it is possible).
-
Can MuleSoft generate a CSR on my behalf?
This is not permitted for security reasons. The private key is created along with the CSR, and private keys should only be shared with parties who are authorised to access the DLB.
-
Is XCA available for Windows or Mac? Where can I get it?
Yes, XCA is available for Windows, Mac, and Linux, and can be downloaded from https://hohnstaedt.de/xca/
-
Can an expired certificate be used to authenticate with a DLB?
No, after the expiration date, the certificate can no longer be used to access the DLB. The client should request a renewal from the CA administrator. No actions are need on the Anypoint platform.
-
My certificate was working fine, but now I'm getting an HTTP_400 error. What are the possible reasons for this error?
A client may receive an HTTP_400 (Bad request) when the certificate is expired, revoked, or invalid. Certificates are invalid if they are signed by a CA that is not added to the DLB.
Nummer des Knowledge-Artikels
001116602
Konnten Sie Ihr Problem mithilfe dieses Artikels lösen?
Geben Sie uns Feedback, damit wir uns verbessern können.
