Seleziona un'organizzazione
How to Quickly Install a Mule Runtime on Your Server and Deploy an Application in Mule 4
Data pubblicazione: Jul 21, 2025
Operazione
GOAL
In this article, we will show you the bare minimum steps required to
(i) Install a Mule Runtime on your local server
(ii) Pair the Mule Runtime with Anypoint Runtime Manager
(iii) Deploy a simple application
Fasi
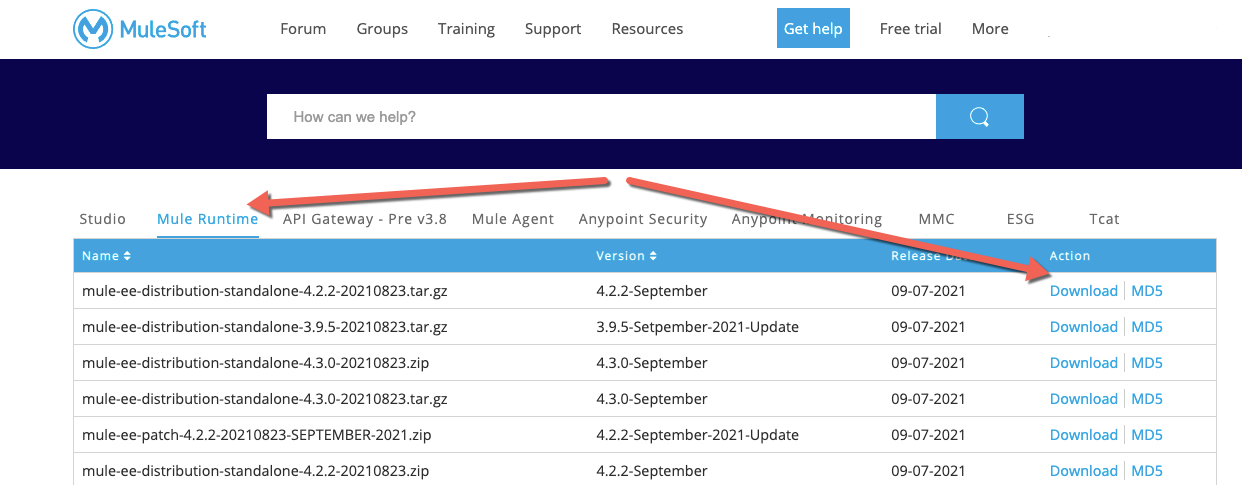
- Download the latest Mule Runtime bundle from Support Portal.
- Unzip the Mule Runtime on the server where you intend to deploy the applications. We will refer to this folder as $MULE_HOME in the article.
- Go to $MULE_HOME/bin and apply the license provided to your Organization as mentioned in this article.
- Start the Mule Runtime and ensure that it is successful
./mule start
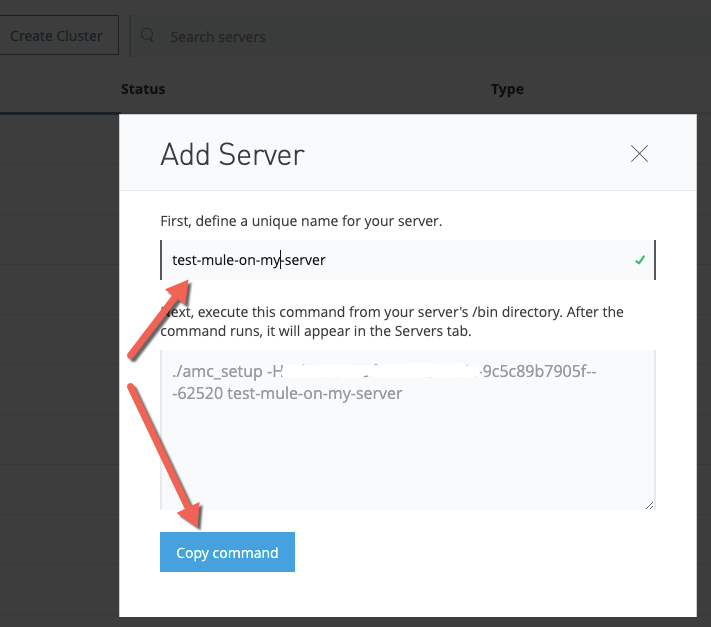
- Go to Anypoint Platform --> Runtime Manager --> Servers and click on Add Server. Provide a name for the server in the text box and copy the command.

- Stop the Mule Runtime.
./mule stop
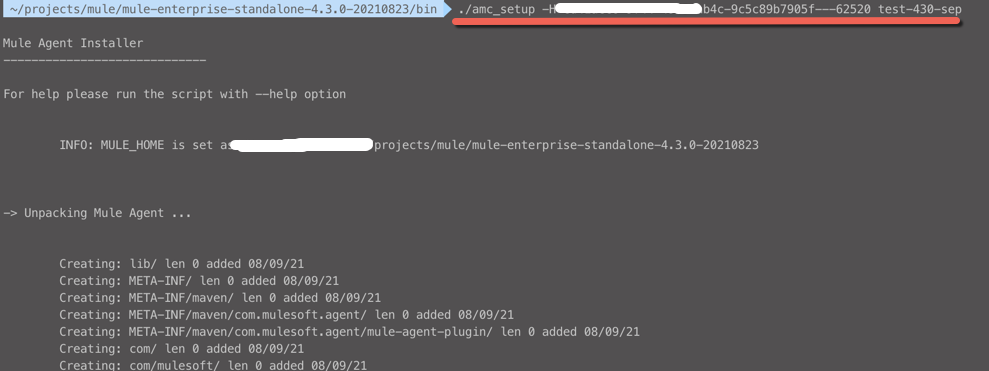
- Go to $MULE_HOME/bin and use the command copied in previous step. This will register your Runtime with the Anypoint Platform Runtime Manager.
./amc_setup -H <your_token> <server_name>

Eg:
./amc_setup -H aaaaaaaa-ab4c-9c5c89b7905f--- 11111 test-mule-on-my-server
- Start the Mule Runtime. Now the Runtime Manager will show the server as connected in Anypoint Platform.
./mule start

- Go to Runtime Manger --> Applications --> Deploy Application
- Upload your application, make necessary changes to the logs and properties. Click "Deploy application" and your application should be ready.
Disclaimer: The above steps are the minimum steps required to install a Runtime and deploy an application. This may be much more complicated considering the permissions for your user on the server or the network considerations. If you hit a roadblock, please troubleshoot with your team and contact MuleSoft Support for any product issues.
Numero articolo Knowledge
001116794
Questo articolo ha risolto il problema?
Facci sapere, così possiamo migliorare!