Valitse organisaatio
How to deploy applications to a hybrid server using the Mule Maven Plugin
Julkaisupäivä: Mar 2, 2024
Ratkaisu
GOAL
To Deploy a Mule Application Using the Runtime Manager REST API using the Mule Maven plugin with a hybrid deployment model (an on-premises Mule server managed by Runtime Manager).
PROCEDURE
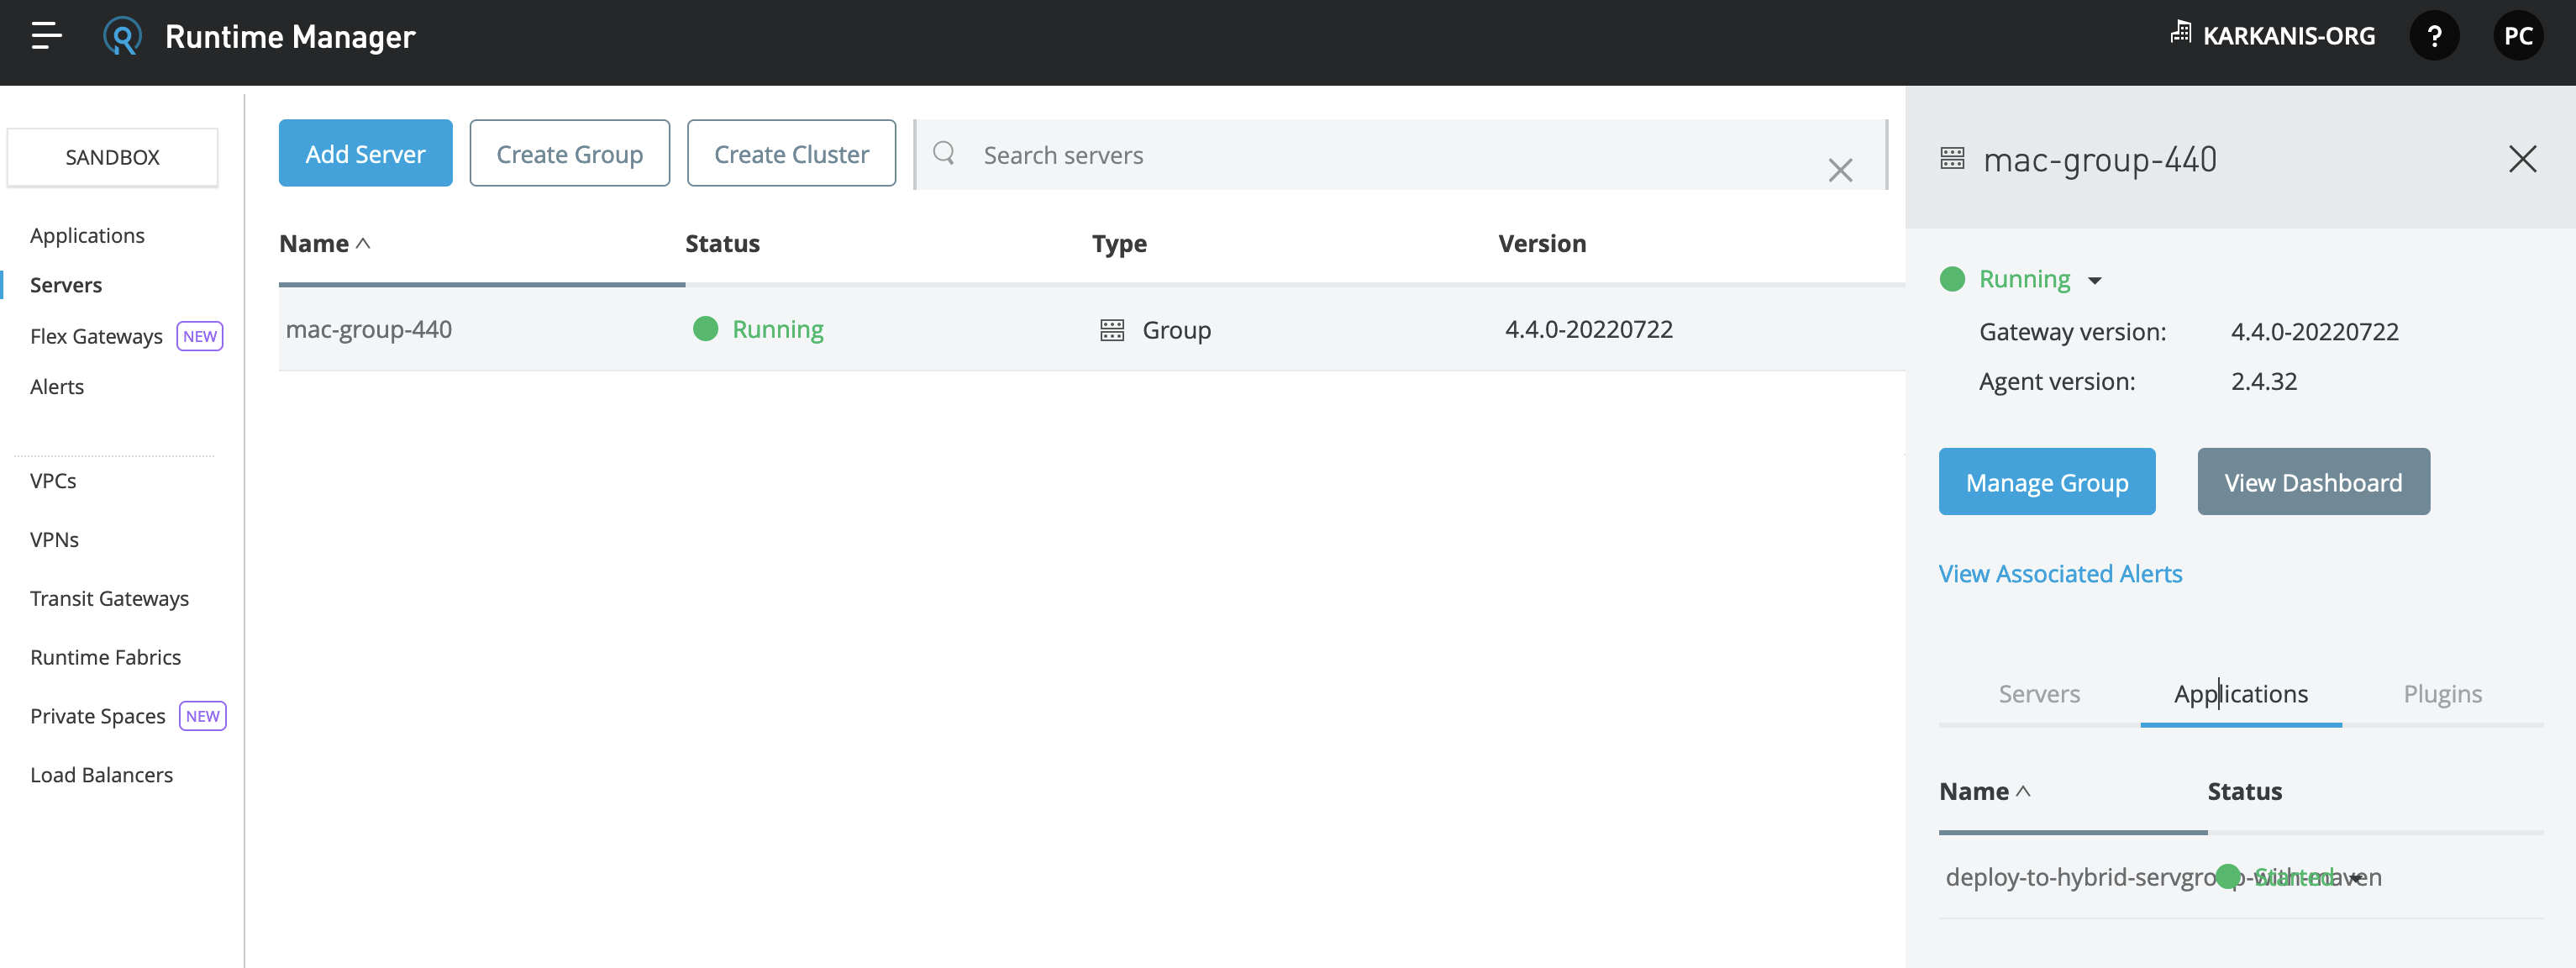
1. Create a server, server group, or cluster and add it to Runtime Manager as stated in the Prerequisites documentation.2. Create a Mule application (you can follow this Hello Mule tutorial).
3. Edit the pom.xml file of the Mule application and:
I) Add the Mule Maven plugin as per Add the Mule Maven Plugin to a Mule Project (both the plugin and the pluginRepository tags).
II) Add the configuration for ARM (Anypoint Runtime Manager) deployment inside the Mule Maven plugin as documented in Deploying Using the Runtime Manager REST API.
Below is an example of a working pom.xml which a deployment configuration to deploy in a server group with a Connected App as authentication method:
<?xml version="1.0" encoding="UTF-8"?>
<project xmlns="http://maven.apache.org/POM/4.0.0" xmlns:xsi="http://www.w3.org/2001/XMLSchema-instance" xsi:schemaLocation="http://maven.apache.org/POM/4.0.0 https://maven.apache.org/xsd/maven-4.0.0.xsd">
	<modelVersion>4.0.0</modelVersion>

	<groupId>com.mycompany</groupId>
	<artifactId>deploy-to-hybrid-servgroup-with-maven</artifactId>
	<version>1.0.0-SNAPSHOT</version>
	<packaging>mule-application</packaging>

	<name>deploy-to-hybrid-server-group-with-maven</name>

	<properties>
		<project.build.sourceEncoding>UTF-8</project.build.sourceEncoding>
		<project.reporting.outputEncoding>UTF-8</project.reporting.outputEncoding>

		<app.runtime>4.4.0</app.runtime>
		<mule.maven.plugin.version>3.8.0</mule.maven.plugin.version>
	</properties>

	<build>
		<plugins>
			<plugin>
				<groupId>org.apache.maven.plugins</groupId>
				<artifactId>maven-clean-plugin</artifactId>
				<version>3.0.0</version>
			</plugin>

			<!-- Mule Maven plugin -->
			<plugin>
				<groupId>org.mule.tools.maven</groupId>
				<artifactId>mule-maven-plugin</artifactId>
				<version>${mule.maven.plugin.version}</version>
				<extensions>true</extensions>

				<!-- Hybrid server deployment configuration -->
				<configuration>
					<armDeployment>
						<muleVersion>${app.runtime}</muleVersion>
						<uri>https://anypoint.mulesoft.com</uri>
						<target>mac-group-440</target>
						<targetType>serverGroup</targetType>
						<connectedAppClientId>999995bfd35c4cb5a769219a4502a999</connectedAppClientId>
						<connectedAppClientSecret>99999D115D9E4b78A6a1C386F538099</connectedAppClientSecret>
						<connectedAppGrantType>client_credentials</connectedAppGrantType>
						<environment>Sandbox</environment>
					</armDeployment>
				</configuration>

			</plugin>

		</plugins>
	</build>

	<dependencies>
		<dependency>
			<groupId>org.mule.connectors</groupId>
			<artifactId>mule-http-connector</artifactId>
			<version>1.7.1</version>
			<classifier>mule-plugin</classifier>
		</dependency>
		<dependency>
			<groupId>org.mule.connectors</groupId>
			<artifactId>mule-sockets-connector</artifactId>
			<version>1.2.2</version>
			<classifier>mule-plugin</classifier>
		</dependency>
	</dependencies>

	<repositories>
		<repository>
			<id>anypoint-exchange-v3</id>
			<name>Anypoint Exchange</name>
			<url>https://maven.anypoint.mulesoft.com/api/v3/maven</url>
			<layout>default</layout>
		</repository>
		<repository>
			<id>mulesoft-releases</id>
			<name>MuleSoft Releases Repository</name>
			<url>https://repository.mulesoft.org/releases/</url>
			<layout>default</layout>
		</repository>
	</repositories>

	<pluginRepositories>
		<pluginRepository>
			<id>mulesoft-releases</id>
			<name>MuleSoft Releases Repository</name>
			<layout>default</layout>
			<url>https://repository.mulesoft.org/releases/</url>
			<snapshots>
				<enabled>false</enabled>
			</snapshots>
		</pluginRepository>

		<!-- Required by the Mule Maven plugin -->
		<pluginRepositories>
		  <pluginRepository>
		    <id>mule-public</id>
		    <url>https://repository.mulesoft.org/nexus/content/repositories/releases</url>
		  </pluginRepository>
		</pluginRepositories>
	</pluginRepositories>

</project>
4. Please note that in the ARM configuration, you need to place the credentials of a user or a Connected App. Either case, they need to have some permissions in place to be able to deploy to the hybrid server. You can check which set of permissions are needed in the following article Minimum permission for hybrid deployment using Runtime Manager UI or Mule Maven Plugin. Please add those permissions through Access Management.
5. Locate with a console or terminal in the application folder:
➜  cd application-name/META-INF/mule-src/application-name/
➜  ls
exchange-docs   mule-artifact.json  pom.xml   src   target
6. Run the following command to deploy to your server:
mvn clean package deploy -DmuleDeploy
If successful, the command will end with a "BUILD SUCCESS" display, and the application will show in Runtime Manager UI.

NOTES
The sample application from step #3 can work without modifying Maven settings.xml file, used to include Nexus credentials and profiles for Enterprise repositories. In case your application needs to access Mule Enterprise modules, connectors, and other components not included in the trial or community versions, please configure the settings.xml file as explained in the documentation Configuring Maven to Work with Mule.Moreover, you can also refer to the article How to use Enterprise Maven Repository credentials with settings.xml and pom.xml example.
Knowledge-artikkelin numero
001121884
Ratkaisiko tämä artikkeli ongelmasi?
Anna palautetta, jotta voimme kehittyä!