組織を選択
エラー:Anypoint Studio の「Valid cert chain, but no trust certificate found!」(証明書チェーンは有効ですが、信頼できる証明書が見つかりません) と「Unable to find valid certification path to requested target」(要求されたターゲットへの有効な認証パスが見つかりません)
公開日: Mar 27, 2026
解決策
問題
以下は、Anypoint Exchange、Design Center、Studio、コネクタ、Munit、ランタイム更新を接続するとき、または Cloudhub にアプリケーションをデプロイするときに Anypoint Studio に記録される 2 つの異なるタイプの SSLHandshakeException エラーです。
javax.net.ssl.SSLHandshakeException: org.eclipse.ecf.internal.ssl.ECFCertificateException:Valid cert chain, but no trust certificate found! (証明書チェーンは有効ですが、信頼できる証明書が見つかりません)
javax.net.ssl.SSLHandshakeException: sun.security.validator.ValidatorException:PKIX path building failed: sun.security.provider.certpath.SunCertPathBuilderException: unable to find valid certification path to requested target (PKIX パスの構築に失敗しました: sun.security.provider.certpath.SunCertPathBuilderException: 要求されたターゲットへの有効な証明書パスが見つかりません)
一般的なアクセス不可、ダウンロード不可、アクセス拒否のエラーが UI に表示される可能性があります。証明書エラーは Anypoint Studio でキャプチャされます。Anypoint Studio の表示方法についての詳細は、「How to Retrieve Studio Error Logs」(Studio のエラーログを取得する方法) を参照してください。
原因
- 「Valid certificate chain, but no trust certificate found」(証明書チェーンは有効ですが、信頼できる証明書が見つかりません) エラーは、Java トラストストアに Anypoint Platform や Studio の更新ホストが存在しない場合に発生します。
- 「Unable to find valid certification path to requested target」(要求されたターゲットへの有効な証明書パスが見つかりません) エラーは、Java トラストストアに完全な証明書チェーンがない場合に発生します。
- Eclipse のアップデートにより、Anypoint Studio は JDK 11 を使用して Studio を起動します。また、組み込みランタイムを実行できるように、JDK 8 と Studio もバンドルしています。つまり、Studio は 11 と 8 を異なる用途に使用します。
ソリューション
注意: VPN の使用中のみエラーが発生する場合、これらすべての手順を完了する前に VPN に接続されていることを確認します。
手順:
パート 1:証明書をダウンロードする
-
コンピューターに証明書をダウンロード/保存するフォルダーを作成します
-
ブラウザーを開いて https://anypoint.mulesoft.com/login (または studio.mulesoft.org や download.eclipse.org など、アクセス時にエラーが表示されるその他の URL) に移動します
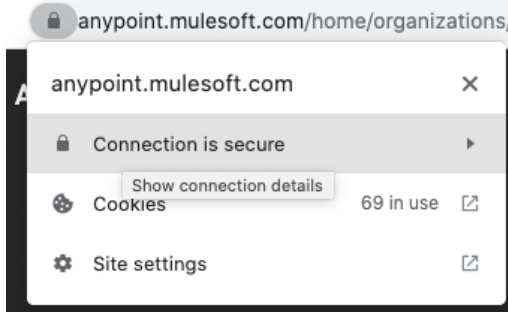
- ブラウザーのアドレスバーでロックアイコンをクリックして [Connection is secure] (接続が保護されている)をクリックします
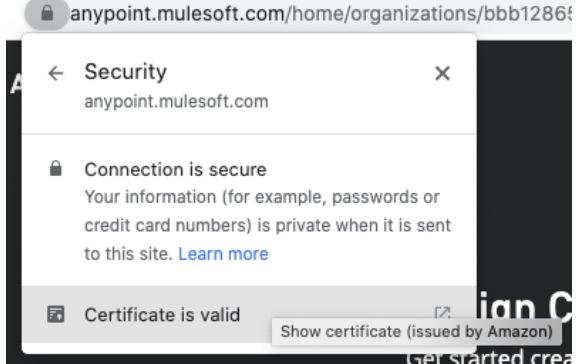
- [certificate is valid] (証明書が有効) をクリックして証明書を表示します
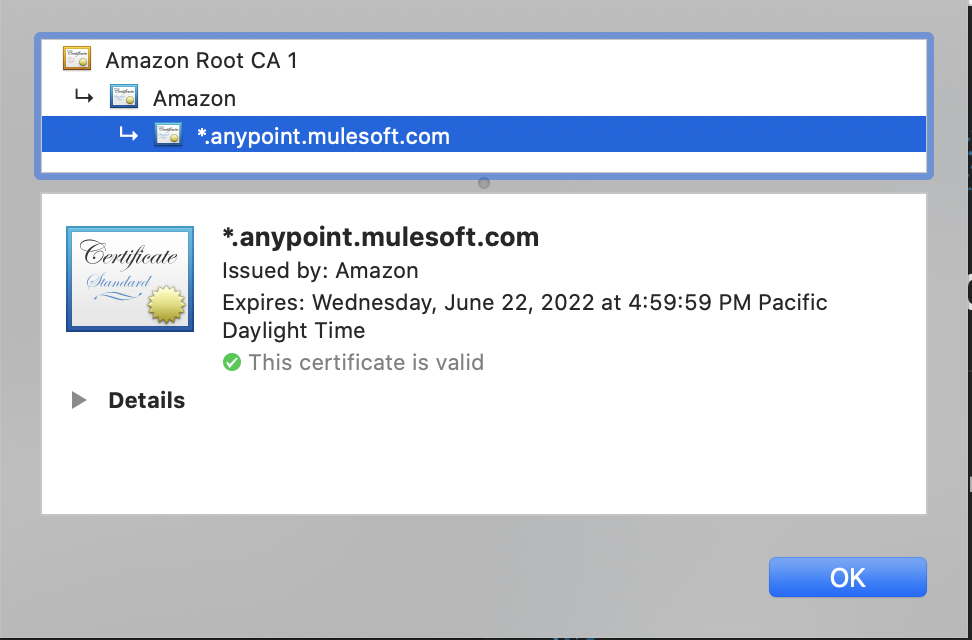
- 必要なすべての証明書が表示されます。画像では 3 つしかありませんが、4 つ表示されることもあります。これらをすべてダウンロードする必要があります。
- それぞれの証明書をダウンロードするときは、作成したフォルダーに証明書を保存し、証明書の名前はできるだけ元の名前と同じになるように変更します。スペースがある場合は削除してください。たとえば、証明書が「Amazon Root CA 1」という名前であれば、「amazon_root_ca_1.cer」に変更します。
- テキストエディターで新規ファイルを開きます。それぞれの証明書の完全な場所をテキストファイルにコピーまたは貼り付けます。たとえば Windows での場所は次のようになります。C:\Users\TestUser\Downloads\Mulesoft_Certificates\Zscaler_Root_CA.crt
- Mac の場合:これは Mac に 2 番目の証明書をダウンロードする例です。詳細をクリック - スクロールダウン - .crt で終わる URI リンクを探す - これをクリックするとダウンロードされます。
-
Windows の場合:詳細をクリックしてファイルにコピーします。証明書エクスポートウィザードを使用して、すべての証明書を新しいフォルダーにダウンロードします。
- この時点で、テキストファイルに 3 つから 4 つのパスがコピーされているはずです。
- 次は keytool コマンドを構築します。

パート 2:証明書を Java トラストストアにインストールする keytool コマンドを作成する
-
証明書が保存されているフォルダーのパスをコピーしてテキストエディターに貼り付けます。
-
Mac の場合:Mac でパスをコピーするには、Finder を開き、パスが必要なフォルダーまたはファイルを右クリックするか、Control を押した状態でクリックし、OPTION キーを長押しすると、「Copy as Pathname」(パス名としてコピー) オプションが表示されます。
-
Windows の場合:Windows でパスをコピーするには、Finder を開いてパスが必要なフォルダーまたはファイルに移動し、Finder の上部にある場所を示す領域をクリックするとパスをコピーできるようになります。
-
-
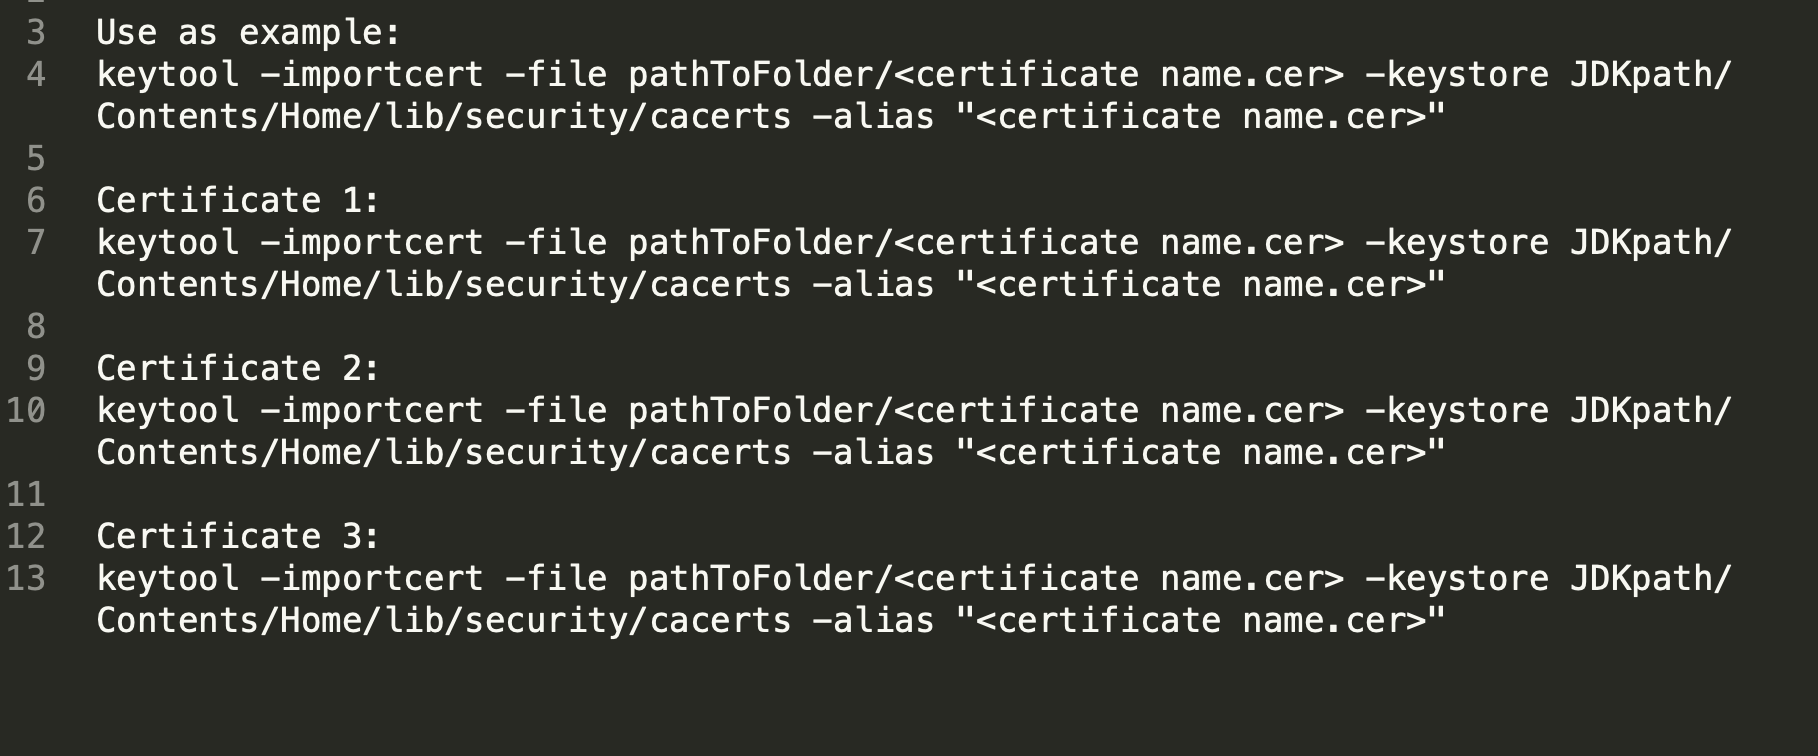
テキストエディターで次のコマンドをコピーまたは貼り付けます。
証明書ごとに 1 つの keytool コマンドを作成する必要があります。たとえば、上記のサンプル画像では 2 つの keytool コマンド (Amazon 用と Amazon CA Root 1 用) が必要になります。keytool コマンドの数は、持っている証明書の数 (通常 2 つか 3 つ) によって異なります。
ヒント:証明書が 3 つある場合、以下の keytool コマンドのサンプルをテキストエディターに改行しながら 4 回コピー/ペーストし、そのうち 1 行をサンプルとして残し、他の行をそれぞれの証明書用に編集することをお勧めします。次に例を示します。-
Mac の場合: keytool -importcert -file pathToFolder/ -keystore JDKpath/Contents/Home/lib/security/cacerts -alias ""
-
Windows の場合: keytool -importcert -file C:\Users\TestUser\Downloads\Mulesoft_Certificates\Zscaler_Root_CA.crt -keystore C:\Users\TestUser\Downloads\AnypointStudio718\plugins\org.mule.tooling.jdk.win32.x86_64_1.3.1\lib\security\cacerts -alias “Zscaler_Root_CA”
-
-
pathToFolder と表示されているフォルダーへのパスを挿入します。 と表示されている部分に証明書の名前を追加します。
-
Mac の場合: keytool -importcert -file /Users/myName/cert/amazon.cer -keystore JDKpath/Contents/Home/lib/security/cacerts -alias "amazon.cer"
-
Windows の場合: keytool -importcert -file /Users/myName/cert/amazon.cer -keystore JDKpath\lib\security\cacerts -alias "amazon.cer"
-
-
Anypoint Studio.ini ファイルを開きます。このファイルを開く方法についての詳細は、How to Find the AnypointStudio Start File (AnypointStudio スタートファイルを見つける方法) を参照してください。
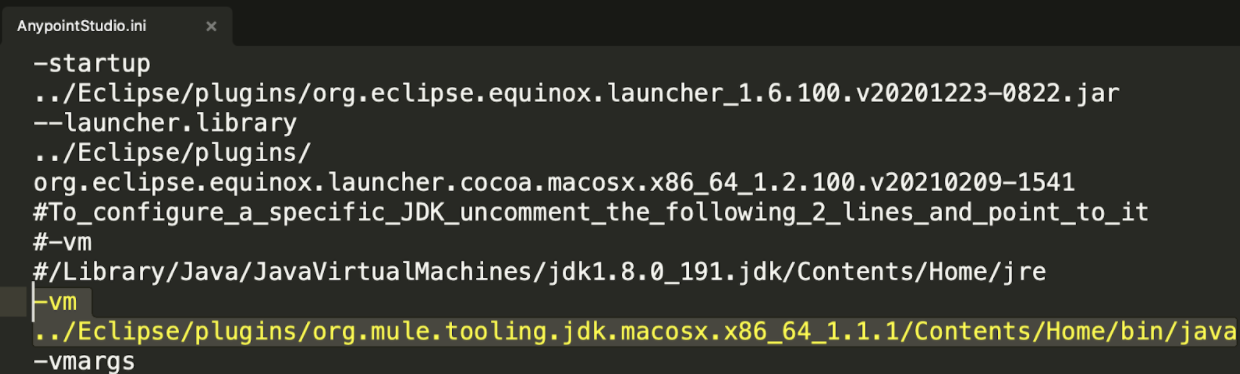
- -vm 引数で Studio が使用している Java インストールを確認します。V8 は JDK 8 を指し、バージョンについて言及がない場合は JDK11 です。次の例は JDK 11 を示しています。
-
Studio がインストールされているフォルダーからプラグインに移動して、.ini ファイルに記述されている JDK フォルダーを見つけます。このフォルダーの名前は「org.mule.tooling.jdk」で始まります。次のサンプルスクリーンショットでは「org.mule.tooling.jdk.macosx.x86_64_1.1.1」が JDK フォルダーです。
- Mac の場合:以下がその例です。
-
Windows の場合:以下に例を示します。
- Mac の場合:以下がその例です。
-
.ini ファイルに記述されている JDK へのパスをコピーして、テキストエディターで JDKpath をコピーしたパスに置き換えます。完成したコマンドは次のようになります。
-
Mac の場合: keytool -importcert -file /Users/myName/cert/Amazon.cer -keystore /Applications/AnypointStudio710.app/Contents/Eclipse/plugins/org.mule.tooling.jdk.macosx.x86_64_1.1.1/Contents/Home/lib/security/cacerts -alias "Amazon.cer"
-
Windows の場合: keytool -importcert -file /Users/myName/cert/amazon.cer -keystore /Applications/AnypointStudio710.app/Contents/Eclipse/plugins/org.mule.tooling.jdk.win32.x86_64_1.1.1\lib\security\cacerts -alias "amazon.cer"
-
-
ダウンロードしたすべての証明書に対してコマンドを複製します。それぞれの証明書に一意の行があることを確認します。 たとえば、Mac を使用していて、3 つの証明書と「cert」という名前のフォルダーがある場合、以下のように一意のコマンドが 3 つあります。「cacerts」が組み込まれていることを確認してください。
-
keytool -importcert -file /Users/myName/cert/certificate_1.cer -keystore /Applications/AnypointStudio710.app/Contents/Eclipse/plugins/org.mule.tooling.jdk.macosx.x86_64_1.1.1/Contents/Home/lib/security/cacerts -alias "certificate_1.cer"
-
keytool -importcert -file /Users/myName/cert/certificate_2.cer -keystore /Applications/AnypointStudio710.app/Contents/Eclipse/plugins/org.mule.tooling.jdk.macosx.x86_64_1.1.1/Contents/Home/lib/security/cacerts -alias "certificate_2.cer"
-
keytool -importcert -file /Users/myName/cert/certificate_3.cer -keystore /Applications/AnypointStudio710.app/Contents/Eclipse/plugins/org.mule.tooling.jdk.macosx.x86_64_1.1.1/Contents/Home/lib/security/cacerts -alias "certificate_3.cer"
-

ステップ 3:Java トラストストアに証明書をインストールする
-
Mac でターミナルを開くか、Windows でシステム管理者権限でコマンドプロンプトを開きます。どのディレクトリにいても構いません。前のセクションで作成した各 keytool コマンドを 1 つずつ貼り付けます。
-
パスワードは「changeit」と入力します。パスワードはすべて小文字で、スペースは使用しません。
-
証明書を信頼するかどうか尋ねられたら「y」と入力します。
-
コマンドを実行したら Studio を再起動します。
-
証明書をインストールしても Windows で証明書エラーが解消されない場合は、IT チームに連絡して Studio の URL をホワイトリストに追加してもらってください。詳細は「What URLs need to be whitelisted by my IT team to run Anypoint Studio?」(Anypoint Studio の実行に際して IT チームによるホワイトリスト登録が必要なのはどのような URL ですか?) を参照してください。
その他のリソース
HTTPS call fails with "SunCertPathBuilderException: unable to find valid certification path to requested target" or "General SSLEngine problem (HTTPS 呼び出しが「SunCertPathBuilderException: 要求されたターゲットへの有効な証明書パスが見つかりません」または「一般的な SSLEngine の問題」と表示されて失敗する)
ナレッジ記事番号
001122500
この記事で問題は解決されましたか?
ご意見をお待ちしております。