Velg en organisasjon
How to Switch Dynamic Zone Visibility Using Multiple Parameters
Publiseringsdato: Jun 20, 2024
Oppgave
How to switch Dynamic Zone Visibility using multiple parameters?
You can hide or reveal zones (tiled or floating dashboard elements) based on the value of a field or parameter. As you interact, zones on your dashboard appear or disappear. The result is a dynamic dashboard that doesn’t compromise your desired layout.
Trinn
The Dynamic Zone Visibility is a new feature added in Tableau Desktop 2022.3.
To be used for Dynamic Zone Visibility, a field or parameter must be:
- Boolean.
- Single value.
- Independent of the viz, meaning the field returns a constant value independent of the structure of the viz, such as a fixed level of detail (LOD) calculation.
Below is an example for switching four views with two parameters using Sample - Superstore data. Follow along with the sample packaged workbook in the Attachments at the bottom of this article.
1. Create the views you would like to switch between. In the attached sample workbook, the following four views are created.
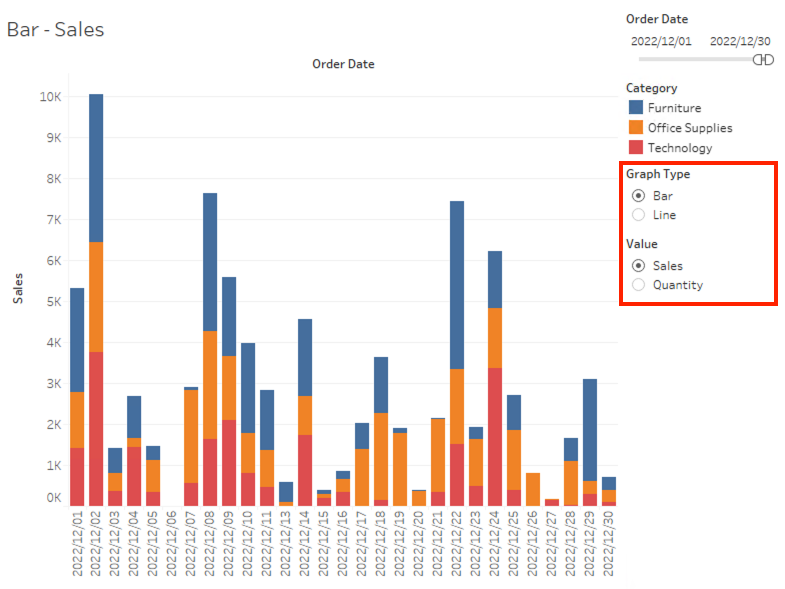
(1). Bar - Sales
(2). Bar - Quantity
(3). Line - Sales
(4). Line - Quantity
(3). Line - Sales
(4). Line - Quantity
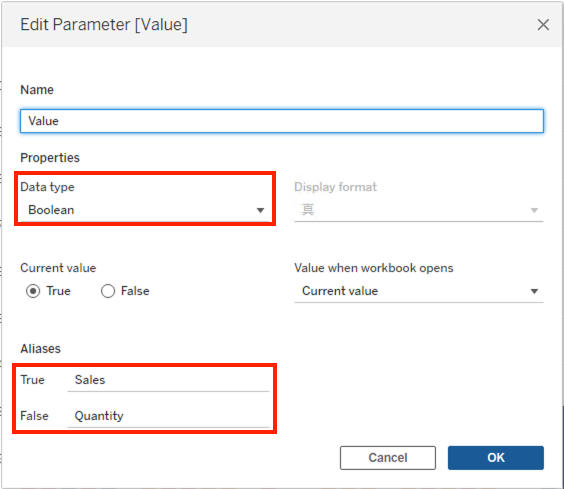
2. Create boolean parameters as follows;
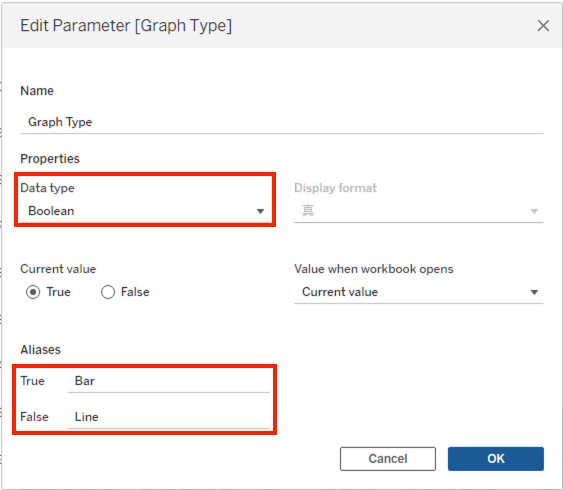
3. Create a calculated field and name it T/F for Bar - Sales.
[Graph Type]=TRUE AND [Value]=TRUE
4. Create a calculated field and name it T/F for Bar - Quantity.
[Graph Type]=TRUE AND [Value]=FALSE
5. Create a calculated field and name it T/F for Line - Sales.
[Graph Type]=FALSE AND [Value]=TRUE
6. Create a calculated field and name it T/F for Line - Quantity.
[Graph Type]=FALSE AND [Value]=FALSE
7. Add a new dashboard.
8. Drop a Vertical object onto the dashboard.
9. Drop every view in the Vertical object.
10. Select Menu > Analysis > Parameters > Graph Type and Value.
11. Open the Layout tab from the left side pane.
12. From your dashboard, click Bar - Sales view and check the box for Control visibility using value.
13. From the dropdown, select Sample - Superstore > T/F for Bar - Sales.
14. Repeat step 12 and 13 for all other views. Select an appropriate calculated field for each view.
Flere ressurser
Knowledge-artikkelnummer
001462954
Hjalp denne artikkelen med å løse problemet ditt?
La oss få vite det slik at vi kan forbedre!