Velg en organisasjon
Adding CC Address in Flow Email Action
Publiseringsdato: Aug 18, 2026
Beskrivelse
In the Salesforce Flows, there is an action where we can send emails. This action is a great workaround for code based solutions especially for Salesforce Admins. These actions can accommodate email templates and multiple emails. We can define body, recipient address lists, rich text formatted body (true or false), sender email address, subject etc. All these serve as inputs in the flow email action and we can add them dynamically by defining variables. This leads to unmatched flexibility in our email related tasks. The standard flow email action does not support adding CC addresses to our emails, so we are going to address here is how a user can add CC email addresses through flows.
Løsning
The most optimal solution for this problem takes us to make a custom invocable action where we have a middle ground in which we can use custom functionality provided by Apex in our flows. This approach gives us a black box approach where we instill a custom Apex action in our flows and provide it with the required parameters to get our job done. We do not need to know what is happening inside that action, but we provide it with parameters and get our desired results.
Here are the steps required to build, deploy, and configure the CC email feature in our Flows.
Build the Flow ### Step 1: Open the Developer Console
Click the Gear icon on the top right corner of your screen and select Developer Console.
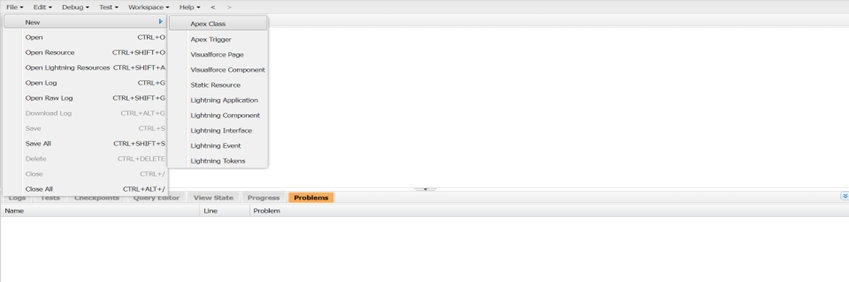
### Step 2: Create a New Apex Class
Click on create a new Apex Class.
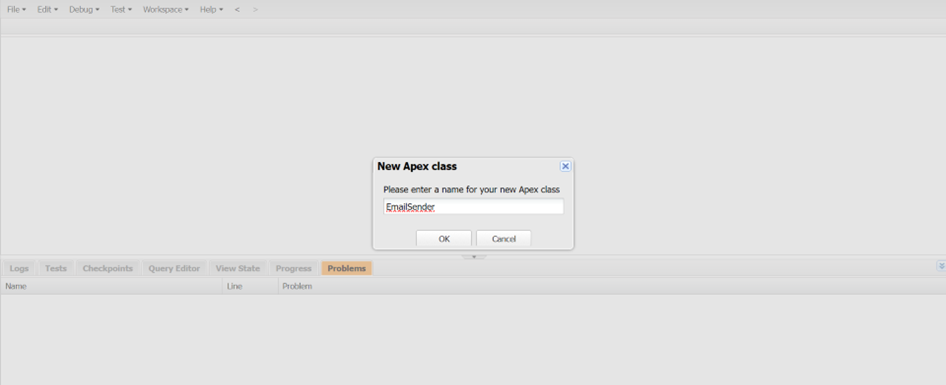
### Step 3: Add the Apex Code
Add the following code to the new Apex Class:
public class EmailSender {

    @InvocableMethod(label='Send Email with CC')
    public static List<List<String>> sendEmailWithCC(List<EmailRequest> requests) {
        List<List<String>> responses = new List<List<String>>();
        for (EmailRequest req : requests) {
            Messaging.SingleEmailMessage mail = new Messaging.SingleEmailMessage();
            mail.setToAddresses(new String[] {req.toAddress});
            if (req.ccAddress != null) {
                mail.setCcAddresses(new String[] {req.ccAddress});
            }
            mail.setSubject(req.subject);
            mail.setPlainTextBody(req.body);
            Messaging.SendEmailResult[] results = Messaging.sendEmail(new Messaging.SingleEmailMessage[] {mail});
            if (results[0].isSuccess()) {
                responses.add(new List<String>{'Email sent successfully'});
            } else {
                responses.add(new List<String>{'Error sending email: ' + results[0].getErrors()[0].getMessage()});
            }
        }
        return responses;
    }
    public class EmailRequest {
    @InvocableVariable(required=true)
    public String toAddress;

    @InvocableVariable(required=true)
    public String ccAddress;

    @InvocableVariable(required=true)
    public String subject;

    @InvocableVariable(required=true)
    public String body;
}
}
`
### Step 4: Create a New Screen Flow
Go to Flows and create a new Screen Flow.
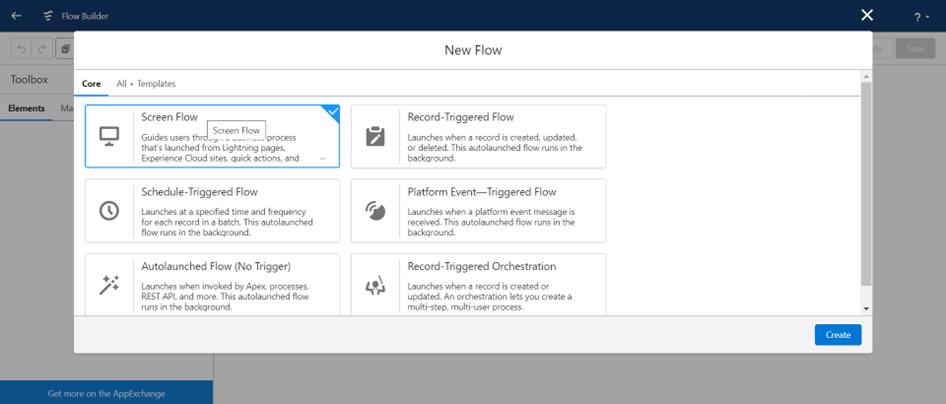
### Step 5: Add the Action Element
Click on Add Element in the Flow, select Action, and then select the Invocable Method that we created in the Apex Class.
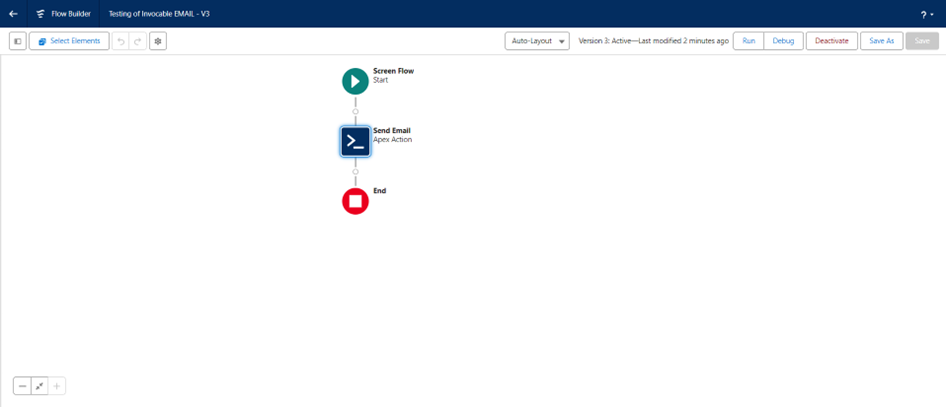
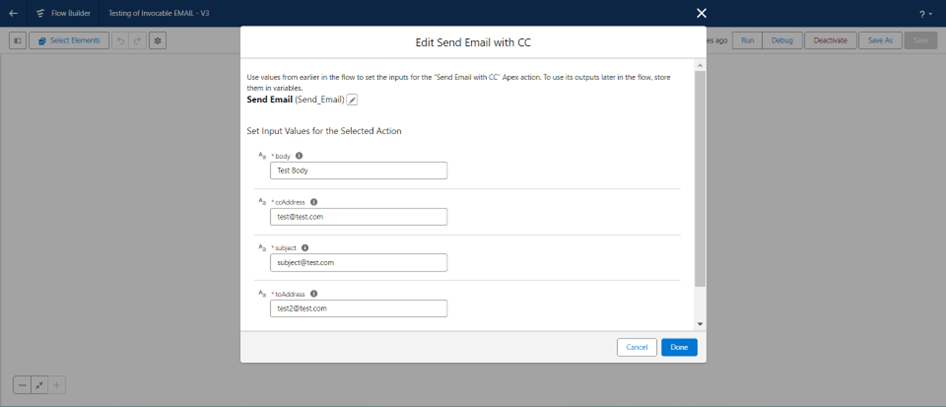
### Step 6: Configure the Action Parameters
Give parameters to our Action.
### Step 7: Save and Activate
Save and Activate the Flow.
## Customizability
The following Screen Flow can be made dynamic according to our needs where we can take inputs from the user (Recipient and CC Email) and send emails respectively. Flows provide endless possibilities to address our requirement, and this flow can also be modified according to the requirements.
## About This Article
Written by: Maham Hassan | Forum Ambassador. Maham Hassan is 2x Mom, Salesforce MVP, Director & Technical Architect @ Cloud-1 & Check Automate, Founder of Dubai Dreamin, 16x Certified, Trailblazer Mentor, Community Group Leader & All Star Ranger.
## Disclaimer
Submissions reflect only the opinions of the user who made available the Submission and not the opinions of Salesforce, regardless of whether the user is affiliated with Salesforce, and may contain or constitute products, services, information, data, content and other materials made available by or on behalf of third parties ("Third Party Materials"). Salesforce neither controls nor endorses, nor is Salesforce responsible for, any Third Party Materials, including their accuracy, validity, timeliness, completeness, reliability, integrity, quality, legality, usefulness or safety, or any applicable intellectual property rights. Any Submissions made available through any message board or forum in response to posted questions, or that otherwise purports to answer any questions, including any questions about Salesforce or Programs, are made available for your general knowledge only and should never be relied upon as answers to your specific questions (even if an answer is marked as a "best" answer or with any similar qualifications). You should always contact Salesforce support for answers to your specific questions. Salesforce has no control over Submissions, and is not responsible for any use or misuse (including any distribution) by any third party of Submissions.
If you have questions, tap into the wisdom of our entire Trailblazer Community here: https://trailhead.salesforce.com/trailblazer-community/feed
Knowledge-artikkelnummer
001979871
Hjalp denne artikkelen med å løse problemet ditt?
La oss få vite det slik at vi kan forbedre!
