Organisation auswählen
How to add a data source filter to an output created from a Tableau Prep Flow on Tableau Cloud or Tableau Server
Veröffentlichungsdatum: Apr 30, 2025
Aufgabe
To add a data source filter to an output created from a Tableau Prep Flow on Tableau Cloud or Tableau Server.
Note that there is no option to add a data source filter in flow authoring.
Schritte
Edit the output of the flow (published data source) to add the data source filters.
Below are steps to edit the extract output of the flow to add the data source filters.
Note:
After adding a data source filter to the flow output using the following steps, the filter will remain as long as the flow output is not deleted. If the flow output is deleted, the data source filter will also be removed. Re-running the flow will not restore the deleted data source filter. Please exercise caution.
Steps:
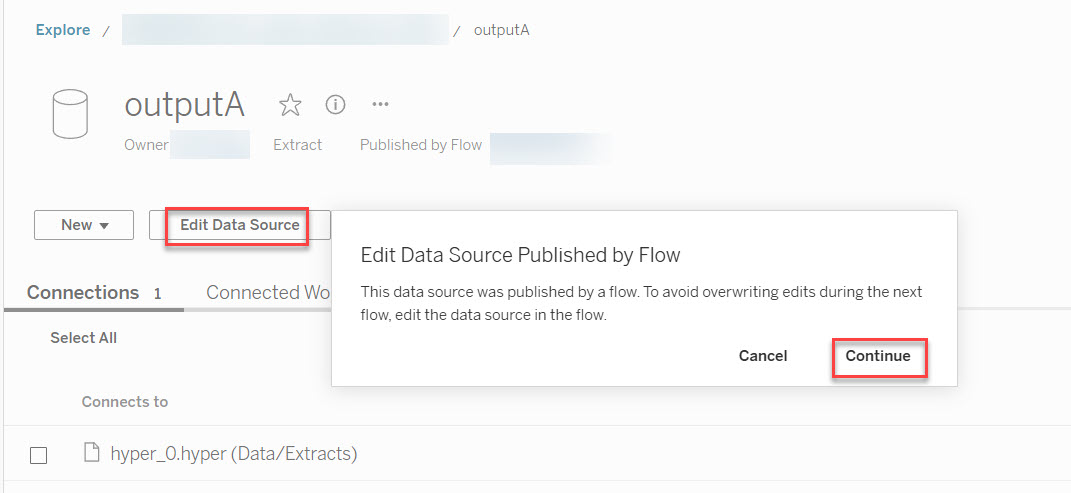
1. In the flow output page (named outputA), click Edit Data Source > Continue.
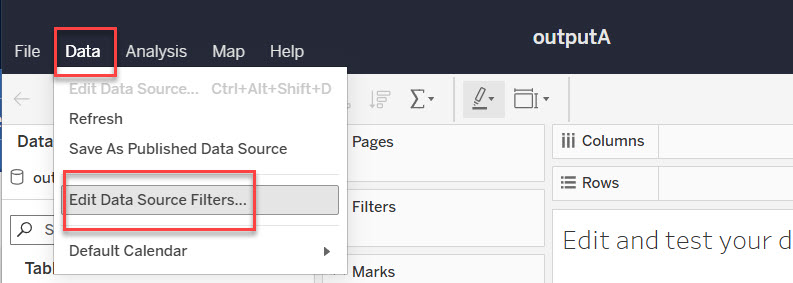
2. In the Data Source Web Authoring page, click Data > Edit Data Source Filter.
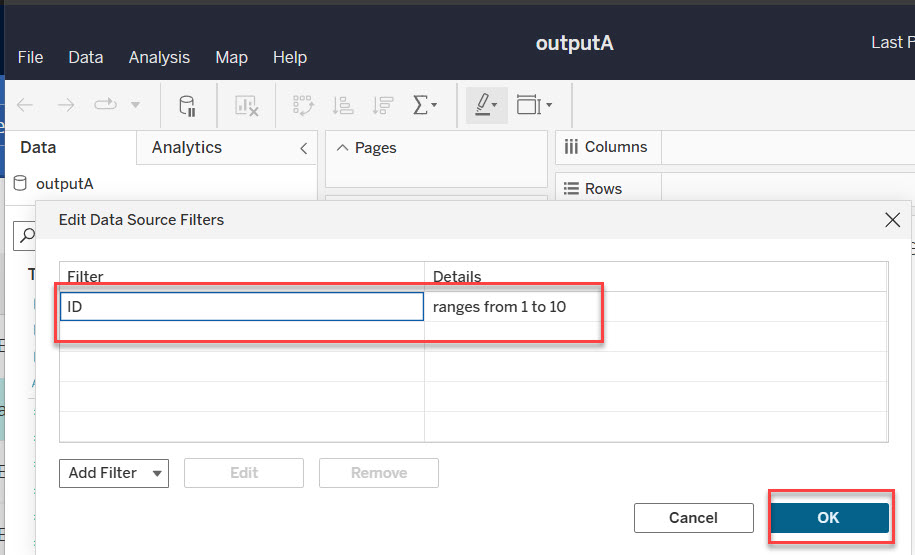
3. Add your data source filter, then click OK.
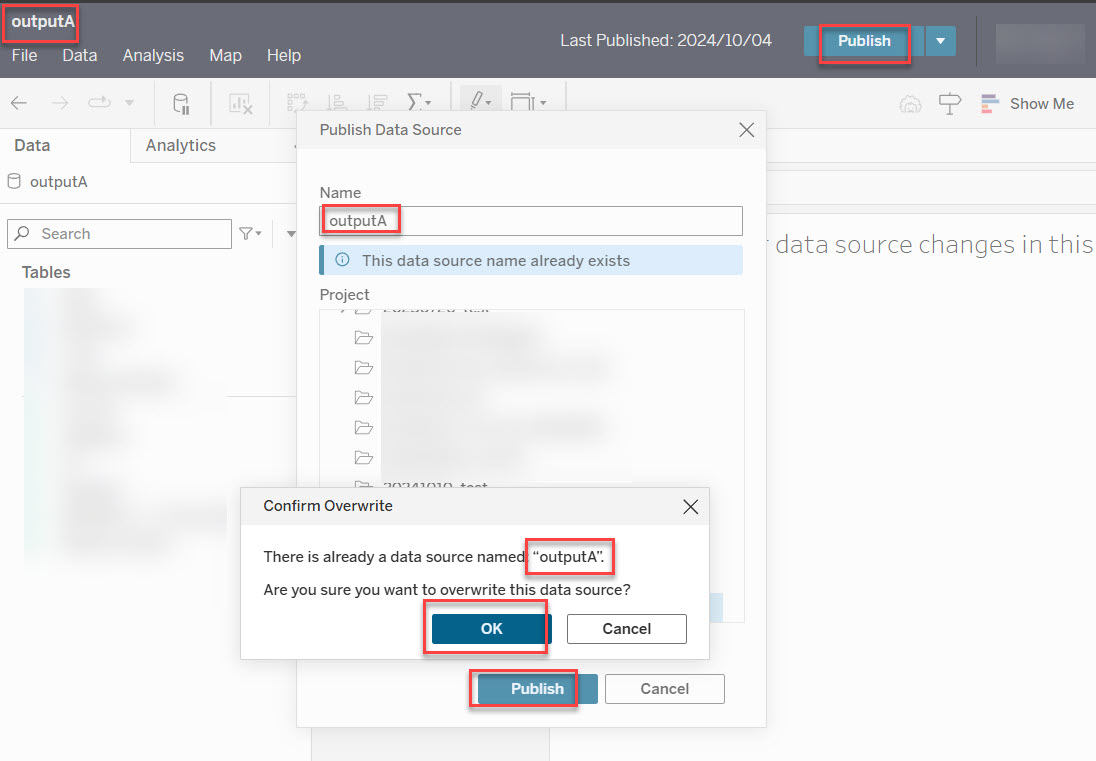
4. Publish the data source outputA. Ensure its name remains as outputA by clicking Publish > Confirm Overwrite > OK.
5. Confirm the data source outputA is published successfully. Then close the Data Source Web Authoring page.

6. Run your flow again and confirm the data source filter added in step 3 is still present.
Zusätzliche Ressourcen
For more details about the data source filter, please refer to the online help below.
Nummer des Knowledge-Artikels
003118089
Konnten Sie Ihr Problem mithilfe dieses Artikels lösen?
Geben Sie uns Feedback, damit wir uns verbessern können.