Sélectionner une organisation
How to Build a Search Screen with Filters in Salesforce Screen Flow
Date de publication: Feb 6, 2026
Description
We have a requirement to build a search screen to display a subset of records. Search screen needs to have filters to limit the amount of data visible. Let's take an example of Cases, We have a requirement to build a custom search screen to display subset of cases in your experience cloud. See example screen below, it shows a data table with a list of records and three filters - Case opened date from, Case Opened Date To and Status. Without the filter, the screen shows only the open cases.
Résolution
We can use Screen Flow to create a Search Screen with required filters
- Using Separate Get Records Element For each of the filter combinations
As a best practice, be sure to build and test Flows in a Sandbox before deploying to a Production environment
Solution : Using Separate Get Records Element For each of the filter combinations
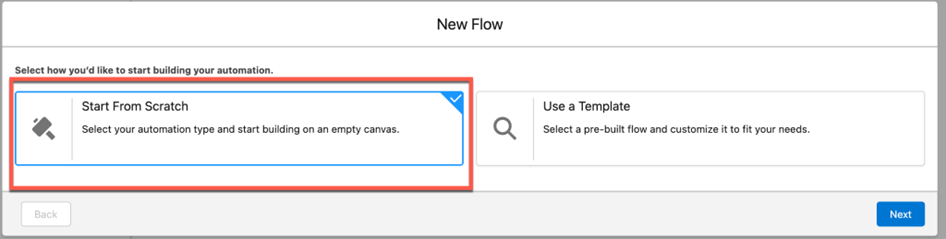
Step 1: Go to Salesforce Setup - > Flows - > New Flow and Choose Start From Scratch -> Screen Flow and Click Create
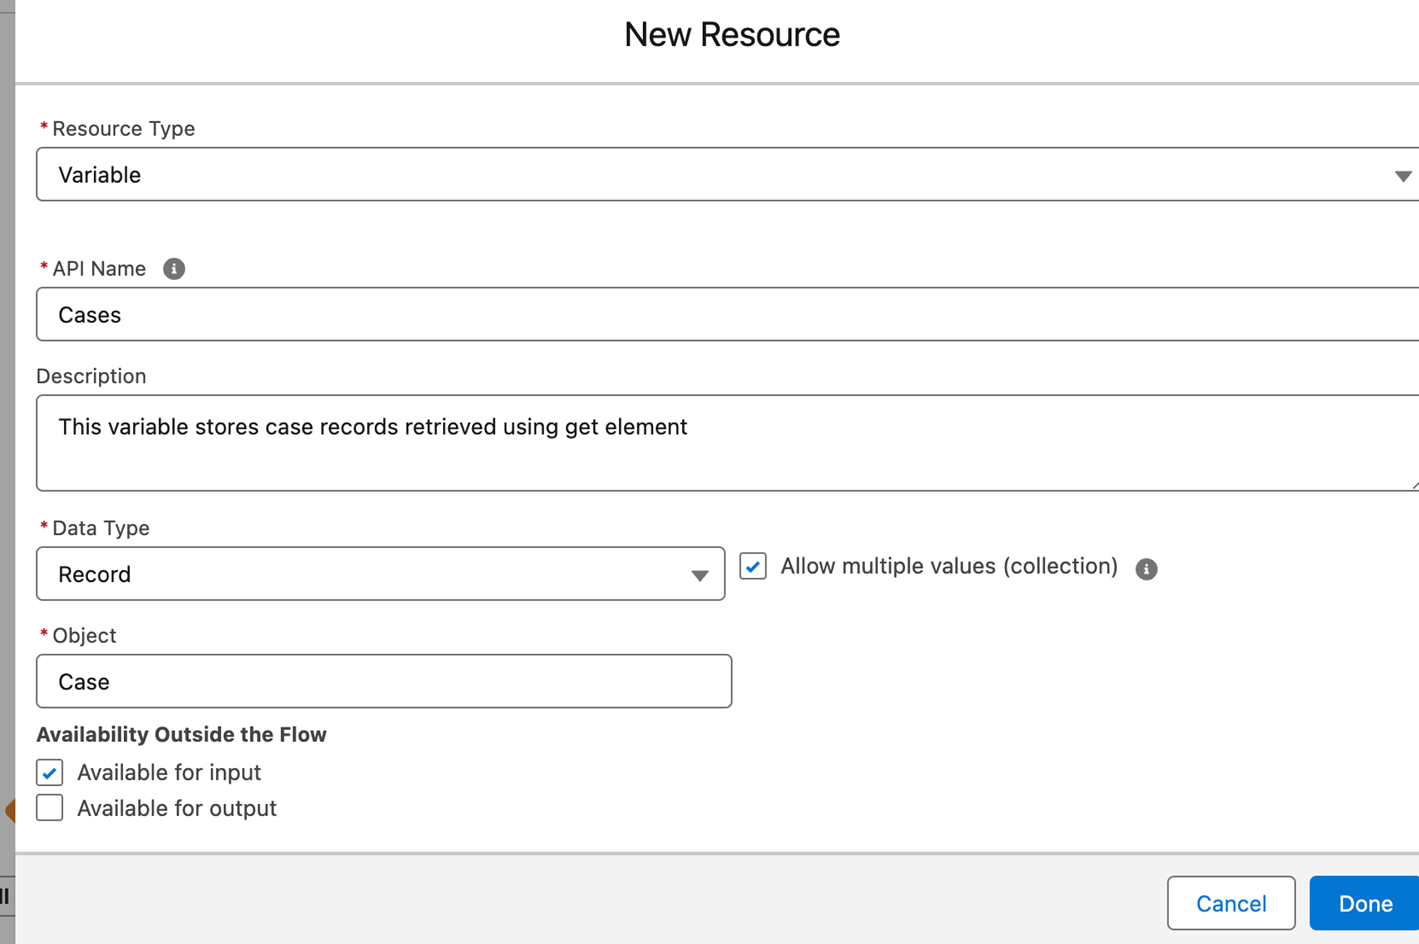
Step 2: Create a Record List Variable that we need to use in next sections. Click the New Resource Button in the Toolbox Section on the left
- Enter resource details as shown below and click Done
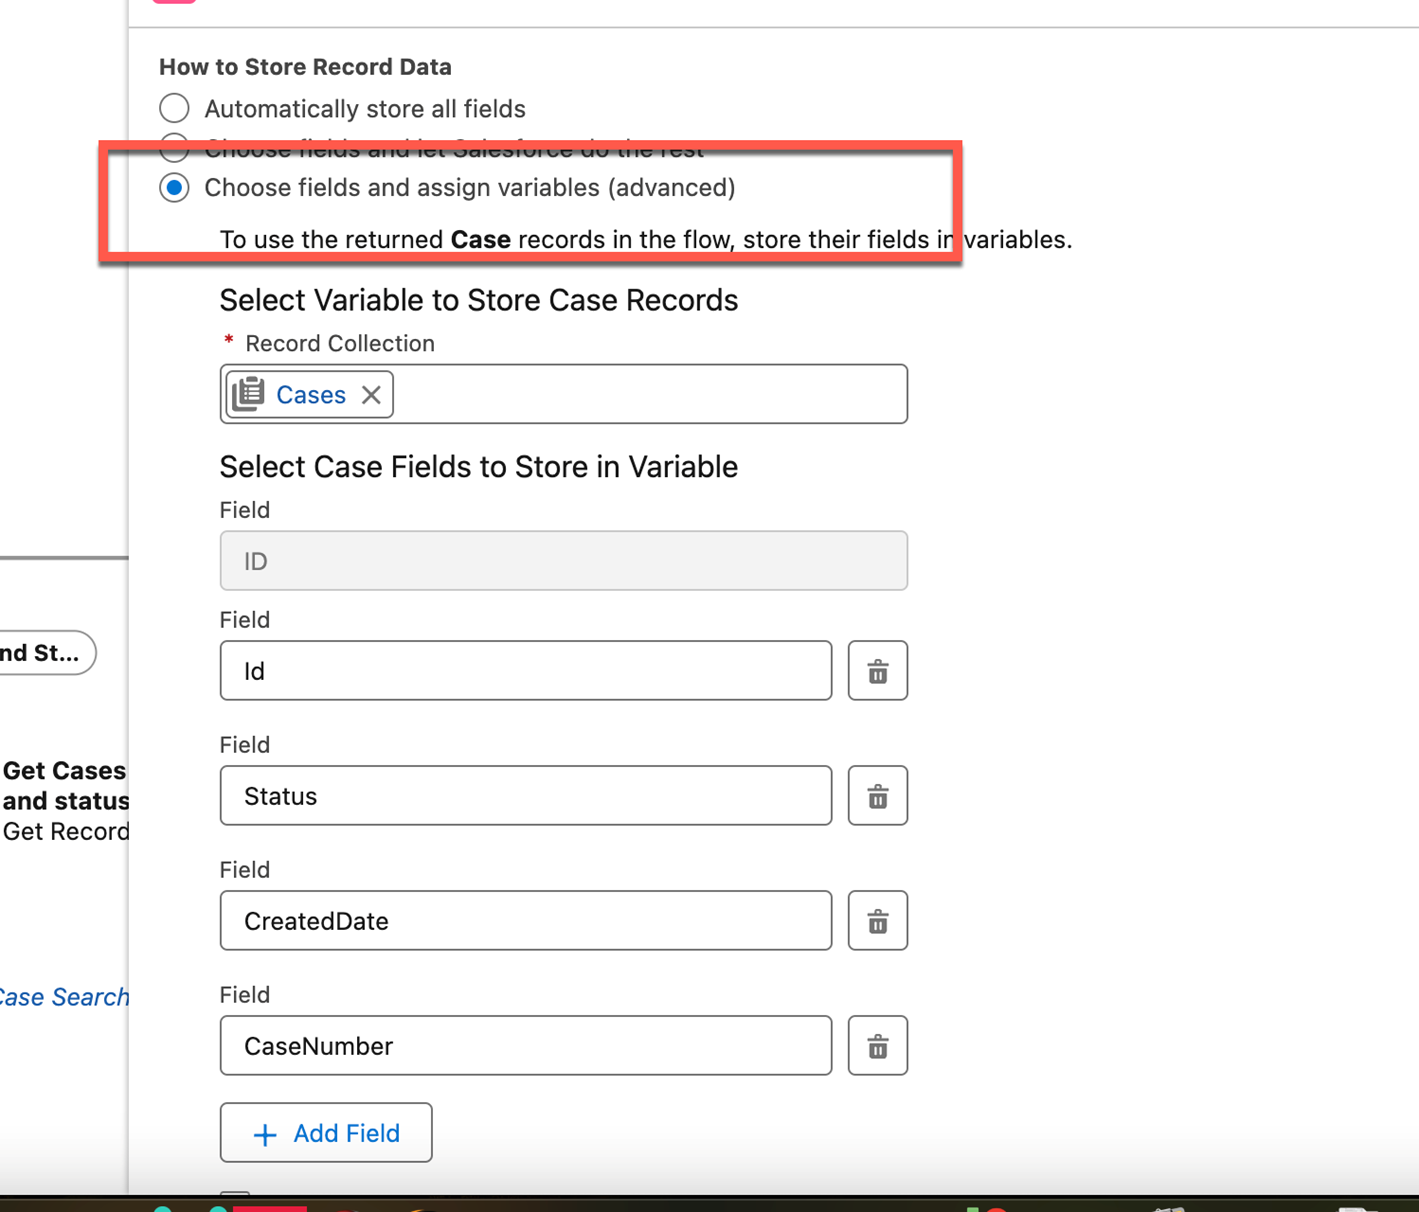
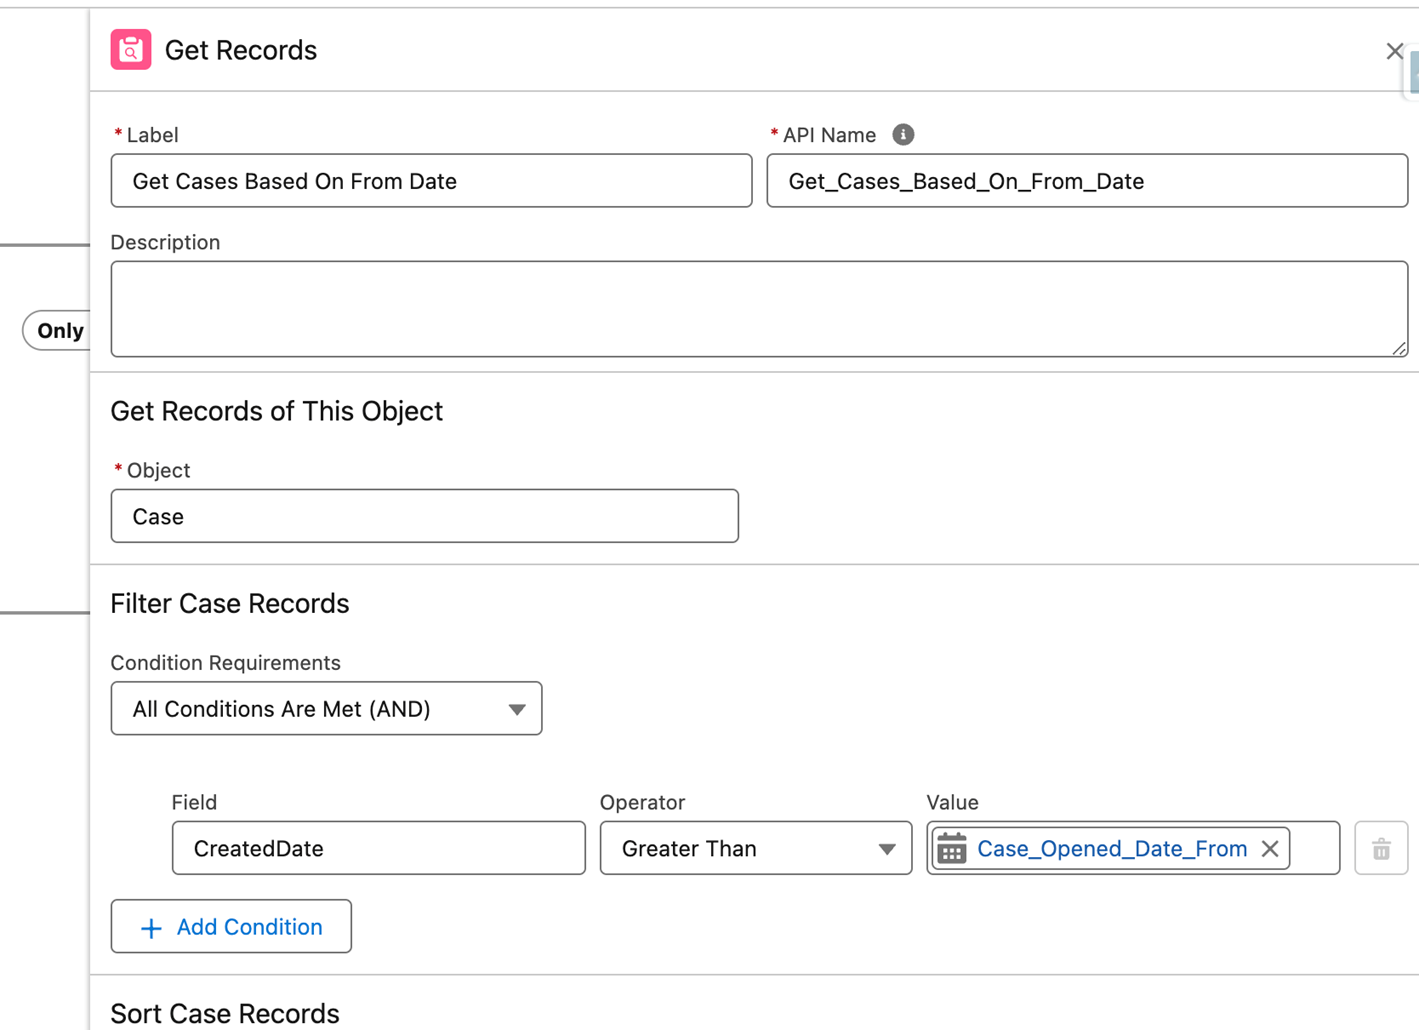
Step 3: Add Get Records Action
- Enter Label, API Name, Select the object and add initial record filters

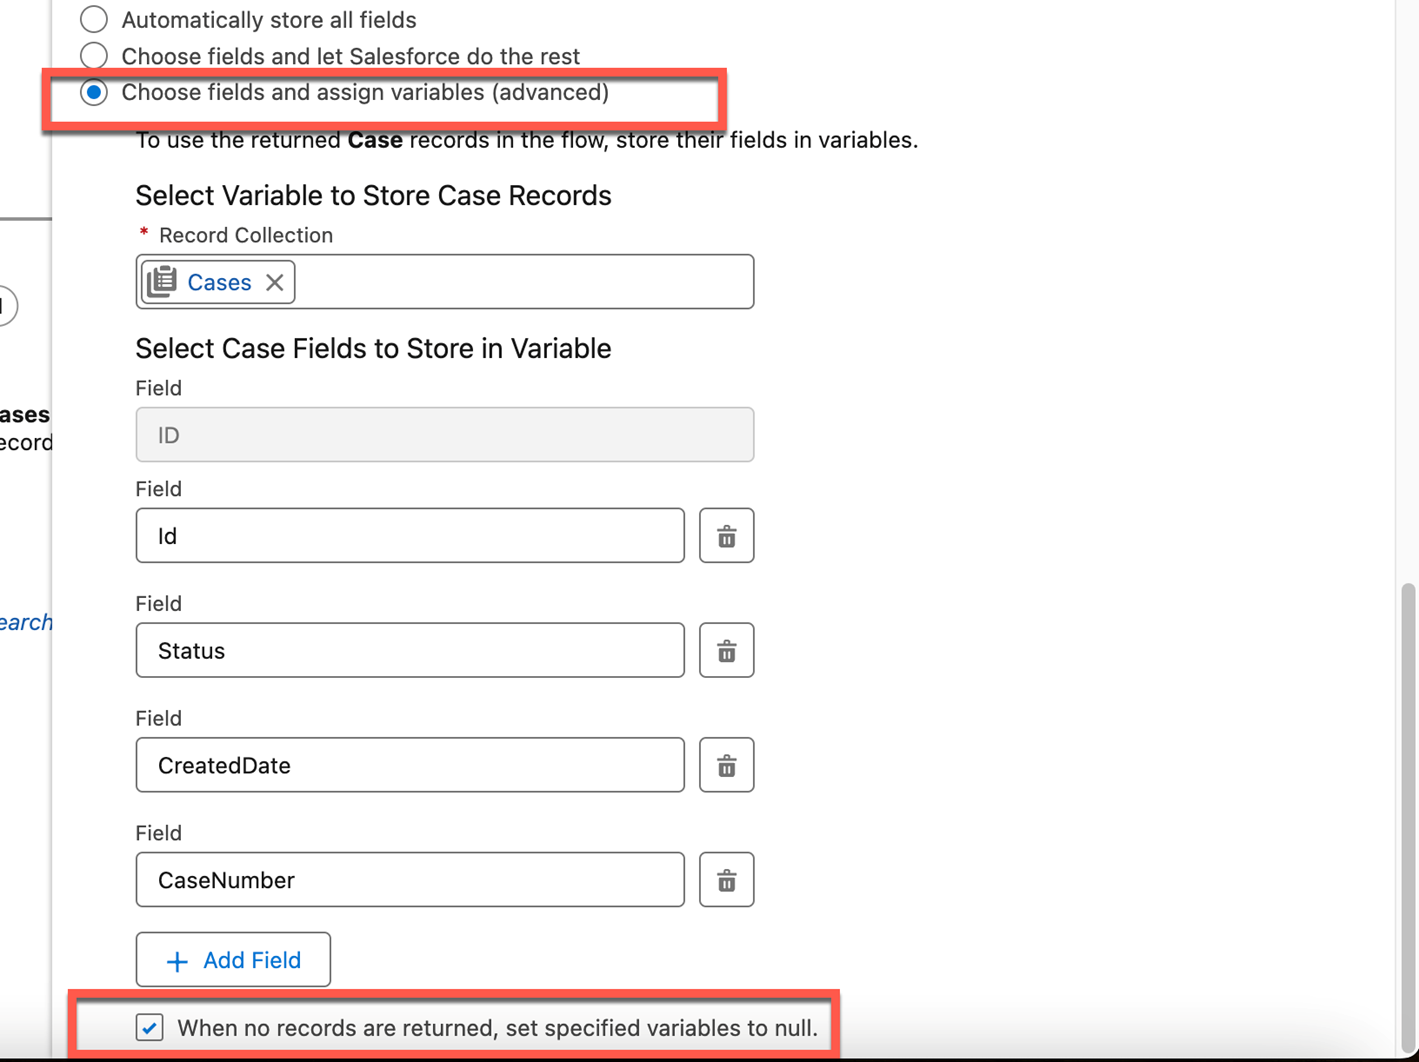
- Choose the third option and select the record collection variable created above. And also add required fields and Click Save on Top right to save the Flow
- Give it some name and click Save
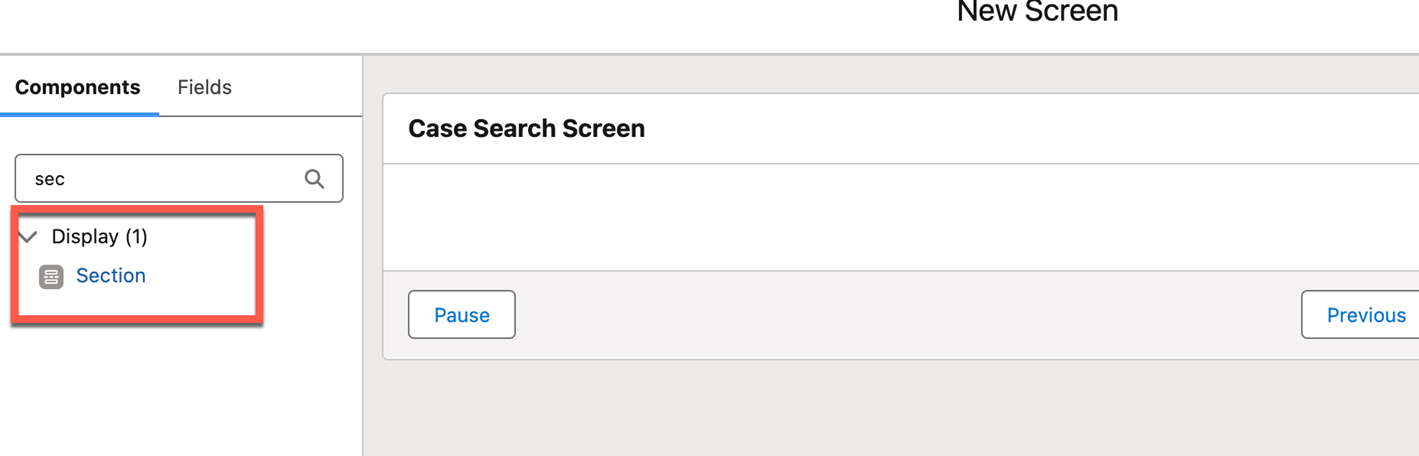
Step 4: Add Search Screen and Add Label/API Name for Search Screen then, Drag section to the Search Screen
- Check the Include Header Checkbox and Add Header for Case Filter section and Add 3 columns using Add Column Button on the right, Drag and drop Date field to first section of screen Add Label/API Name and Set default value as same API Name
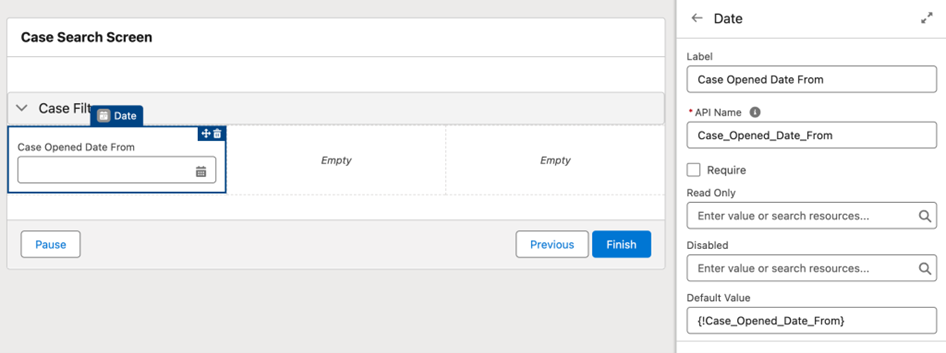
- Similarly Add Case Opened Date To

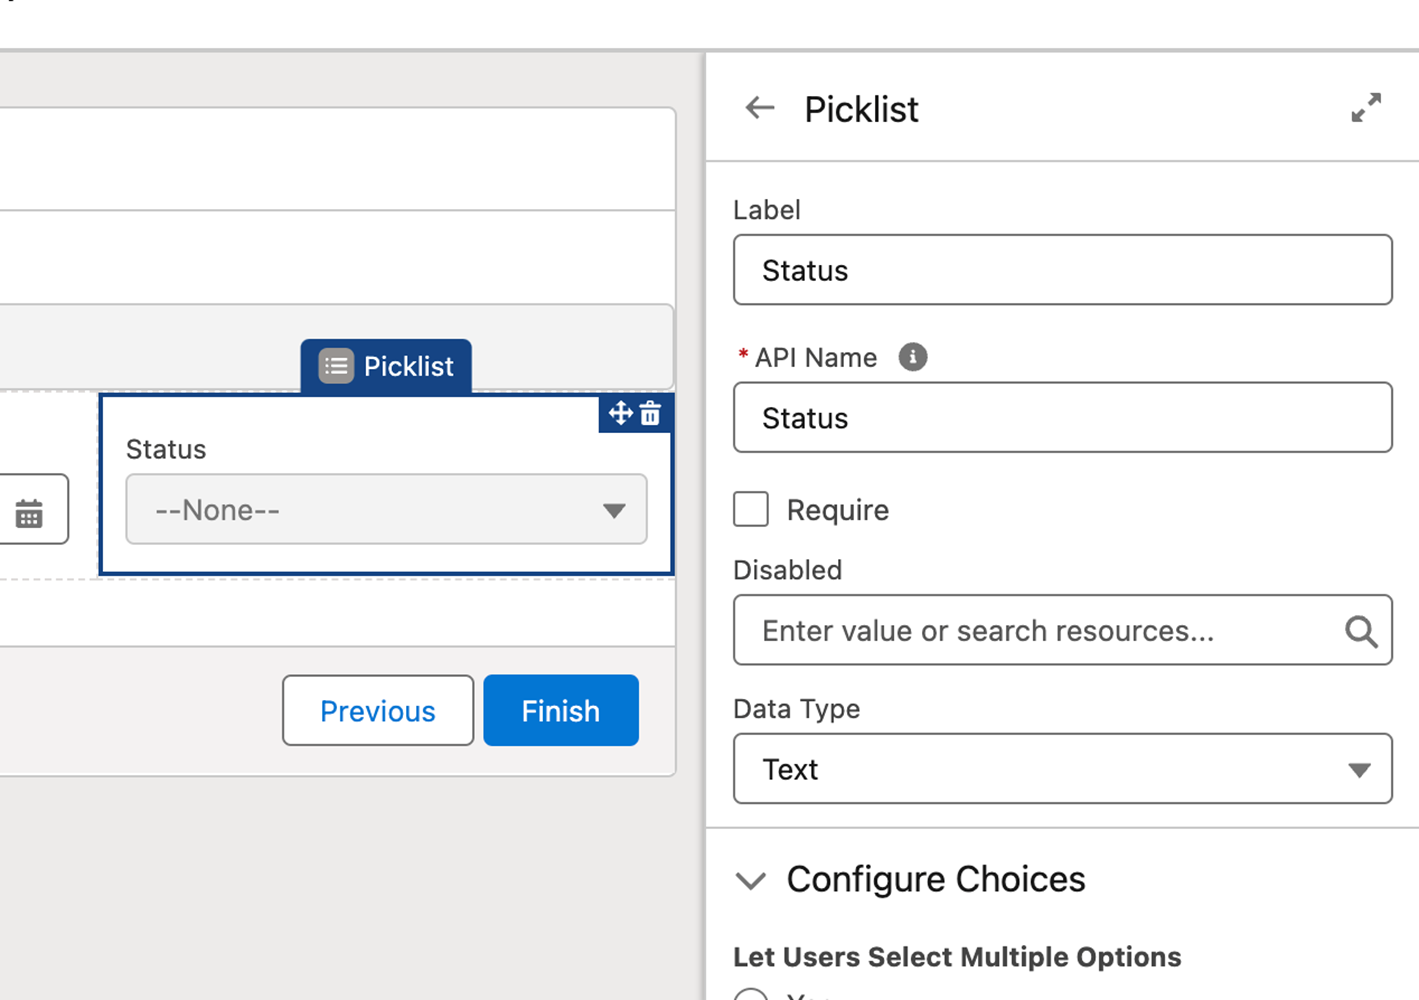
- Drag Picklist type field into third column of section
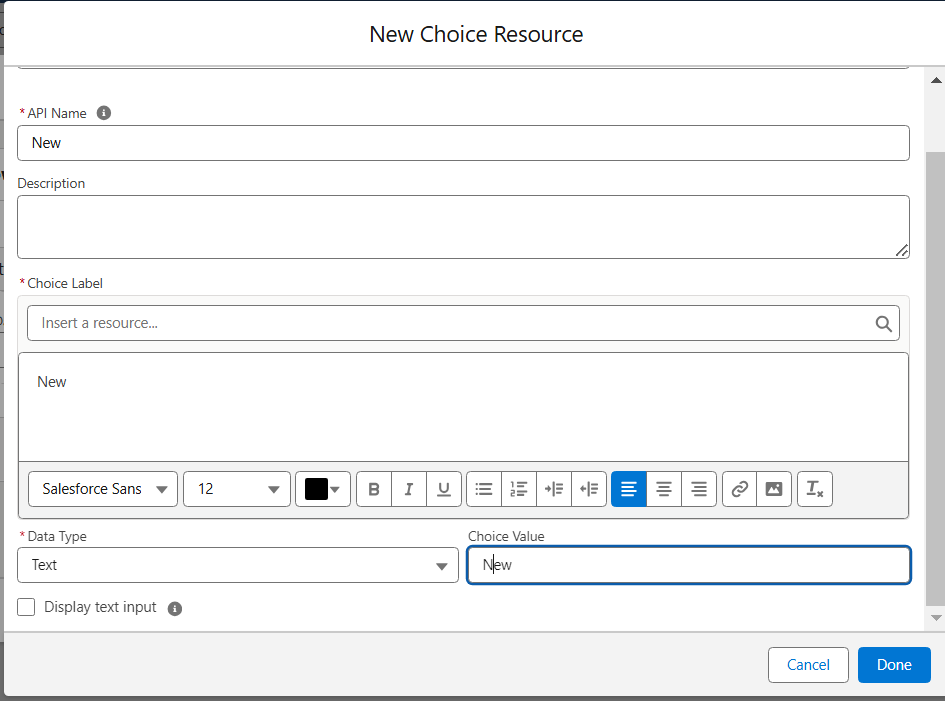
- Click Add Choice ->New Choice Resource ->Select choice resource type and Add New Status Value as shown below:
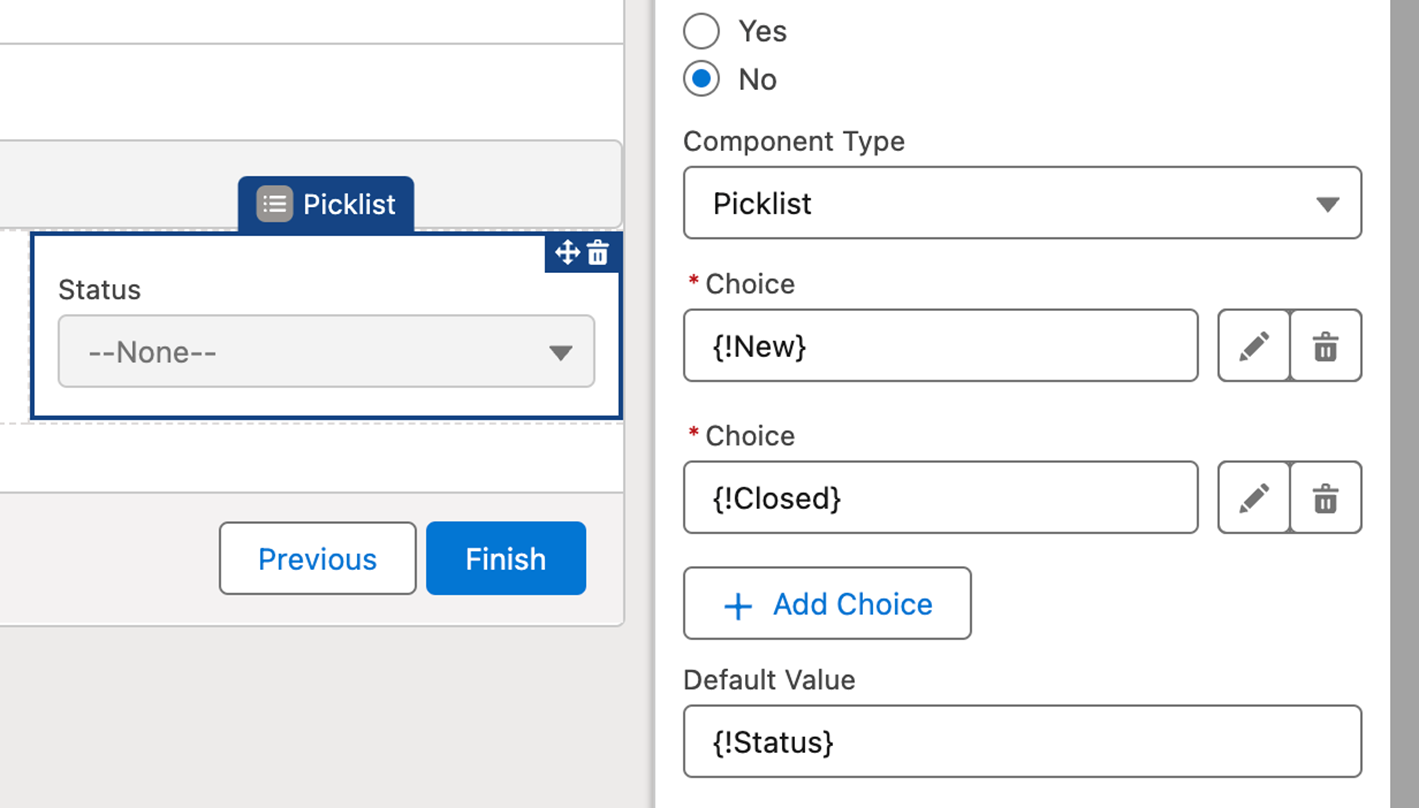
- Similarly add other choices. Add Status as Default Value as shown above
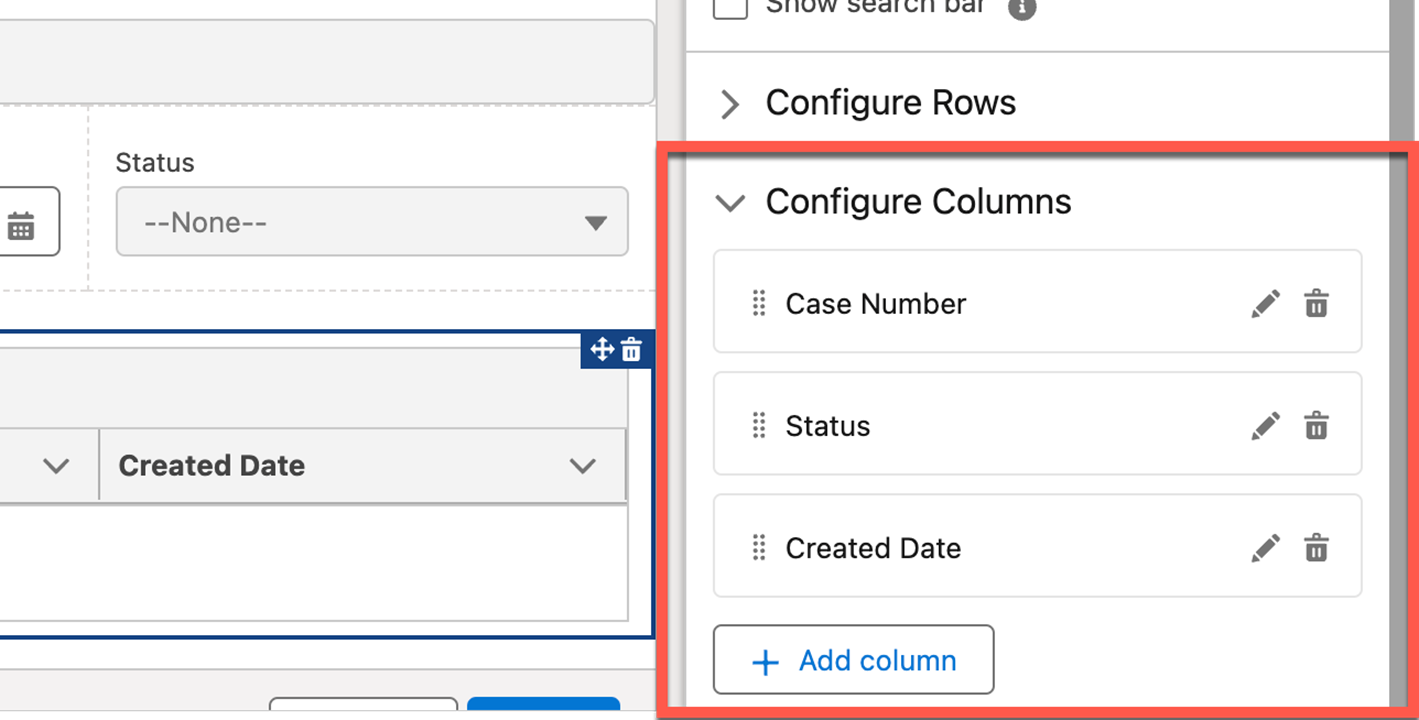
- Add Data Table to the screen

- Configure columns for the Data Table
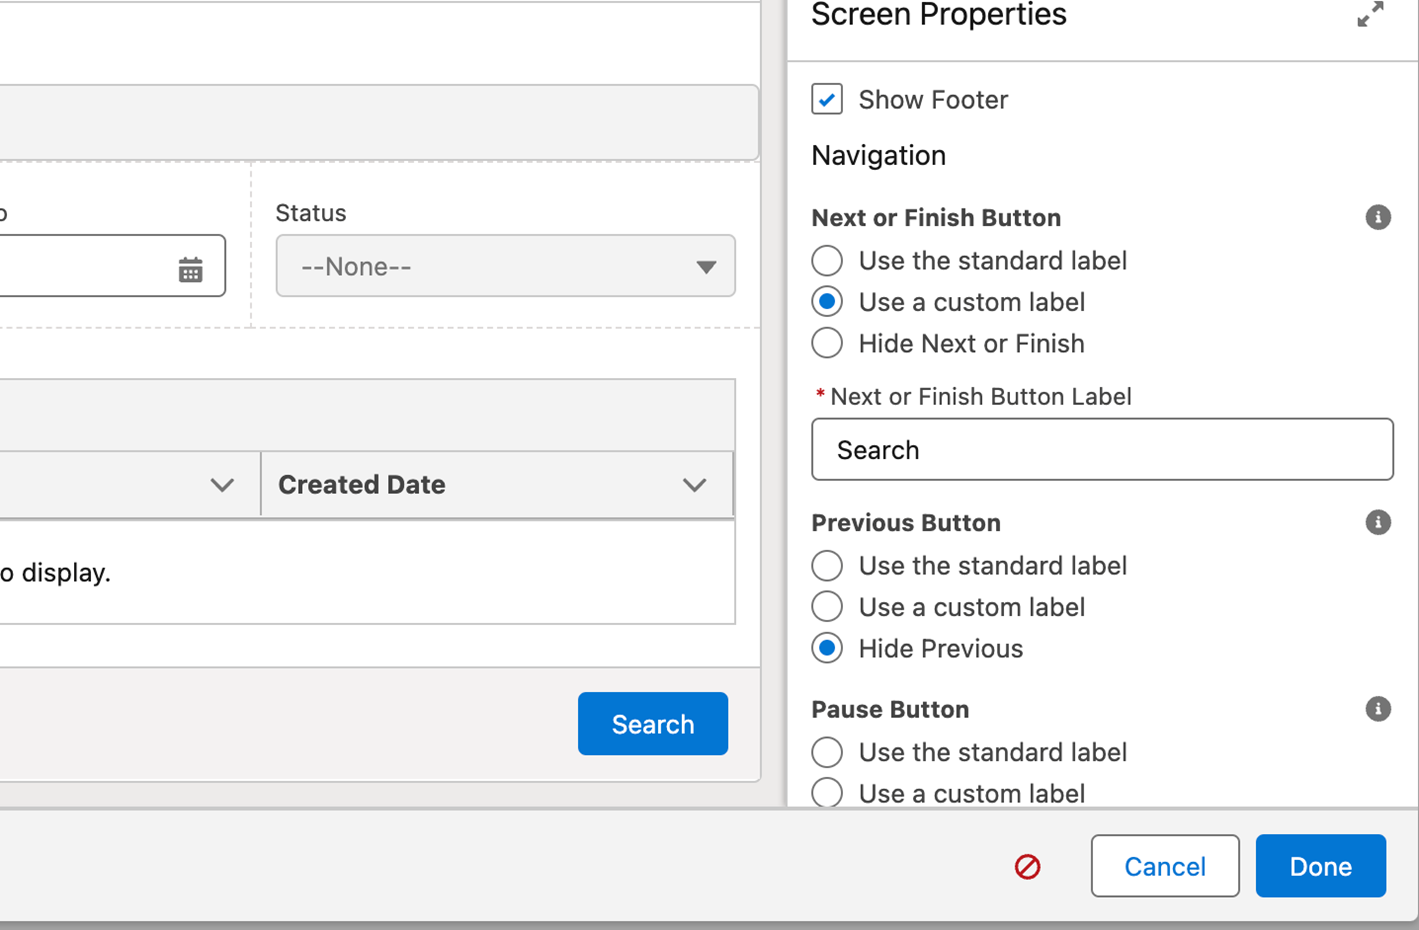
- Configure Footer: Hide Previous and Pause Buttons and Add Custom Label for Next/Finish Button. And click Done on the screen.
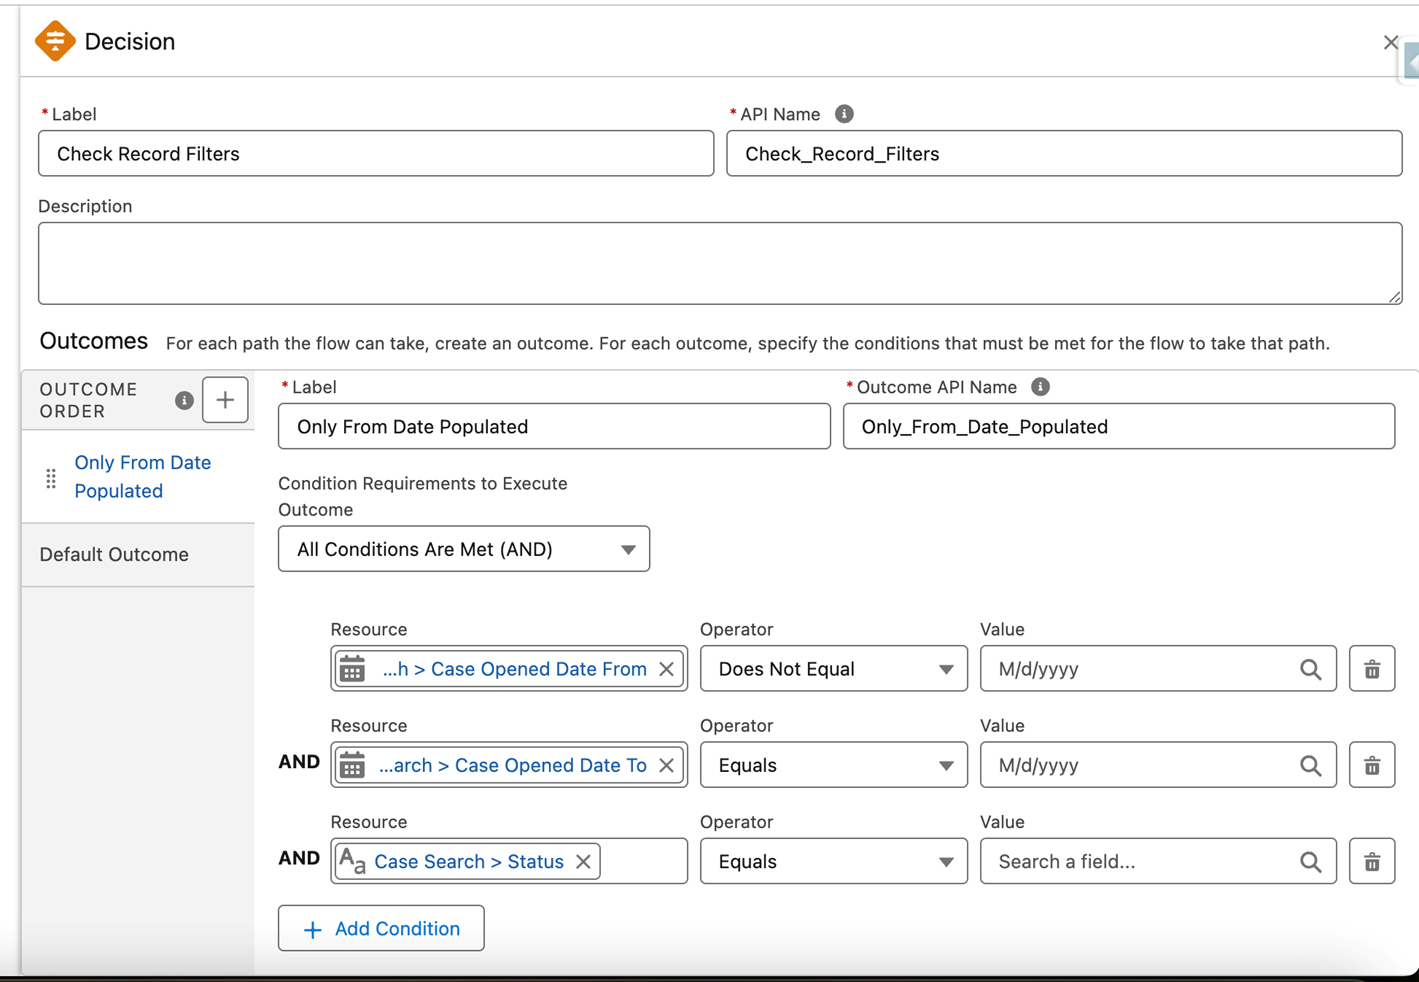
Step 7: Add Decision Element
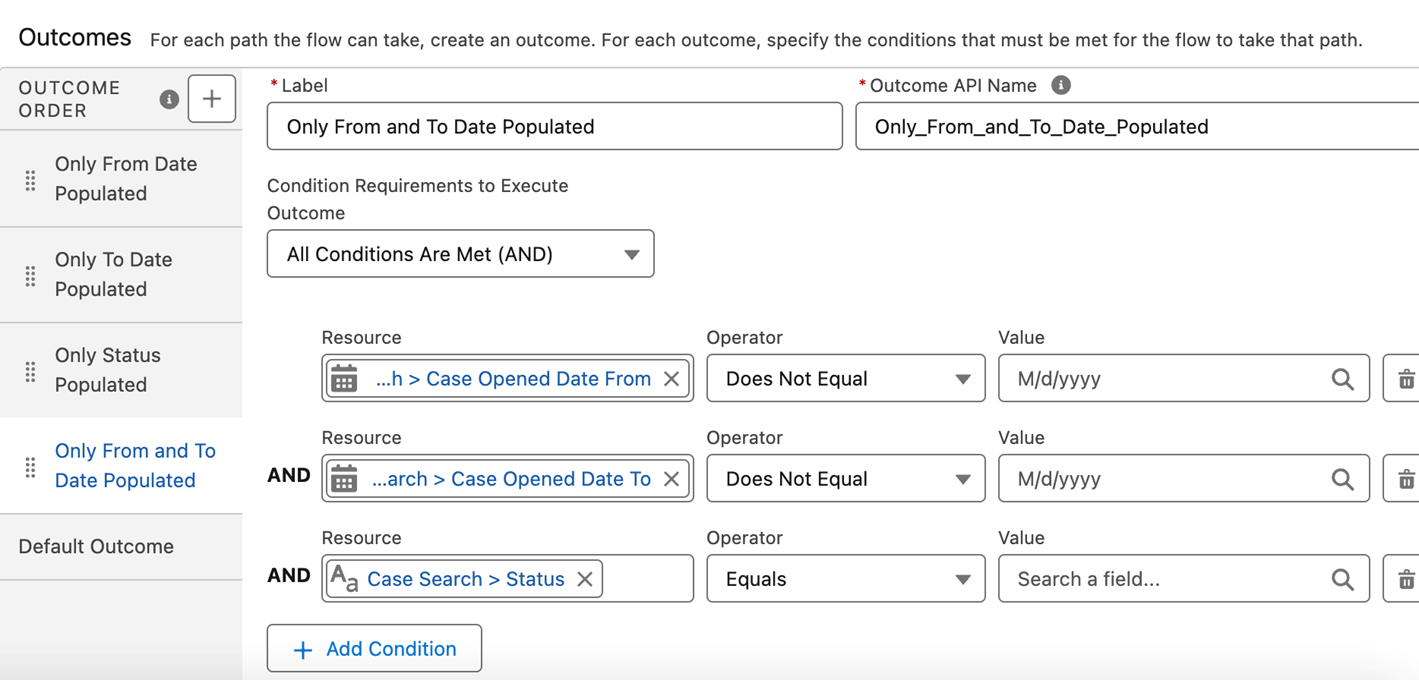
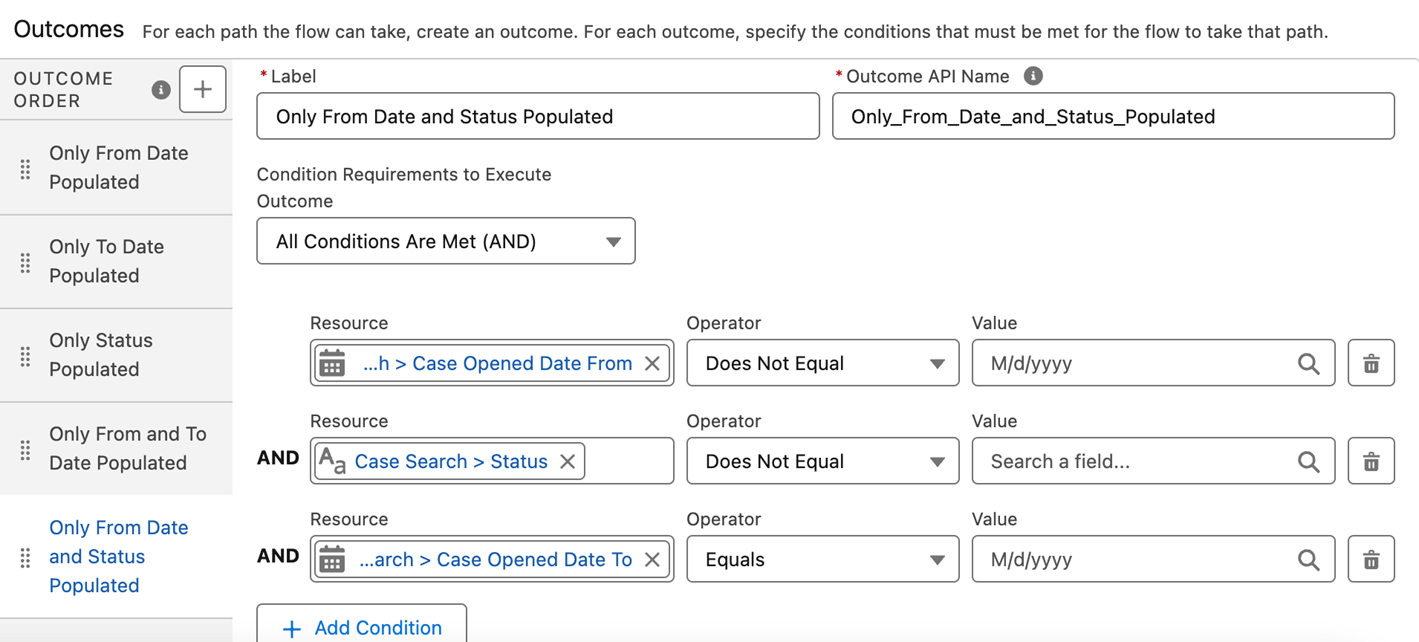
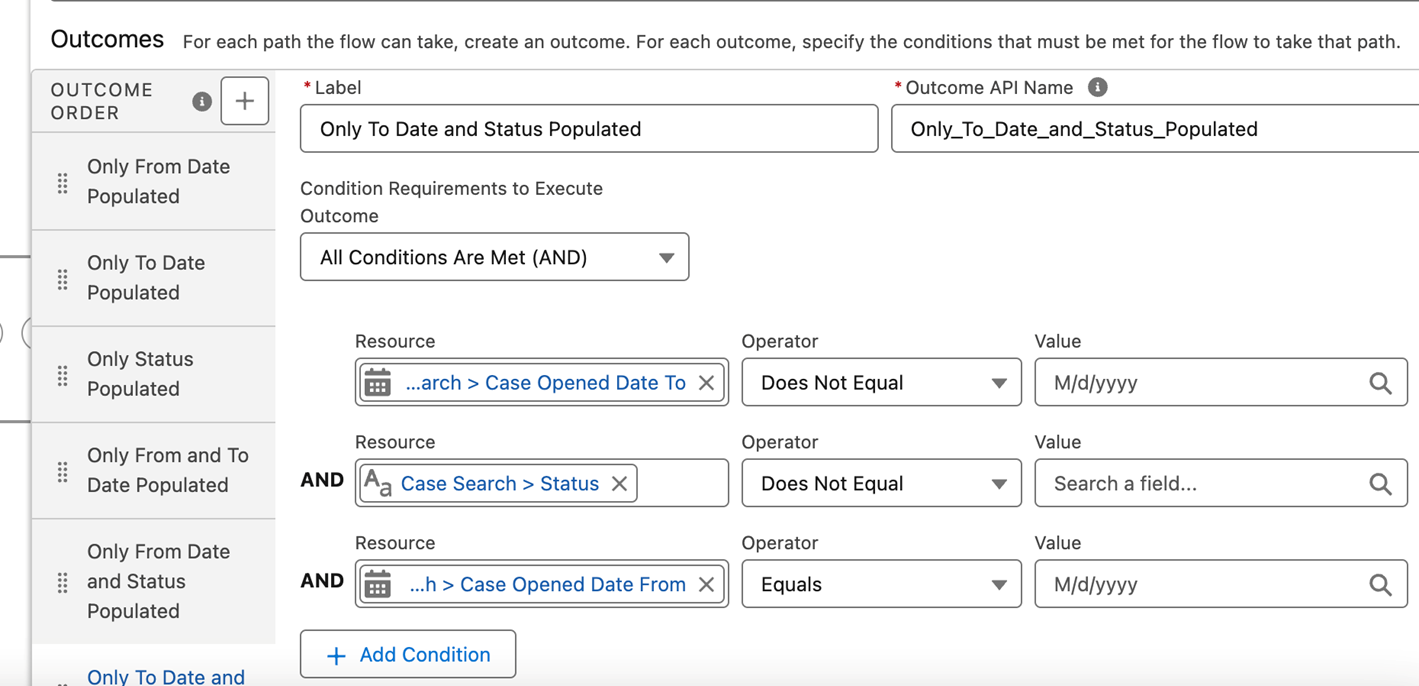
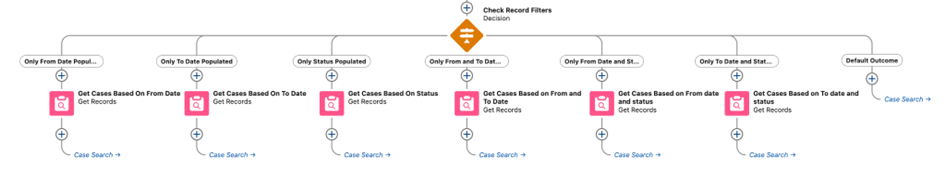
We need 6 different outcomes in Decision to cover all scenarios
Scenario 1: Only From Date is populated in filters
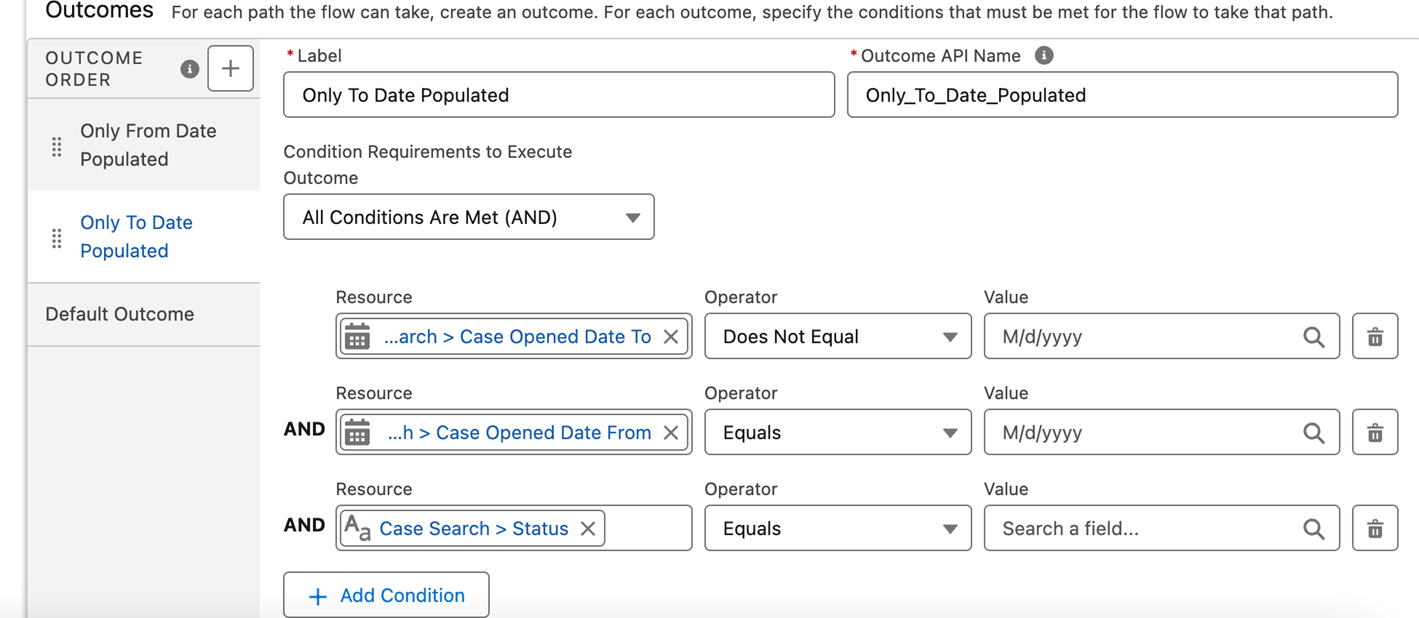
Scenario 2: Only To Date Populated
Scenario 3: Only Status Populated

Scenario 4: Both From Date and To Date Populated But Status is Blank
Scenario 5: Both From Date and Status Populated But To Date is Blank
Scenario 6: Both To Date and Status Populated, But From Date is Blank
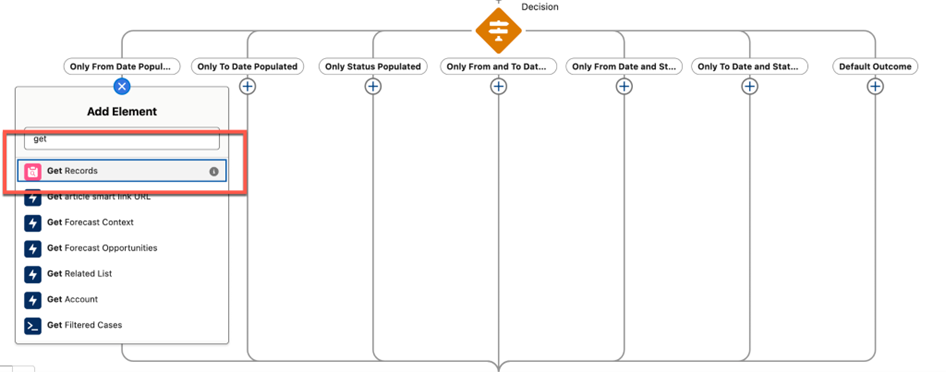
Step 7: Add Get Records Elements for Each Condition
- Add Get Records Element For Condition 1 -Only From Date Populated
Scenario : Filter based on Case From Date Filter
- Choose the 3rd option and then select the record collection we created in the beginning. and then Add fields to the Get Records Element
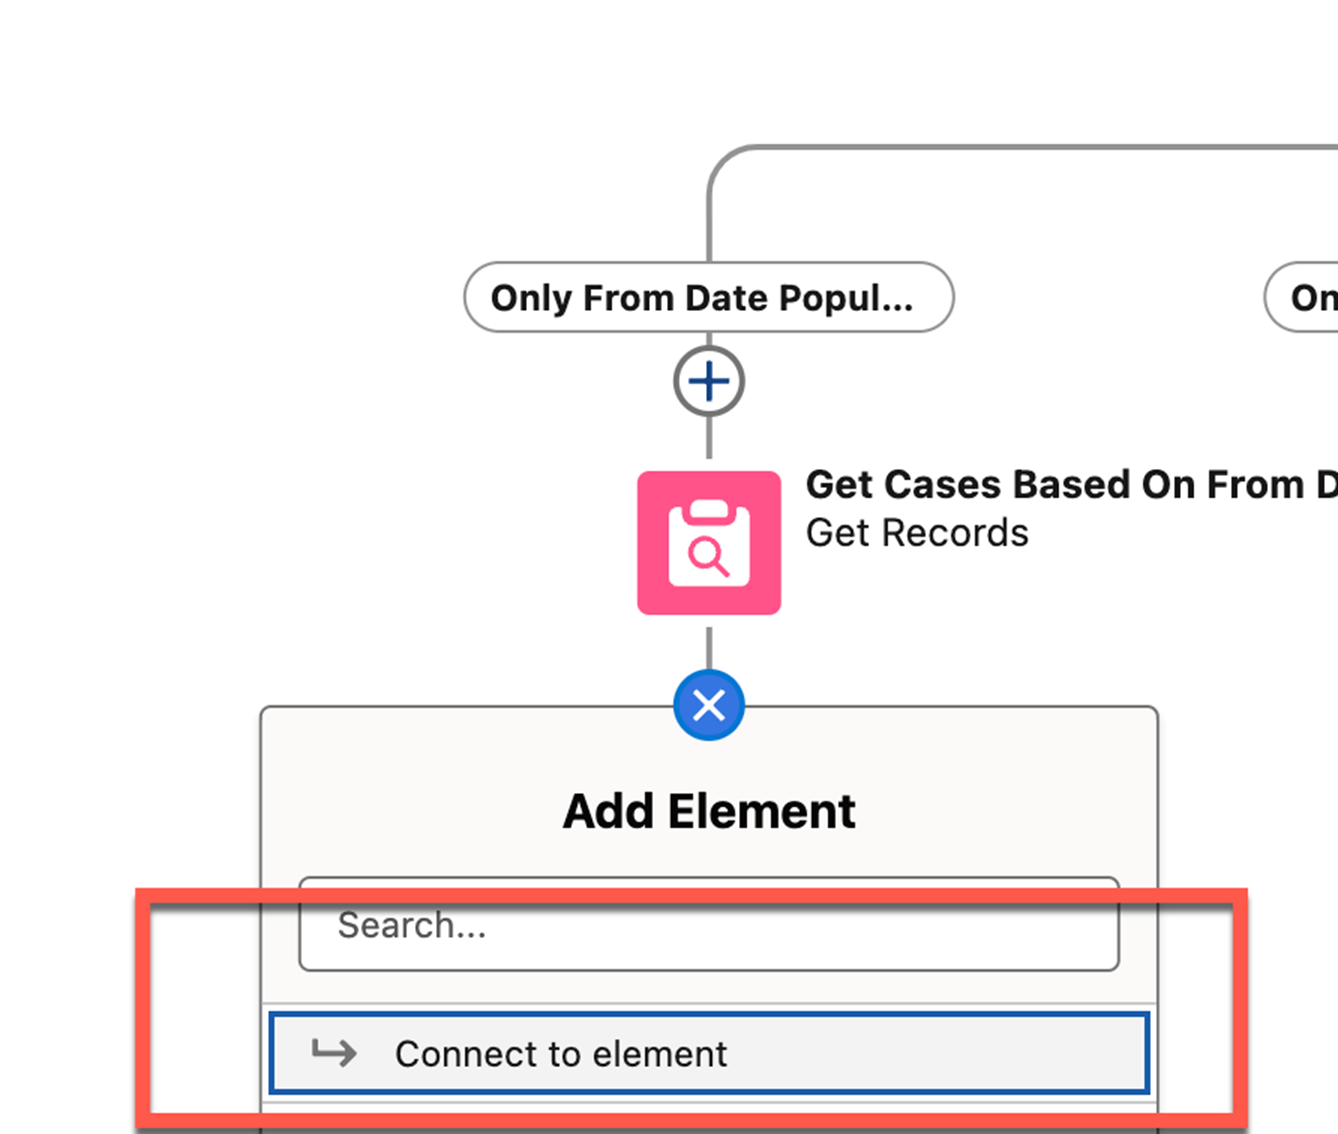
- Click Plus to Connect to Case Search Screen element
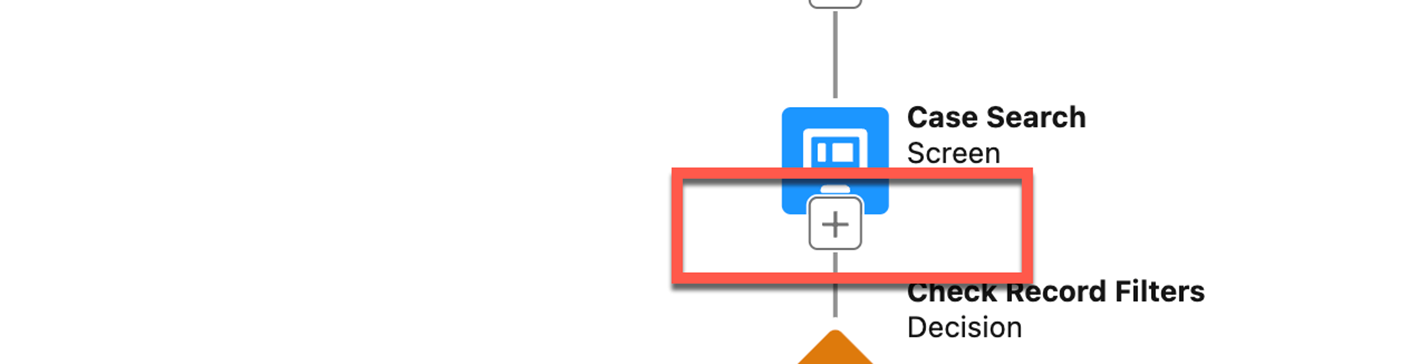
- And Click Plus on Case Search Screen
- Similar to First Get Records Element, Create 5 Other Get Records elements as shown below and connect them back to Search Screen including default outcome (Adjust filters based on outcome)
- Now your Flow is ready, You can Save and Activate it. Click the Run button on Top to test it
______________________________________________________________________________________
Written by: Sushill Kumar | Forum Ambassador
Sushil Kumar is a Salesforce Technical Architect at UKG. At the time of writing, Sushil has worked in the Salesforce ecosystem for 13 Years, holds 14 Salesforce Credentials including Salesforce Application and System Architect. Sushil serves as a Trailblazer Community Forum Ambassador, and regularly participates in the community.
If you have questions, tap into the wisdom of our entire Trailblazer Community here: https://trailhead.salesforce.com/trailblazer-community/feed
Submissions reflect only the opinions of the user who made available the Submission and not the opinions of Salesforce, regardless of whether the user is affiliated with Salesforce, and may contain or constitute products, services, information, data, content and other materials made available by or on behalf of third parties ("Third Party Materials). Salesforce neither controls nor endorses, nor is Salesforce responsible for, any Third Party Materials, including their accuracy, validity, timeliness, completeness, reliability, integrity, quality, legality, usefulness or safety, or any applicable intellectual property rights. Any Submissions made available through any message board or forum in response to posted questions, or that otherwise purports to answer any questions, including any questions about Salesforce or Programs, are made available for your general knowledge only and should never be relied upon as answers to your specific questions (even if an answer is marked as a “best” answer or with any similar qualifications). You should always contact Salesforce support for answers to your specific questions. Salesforce has no control over Submissions, and is not responsible for any use or misuse (including any distribution) by any third party of Submissions.
Numéro d’article de la base de connaissances
003876218
Cet article a-t-il résolu votre problème ?
Dites-nous ce que nous pouvons améliorer !