Välj en organisation
How to Dynamically Populate Contact Details Based on Selected Contact in a Salesforce Screen Flow
Publiceringsdatum: Aug 25, 2025
Beskrivning
An organization is looking to dynamically populate Contact Name, Phone, Title and Email on the same screen as soon as the user selects a Contact from lookup in a Screen Flow.
Lösning
Note: In this use-case, we are using the Reactive Screen Actions functionality released in Spring 25.
The Trigger Screen Actions Automatically (Beta) is in Beta in Spring 25, so you have to agree that the Unified Pilot Research Agreement governs your use of this Beta feature. View Agreement
We have to create two Flows in this use case:
1. A Screen Flow where user selects the Contact and view the Contact details.
2. An Autolaunched Flow to fetch the Contact details selected contact field values for the Contact selected in the screen flow and pass back to main Screen Flow.
First, we will see how to create an Autolaunched Flow as it is needed to be triggered from the Screen Flow and then we will create the Screen Flow.
Follow the steps provided below to create the automation:
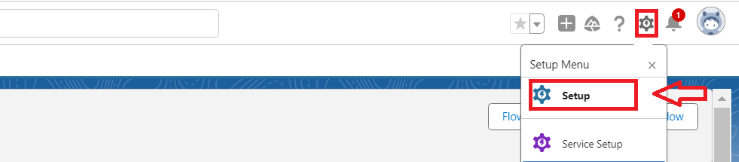
Step 1: Navigate to Setup
Log in to Salesforce. Click the Gear Icon on the top right corner and select Setup.

Step 2: Open Flows
From the Quick Find box, search for Flows and select the New Flow button.

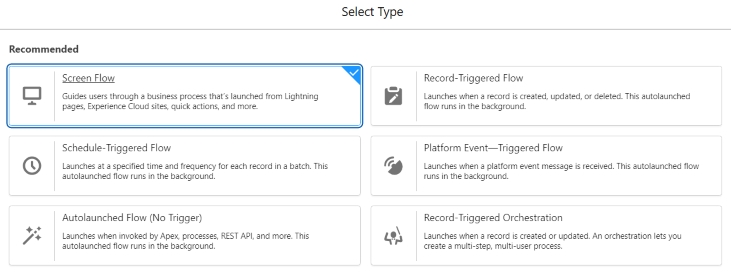
Step 3: Select Autolaunched Flow
Select Autolaunched Flow (No Trigger) and click Create.

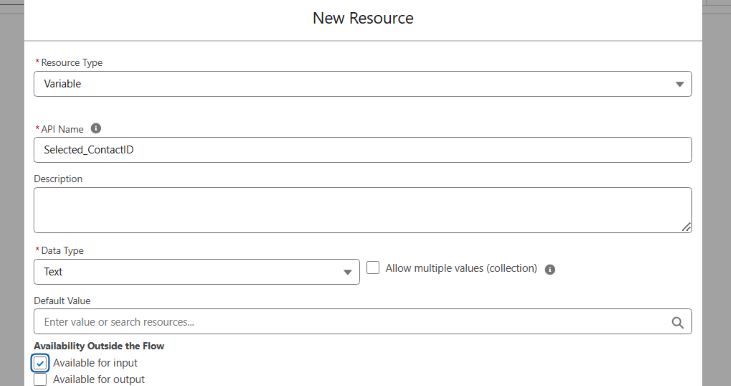
Step 4: Create a Variable to Store the Contact ID
From the flow manager, create a new resource of Variable resource type. This stores the Contact ID passed from the Screen Flow to the Autolaunched Flow. Set Data Type as Text and mark as Available for Input.
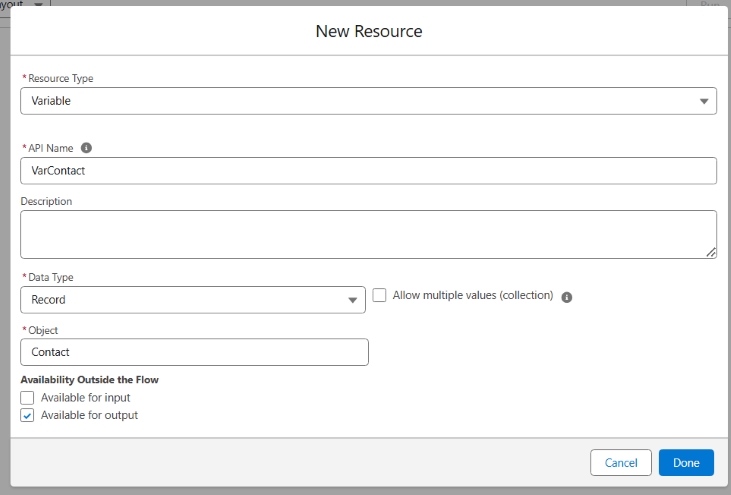
Step 5: Create a Variable to Store the Contact Record
Create another new Variable resource to store the Contact record details to pass back to the Screen Flow. Set Data Type as Record and mark as Available for Output.
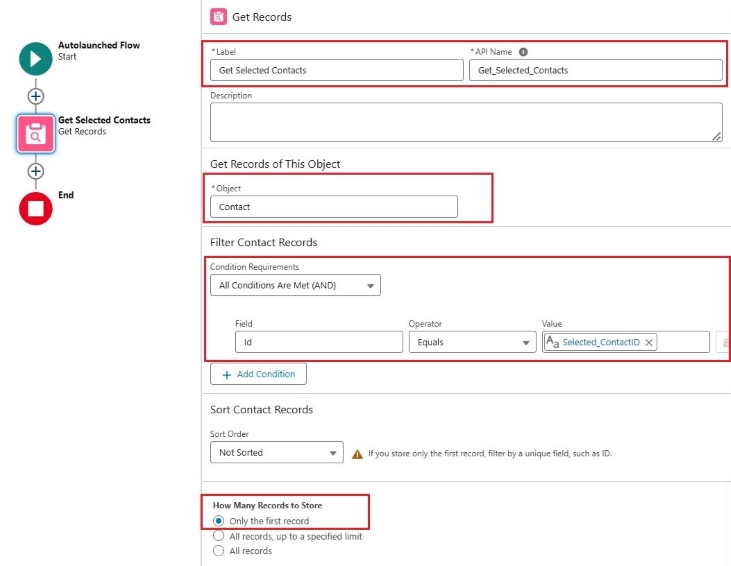
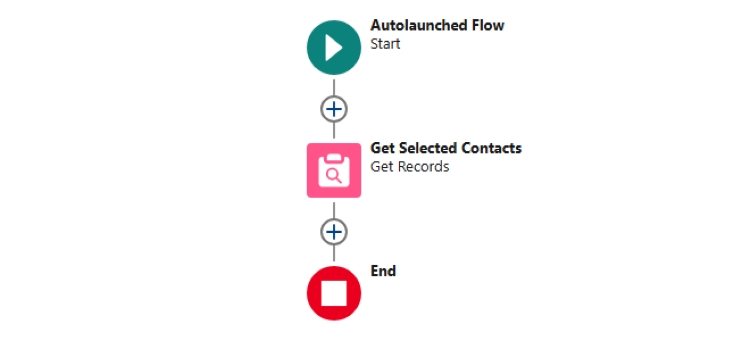
Step 6. Now add a Get Records Element available under the Data section when the + icon is selected.
Notes :
- Provide any suitable name
- It's optional but it's a best practice to provide descriptions
In the Get Records element, substitute the following values:
| Label | Get Selected Contacts |
| Description | Provide any suitable description |
| Object | Contact |
| Condition Requirements | All Conditions Are Met (AND) |
| Logic | {!Selected_ContactID} |
| How Many Records to Store | Only the first record |
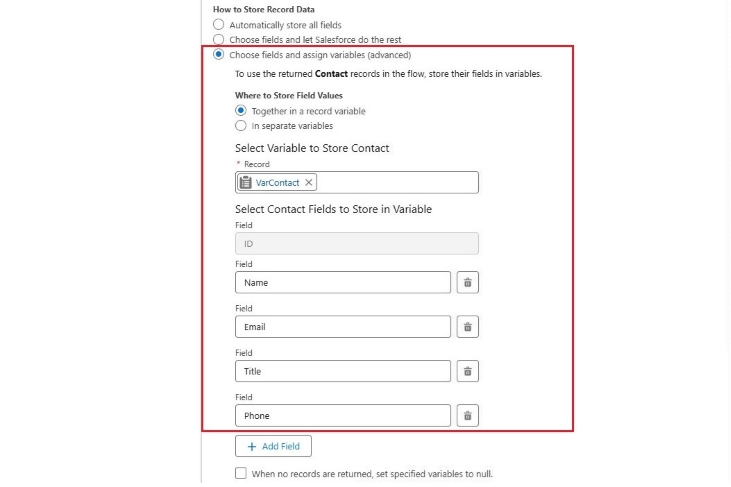
| How to Store Record Data | Choose fields and assign variables (advanced) |
| Where to Store Field Values | Together in a record variable |
| Select Variable to Store Contact | {!VarContact} |
| Select Contact Fields to Store in Variable | ID, Name, Email, Title, Phone |
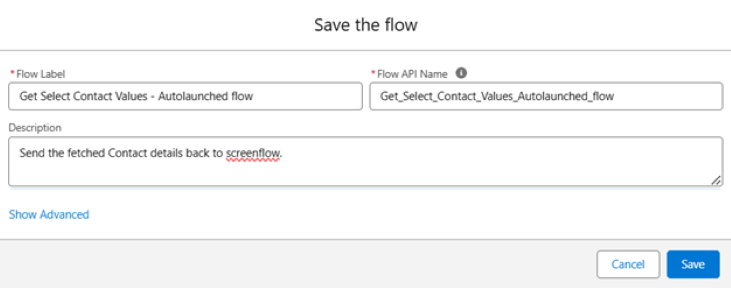
Step 7. Finally, Save the flow by hitting the Save button and provide the appropriate name to the Flow. In this article, we have provided the name as Get Select Contact Values - Autolaunched flow. Now, click on the Activate button available next to the Save button to Activate the Flow

Part 2: Create the Screen Flow
Step 1. Click the Gear Icon on the top right corner of your screen and select Setup
Step 2. From the quick find box, search for Flows and select the New Flow button

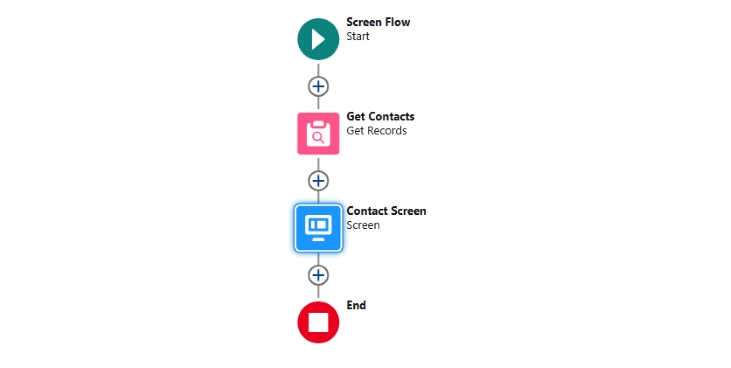
Step 3. Select Screen Flow and hit the Create button
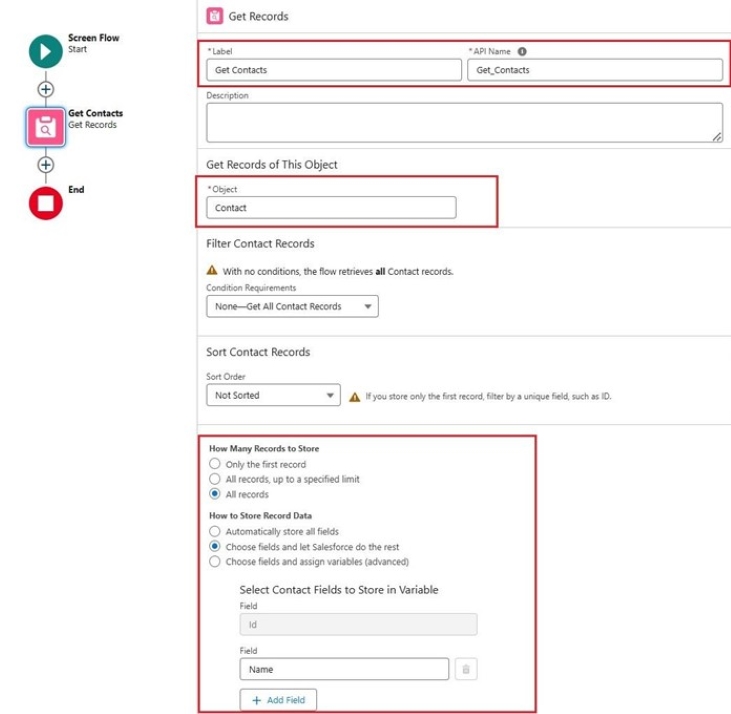
Step 4. Now, add a Get Records element available under the Data section when the + icon is selected.
Note :
- Provide any suitable name
- It's optional but it's a best practice to provide descriptions
In the Get Records Element, substitute the following values:
| Label | Get Contacts |
| Description | Provide any suitable description |
| Object | Contact |
| Condition Requirements | None - Get All Contact Records |
| How Many Records to Store | All records |
| How to Store Record Data | Choose fields and let Salesforce do the rest |
| Select Contact Fields to Store in Variable | ID, Name |
Step 5. Now, add a Screen Element available under Interaction section when the + icon is selected
- First, add a Display Text and a Choice Lookup component from the left pane to the screen so that the contact can be selected from the screen by end user
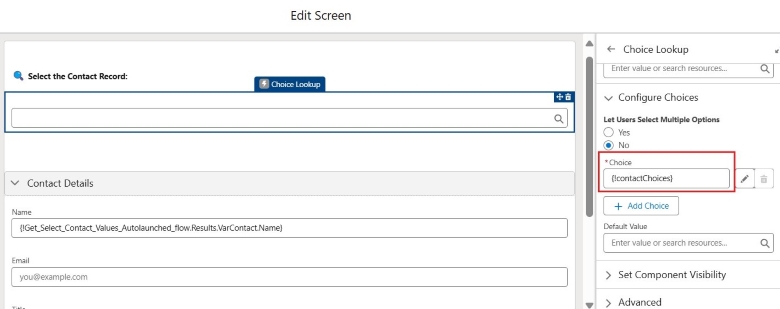
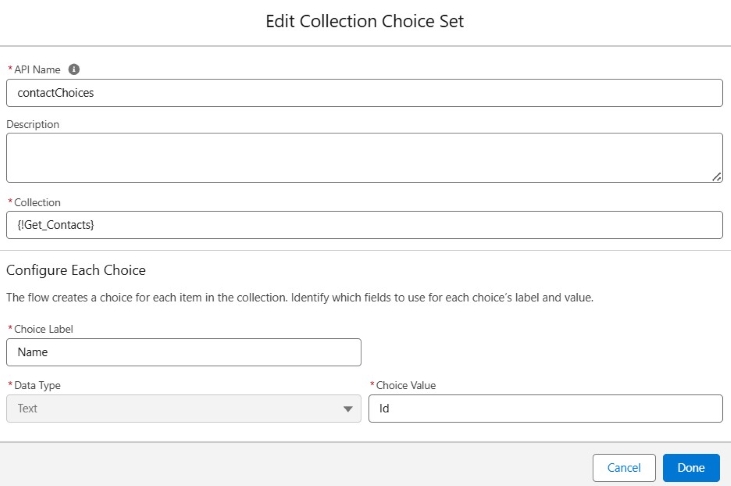
- Create a New Choice Resource for Choice with following configuration
| Resource Type | Collection Choice Set |
| API Name | Give it a Suitable API Name |
| Collection | {!Get_Contacts} |
| Choice Label | Name |
| Data Type | Text |
| Choice Value | Id |
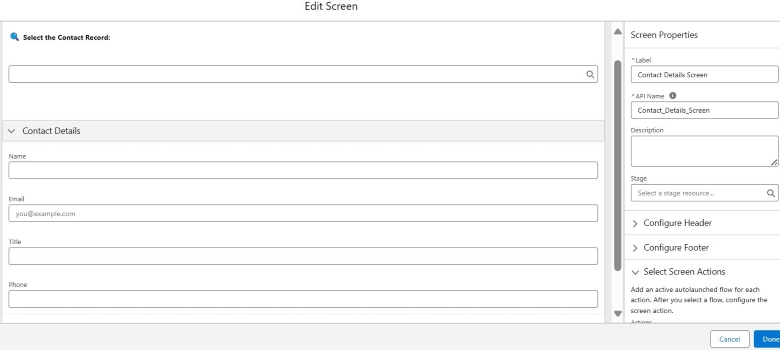
- Further, drag and drop a Section component on the screen and add two Text components one for Name and one for Title along with Email and Phone components within the section
- To learn more about what components are available in screen flow screens, checkout this article:
https://help.salesforce.com/s/articleView?id=platform.flow_ref_elements_screencmp.htm&type=5 - In this use case, we are going to prefill Name, Email, Title and Phone of the Contact selected via lookup component
The API names of screen components used in this use case are as follows:
| For Contact Lookup | ContactLookup |
| For Contact Name | Name |
| For Contact Email | |
| For Contact Title | Title |
| For Contact Phone | Phone |
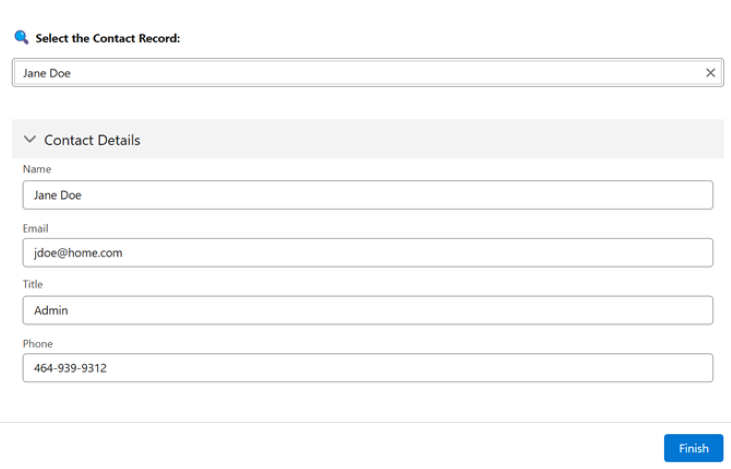
The screen after adding all the required component looks like below
Step 6. In order to prefill the values in Name, Email, Title and Phone fields from the selected contact record from lookup, we are going to use Reactive Screen Actions functionality release in Spring 25 release
- As we had already created the Auto launched flow for fetching the contact details from the selected contact, so now it is the time to add that flow to be called from this screen
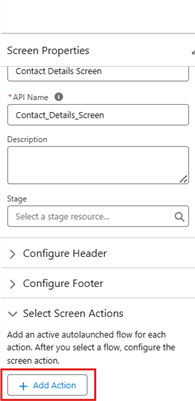
- In order to do that, navigate to the Screen Properties pane available on left side on screen and expand the Select Screen Actions section
- Now, click + Add Action' button and select the Auto Launched Flow from the search bar
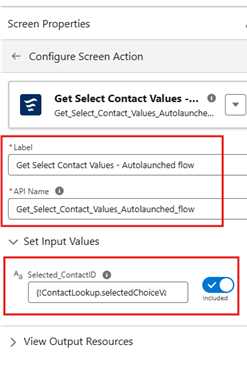
- Label and API Name of the screen action auto fills with the Flow name but you can change the name of the action to something else if needed
- In Select Input Values section, select the values as below :
| Selected_ContactID | {!ContactLookup.selectedChoiceValues} |
Note: Toggle ON the switch in order to provide the Input value to Selected_ContactID
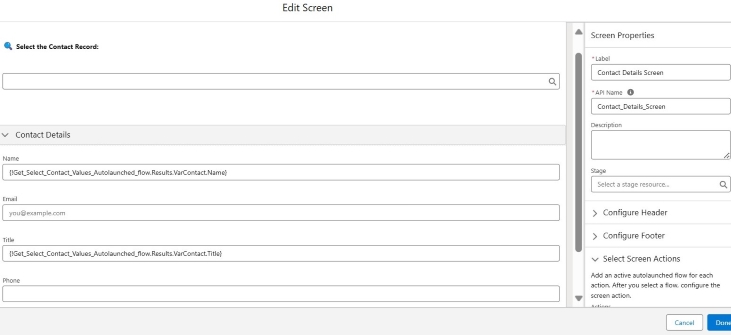
Step 7. Now, as we got the output resource available in the Screen Flow from the added Autolaunched Flow, it will be used now to prefill the Name, Email, Title and Phone components on the screen
So, go to each of the four components on the screen and add default values to the components
The default values of all four screen components used in this use case are as follows:
| For Contact Name | {!Get_Select_Contact_Values_Autolaunched_flow.Results.VarContact.Name} |
| For Contact Email | {!Get_Select_Contact_Values_Autolaunched_flow.Results.VarContact.Email} |
| For Contact Title | {!Get_Select_Contact_Values_Autolaunched_flow.Results.VarContact.Title} |
| For Contact Phone | {!Get_Select_Contact_Values_Autolaunched_flow.Results.VarContact.Phone} |
The screen after adding all the required component looks like below:
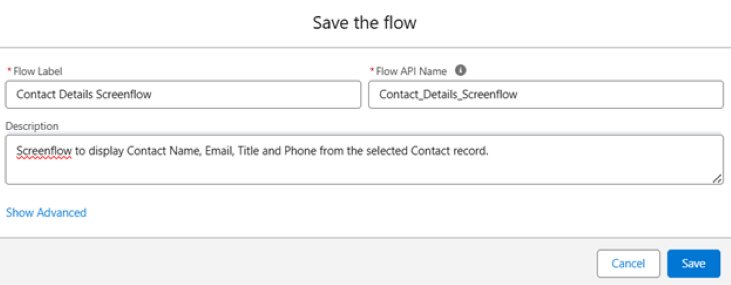
Step 8. Finally, Save the flow by hitting the Save button and provide the appropriate Name to the Flow. In this article, we have provided the name as Contact Details Screen Flow
Now, click on the Activate button available next to the Save button to activate the Flow

Output :
__________________________________________________________________________
Written by: Ajaypreet Singh Saini | Forum Ambassador
Ajaypreet Singh Saini is working as a Salesforce Implementation Specialist at Grantbook. Prior to Grantbook, Ajaypreet served as a Salesforce Administrator for 2 years working on Sales Cloud where he was responsible for configuring and administrating complex processes and maintaining security of Salesforce Instance.
Submissions reflect only the opinions of the user who made available the Submission and not the opinions of Salesforce, regardless of whether the user is affiliated with Salesforce, and may contain or constitute products, services, information, data, content and other materials made available by or on behalf of third parties ("Third Party Materials). Salesforce neither controls nor endorses, nor is Salesforce responsible for, any Third Party Materials, including their accuracy, validity, timeliness, completeness, reliability, integrity, quality, legality, usefulness or safety, or any applicable intellectual property rights. Any Submissions made available through any message board or forum in response to posted questions, or that otherwise purports to answer any questions, including any questions about Salesforce or Programs, are made available for your general knowledge only and should never be relied upon as answers to your specific questions (even if an answer is marked as a “best” answer or with any similar qualifications). You should always contact Salesforce support for answers to your specific questions. Salesforce has no control over Submissions, and is not responsible for any use or misuse (including any distribution) by any third party of Submissions.
If you have questions, tap into the wisdom of our entire Trailblazer Community here: https://trailhead.salesforce.com/trailblazer-community/feed
Knowledge-artikelnummer
004137501
Löste denna artikel ditt problem?
Berätta för oss vad vi kan förbättra!