組織を選択
Reconnecting the Quip/Salesforce Integration after a Sandbox Refresh
公開日: Apr 30, 2025
説明
CREATE AND REPLACE YOUR API KEY
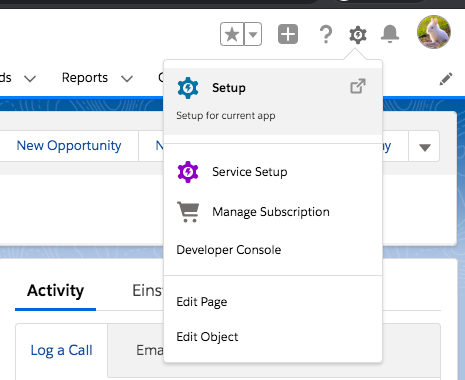
1. In Salesforce click the gear (upper right), then select “Setup.”
2. Search for Auth. Provider in the Quick Find
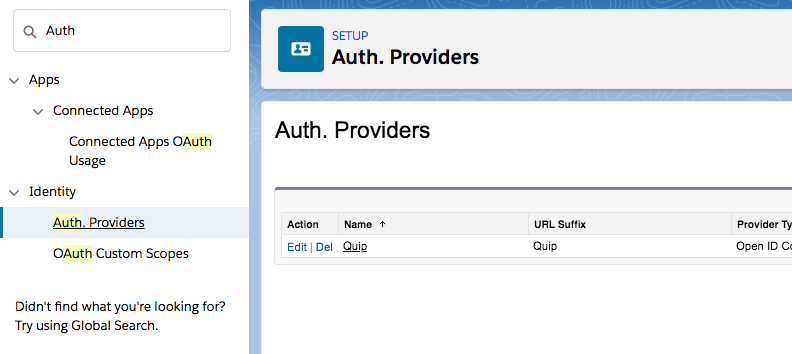
3. Search for Quip
4. Open the Quip Auth Provider and click Edit
5. Log into the Quip Admin Console (admin.quip.com)
6. Choose Settings > Integrations > Click on New API Key
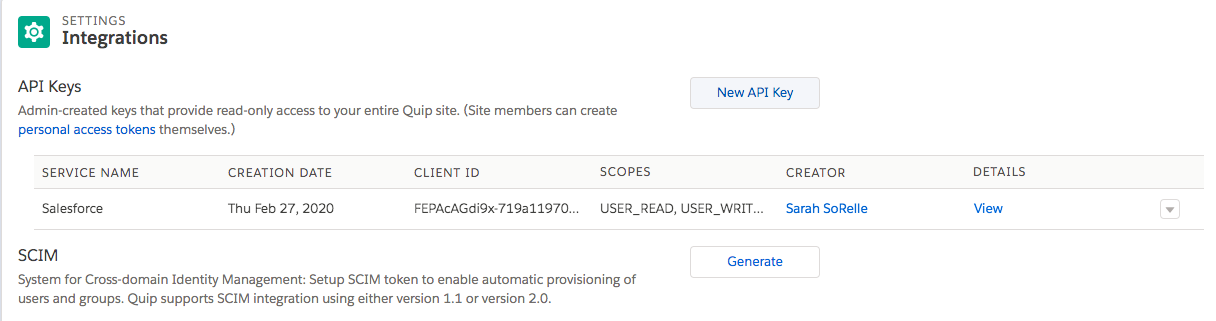
7. Create a new Salesforce API Key > check all boxes with the exception of TEAMS in the Scope (you may not see the TEAMS option in your view) > Generate the new key
8. Go back to your Quip Auth.Provider in Salesforce
9. Replace the Consumer Key and Consumer Secret with the new Client ID and Client Secret from your Quip Admin Console > Save
10. Follow the steps in this Document to reconnect the External Data Source for each user:
https://help.salesforce.com/s/articleView?id=000390263&type=1
その他のリソース
Quip Education Portal - https://quip.com/training
Quip Admin Learning Path - https://quip.com/training/work-anywhere-quip-admin-learning-path
Quip Implementation Hub - https://quip.com/training/salesforce-anywhere-and-quip-deployment-hub
Quip Documentation in help.salesforce.com - https://help.salesforce.com/s/articleView?id=xcloud.quip.htm&type=5
ナレッジ記事番号
004695446
この記事で問題は解決されましたか?
ご意見をお待ちしております。
