Velg en organisasjon
Automatically Clear "Selected" State of a Field After URL Action
Publiseringsdato: Aug 14, 2025
Forkunnskaper
Oppgave
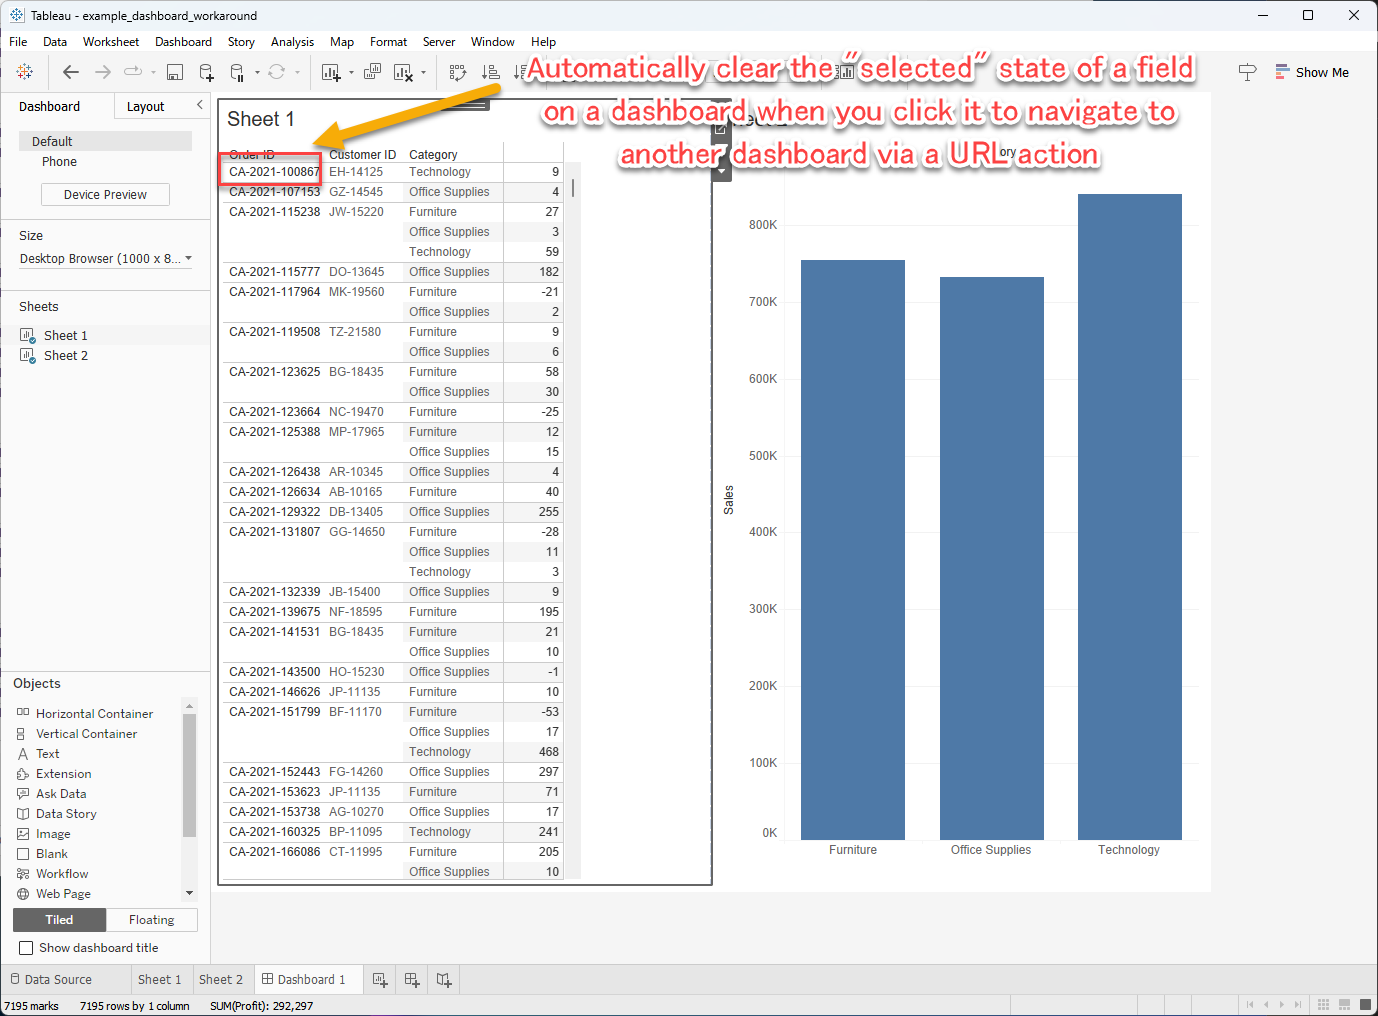
Automatically clear the 'selected' state of a field after a URL action.
When clicking a field on a dashboard to navigate to another dashboard via a URL action, that field remains in a "selected" state as below. This requires clicking the same field twice to navigate again.

This guide explains how to automatically clear the "selected" state of a field on a dashboard when you click it to navigate to another dashboard via a URL action.
Trinn
To clarify the benefit of this solution, here is a simple explanation of the behavior before and after implementing the workaround, as requested.
- Original Behavior (Before Workaround): When you click a field (e.g., an Order ID) on the dashboard to trigger a URL action, that field remains highlighted or "selected". To use the URL action on that same field again, you must first click to clear the selection, and then click a second time to activate the URL action. This behavior is demonstrated in the dashboard "Dashboard_Original" of the attached workbook.
- Improved Behavior (After Workaround): After applying the steps below, when you click the field to trigger the URL action, the selection is cleared automatically. This allows you to immediately click the same field again to trigger the URL action with a single click. This improved experience is demonstrated in the dashboard "Dashboard_Solution" of the attached workbook.
Note:
In this example, use "Dashboard 1" and the "Order ID" field in "Sheet 1" within that dashboard, and design a Filter Action to automatically clear the selection state of this field. Follow these steps to clear the selection state, which prevents the need for a second tap.
In this example, use "Dashboard 1" and the "Order ID" field in "Sheet 1" within that dashboard, and design a Filter Action to automatically clear the selection state of this field. Follow these steps to clear the selection state, which prevents the need for a second tap.
If existing filter actions in the dashboard overlap with the source and target sheets specified above, those actions may not function correctly. Be cautious of this potential conflict.
Steps:
1. Open the target workbook in Tableau Desktop.
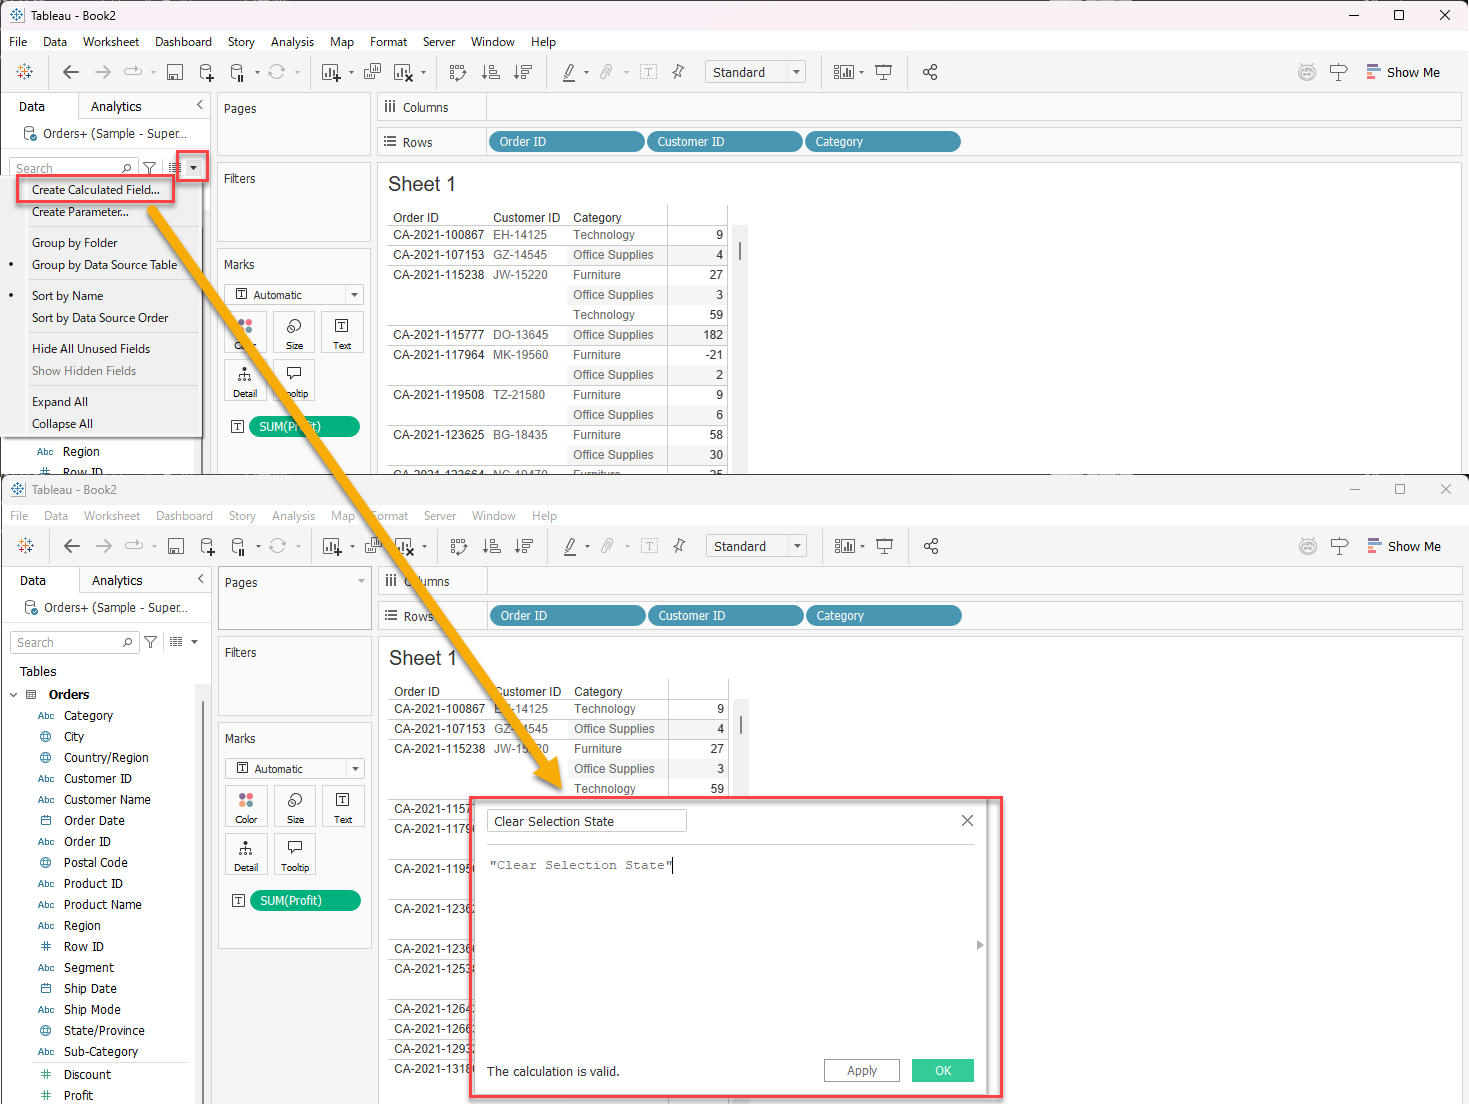
2. Create a dummy calculated field (Ensure the dummy calculated field is not added to "Sheet 1").
- Field Name: Clear Selection State
- Value: "Clear Selection State"
3. Select "Dashboard 1", then click "Dashboard" from the top menu and select "Actions".
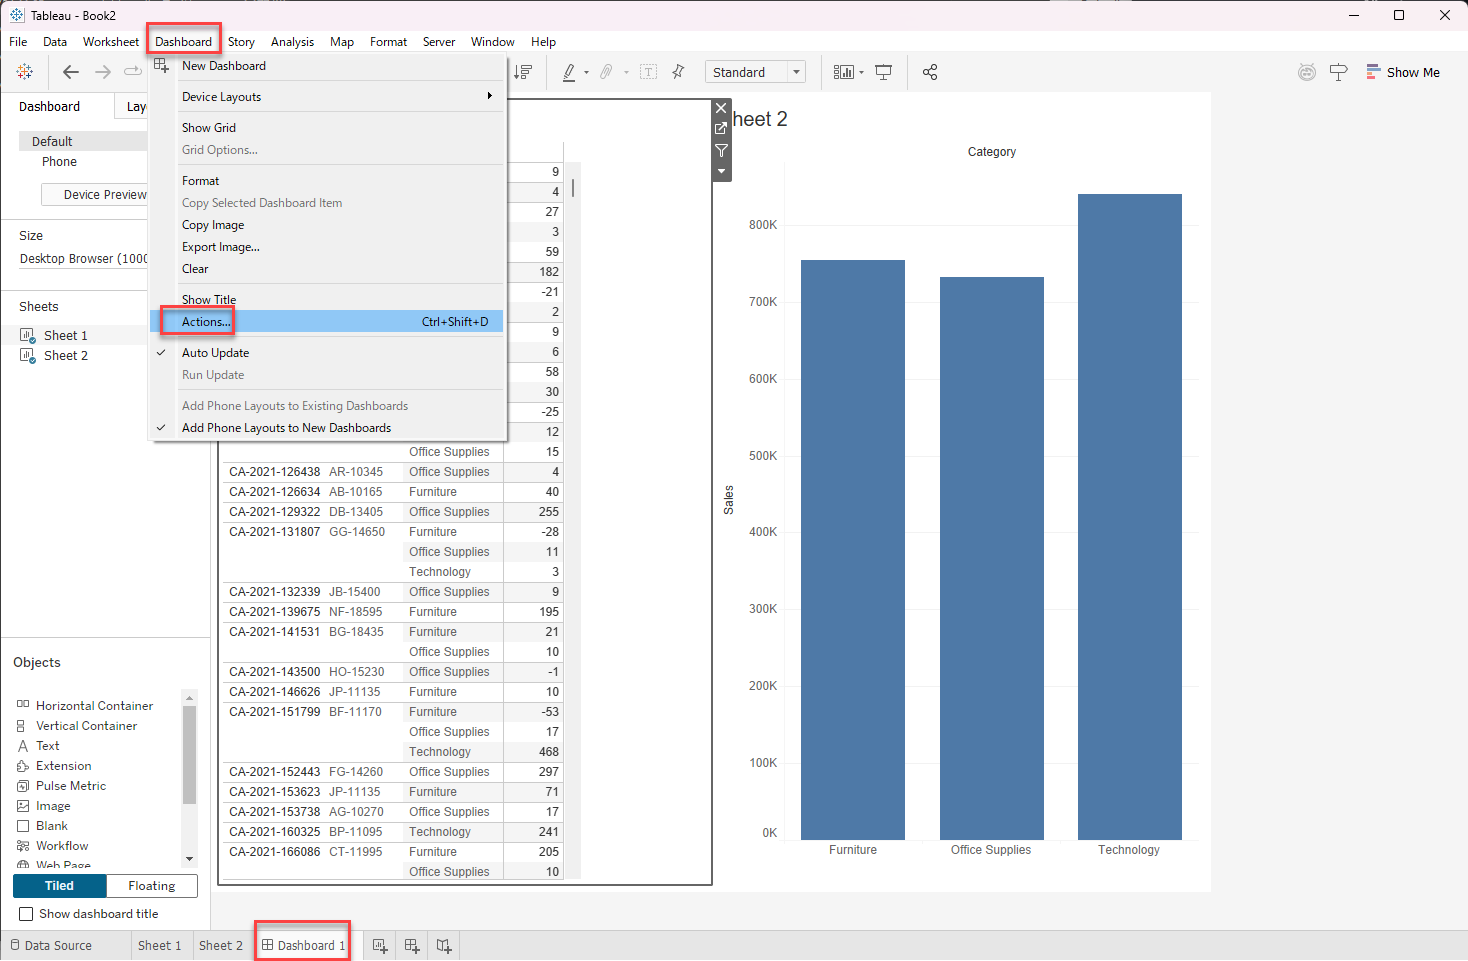
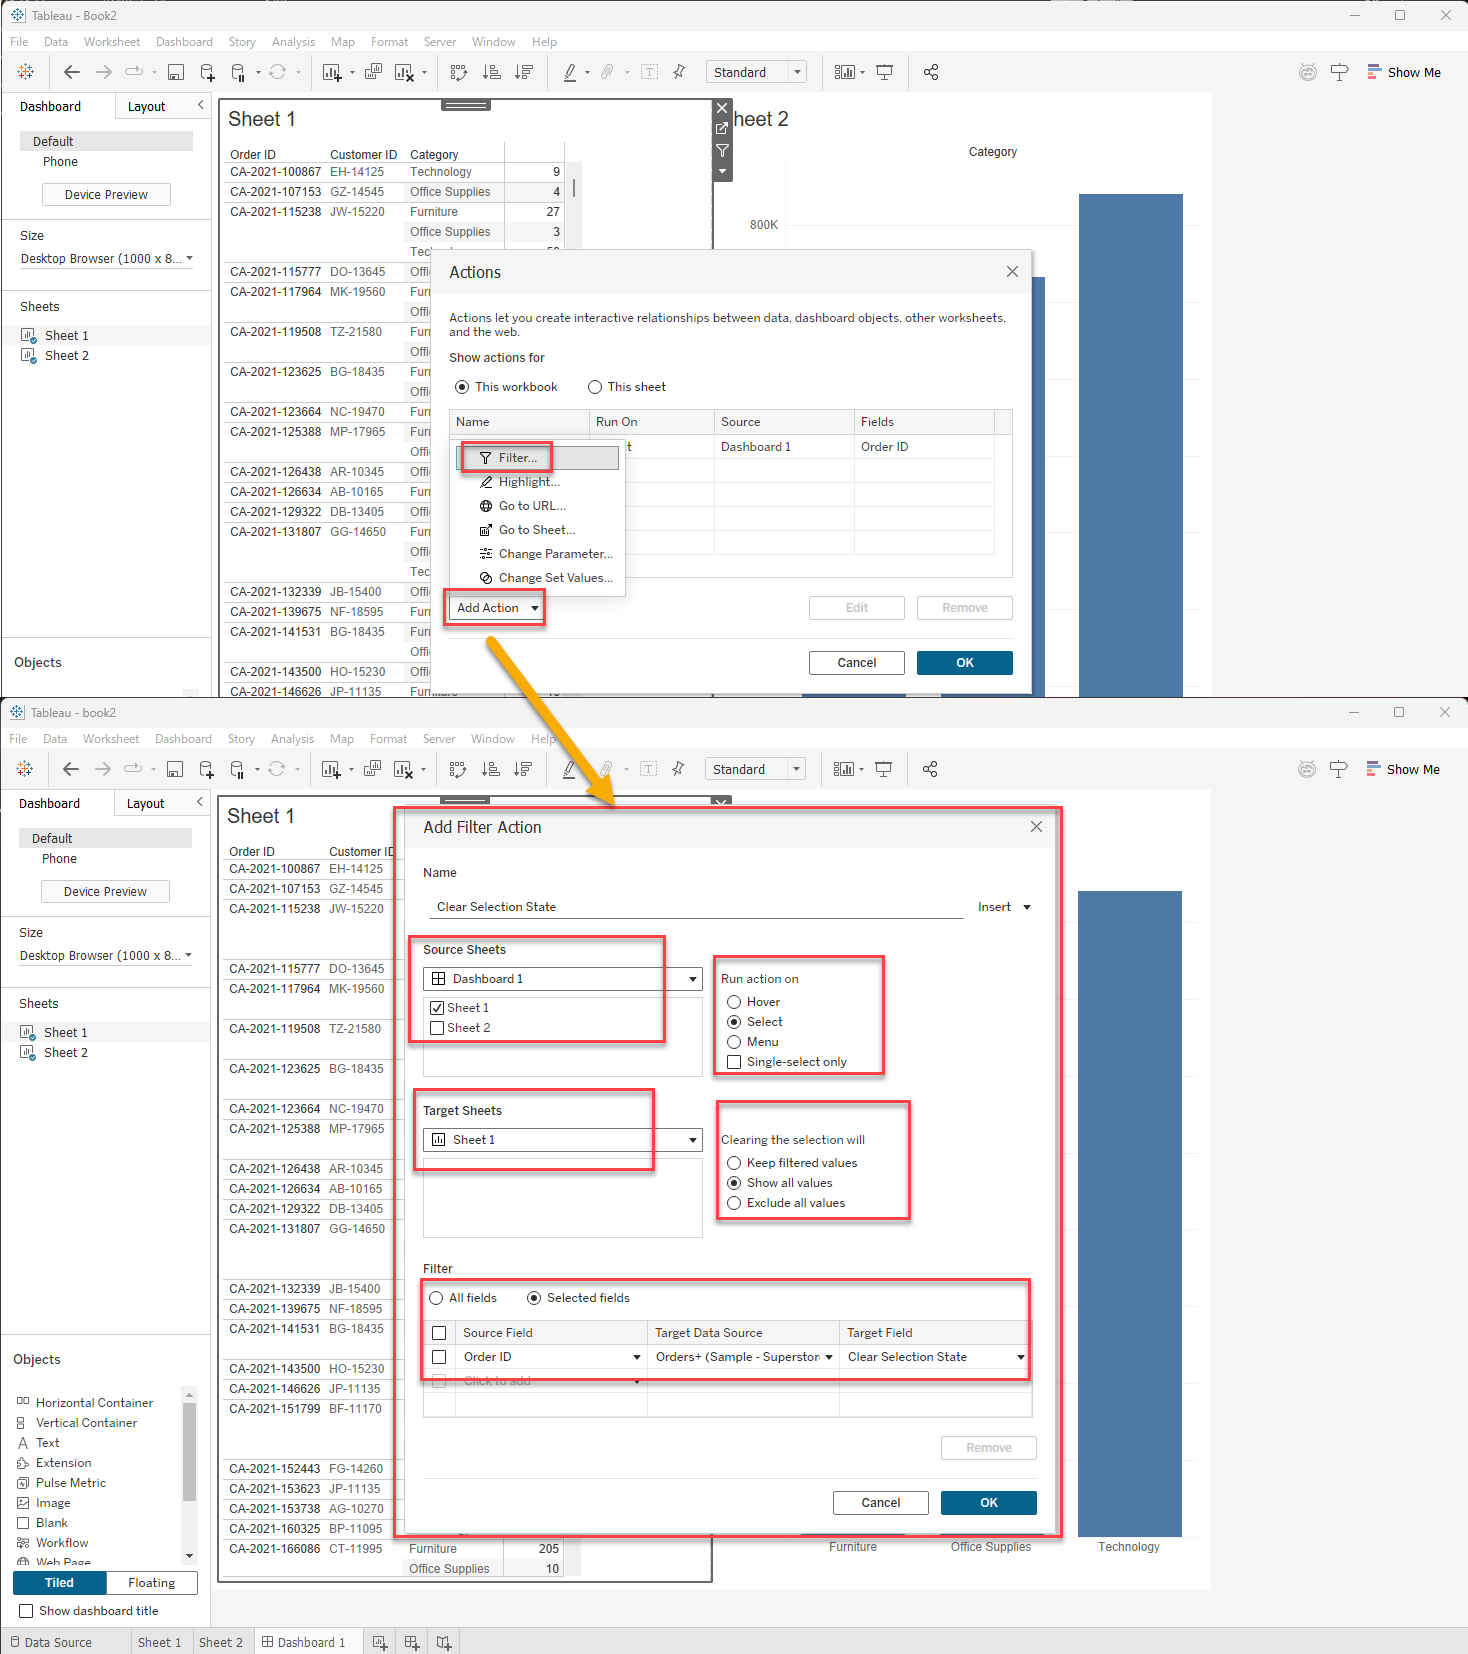
4. In the "Actions" settings window, click "Add Action" and select "Filter". Create the filter action as follows:
- Name: Clear Selection State
- Source Sheets: Select "Dashboard 1" and check only "Sheet 1".
- Run Action On: Select
- Target Sheets: Select "Sheet 1" (Note: Not "Sheet 1" on "Dashboard 1").
- Clearing the Selection Will: Show all values
- Filter: Selected Fields
- Source Field: Order ID (from "Sheet 1")
- Target Data Source: Leave as default (no changes needed)
- Target Field: Clear Selection State (the dummy calculated field created in step 2)
Flere ressurser
Knowledge-artikkelnummer
004754347
Hjalp denne artikkelen med å løse problemet ditt?
La oss få vite det slik at vi kan forbedre!