Sélectionner une organisation
How To Customize Actionable Relationship Center (ARC) Nodes Using Flexcard
Date de publication: May 30, 2025
Description
In Salesforce FlexCards and the Actionable Relationship Center (ARC) are powerful tools to surface contextual and relational data between objects in a clean, user-friendly interface. FlexCards let users view key data points at a glance, while ARC enables visualization of relationships like Account-to-Contact with interactive graph-based navigation.
This guide walks you through the process of:
-
Creating a FlexCard using a SOQL data source to display related Contact data.
-
Building an ARC Relationship Graph to visualize the relationship between Account and Contact.
-
Embedding the ARC graph with the FlexCard into a Lightning Record Page for interactive exploration.
Let’s begin by creating the FlexCard.
Part 1: Create the FlexCard
1. Launch OmniStudio FlexCards
-
Go to App Launcher.
-
Search for OmniStudio FlexCards.
-
Click New.
2. Create FlexCard
-
Name it something like:
SFTestFlexi. -
Click Save.
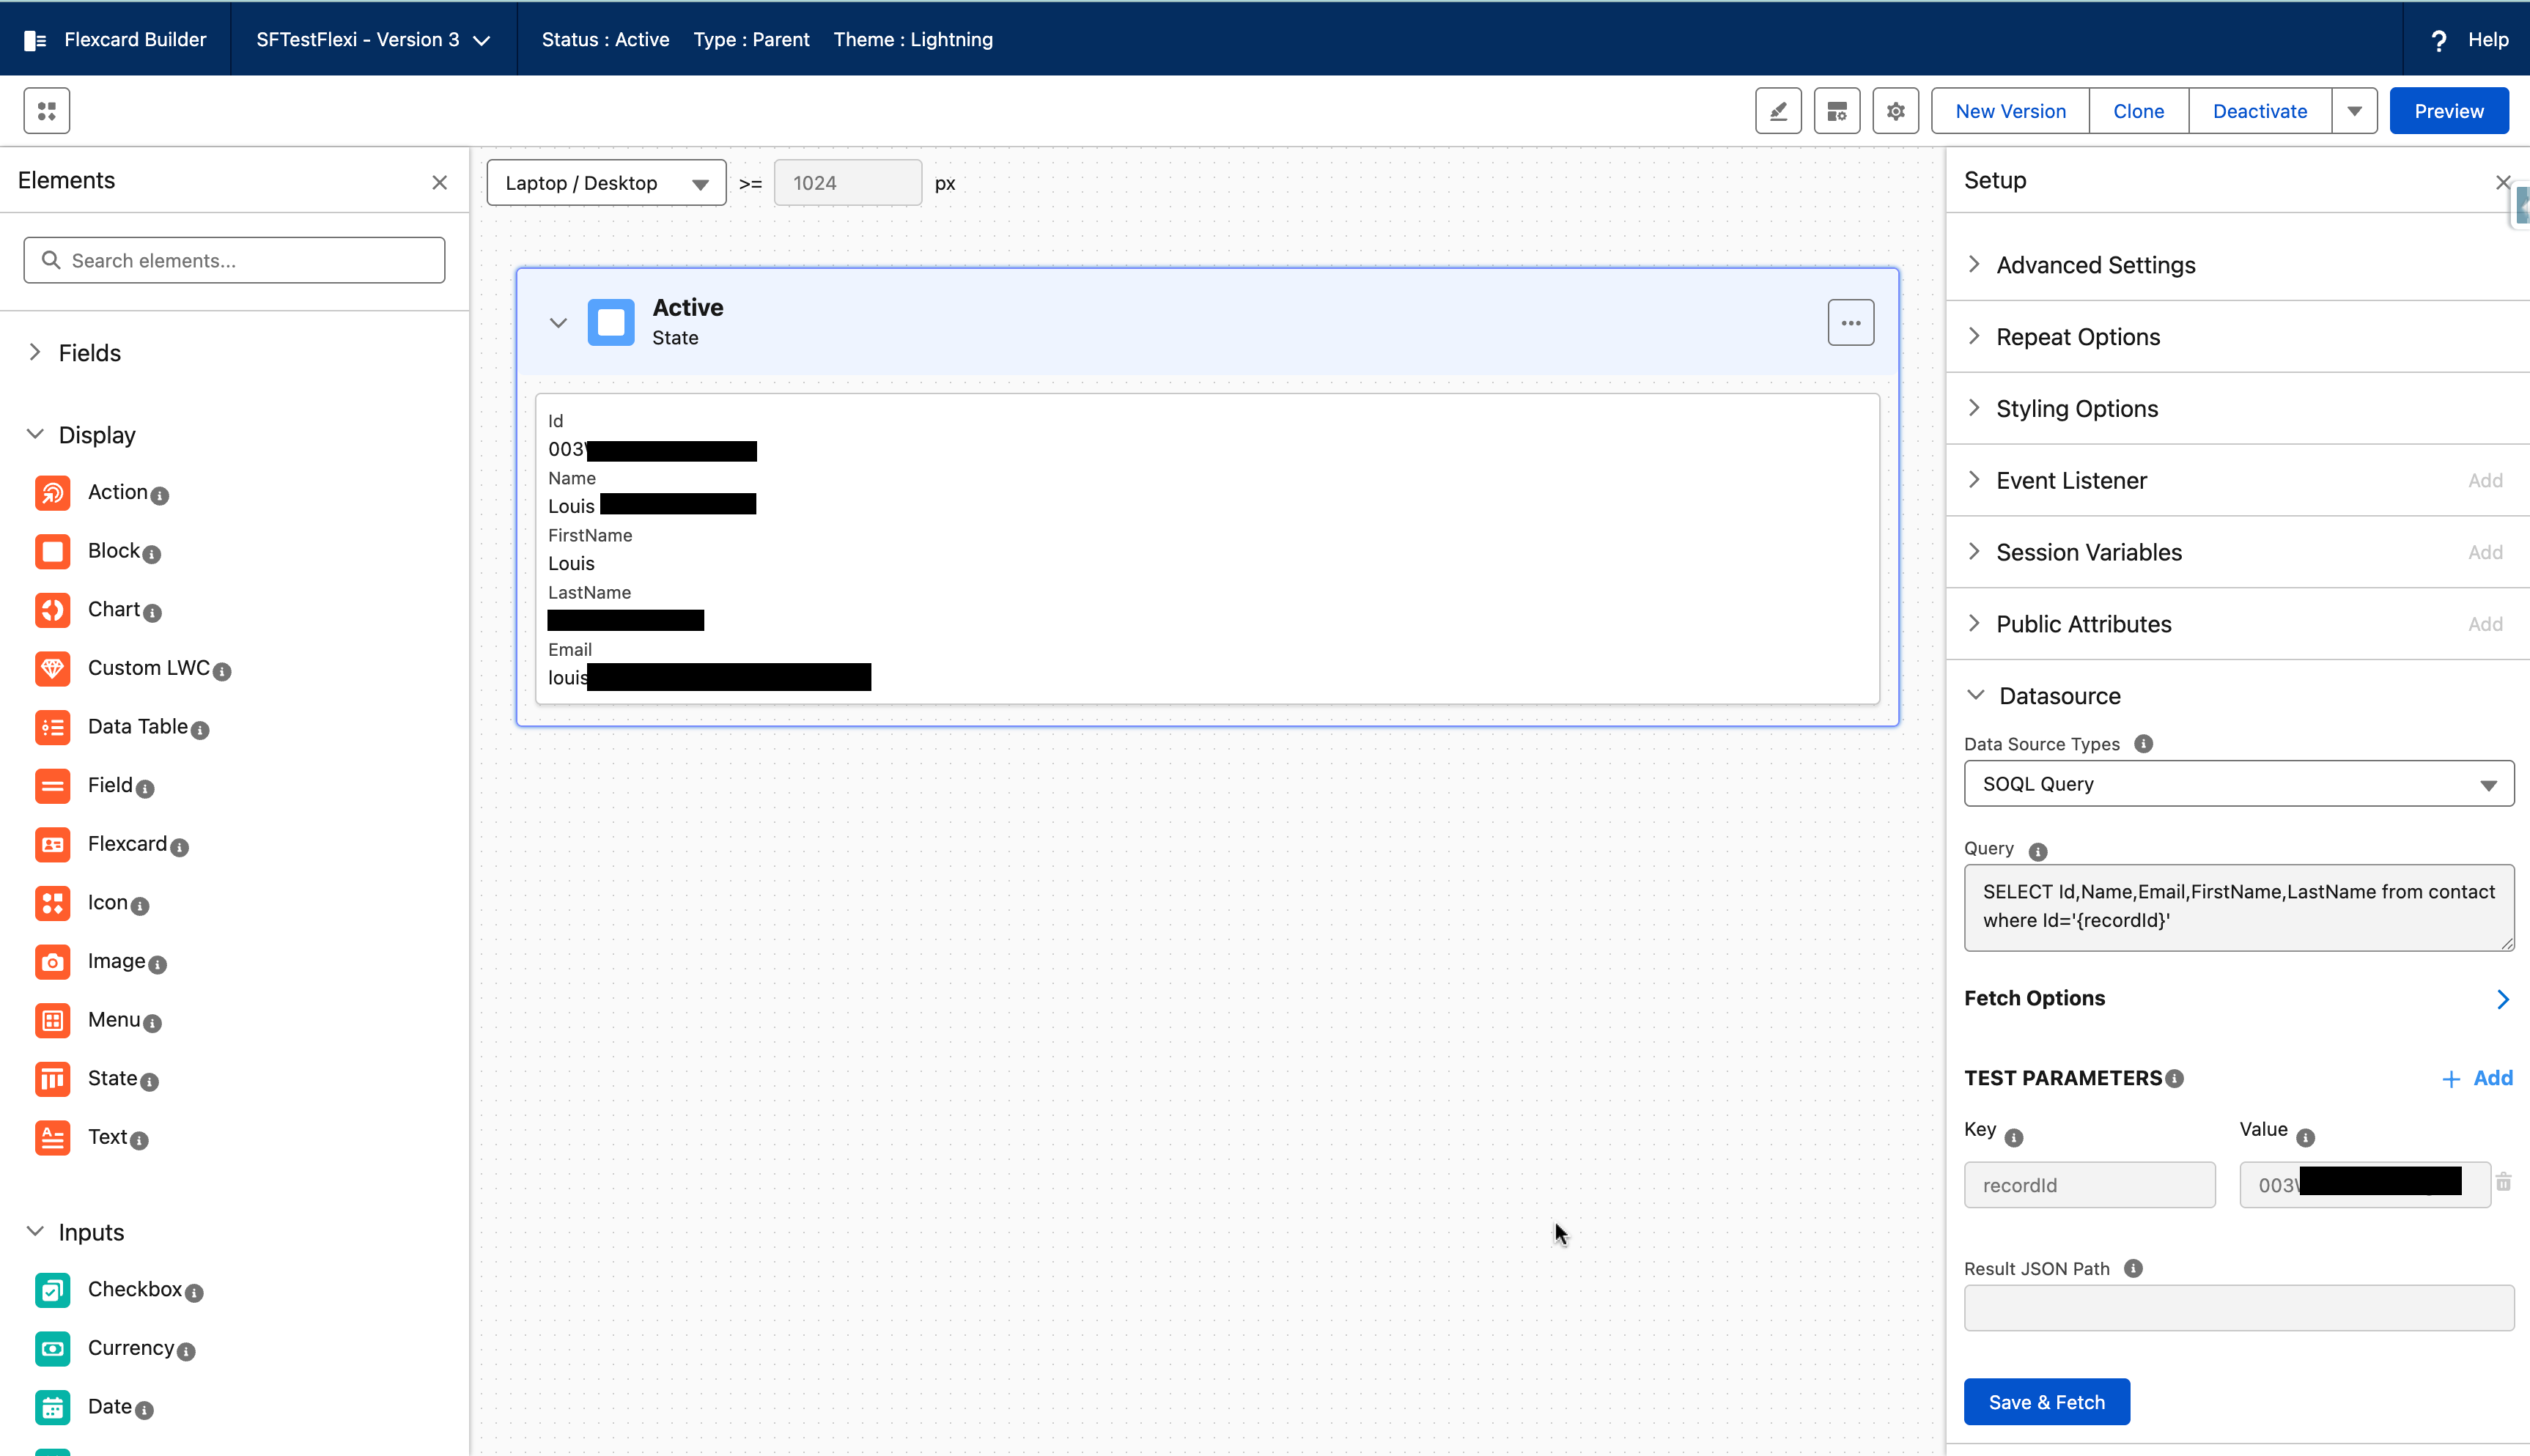
3. Configure Data Source (SOQL)
Use SOQL to fetch data from the Contact object using a Contact ID as the recordId:
SOQL query: SELECT Id,Name,Email,FirstName,LastName from contact where Id='{recordId}'
4. Design the FlexCard
-
In the FlexCard designer, go to the Fields section.
- The fields retrieved by the SOQL query from the Contact object will appear in the Fields panel of the FlexCard designer and can be dragged onto the canvas for display.(Drag and drop the queried fields e.g., Id,Name,Email,FirstName,LastName)
5. Preview and Activate
-
Click Preview to test with sample data.
- You will see the fields from the Contact object shown on the canvas, based on your mapping.
- Now Activate the FlexCard.
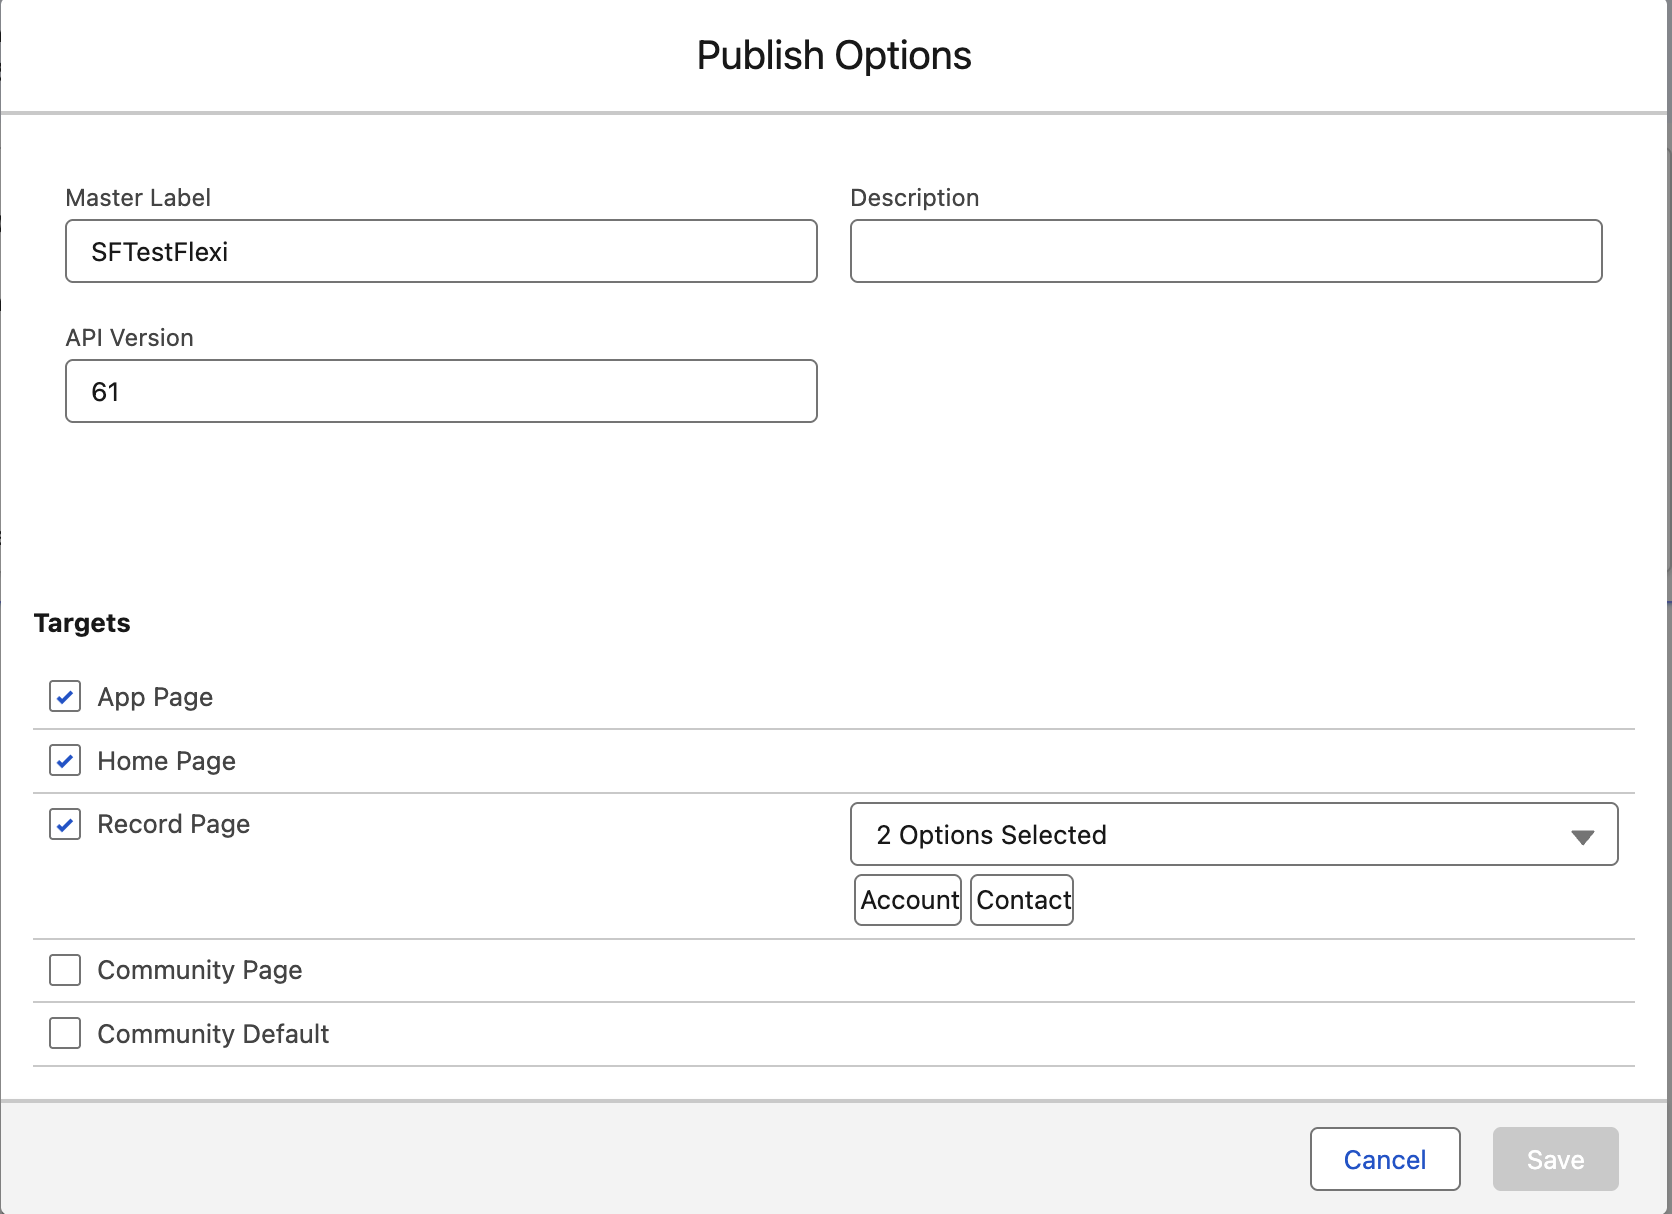
6. Publish the FlexCard
-
Publish the FlexCard to the relevant Lightning Record Pages.
-
In this case, consider adding it to both Account and Contact record pages.
Part 2: Configure Actionable Relationship Center (ARC)
1. Enable ARC and Create a Relationship Graph
-
Go to Setup > Feature Settings > Actionable Relationship Center.
-
Click New Relationship Graph.
-
Under Default Templates, choose New (Start from Scratch) → Click Create Graph.
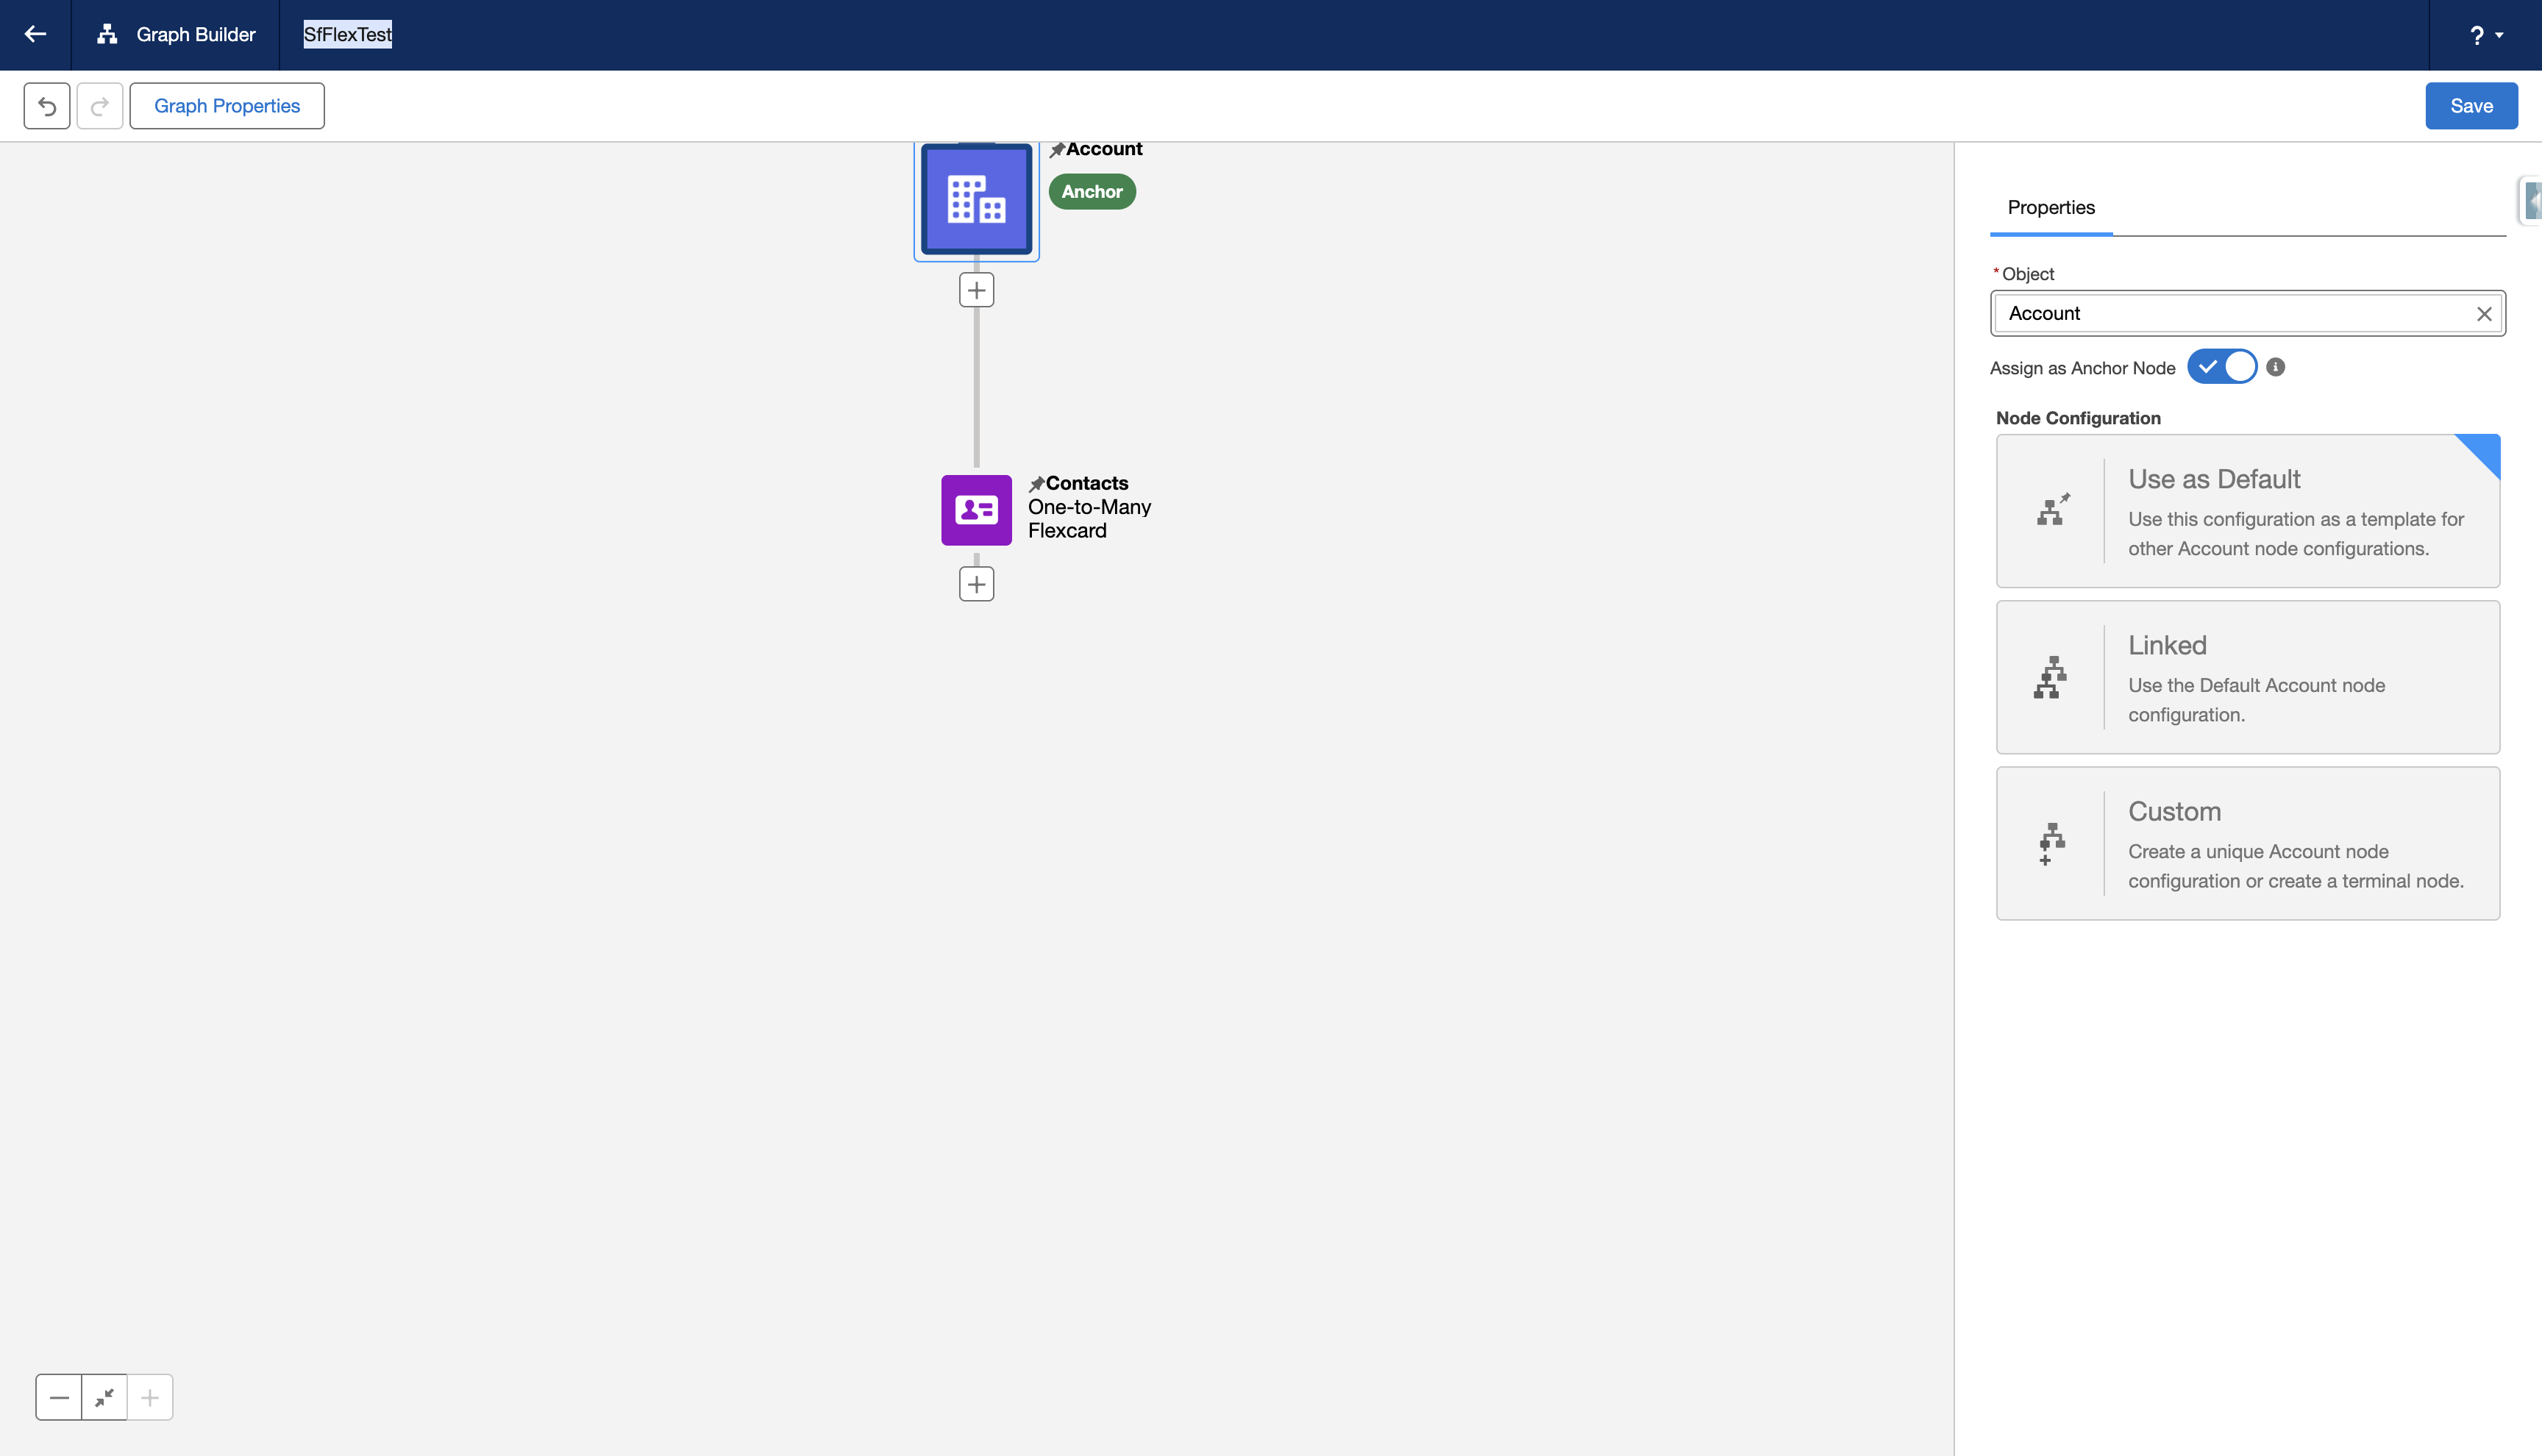
2. Graph Properties
-
Label:
SfFlexTest -
Developer Name: Auto-filled or use a unique name.
-
Click Save.
3. Configure Root Node
-
Click the root node on the graph.
-
Set:
-
Object:
Account -
Node Configuration: Use as Default
-
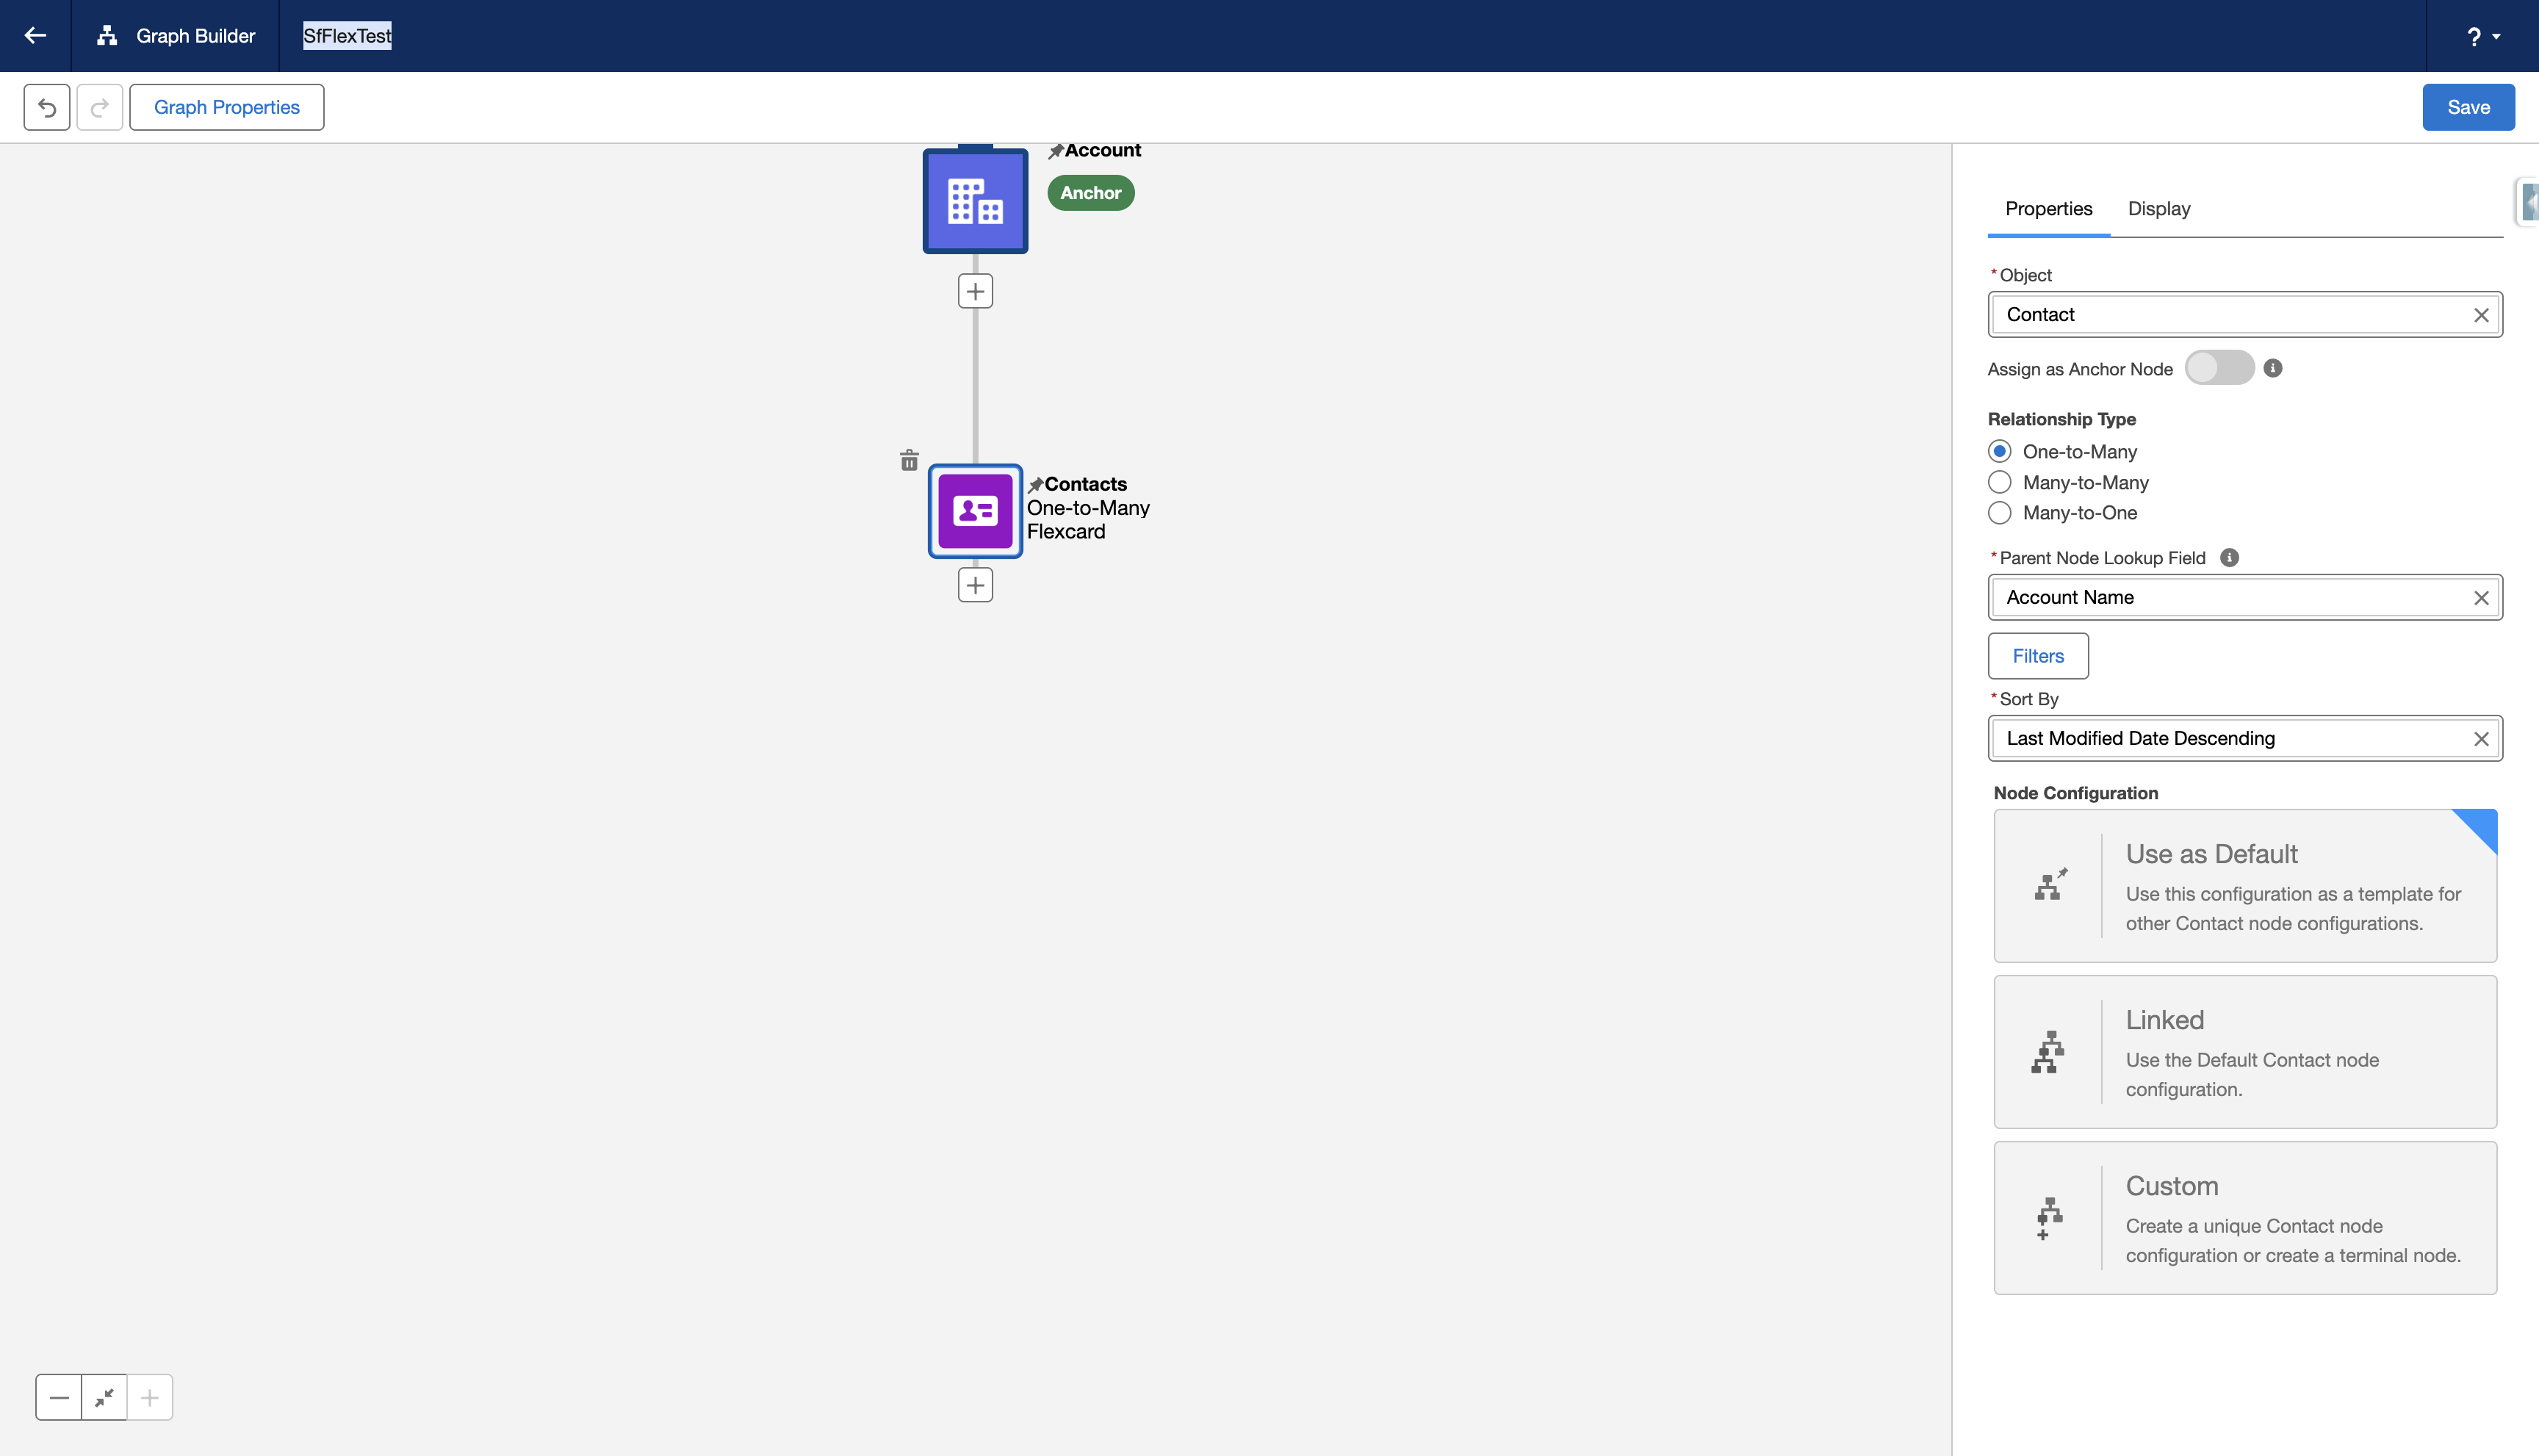
4. Add Child Node (Contact)
-
Click the plus (+) icon below the Account node.
-
On Properties Tab:
-
Object:
Contact -
Relationship Type: One-to-Many
-
Parent Node Lookup Field:
AccountId -
Sort By:
LastModifiedDate DESC
-
-
Click Save.
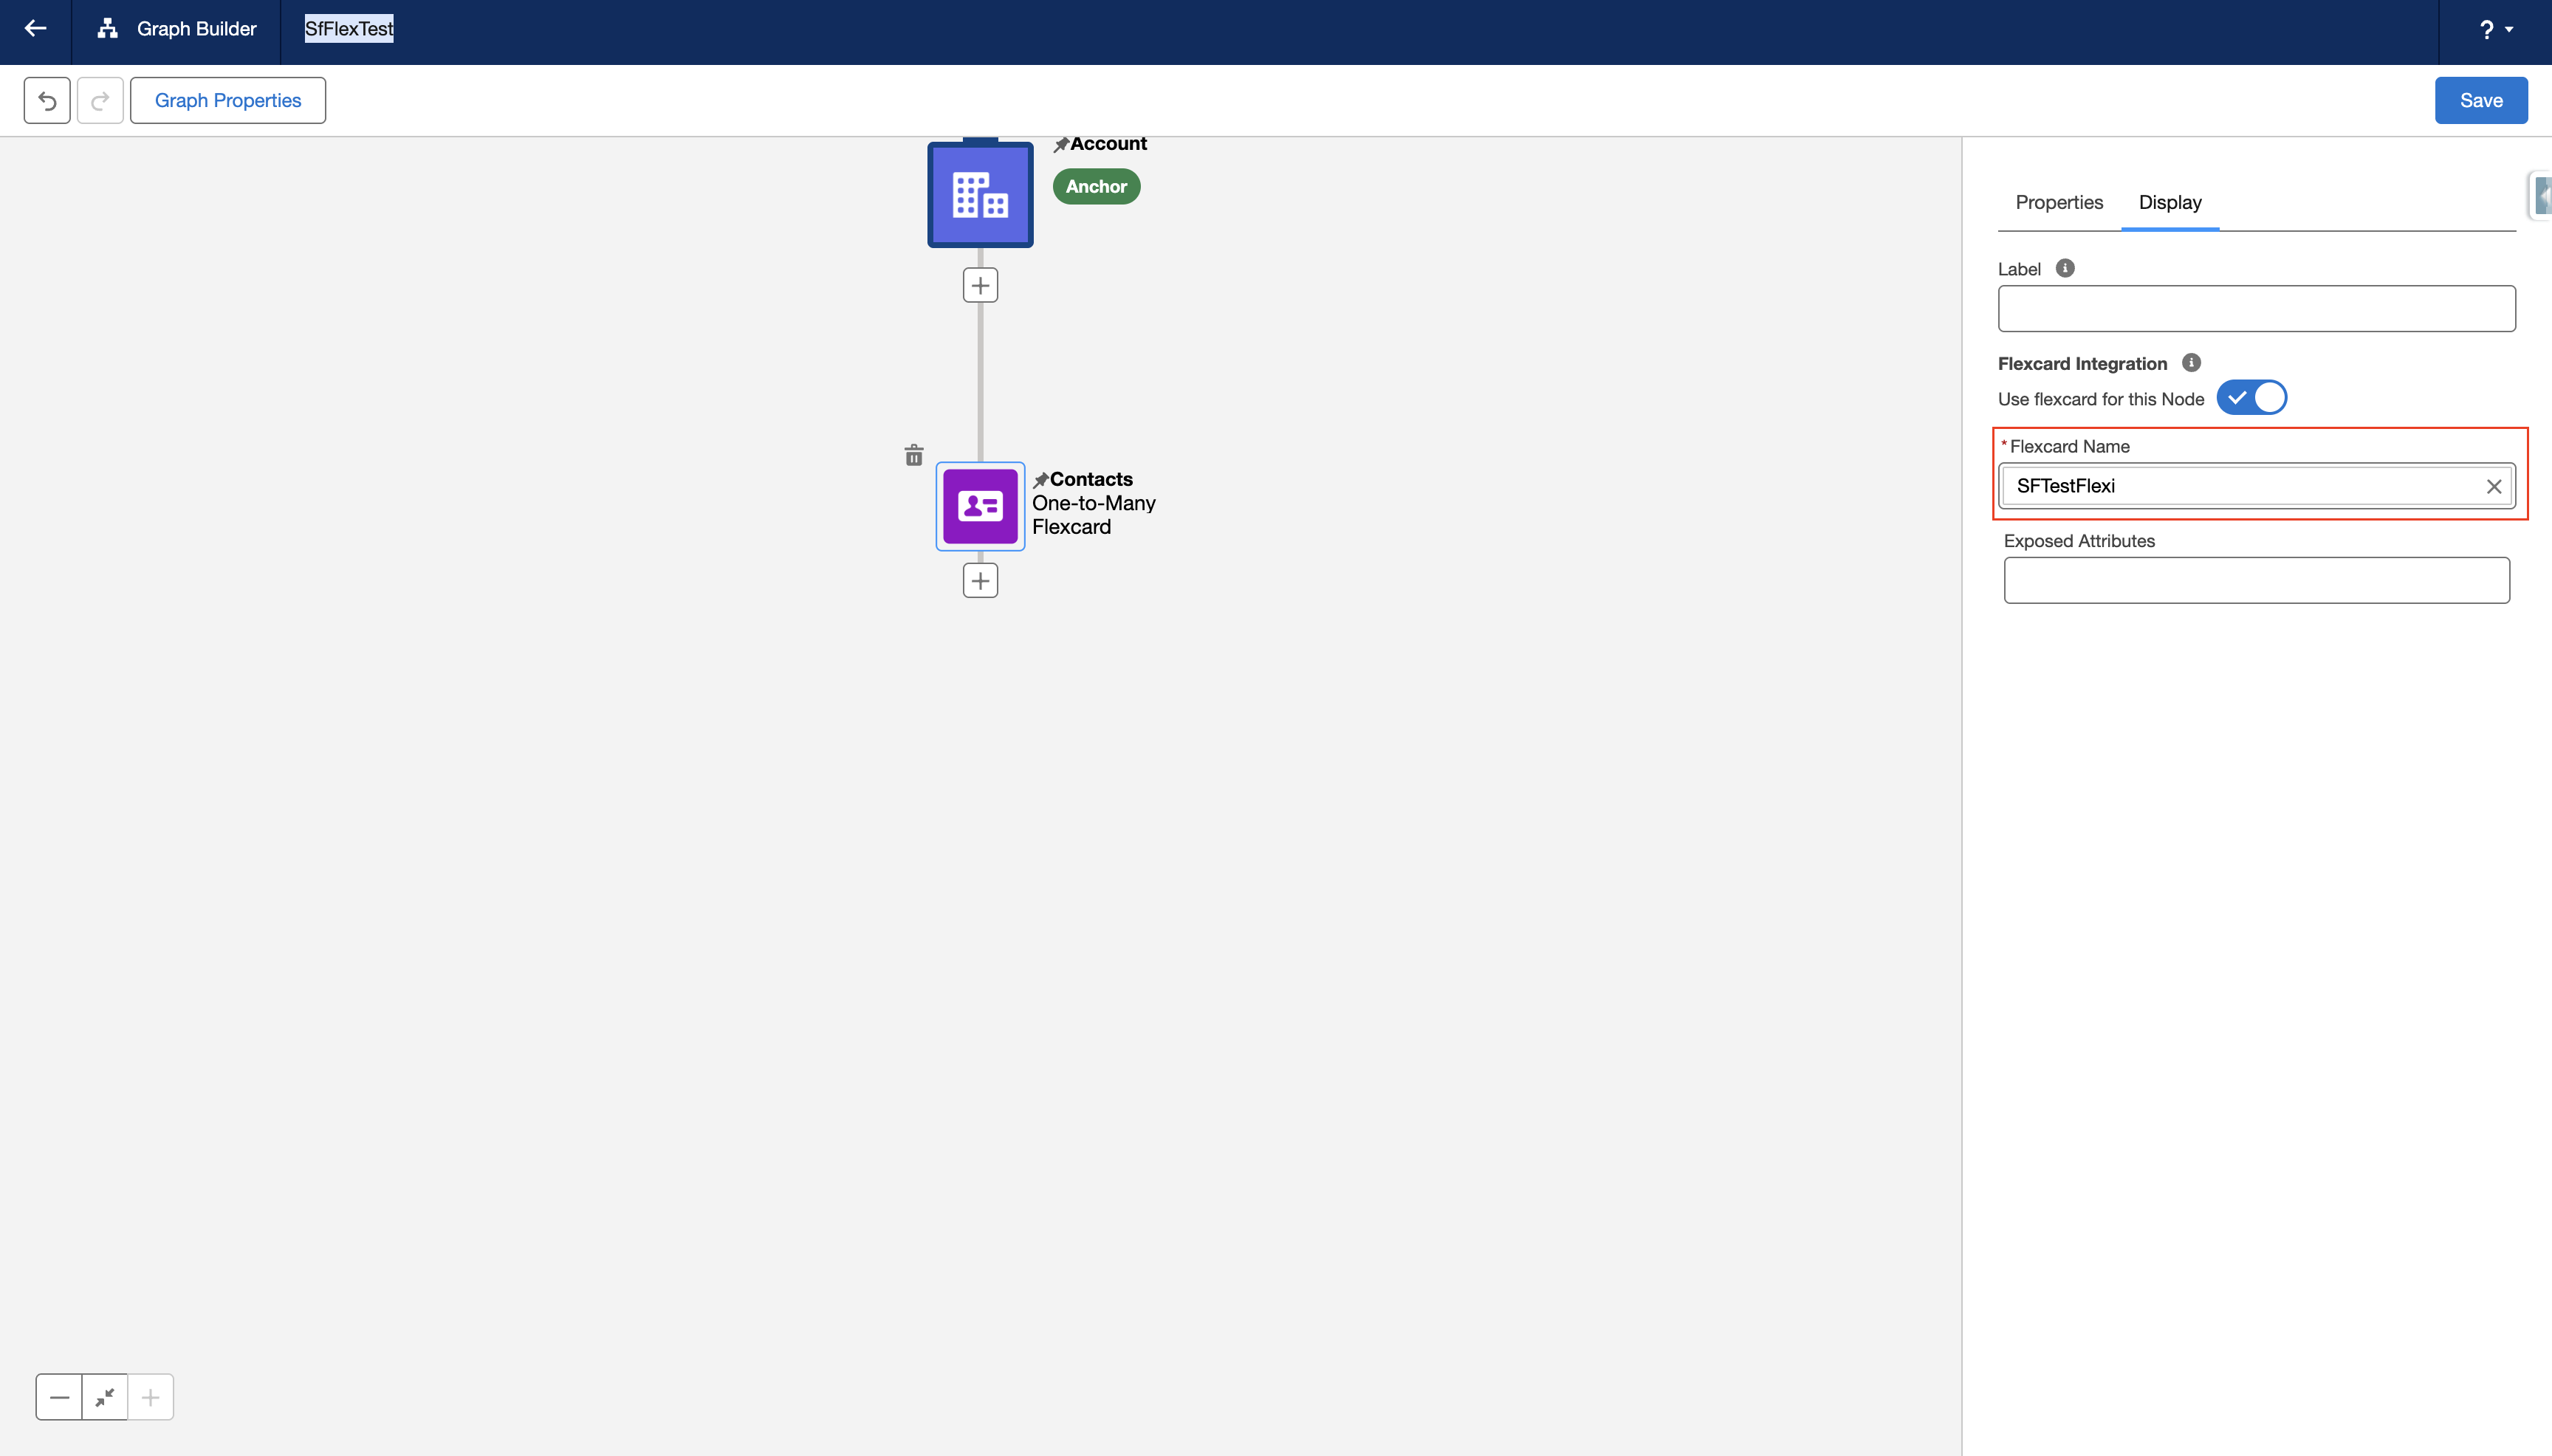
5. Configure Display Tab for Child Node
-
Go to the Display Tab of the Contact node.
-
Enable: Use FlexCard for this Node.
-
Enter FlexCard Name:
SFTestFlexi.
Part 3: Add ARC Graph to Lightning Record Page
1. Edit Lightning Record Page (Account)
-
Go to Object Manager > Account > Lightning Record Pages.
-
Choose the Account record page and click Edit.
2. Add ARC Tab and Component
-
Add a new tab in the layout.
-
Label it as:
ARC Relationship. -
Inside this new tab:
-
Search for the ARC Relationship Graph component.
-
Drag it to the canvas.
-
In properties, set:
-
Graph Name:
SfFlexTest
-
-
-
Click Save and Activate the page layout if needed.
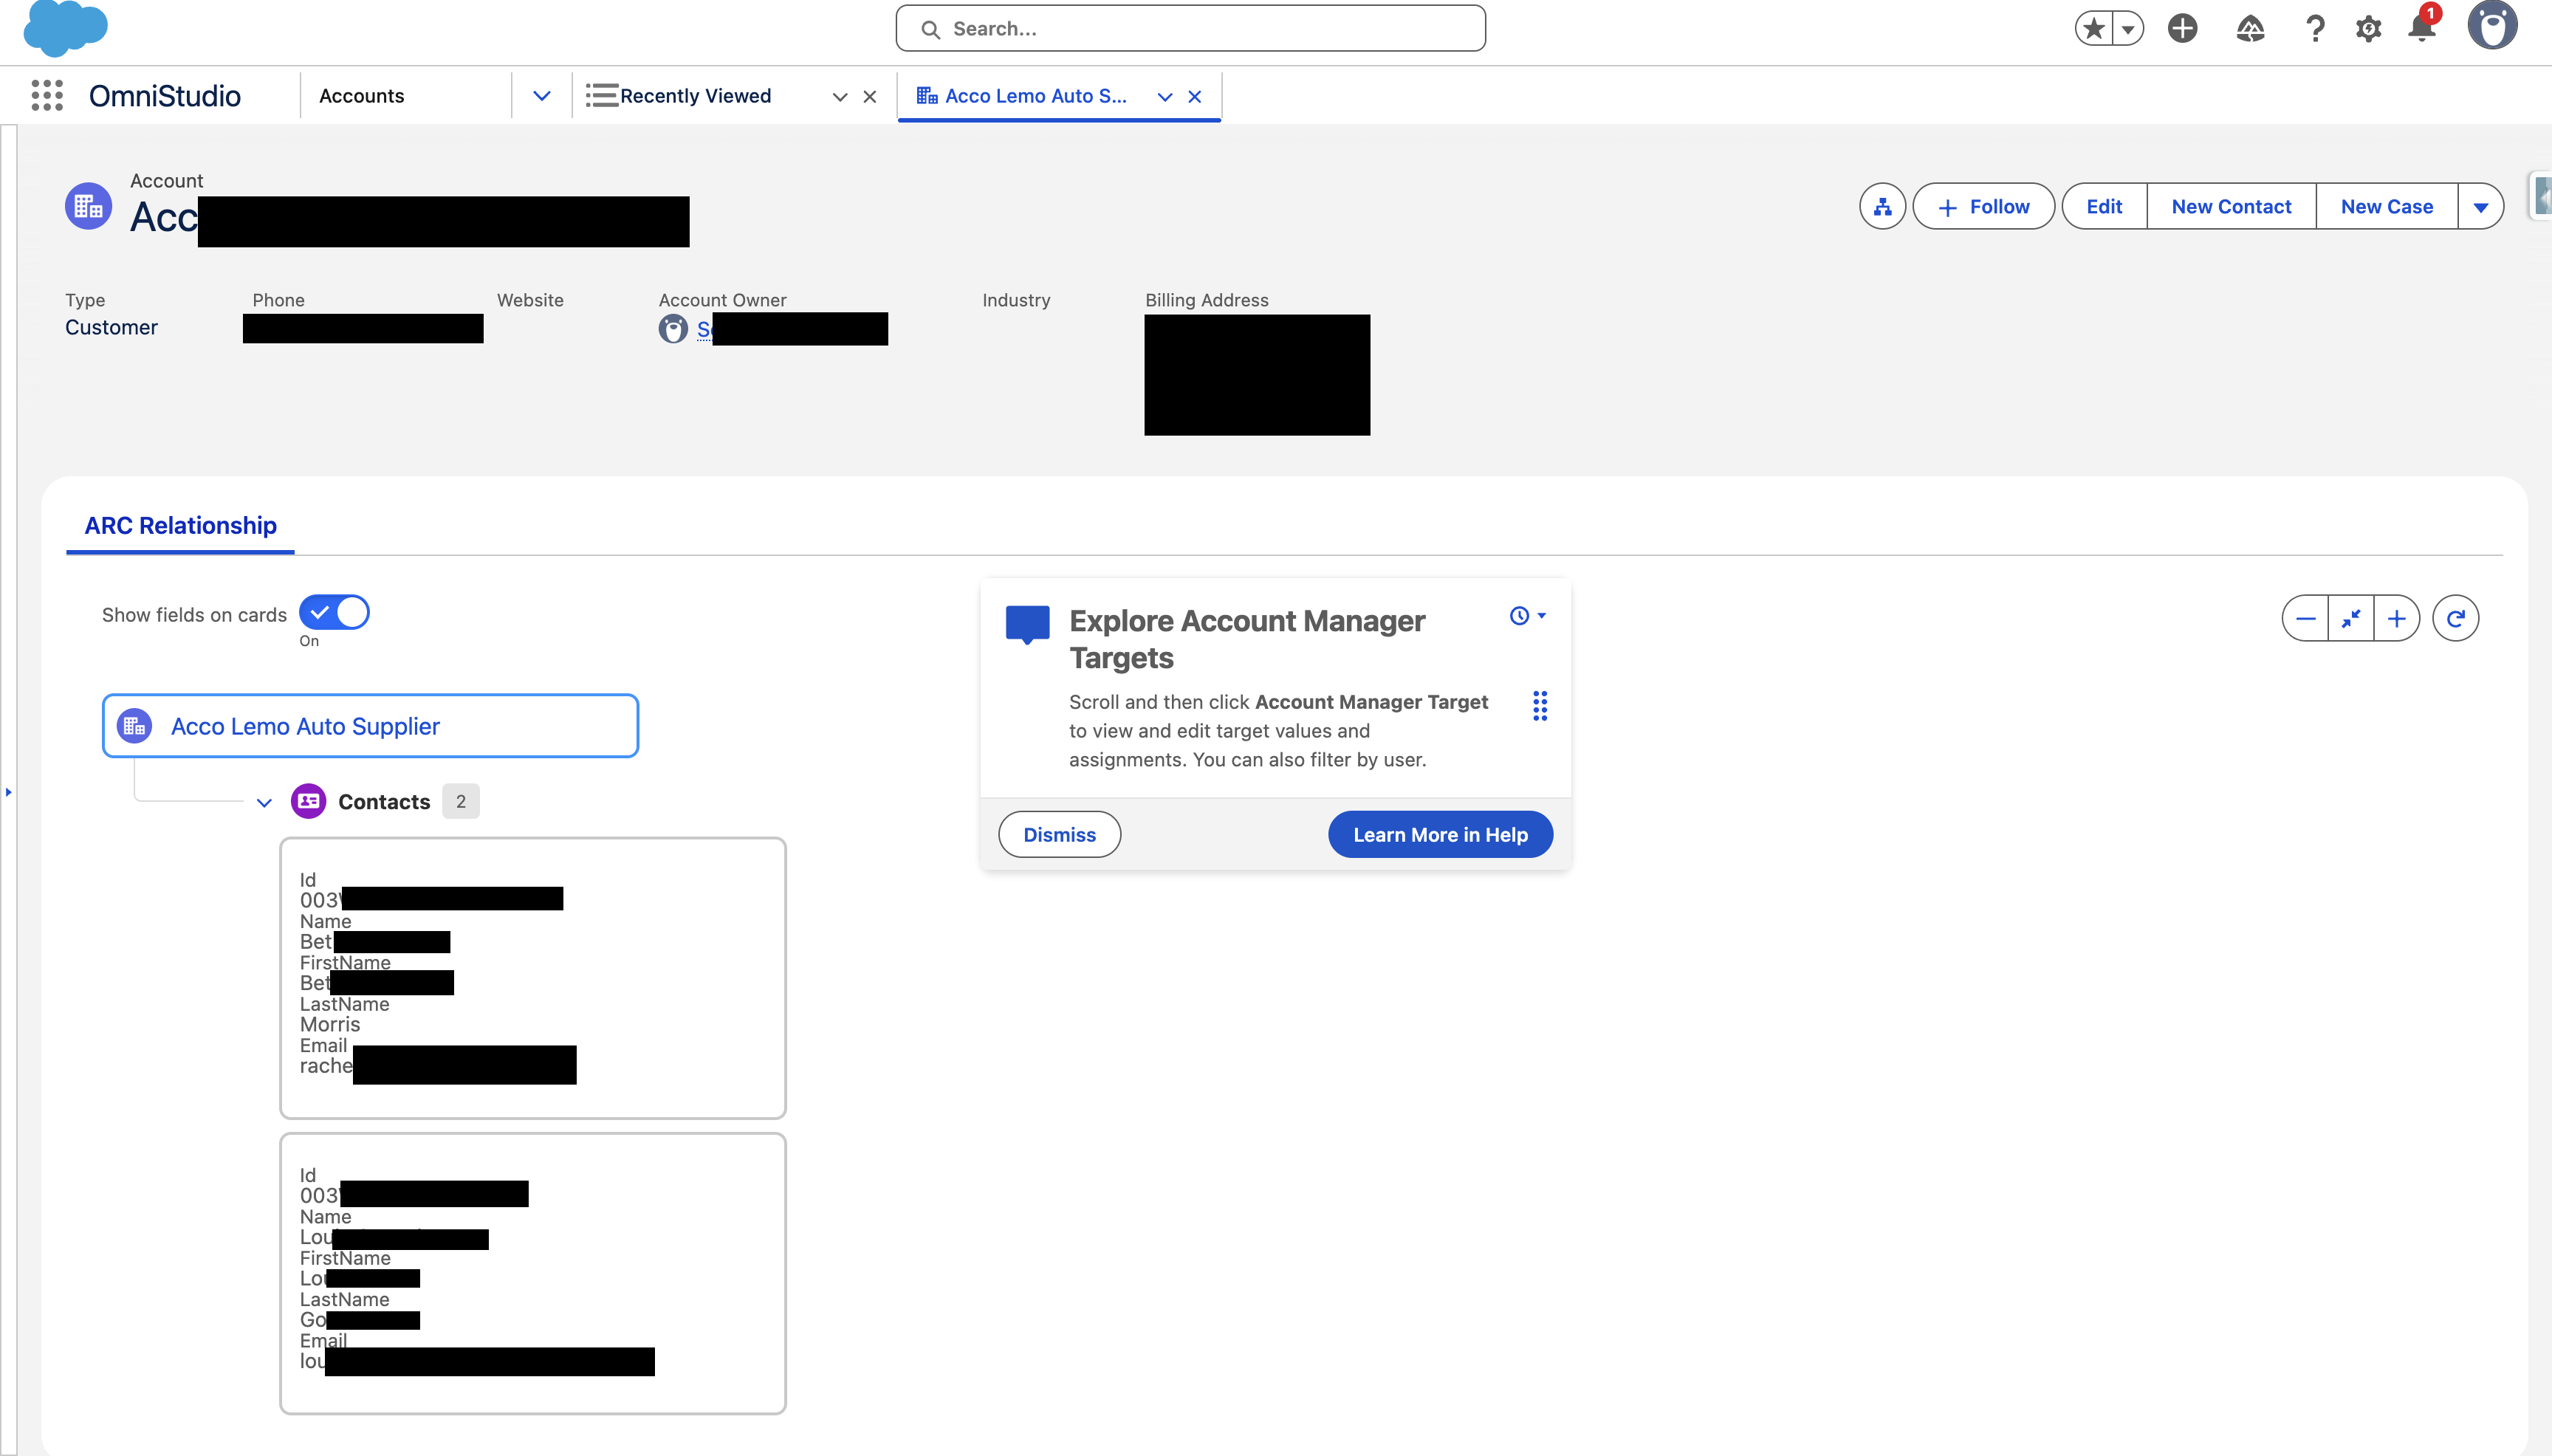
Now, when you view the Account record page:
-
You will see an ARC tab with a graph.
-
The child Contact records will be shown.
-
The FlexCard will display contextual fields like
Name, FirstName, LastName andEmail
Numéro d’article de la base de connaissances
004867948
Cet article a-t-il résolu votre problème ?
Dites-nous ce que nous pouvons améliorer !