Seleccionar una organización
Data 360: Activating Data from Salesforce Data Cloud to Google Cloud Storage
Fecha de publicación: Oct 17, 2025
Descripción
Overview
To send data from Salesforce Data 360 (Formerly Data Cloud) to Google Cloud Storage, you’ll need to:
- Create a Google Cloud Storage bucket
- Add a folder to the bucket
- Create a service account and configure permissions
- Connect the bucket to Data 360
- Create an Activation Target in Data 360
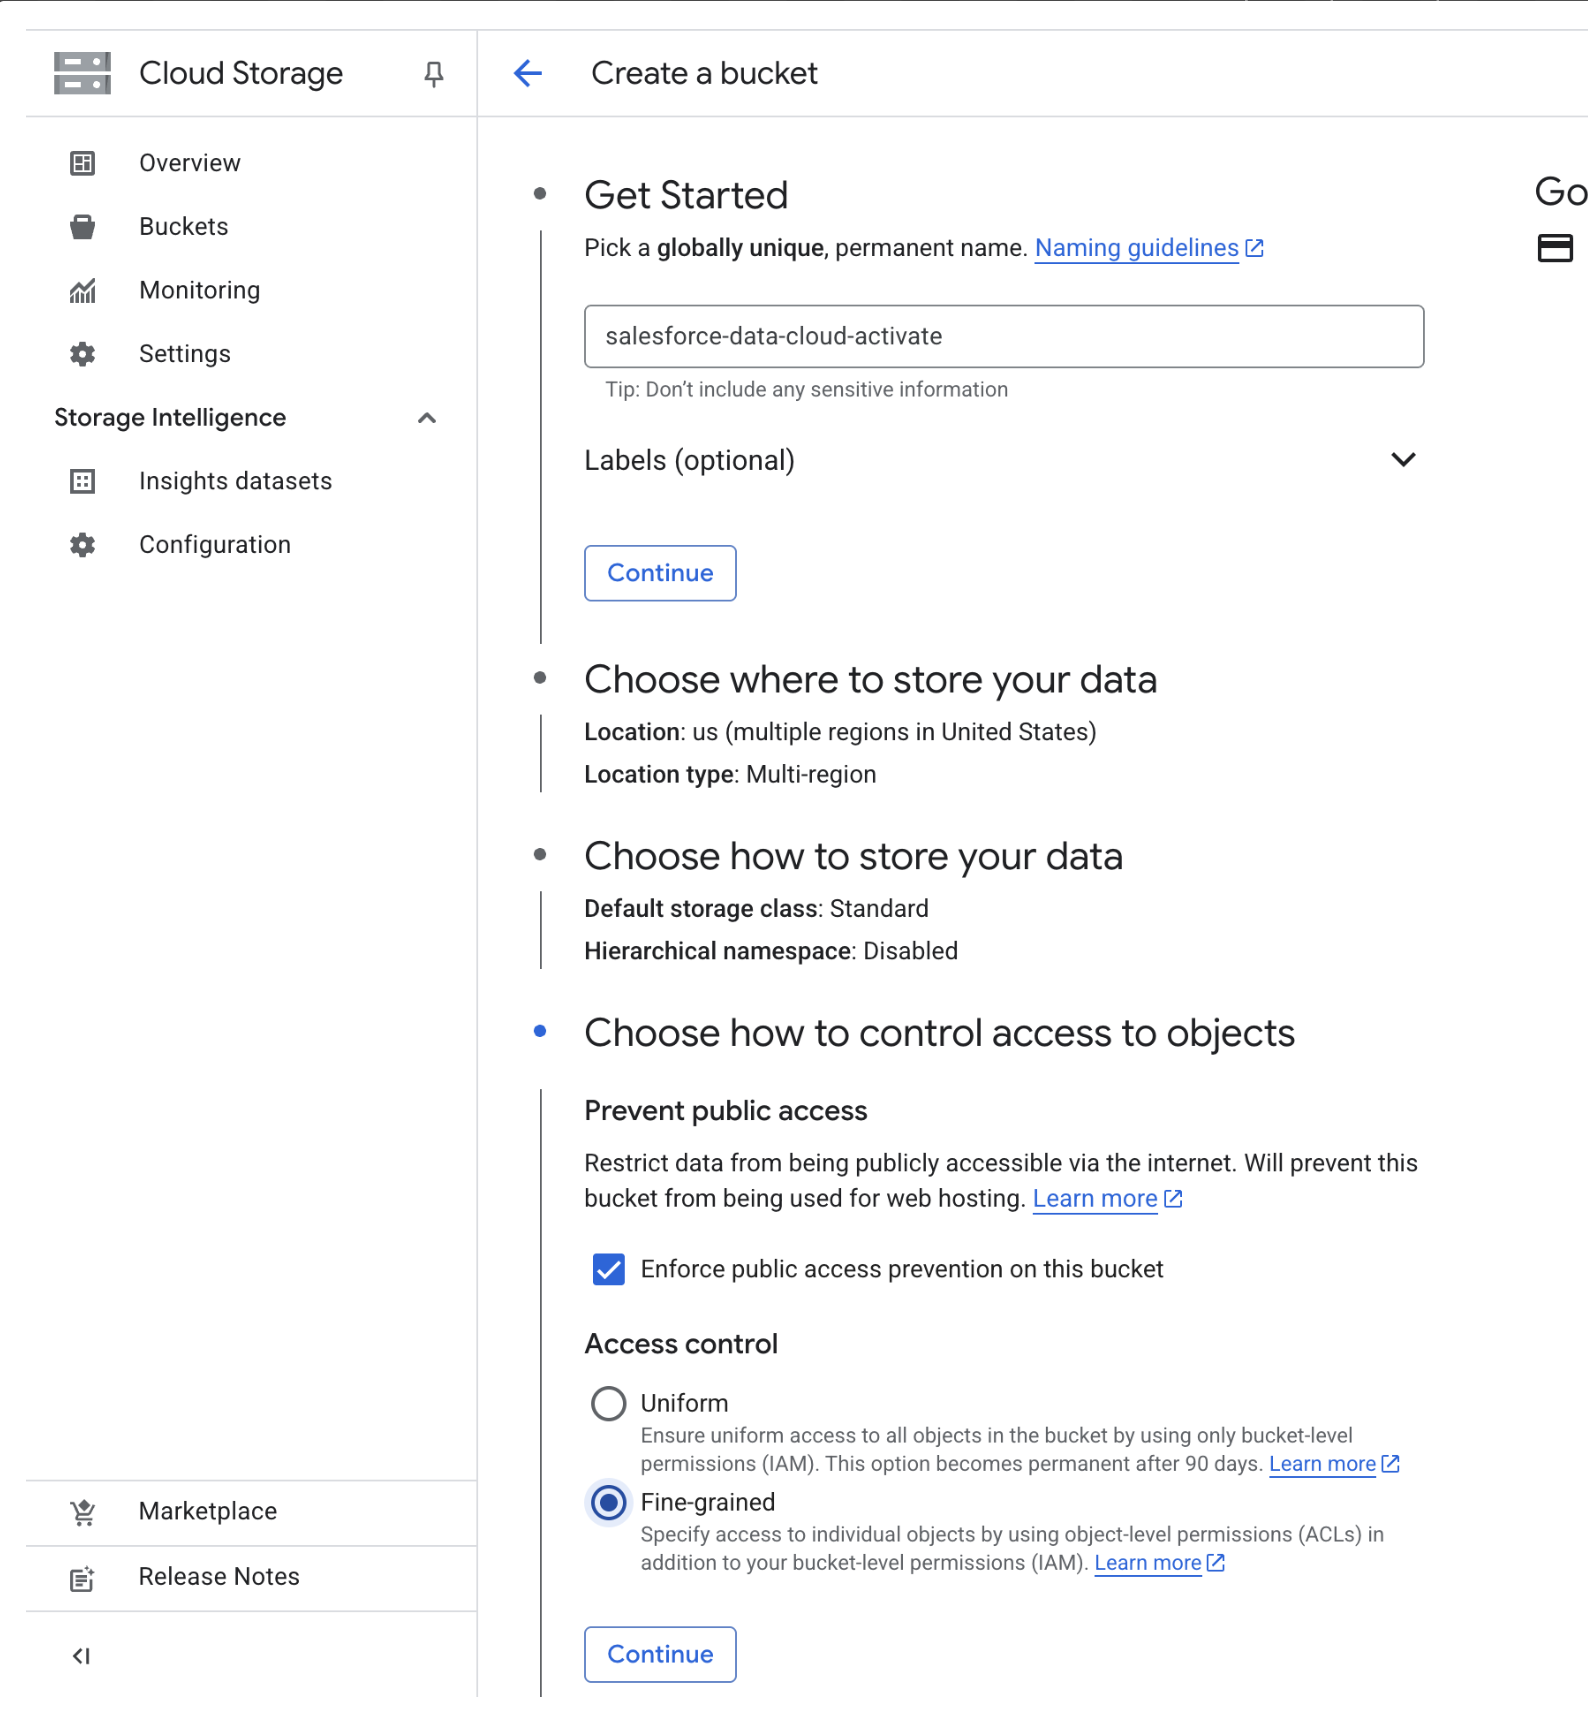
1. Create a Google Cloud Storage Bucket
- Navigate to the Cloud Storage Buckets page in the Google Cloud Console.
- Click +Create.
- Provide a name for your bucket.
- Use default options for location, location type, and storage class unless you have specific preferences.

- Under Access Control, uncheck "Enforce public access prevention on this bucket" and set Access Control to Fine-grained.
- Click Create.
Note: For detailed guidance on these settings, refer to Google Cloud documentation.
You now have a Google Cloud Storage bucket configured for Data 360! You can find up-to-date information about configuring Google Cloud Storage buckets for use with Data 360 in the official documentation.
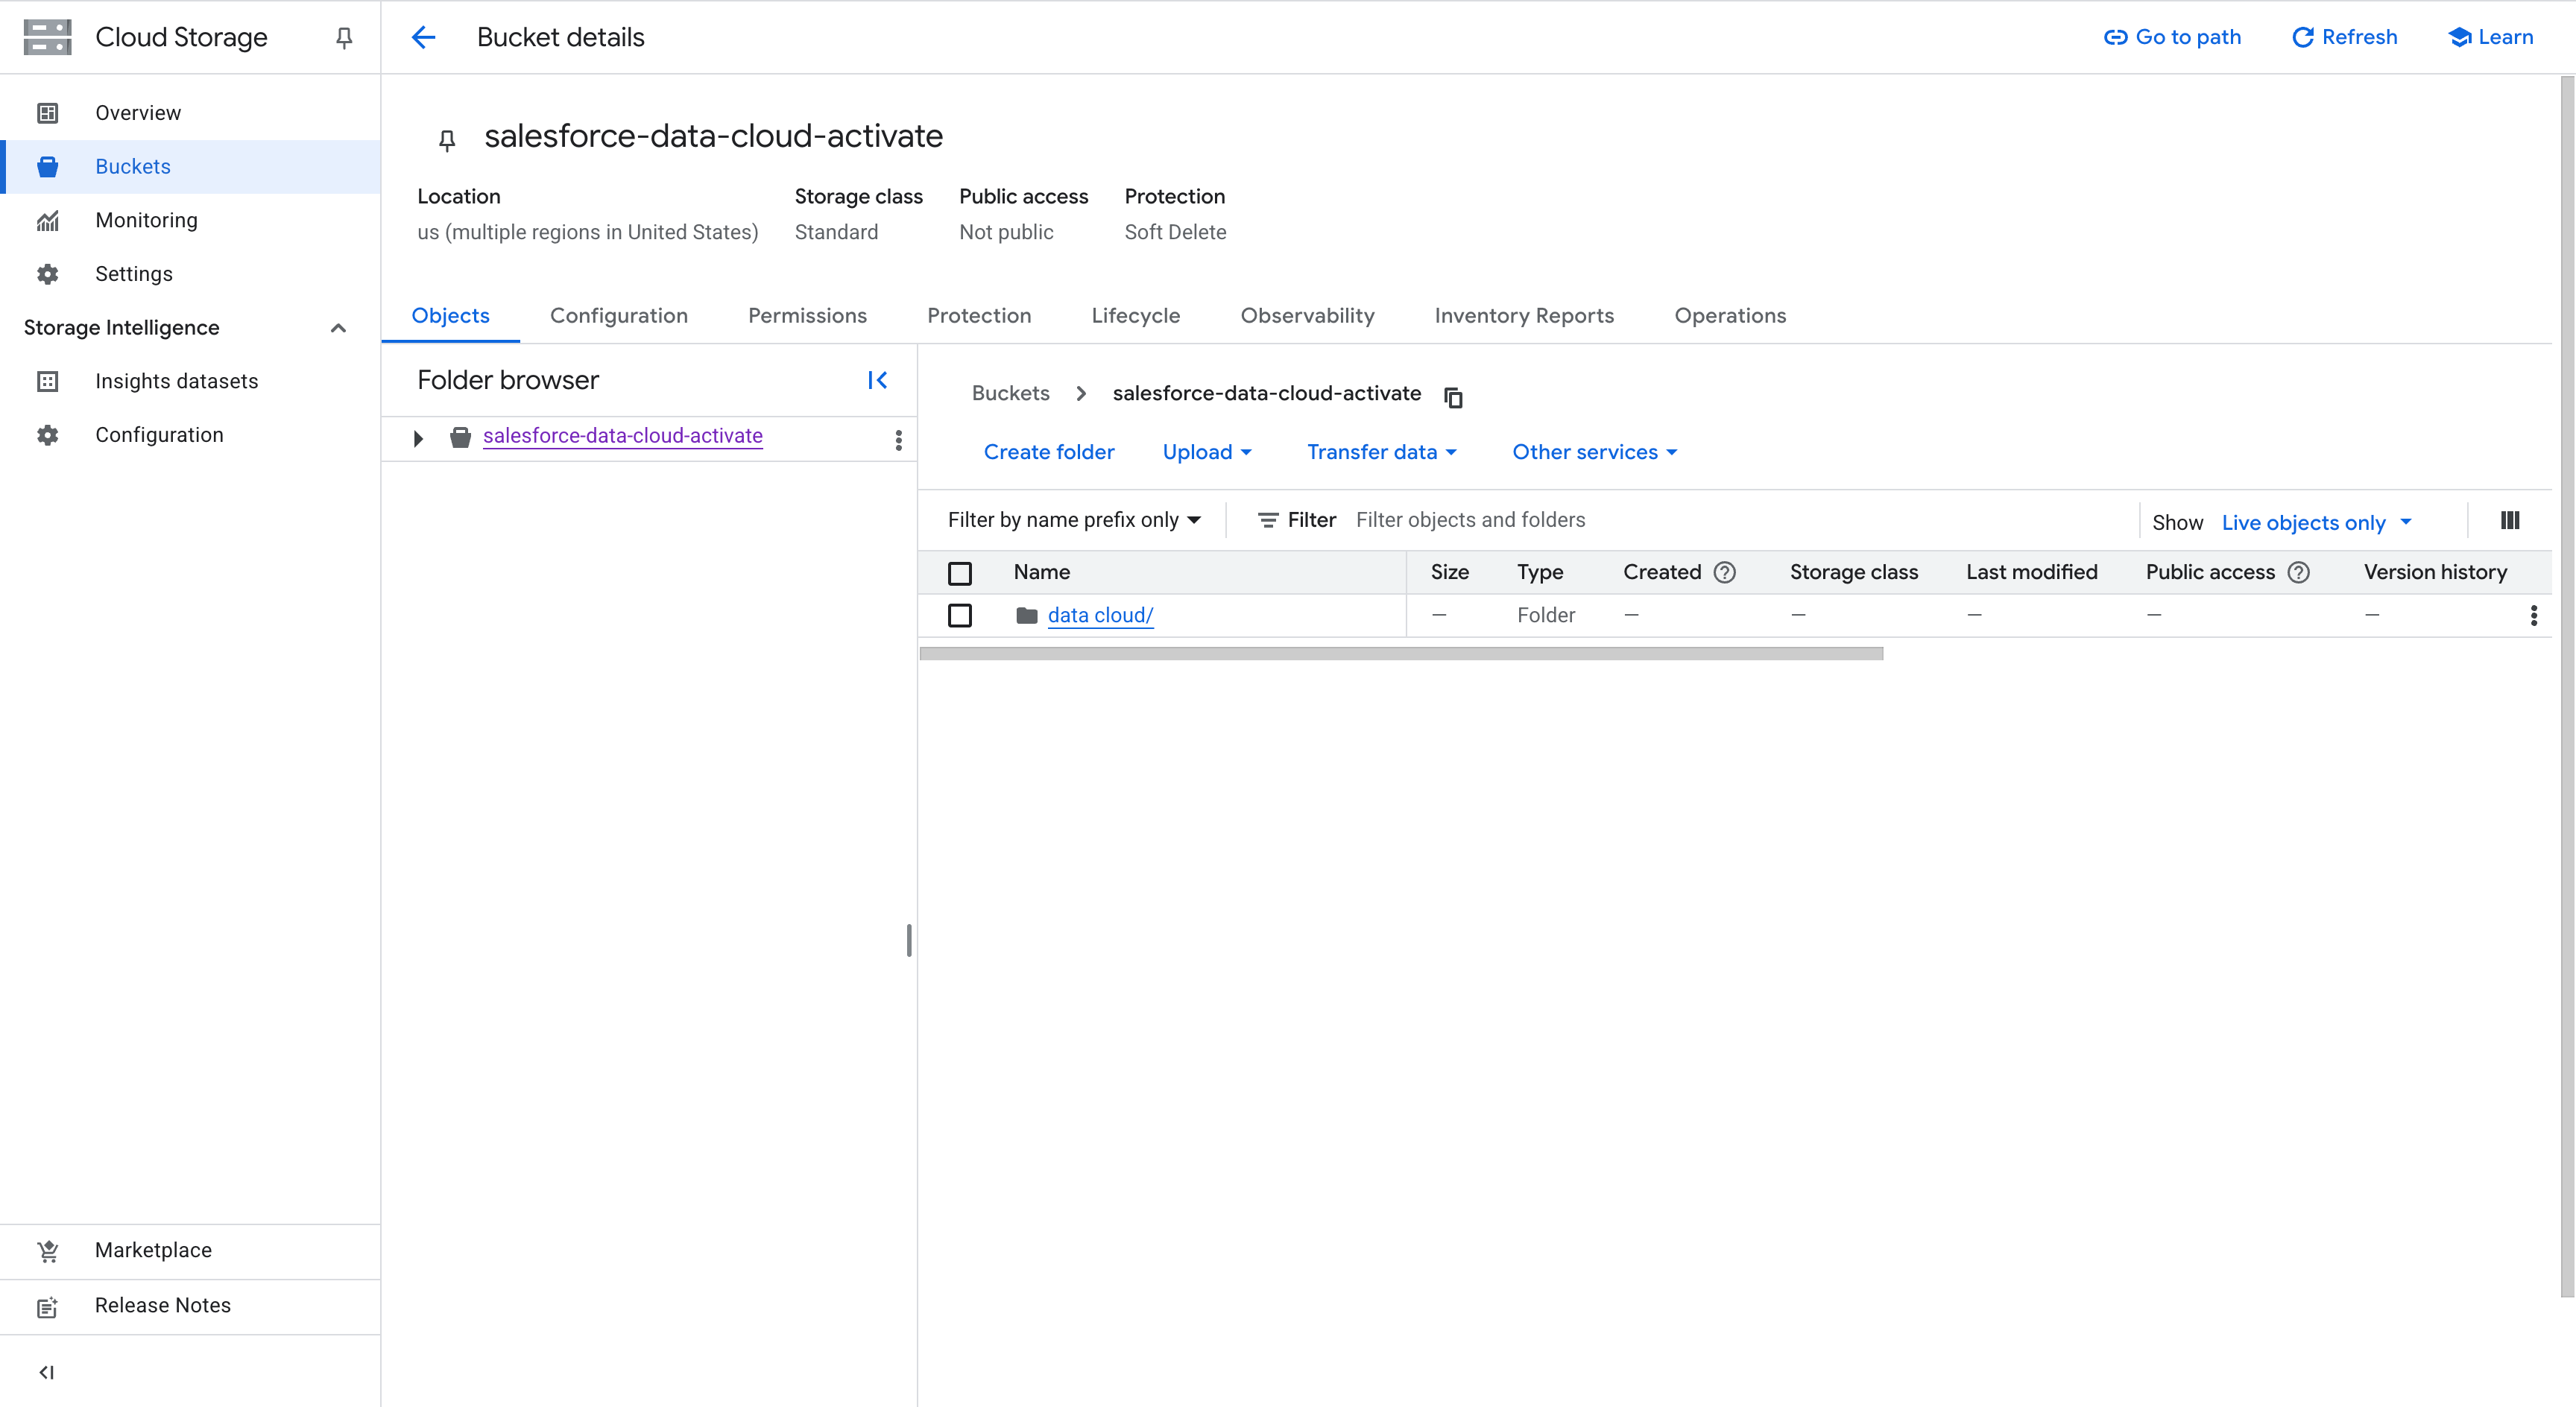
2. Add a Folder to the Bucket
- In the Google Cloud Console, navigate to Cloud Storage and select the bucket you created.
- Click Create Folder and specify a name for your folder.
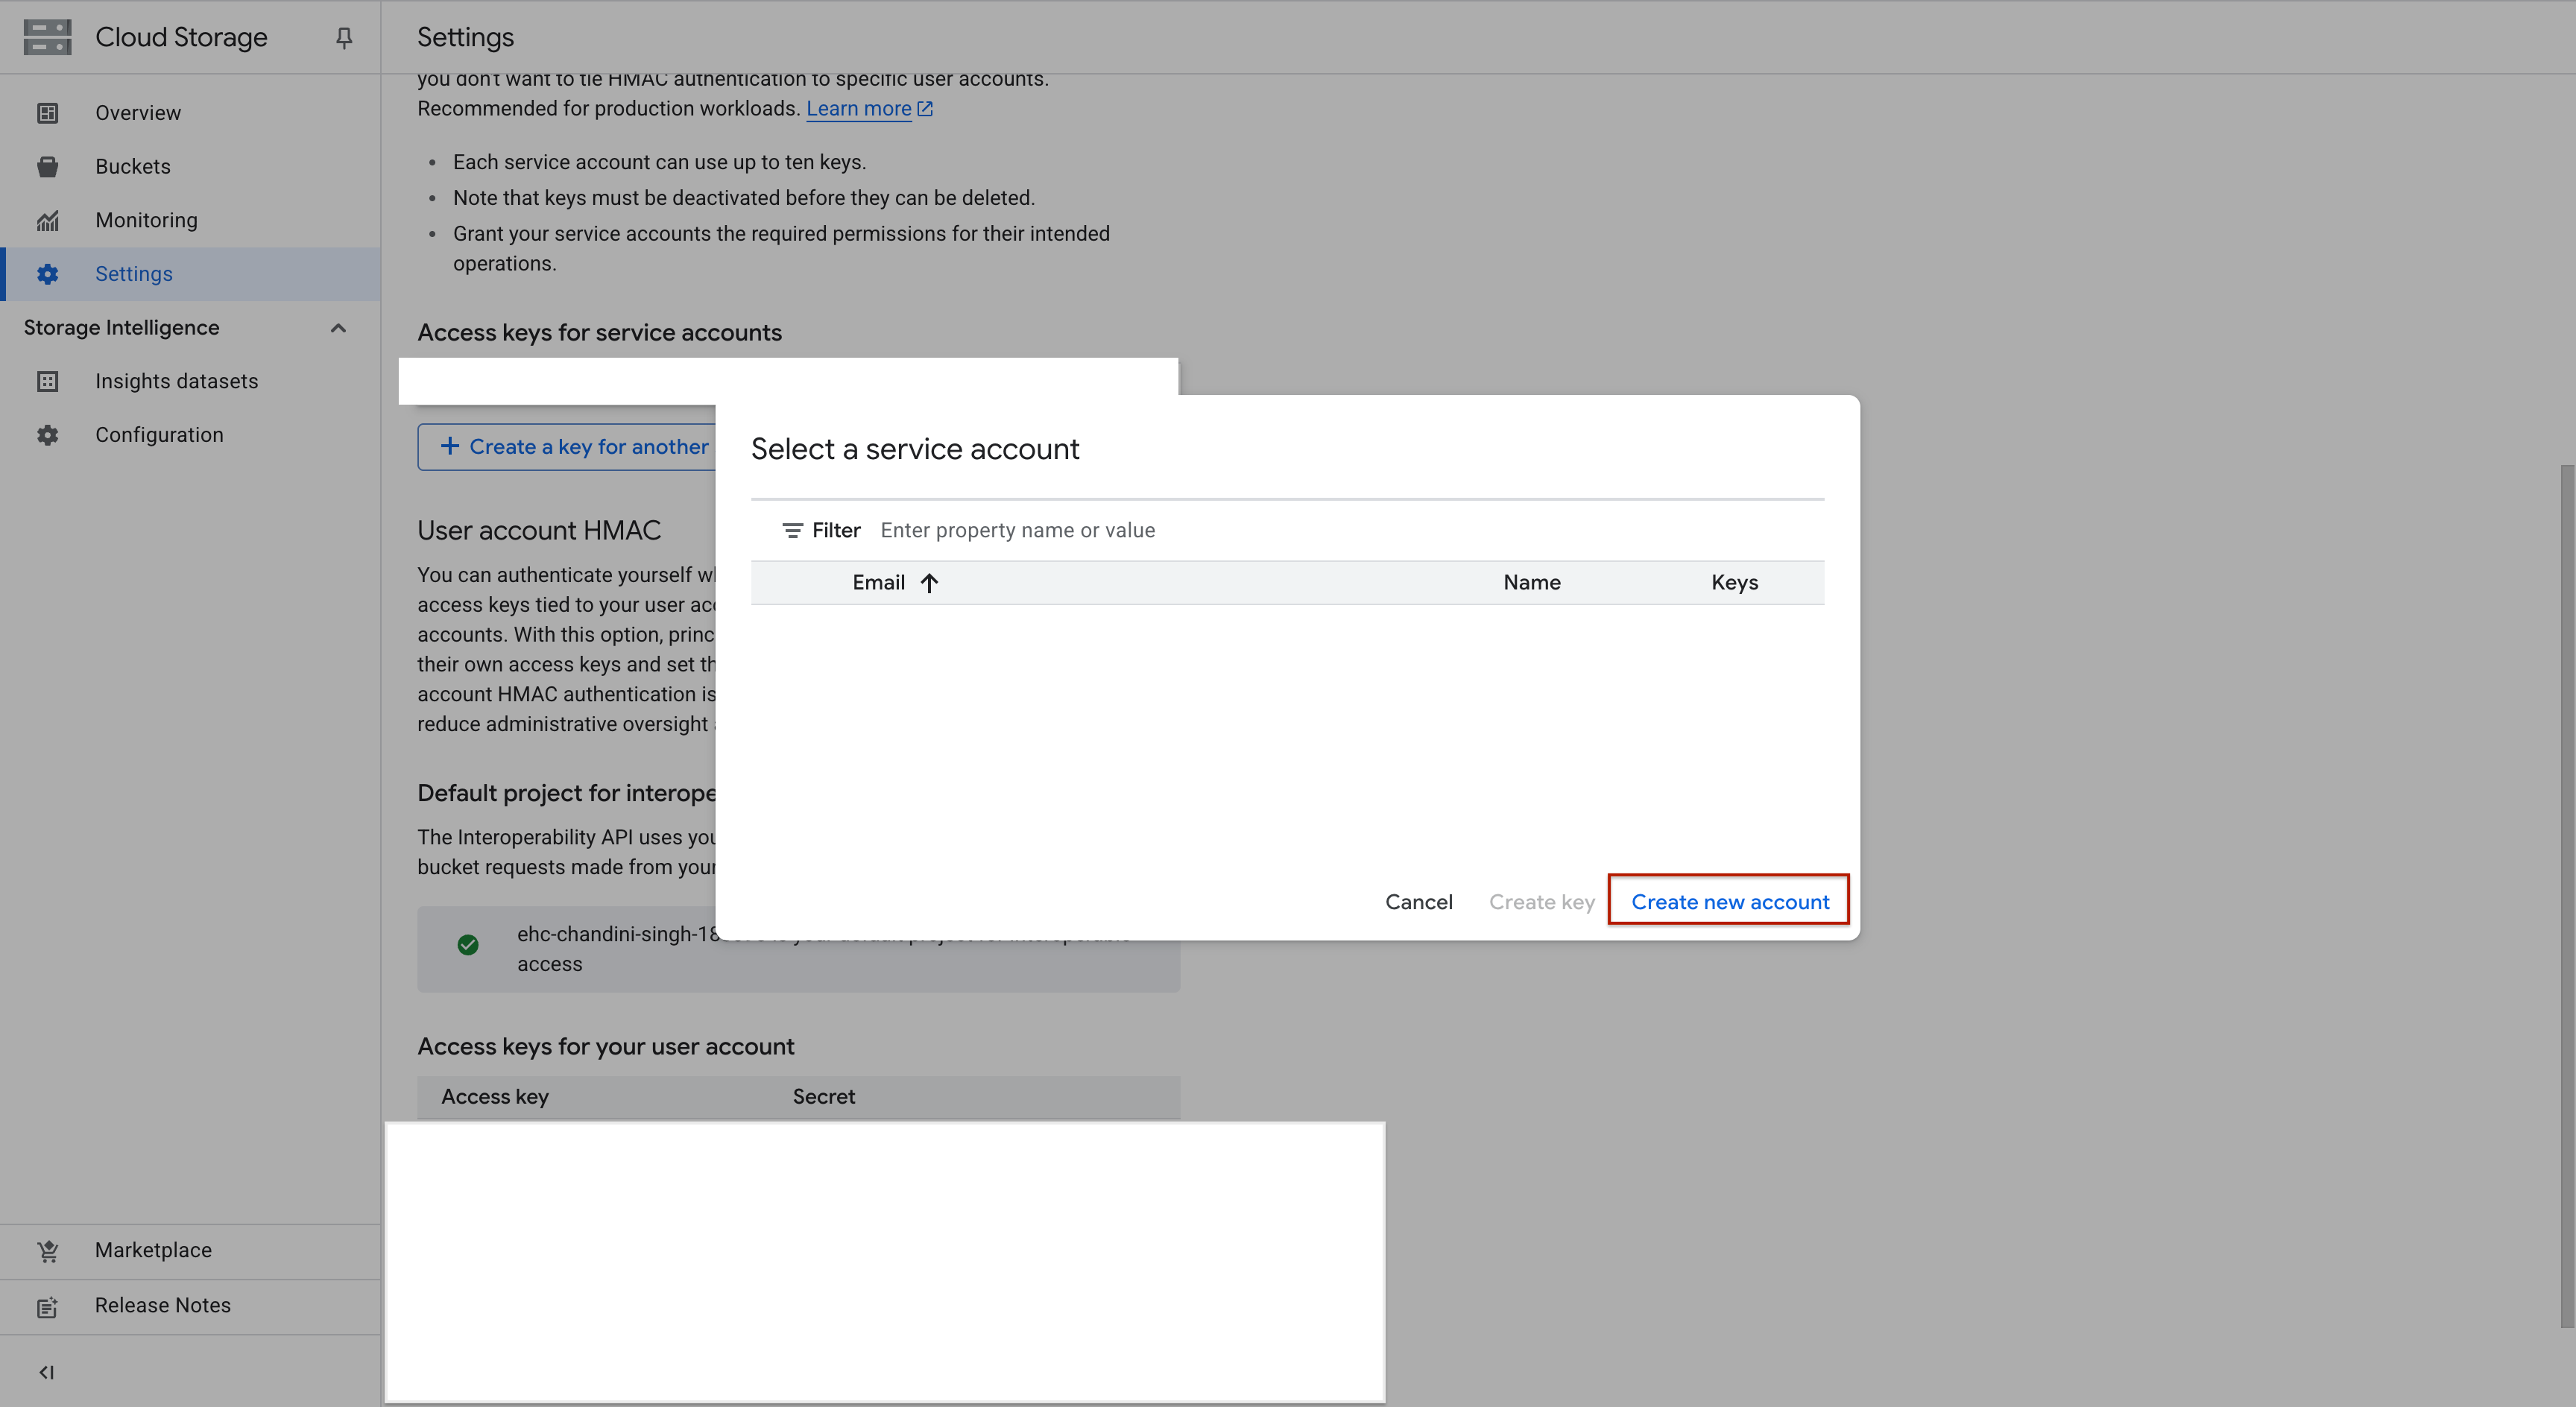
3. Create a Service Account for Data 360 Access
Service accounts act as secure access keys that allow Data 360 to write to your Google Cloud Storage bucket.
- Go to Cloud Storage Settings > Interoperability tab.
- Under Service Account HMAC, click Create a key for another service account.
- If no keys exist, the button will read Create a key for a service account.
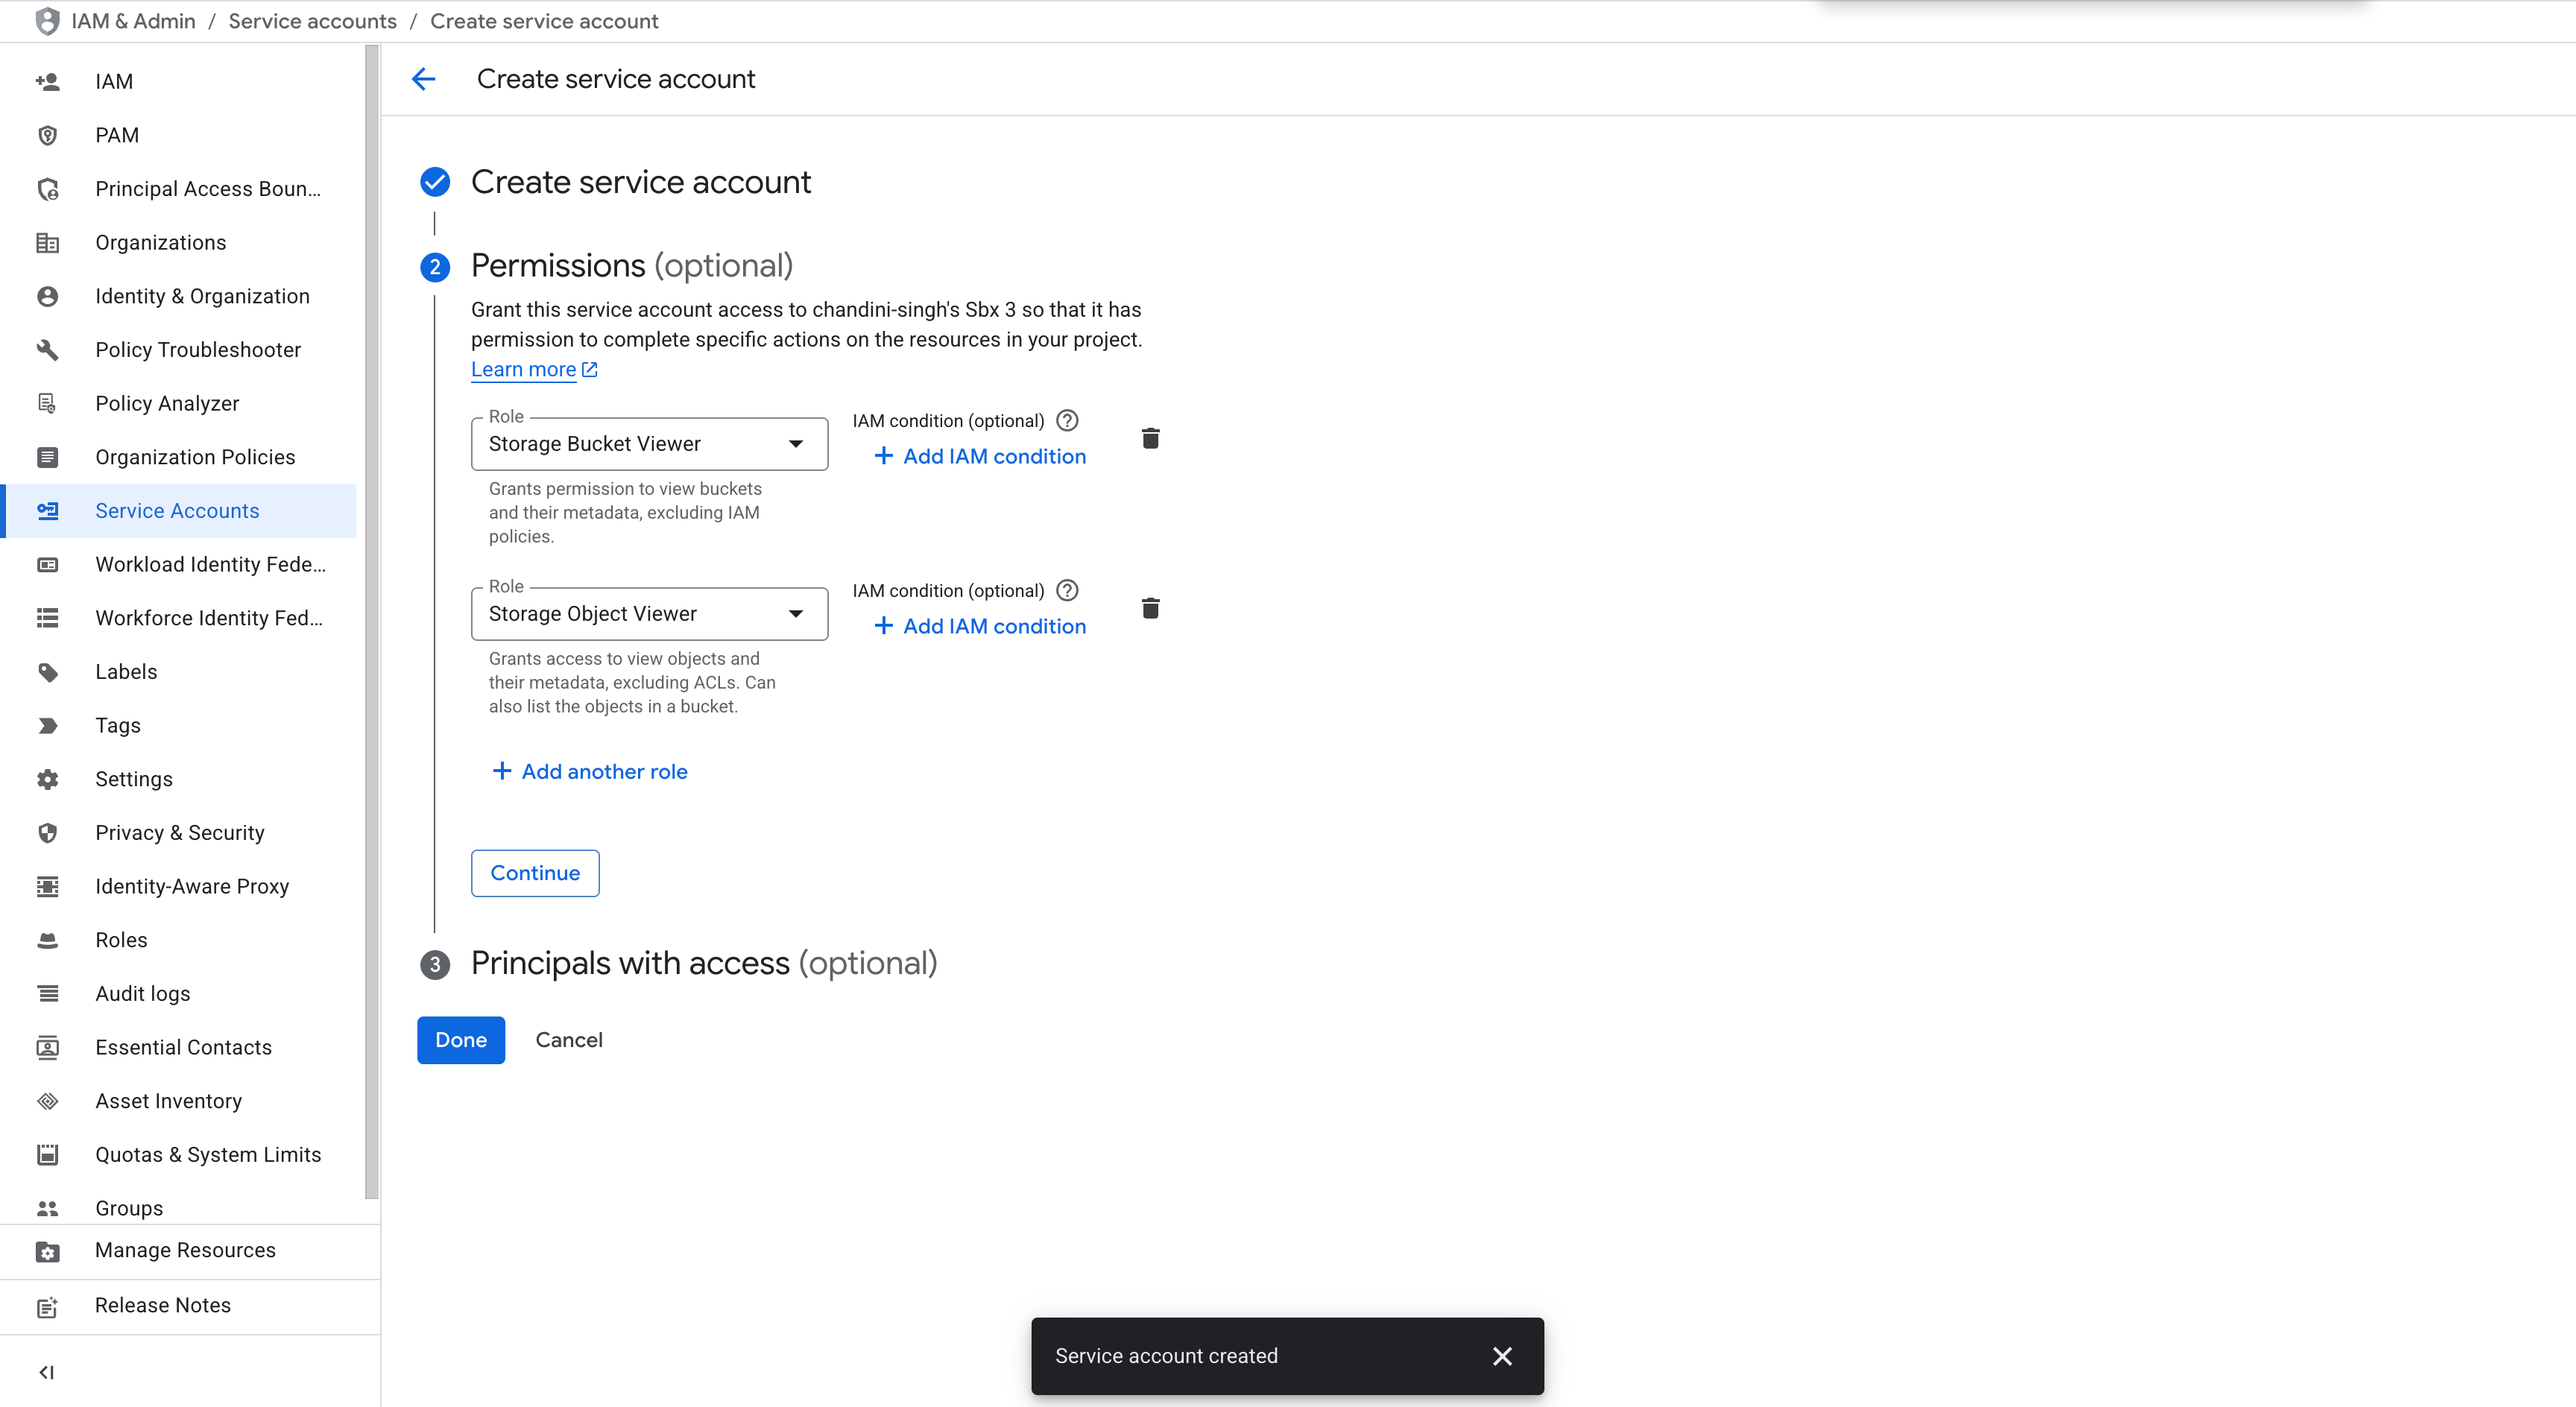
- If needed, create a new service account.
- Assign the following roles to the service account:
Storage Bucket Viewer
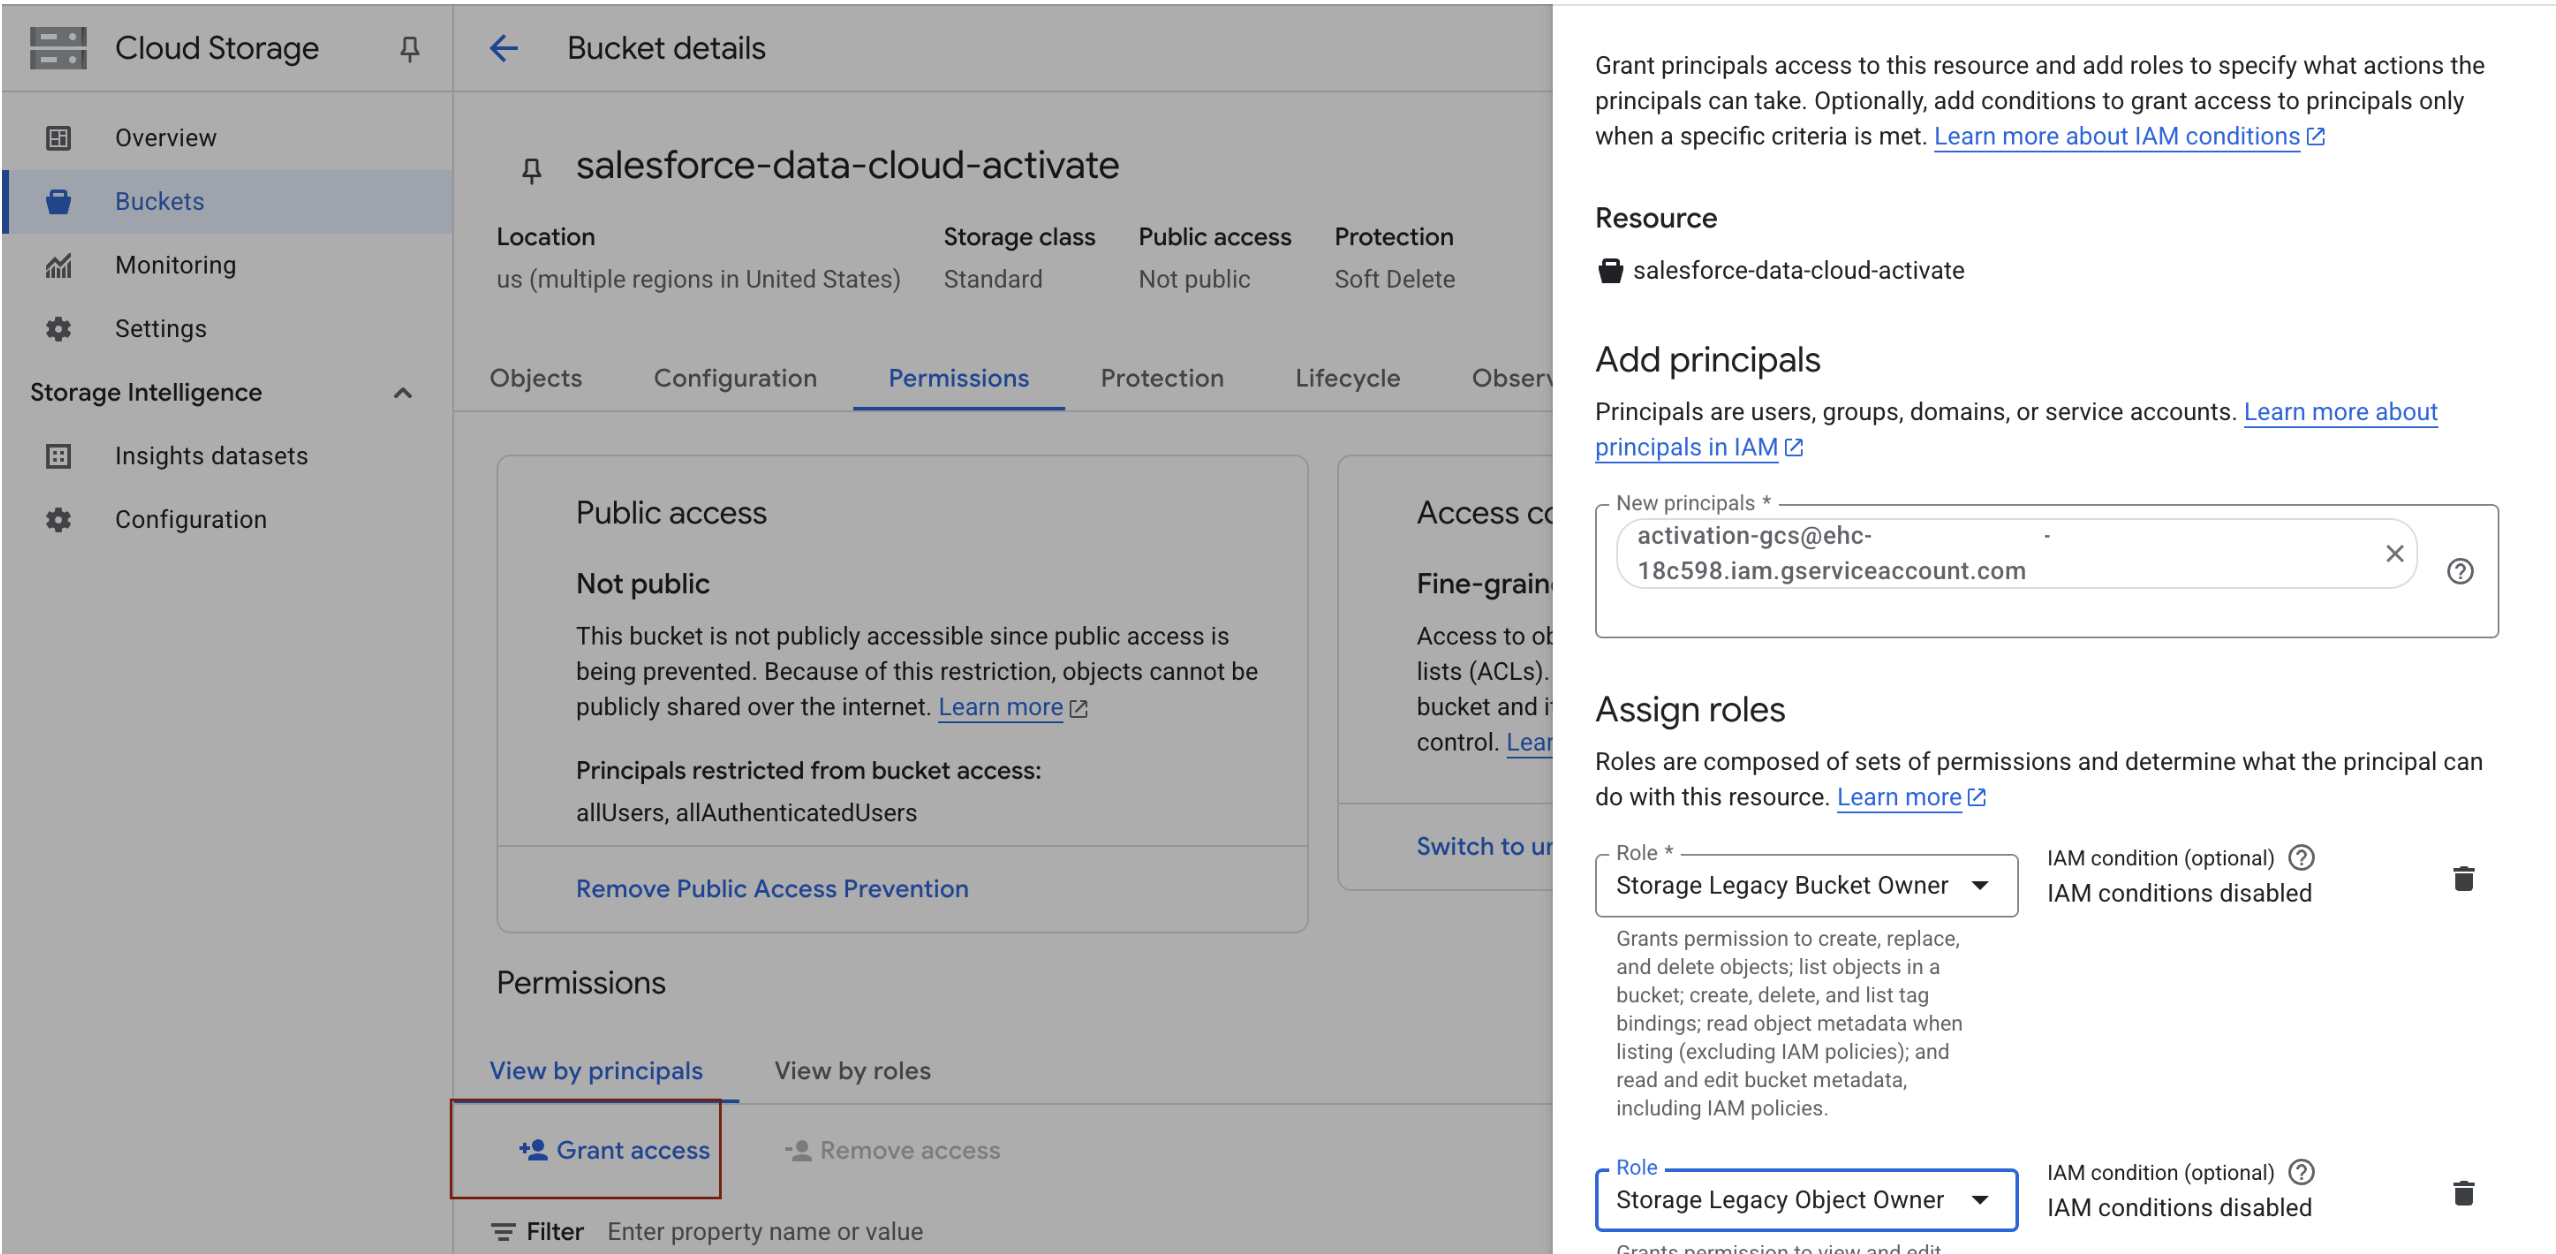
Storage Object Viewer - Open the bucket's Permissions tab, scroll to the Permissions section, and click Grant access.
- Paste your service account’s email into the New principals field and assign these roles:
Storage Legacy Bucket Owner
Storage Legacy Object Owner - Click Save.
4. Connect Data 360 to Your Google Cloud Storage Bucket
- In Salesforce Data 360, go to Setup and search for Other Connectors in Quick Find.
- On the Other Connectors page, click New.
- In the modal, select Google Cloud Storage as the data source.
- Ensure you’re on the Target tab.
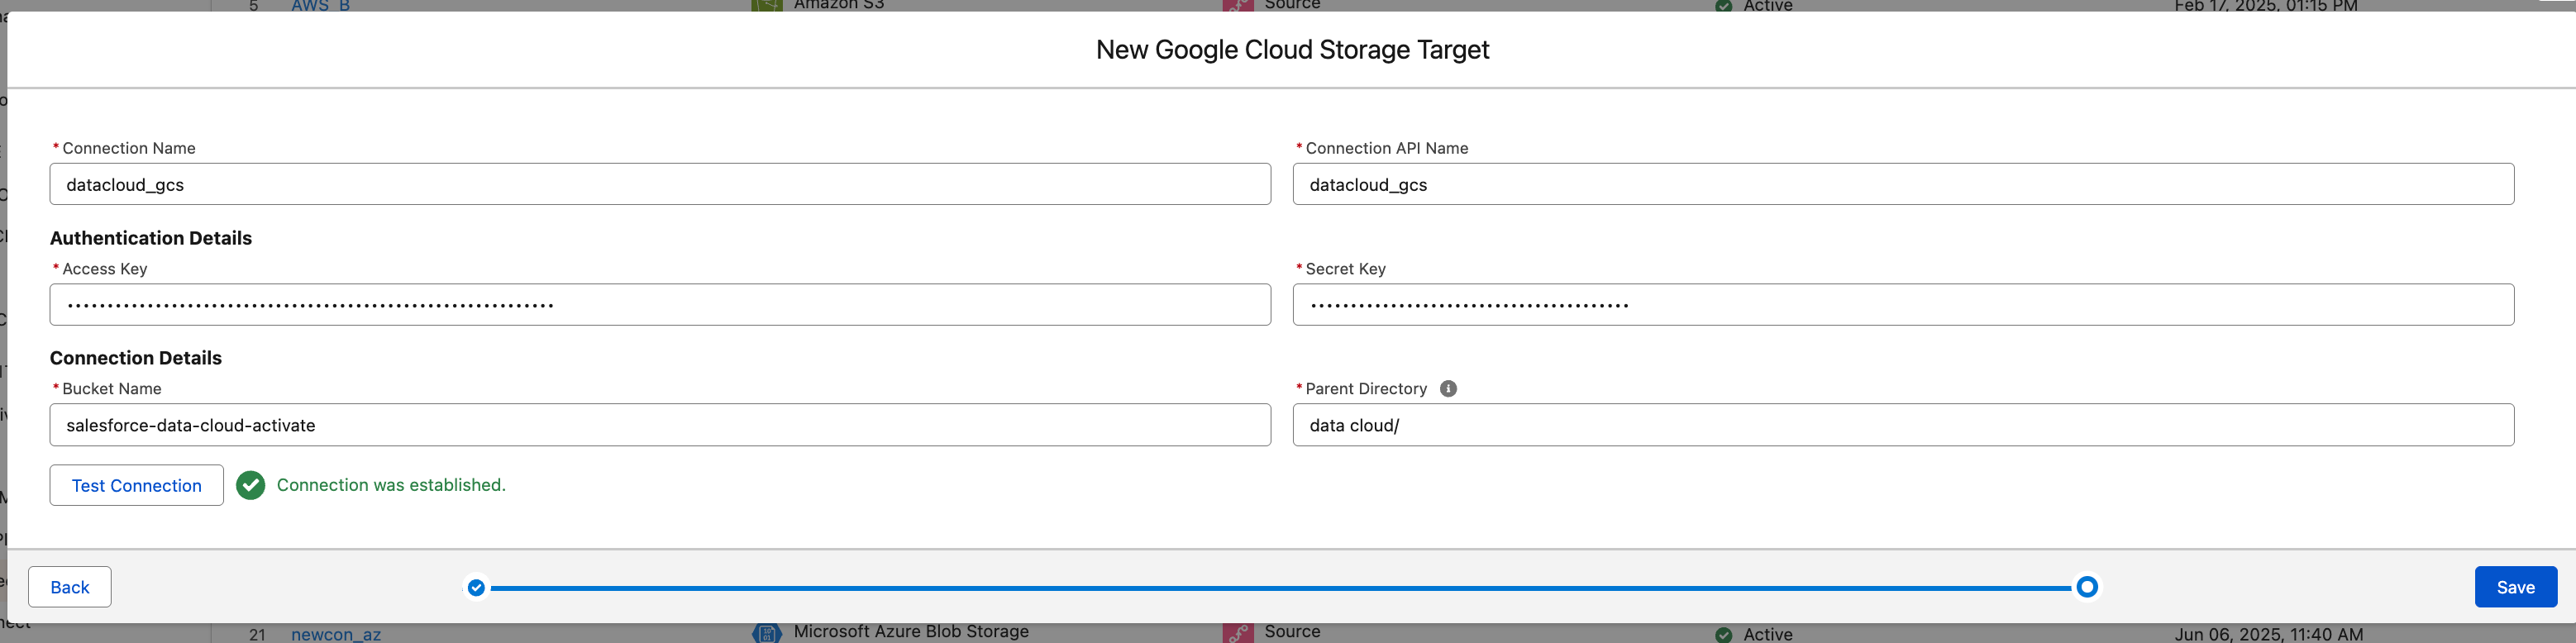
- Fill in the following fields:
- Name: Give your connection a unique name
- Bucket Name: Enter the name of your Google Cloud Storage bucket
- Secret Key: Paste the HMAC secret key of the service account
- Access Key: Paste the HMAC access key
- Parent Folder: Provide the folder name, including a trailing slash (e.g.,
data cloud/)
- Click Test Connection to verify connectivity.
- Note: This test verifies credentials and bucket access but not the folder path.
- If the test succeeds, click Save.

5. Create an Activation Target
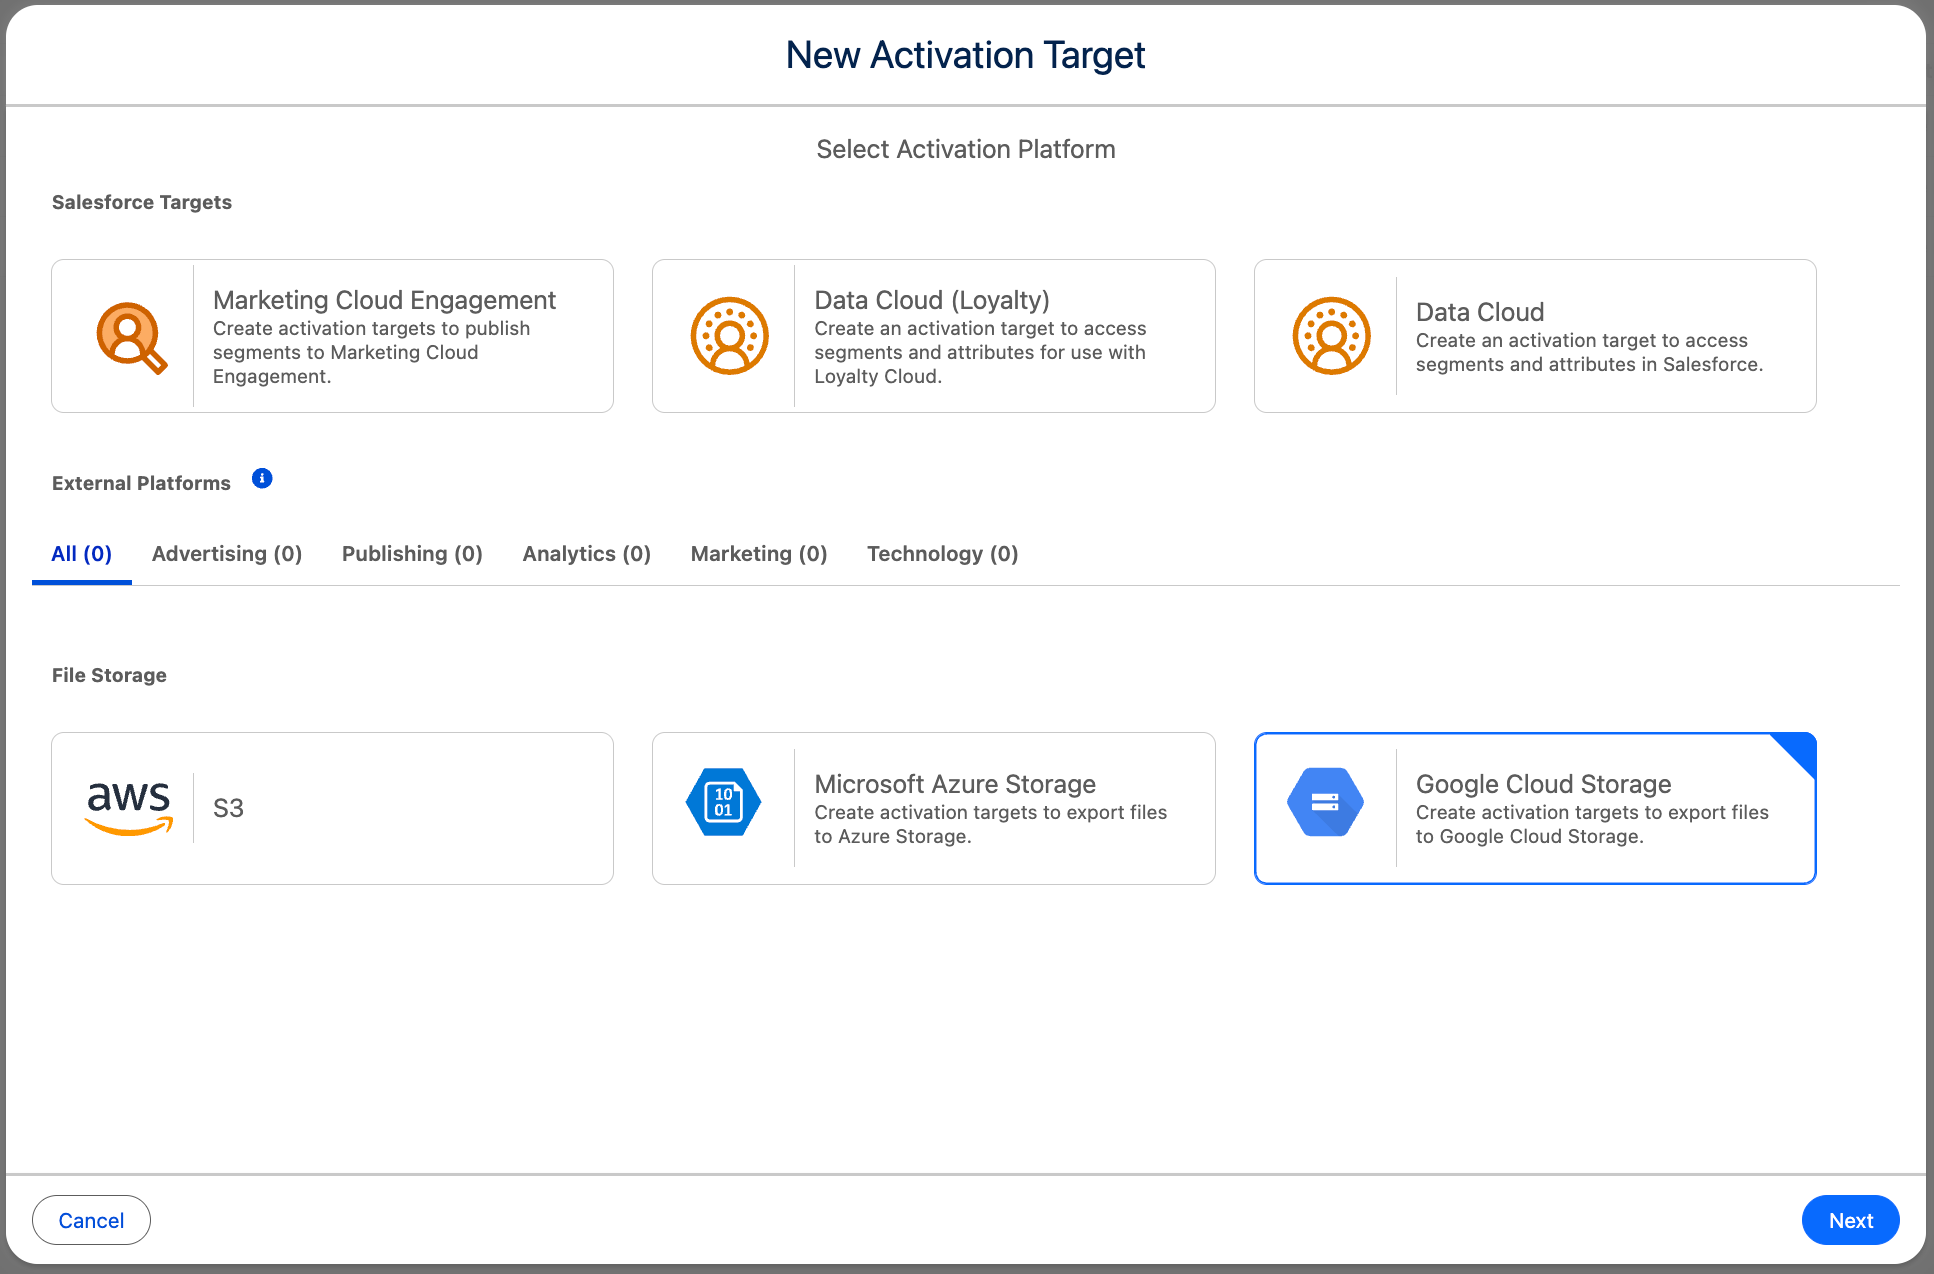
- In Data 360, navigate to the Activation Target tab and click New.
- Select the Google Cloud Storage connection you just configured.
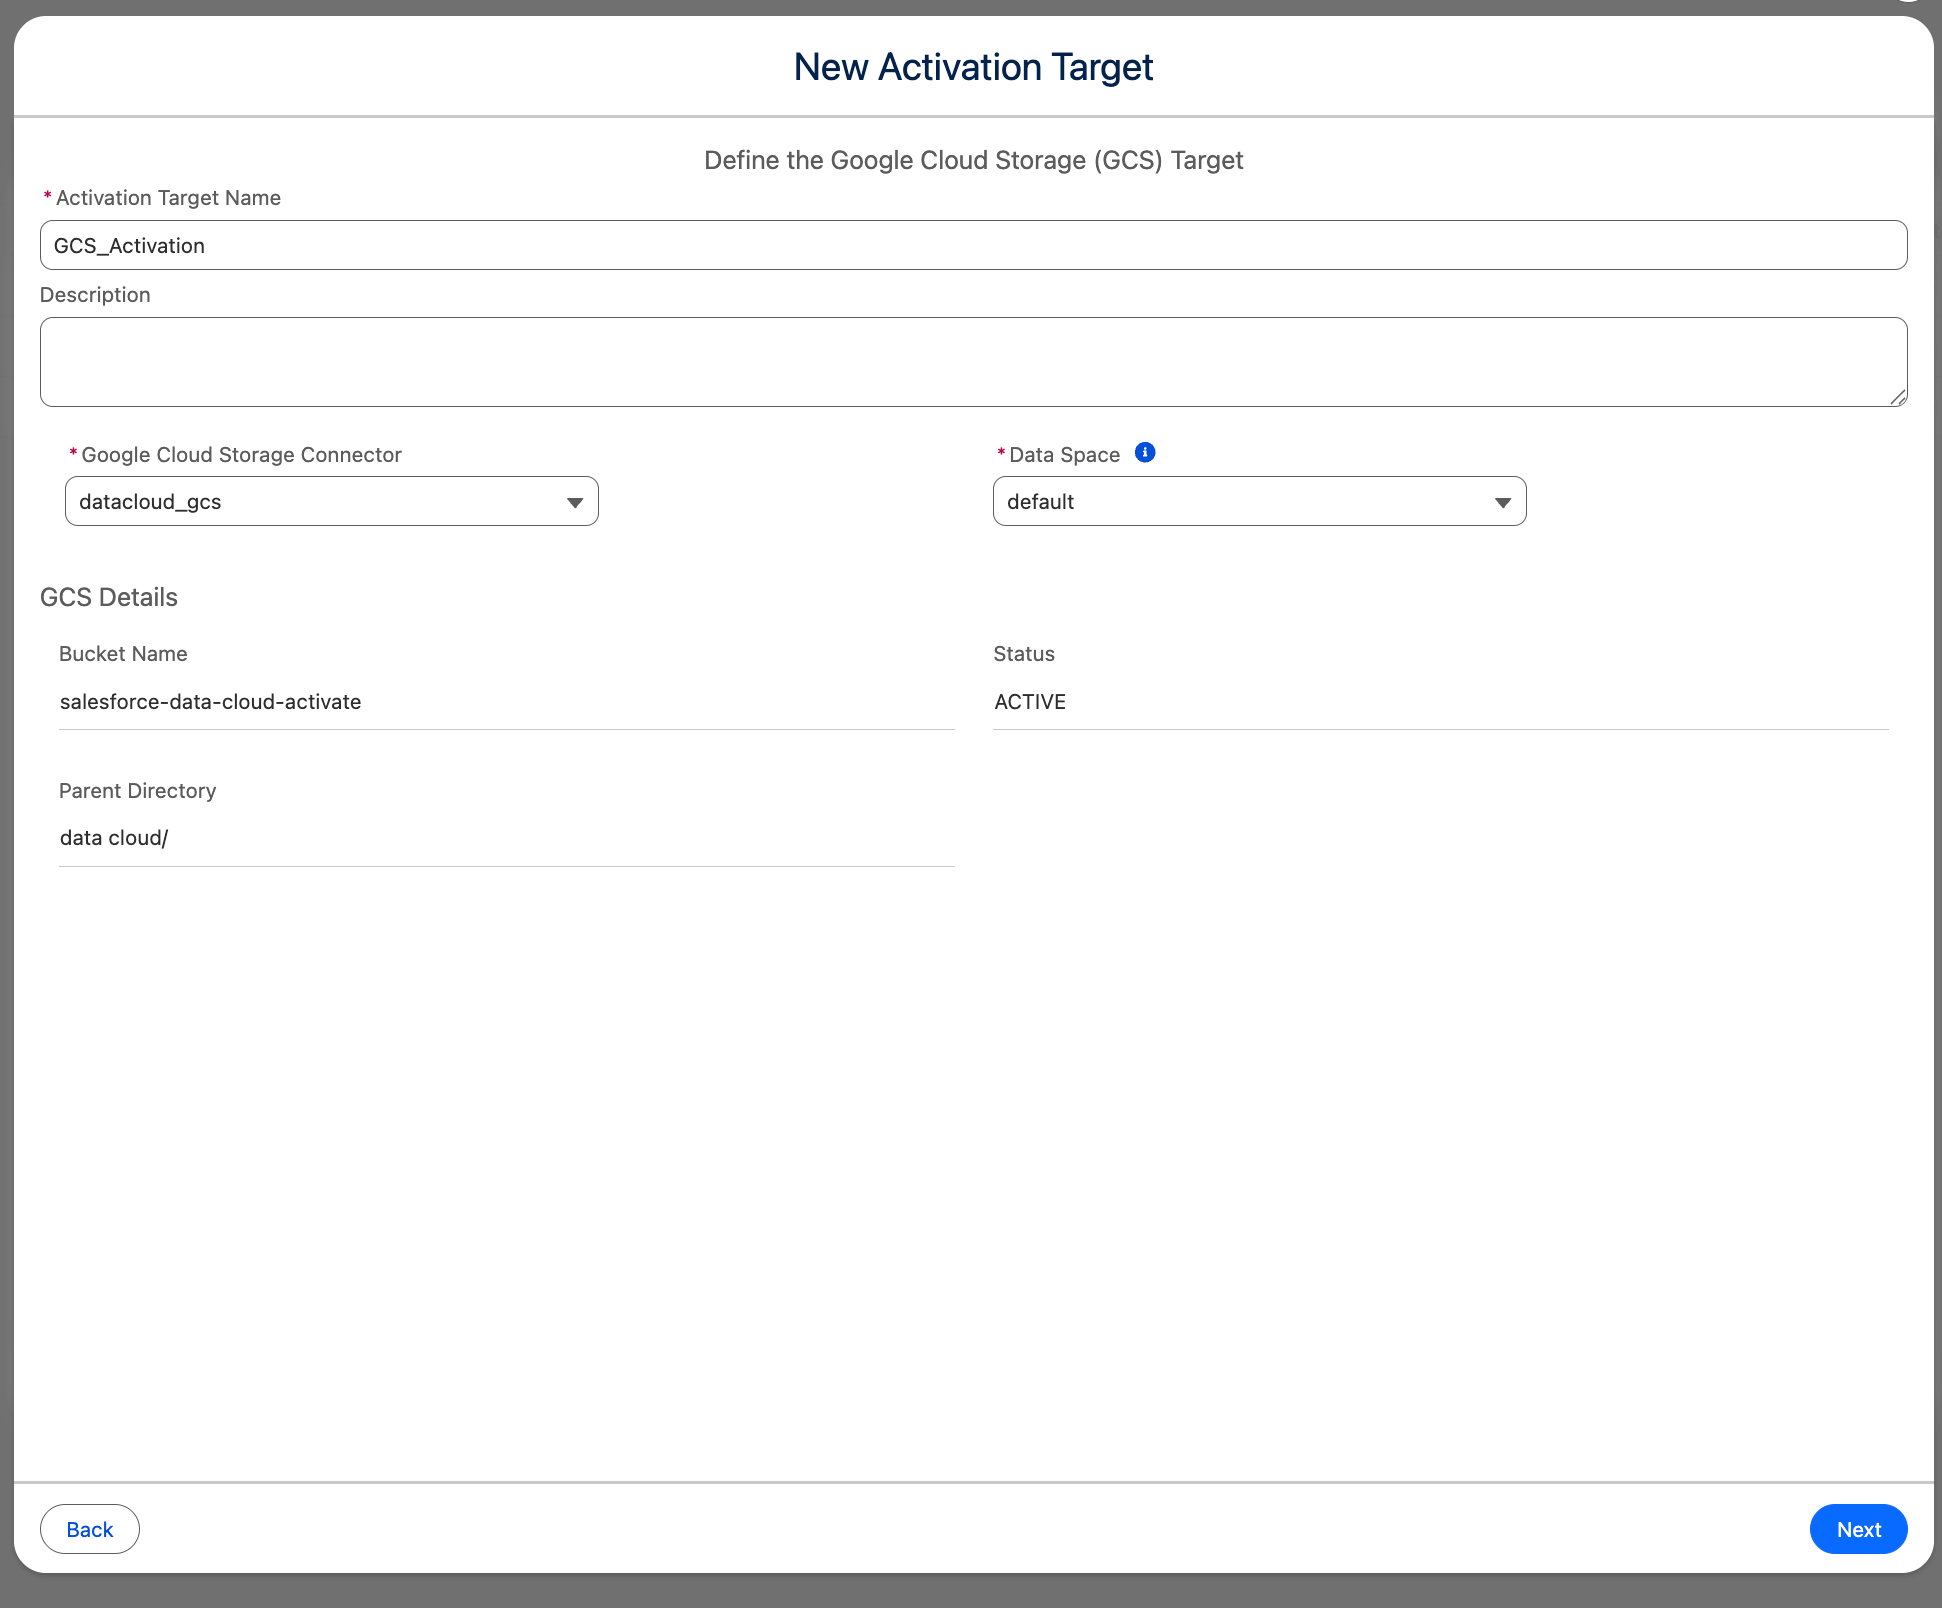
- In the modal:
- Enter a name for the Activation Target.
- The Bucket Name and Parent Directory fields will auto-populate.
- Click Next, configure settings based on your use case, and click Save.
You’ve now successfully connected Salesforce Data 360 to Google Cloud Storage and created an activation target. You can now attach this activation target to your activation to begin sending data.
Número del artículo de conocimiento
004980240
¿Resolvió este artículo su problema?
¡Háganos saber cómo podemos mejorar!