Valitse organisaatio
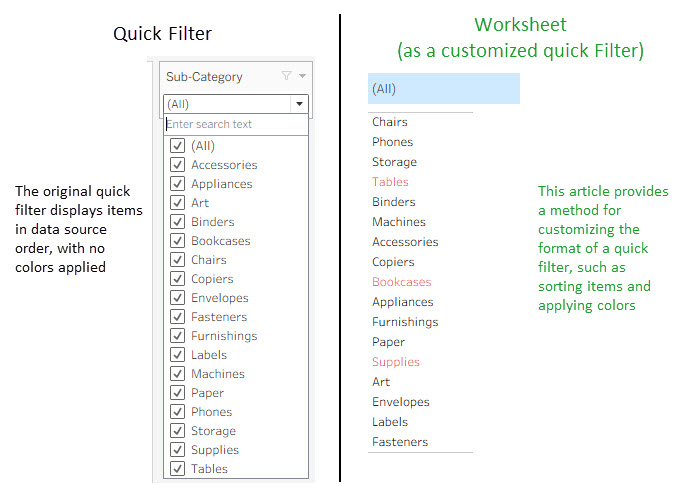
How to Use a Worksheet as a Quick Filter to Customize the Filter Format
Julkaisupäivä: Aug 19, 2025
Tehtävä
Example: How to sort the quick filter sub-categories in descending order of Sales and color sub-categories with negative profit in red.
Vaiheet
Step 1 - Create a worksheet Filter List as the cutomized quick filter list
- Create a worksheet and rename it Filter List
- Add Sub-Category to Rows, right click it, uncheck Show Header
- Right-click Sub-Category, select Sort..., and configure the sort as follows:
- Sort By: Field
- Sort Order: Descending
- Field Name: Sales
- Affrefation: Sum
- Add Sub-Category to Text in the Marks card
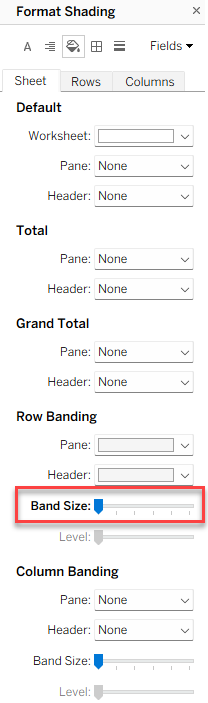
- From the menu bar, select Format > Shading...
- Change the Band Size of Row Banding to the leftmost level
- Create the following calculation field Color:
if sum([Profit])<0 then "Red" else "Black" END - Add Color to Color on the Marks card
- Edit the color lengend to set the colors
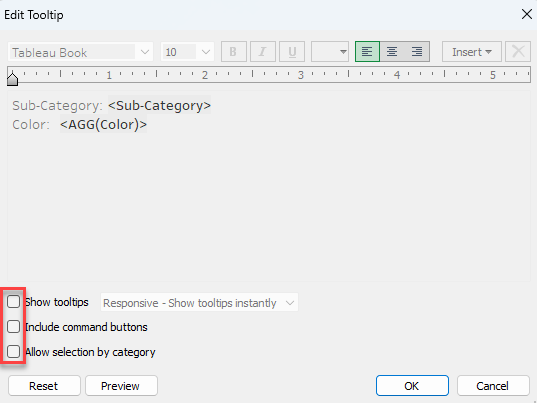
- Click Tooltip on the Marks card, uncheck all options below:
- Show tooltips
- Include command buttons
- Allow selection by category

Step 2 - Create a worksheet Button to show selected sub-categories of a filter
- Create a worksheet and rename it Button
- Create the calculation field 1 with "1" as the formula. (This field is used to initialize the filter action Button introduced below)
- Create the following calculation field Button:
if countd([Sub-Category])=min({fixed:countd([Sub-Category])}) then "(All)" elseif countd([Sub-Category])>1 then "(Multiple values)" else min([Sub-Category]) end - Add 1 to Detail, Button to Text in the Marks card.
- Click Tooltip in the Marks card and uncheck all options below:
- Show tooltips
- Include command buttons
- Allow selection by category
Step 3 - Build the dashboard
- Create a dashboard and rename it Solutions
- Place the views as follows:
- Target View on the left side of the dashboard
- Button above and to the right
- Filter List below the Button
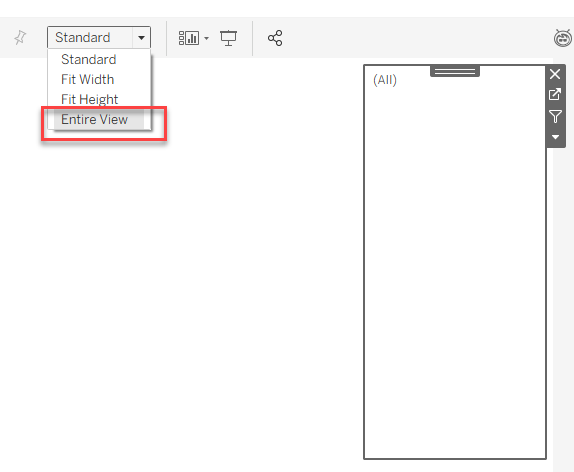
- Right click Button, uncheck Title, and change the view to Entire View
- Right click Filter List, uncheck Title, change the view to Fit Width
- Adjust all three worksheets to make the dashboard layout look natural.
Step 4 - Add dashboard actions
- From the menu bar, select Dashboard > Actions...
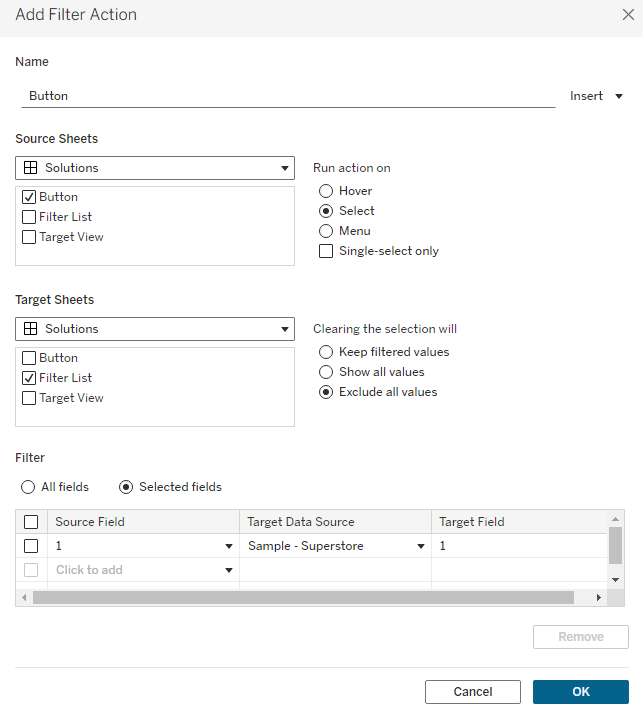
- From the pop-up window, select Add Action >Filter, create a filter action as the following:
- Name: Button
- Source Sheets: Button
- Target Sheets: FIlter List
- Run action on: Select
- Clearing the selection will: Exculde all values
- Filter: Selected fields
- Source Field: 1
- Target Field: 1
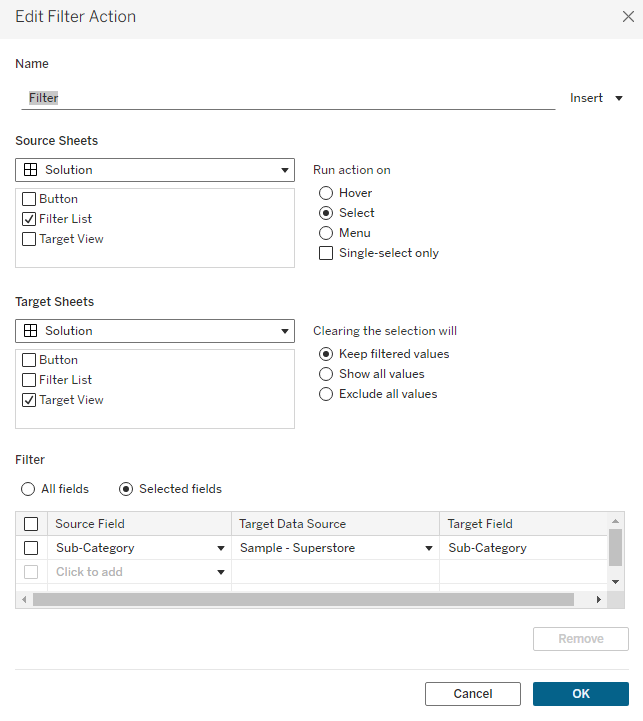
- Repeat the above 2 steps to create a new filter action as the following:
- Name: Filter
- Source Sheets: Filter List
- Target Sheets: Target View
- Run action on: Select
- Clearing the selection will: Keep filtered values
- Filter: Selected fields
- Source Field: Sub-Category
- Target Field: Sub-Category
Step 5 - Verify functionality
- Confirm the Button worksheet shows (All) and all sub-categories are visible in Filter List.
- Click (All) in Button worksheet
- Click Art in Filter List and confirm only Art is shown in the Target View
- Confirm (All) is still displayed in the Button worksheet.
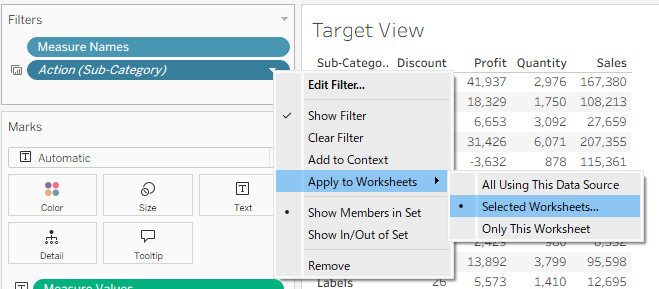
- Go to Target View, right-click the generated filter Action(Sub-Category) in the Filters card, and select Apply to Worksheets > Selected Worksheets...
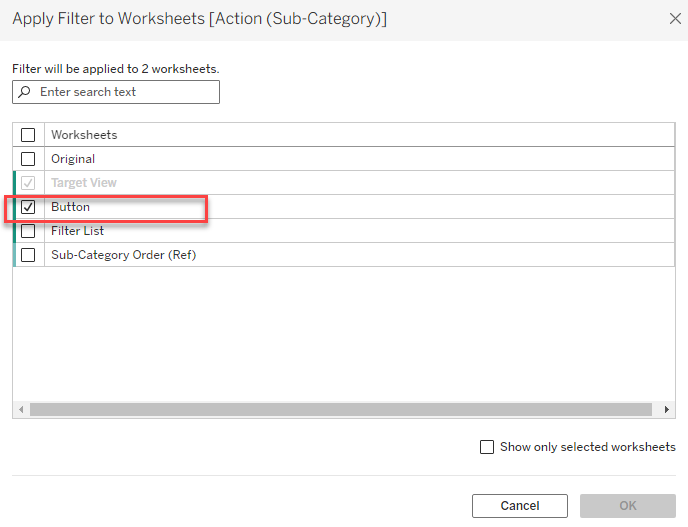
- Check worksheet Button in the pop-up window.
- Go back to dashboard Solutions, confirm Art is still displayed in the Button worksheet now.
- Click Art in Button worksheet, confirm the filter list is hiden.
- Click Art in Button worksheet, select multiple sub-categories in the filter list sheet, confirm it displays (Multiple values) in the button sheet.
Lisäresurssit
The above steps can be reviewed in the attached workbook How to Customize Quick Filter Format.twbx.
Specifying Sort Order of Items in Quick Filters
Change the color of items in quick filter based on certain conditions
Knowledge-artikkelin numero
005132394
Ratkaisiko tämä artikkeli ongelmasi?
Anna palautetta, jotta voimme kehittyä!