Välj en organisation
How to Create a Custom Picklist on Salesforce Account and Use It in Screen Flow and Record-Triggered Flow
Publiceringsdatum: Oct 13, 2026
Beskrivning
This article explains how to create and configure a custom picklist field on the Account object to maintain consistent county values using Salesforce Flow. It also demonstrates how to use this picklist in Screen Flows and Record-Triggered Flows for streamlined data entry and automation.
Lösning
This article explains how to create a custom picklist field on the Salesforce Account object to keep dropdown values consistent, and how to reference it in Salesforce Flow for guided data entry (Screen Flow) or automated field population (Record-Triggered Flow).
Assumptions
- The standard Account object is used for example purposes.
- A few counties in Georgia are populated via Salesforce Flow.
Create a Custom Picklist Field on the Account Object
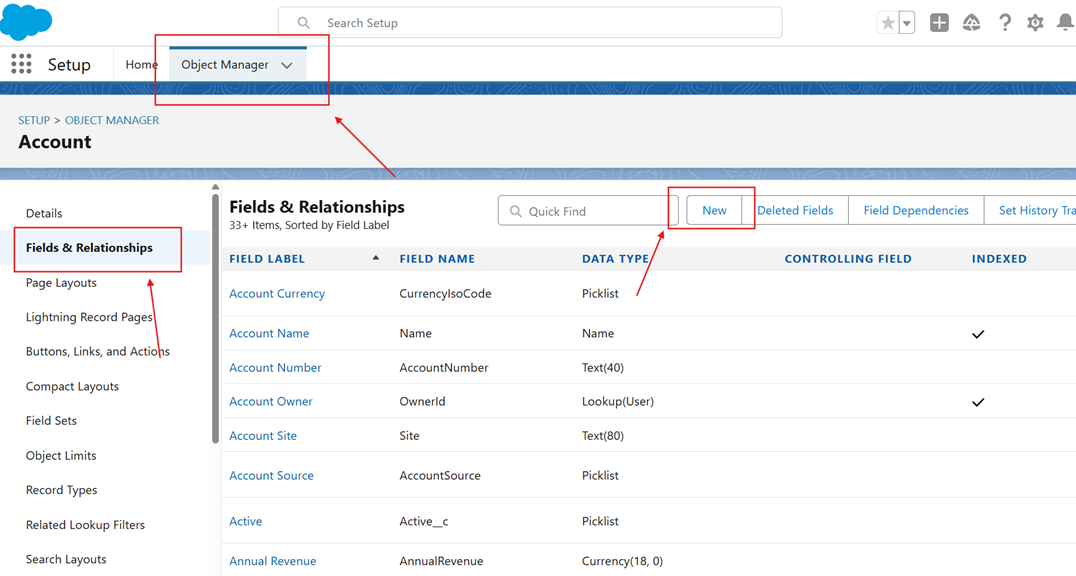
- Go to Setup > Object Manager > Account > Fields & Relationships, then click New in the top right corner.
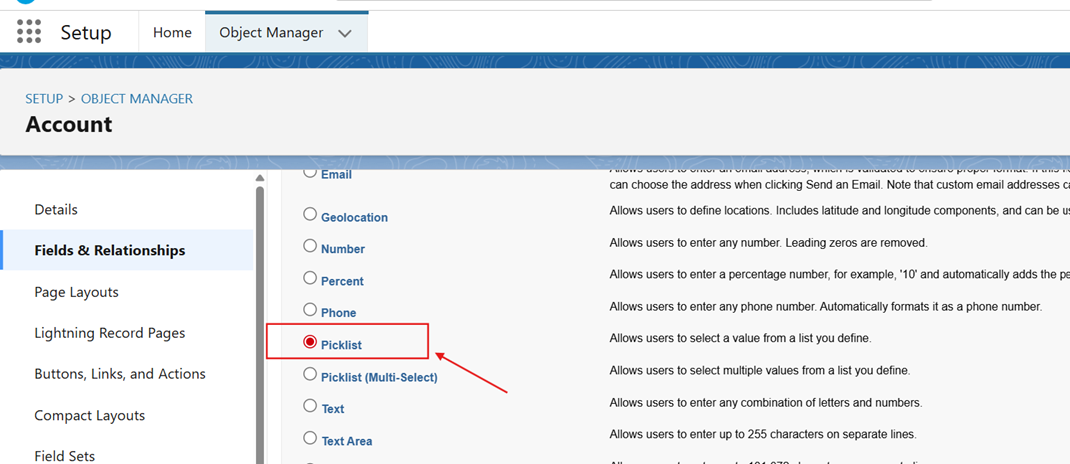
- Select Picklist as the Data Type.
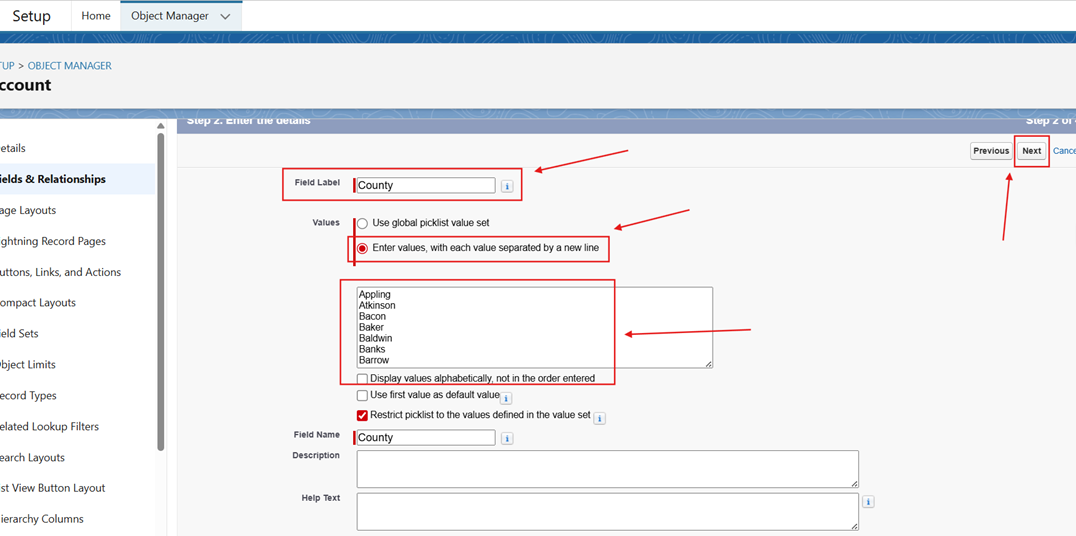
- Enter the Field Label, select Enter values, with each value separated by a new line, and enter the Field Name as County. Click Next.
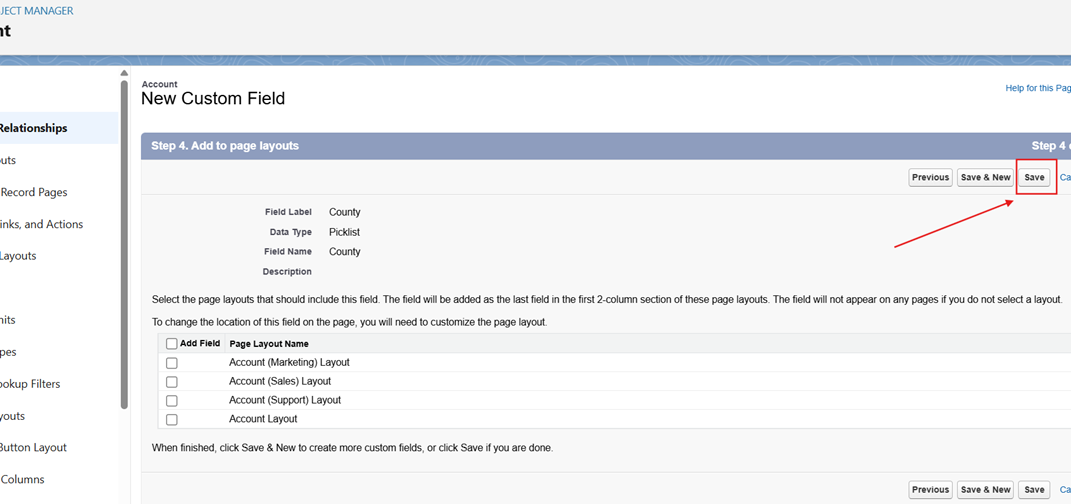
- Click Next on the remaining steps until the Save button appears, then click Save to finish the field setup.
Use Case 1: Display a List of Counties in a Screen Flow
This use case shows how to display the County picklist values to users in a Salesforce Screen Flow.
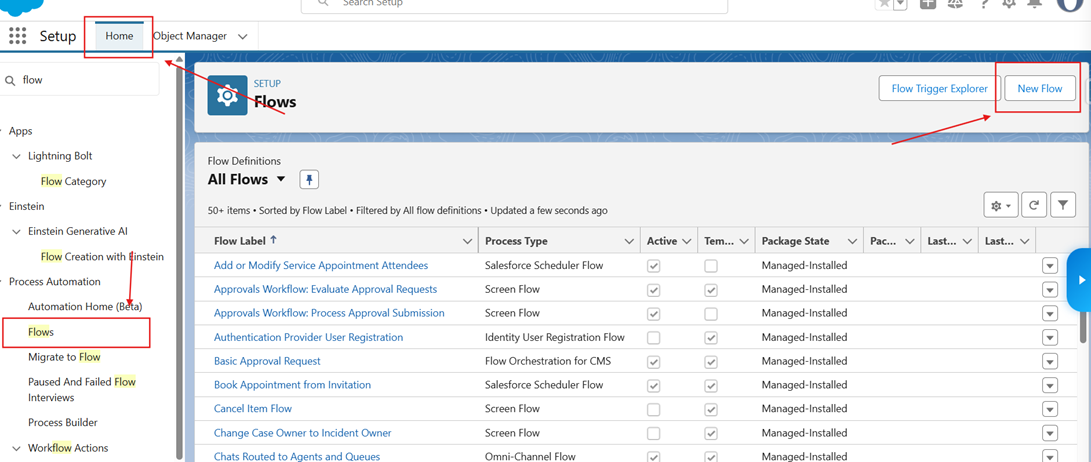
- Open your existing Screen Flow or create a new one: go to Setup > Home, type Flows in Quick Find, click Flows, then click New Flow in the top right corner.
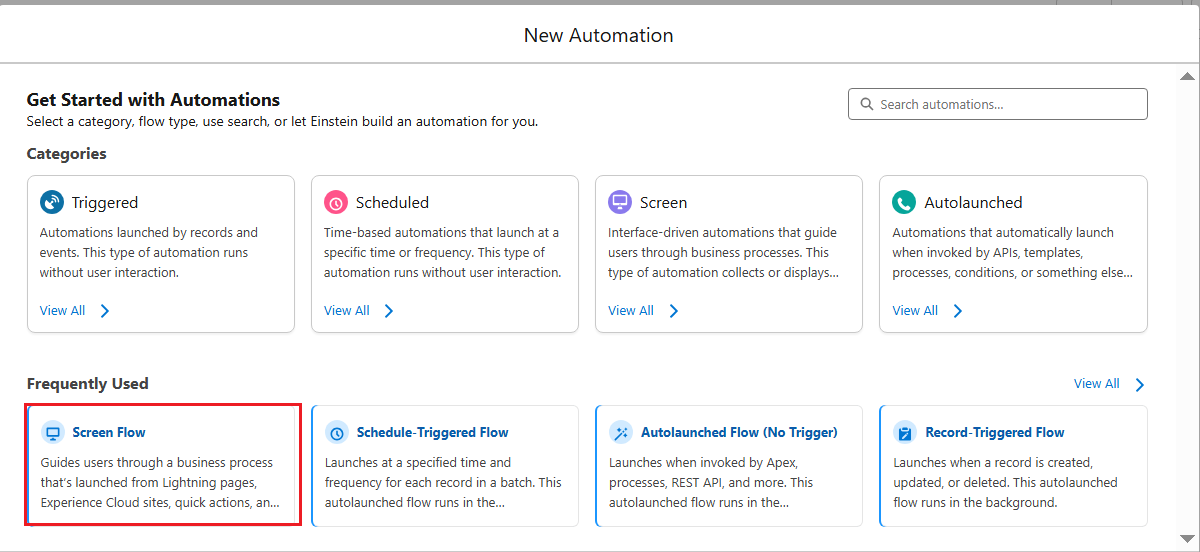
- Select Screen Flow.
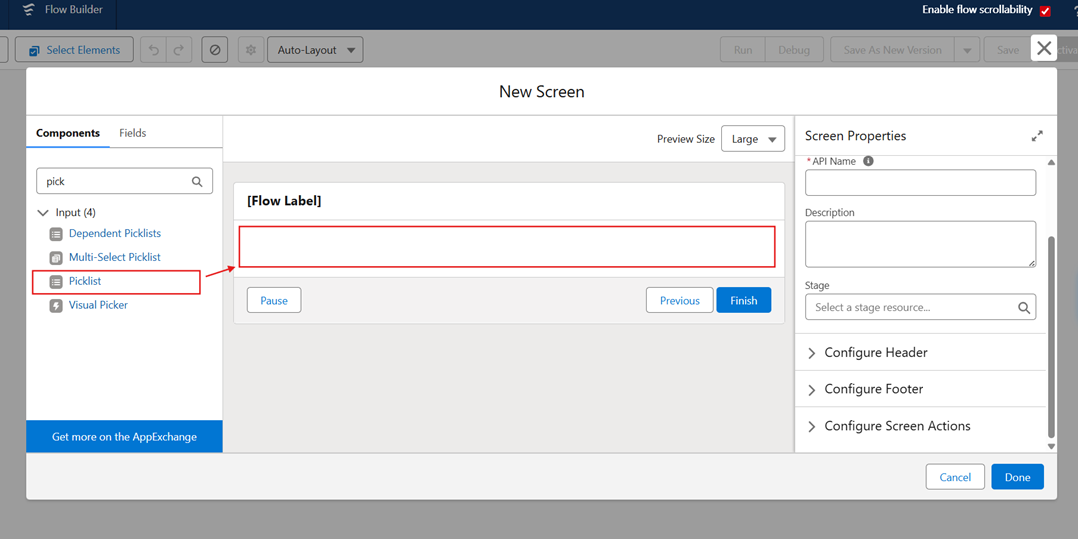
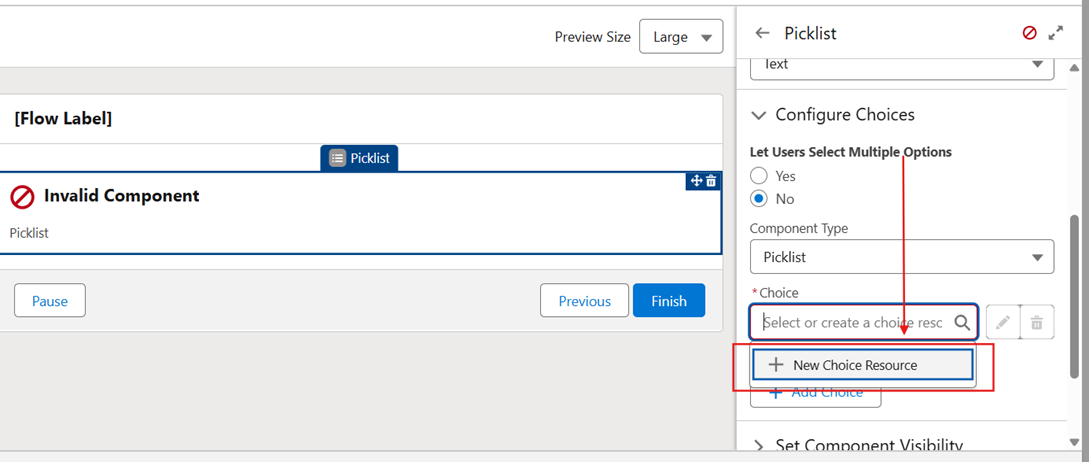
- Add a new Screen element or open an existing one, then drag and drop Picklist onto the Screen.
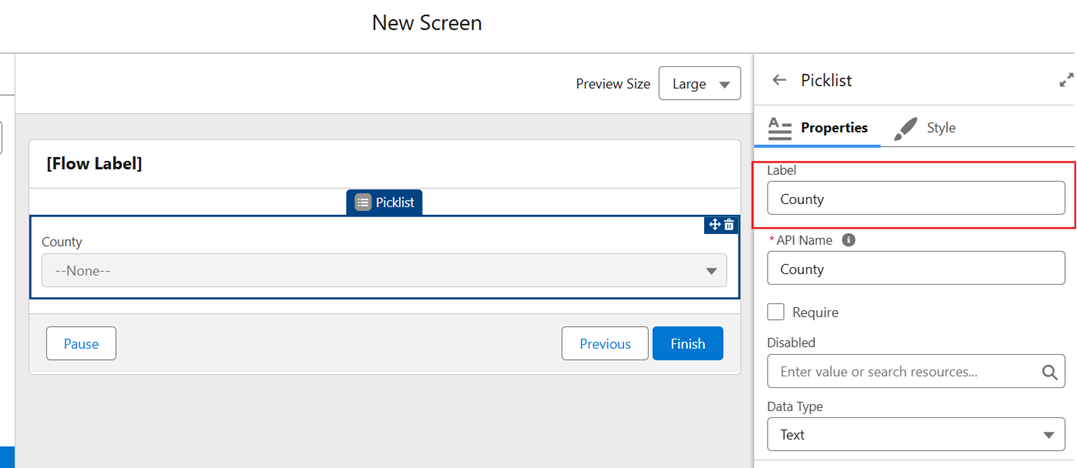
- Enter a preferred Label. This example uses County.
- Scroll down in the properties and select New Choice Resource in Choice.
Note: Ignore the component error. It resolves once the Choice option is set.
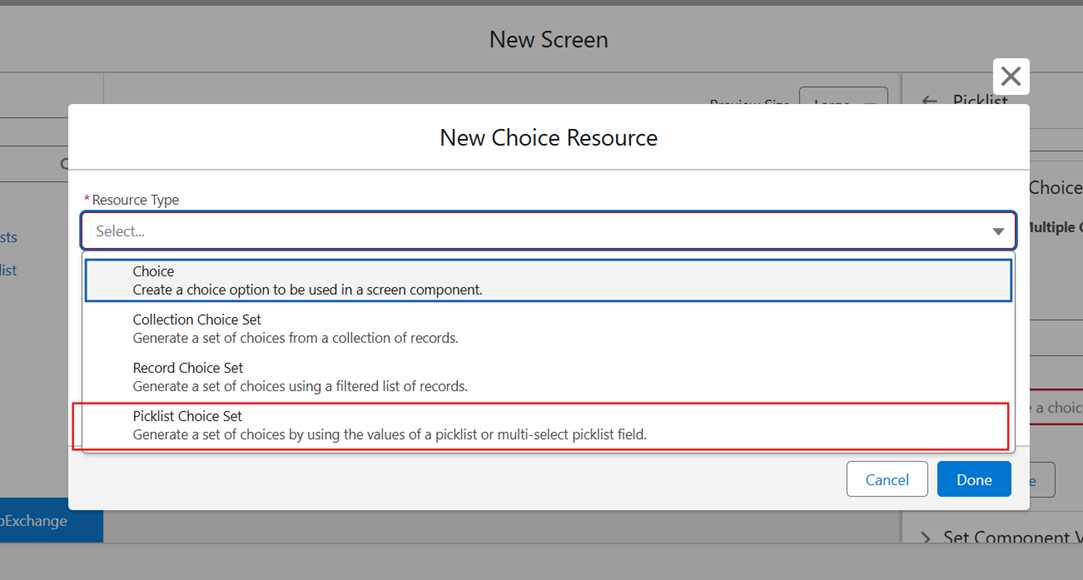
- Click Picklist Choice Set.
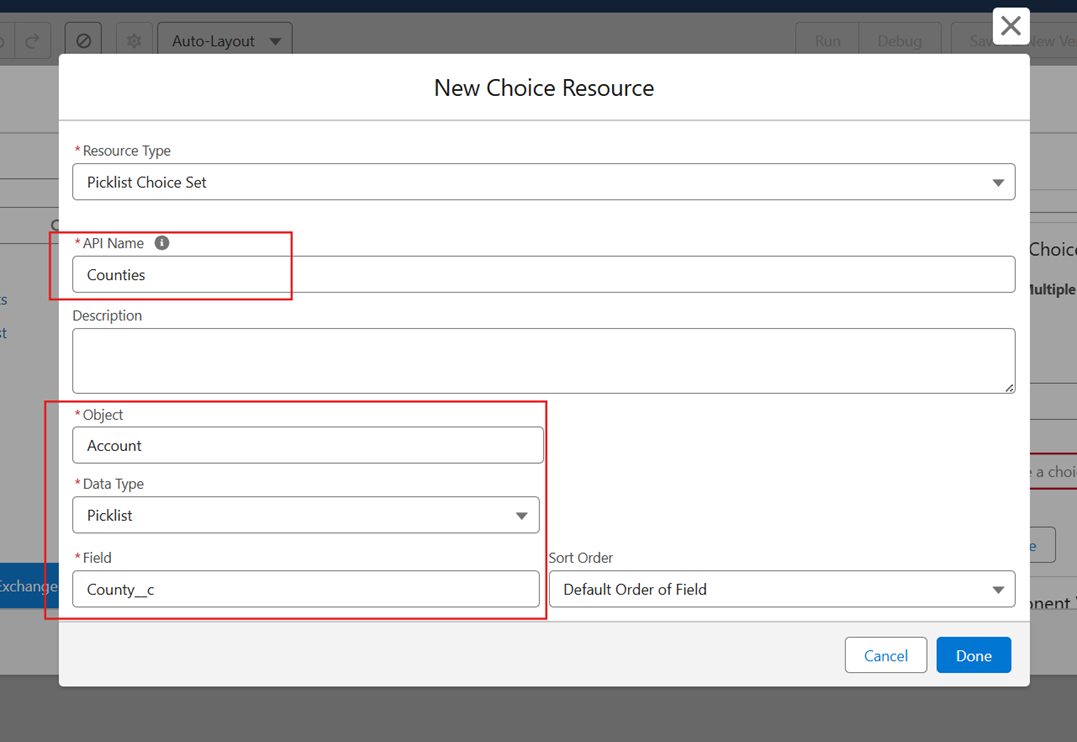
- Enter the API Name and select the remaining options as shown in the screenshot to configure the Choice option.
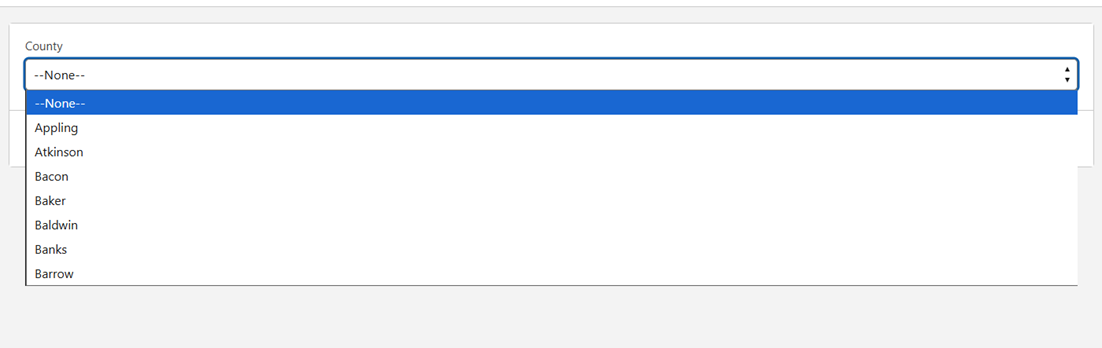
- The fully configured Picklist now shows the counties. Click Debug in the top right corner to see it in action.
Use Case 2: Populate County on Account Using a Record-Triggered Flow
This use case shows how to populate the County field automatically with a Salesforce Record-Triggered Flow.
- Open an existing Record-Triggered Flow or create a new one using the same navigation as the first step of Use Case 1. Add an Assignment element and configure it as shown in the screenshot to populate County.
- Save and Activate the flow to see it in action.
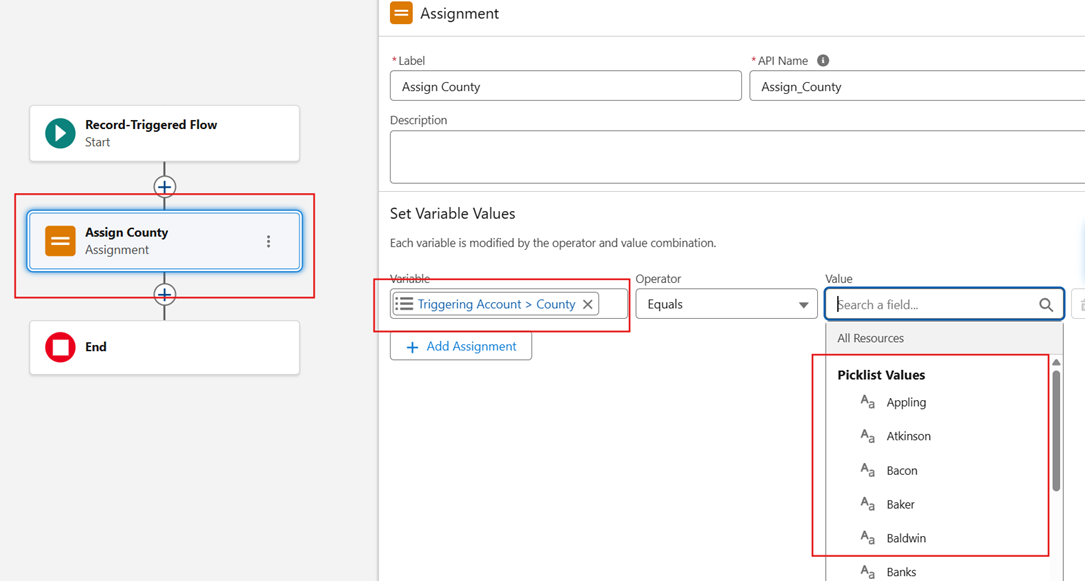
Note: You can use Fast Field Update to populate the field, or use the Actions and Related Records option to update the assigned County on the Account.
Ytterligare resurser
- How to conditionally show Screen Component Using Dependent Picklist in Salesforce Flow
- How to Dynamically Populate Contact Details Based on Selected Contact in a Salesforce Screen Flow
- How to Dynamically Find Salesforce Object Prefixes to Reuse the Same Screen Flow Across Multiple Objects
- Currency field in a Screen Flow shows only the ISO code instead of the full currency name.
Knowledge-artikelnummer
005224343
Löste denna artikel ditt problem?
Berätta för oss vad vi kan förbättra!