Vælg en organisation
How to Conditionally Show a Screen Component Using a Dependent Picklist in Salesforce Screen Flow
Udgivelsesdato: Oct 13, 2026
Beskrivelse
In this article, we'll explore how to create a Screen Component in Salesforce Flow that behaves dynamically by showing a Text box only when a specific value is selected in a Dependent Picklist and hiding it for other selections. This helps improve user experience by displaying only the relevant fields.
For example, a customer intake form shows an 'Explain if Other' text box only when the user selects 'Other' from a category dropdown — improving form clarity and reducing data entry errors.
Løsning
This article explains how to configure a Salesforce Screen Flow so that a Text component appears only when a specific value, such as "Other", is selected in a Dependent Picklist component, and stays hidden for all other values.
Step 1: Create a New Screen Flow and Add a Variable
- Go to Setup.
- In the Quick Find box, type Flows and select Flows from the results.
- Click New Flow.
- Choose Screen Flow and click Create. The Flow Builder opens.
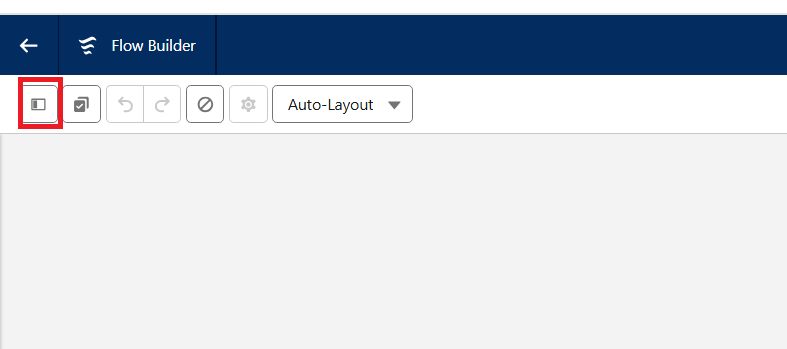
- Click the Toggle Toolbox icon.
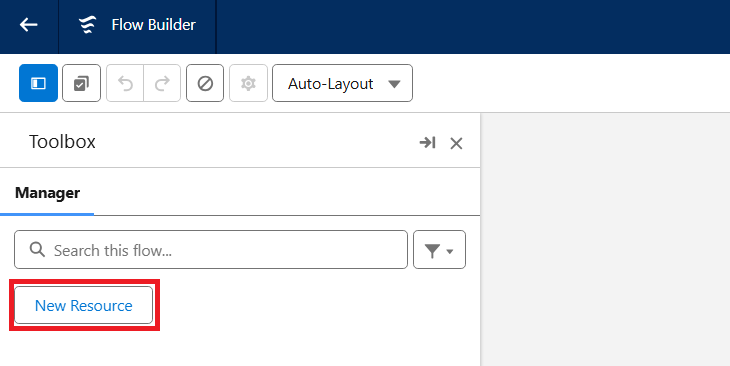
- Click New Resource, and select Variable.
- Enter the following details:
| API Name | recordId |
| Data Type | Record |
| Available for input | Check this box |
Note: The name of the Variable must be exactly recordId, without any quotation marks or spaces.
Step 2: Add a Screen Element and Insert the Dependent Picklist Component
- In the Flow Builder, click the + icon on the canvas.
- Select Screen from the list of elements.
- Give your Screen a clear Label.
- In the Screen Component panel on the left, find the Dependent Picklist Component and drag it onto your Screen.
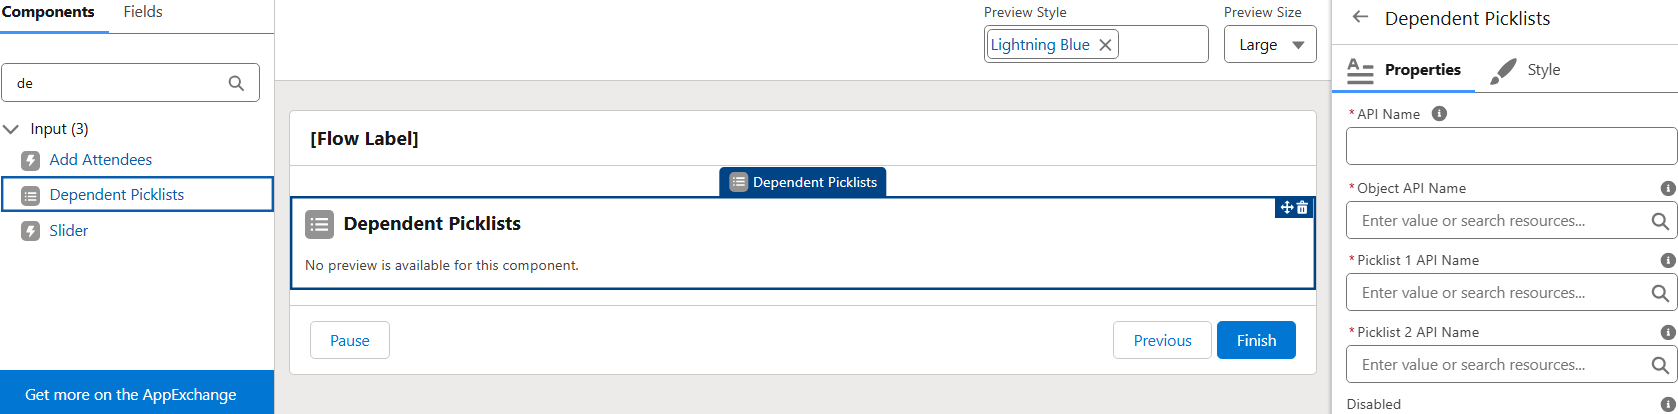
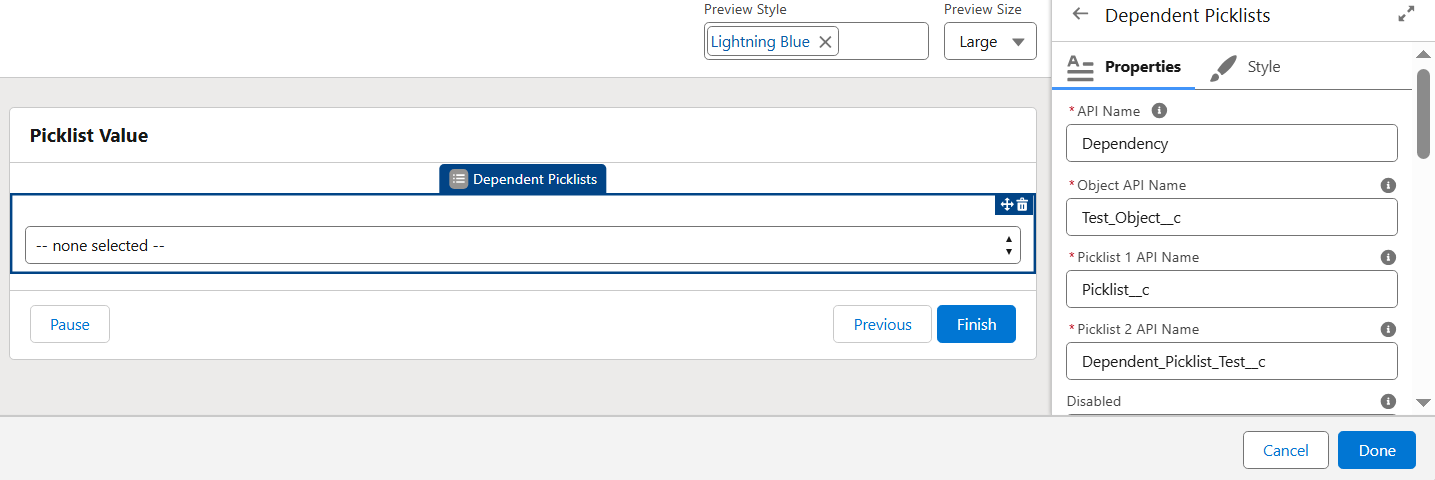
- Use the Configuration Panel on the right to fill in the required details, and click Done.
- For this example, the object API Name is Test_Object__c, the Controlling Picklist Field is Picklist__c, and the Dependent Picklist Field is Dependent_Picklist__c.
Note: Update these values to match the object and field API names in your org.
Step 3: Add a Text Component and Set Conditional Visibility
- On your Screen Element, drag a Text Component from the left panel and drop it onto the Screen.
- In the right-hand panel, enter a Label for the component.
- For this example, set the Label to Explain if Other.
- The API Name populates automatically based on the Label.
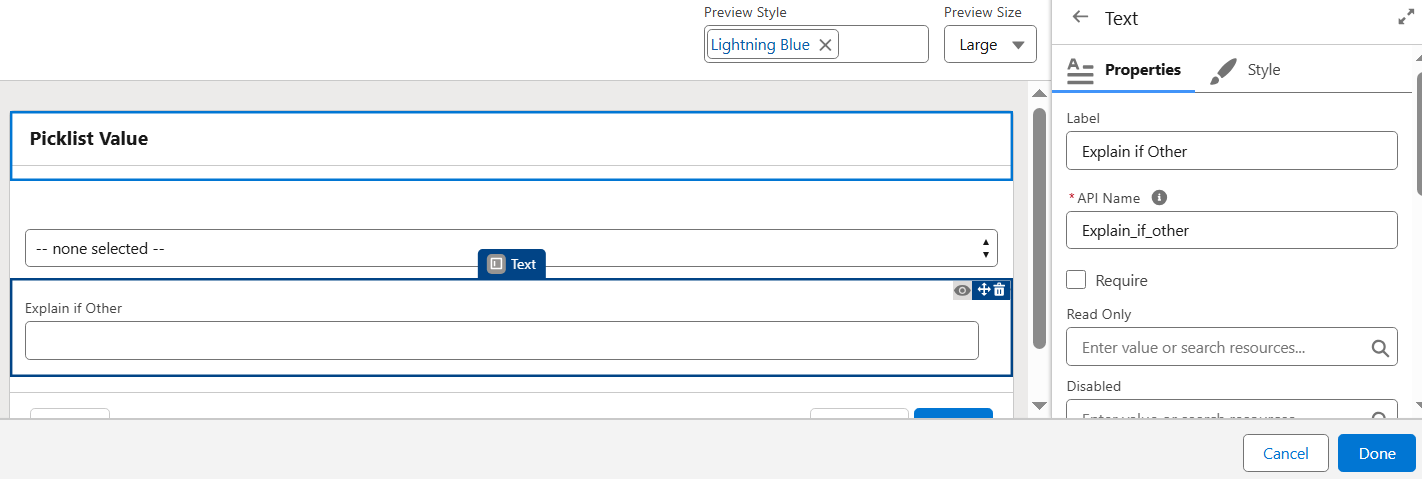
- In the right-hand panel, scroll down to the Set Component Visibility section and expand it.
- Under When to Display Component, choose All Conditions Are Met (AND).
- Click Add Condition, and in the Resource field, select the Dependent Picklist Component that you added earlier.
- In Resource, select the Dependent Picklist value and configure it as shown in the following table.
| Resource | {!Dependency.middleValue} |
| Operator | Equals |
| Value | Other |
Step 4: Test and Save the Flow
- Click Run on the Flow Builder canvas to test.
- On the Screen, select Other from the Dependent Picklist.
- The Text field appears.
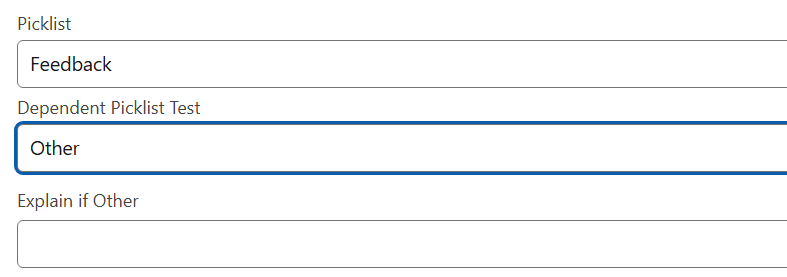
- Change the Dependent Picklist to any other value.
- The Text field disappears.
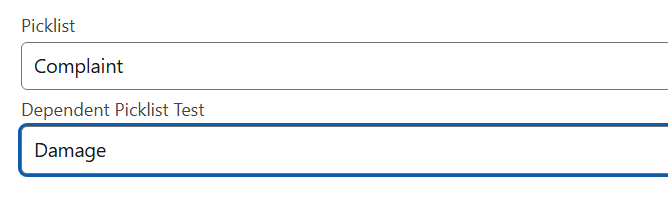
- When the visibility works as expected, click Save, and then click Activate.
Yderligere ressourcer
- How to Create a Custom Picklist on Salesforce Account and Use It in Screen Flow and Record-Triggered Flow
- How to Dynamically Populate Contact Details Based on Selected Contact in a Salesforce Screen Flow
- How to Dynamically Find Salesforce Object Prefixes to Reuse the Same Screen Flow Across Multiple Objects
Vidensartikelnummer
005227554
Løste denne artikel dit problem?
Giv os besked, så vi kan forbedre os!