Sélectionner une organisation
Build a Salesforce Dashboard with Fixed Filters
Date de publication: May 5, 2026
Description
This article explains how to create a Salesforce Dashboard with fixed Filters applied at the Dashboard level. By adding predefined Filters, all Dashboard components display consistent data, improving usability and reducing setup time. The steps include creating a new Dashboard, adding Reports as components, configuring Filters, and saving the Dashboard for use.
Résolution
Create a Dashboard with fixed Filters by configuring Filter values at the Dashboard level. This approach ensures that all Dashboard components display data according to predefined criteria, streamlining the user experience and reducing configuration time.
Here is the step-by-step guide for creating this Dashboard:
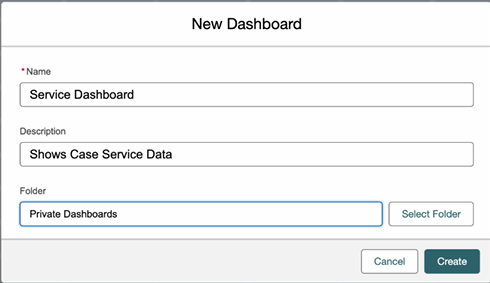
Step 1: Navigate to Dashboards and create a New Dashboard
- From our Salesforce org, navigate to the Dashboards section
- Click the New Dashboard button to initiate Dashboard creation
- Enter the Name, Description, and relevant Folder, then click Create
Step 2: Add Dashboard Components
- Click the + Widget button and select Chart or Table from drop-down to add a Chart to your Dashboard
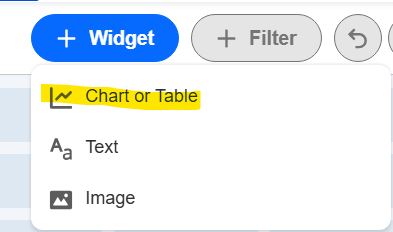
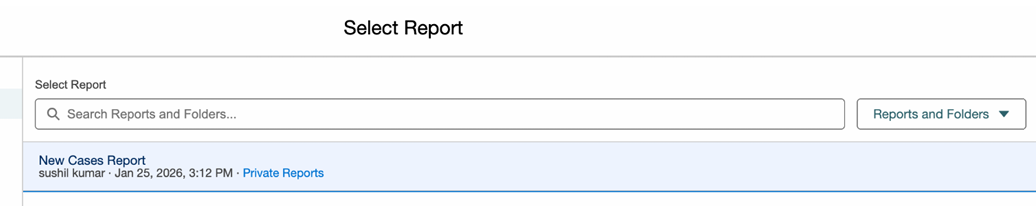
- Select the Report that you want to add
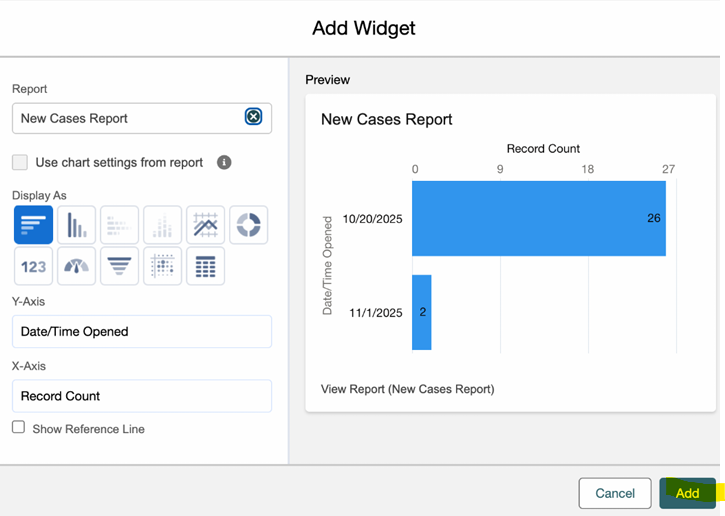
- Choose your Chart type and click Add
Note: Adding a Report as a Dashboard component links the report's data to a visual widget. You can add multiple components from different reports to a single Dashboard.
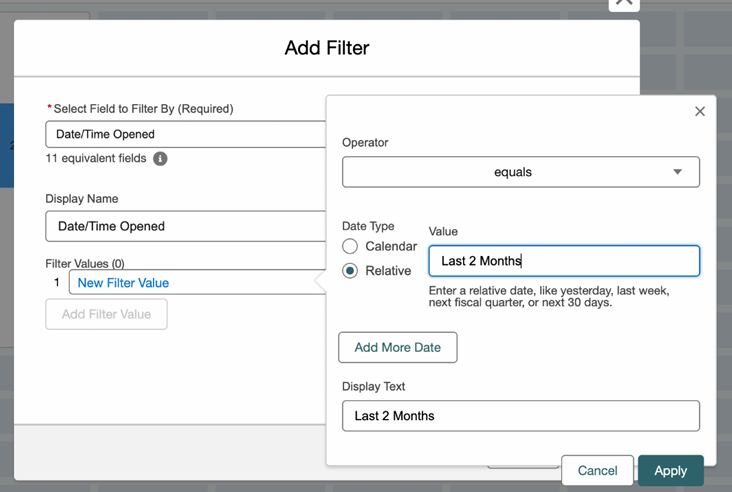
Step 3: Add Filters
- Click on +Filter button

- Select the field to Filter by and choose the Filter values. In the Relative text box, enter values as shown below. You can adjust the values as
needed. Refer to this documentation for a list of supported date Filter values.
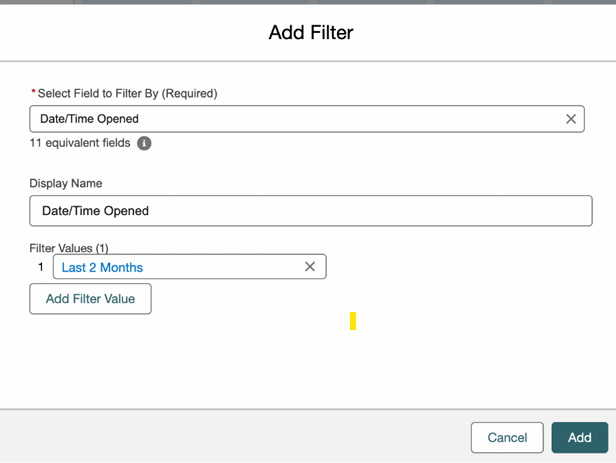
- Filter gets added in Filter Values as shown below. You can add more Filters as needed by clicking Add Filter Value and finally click Add button
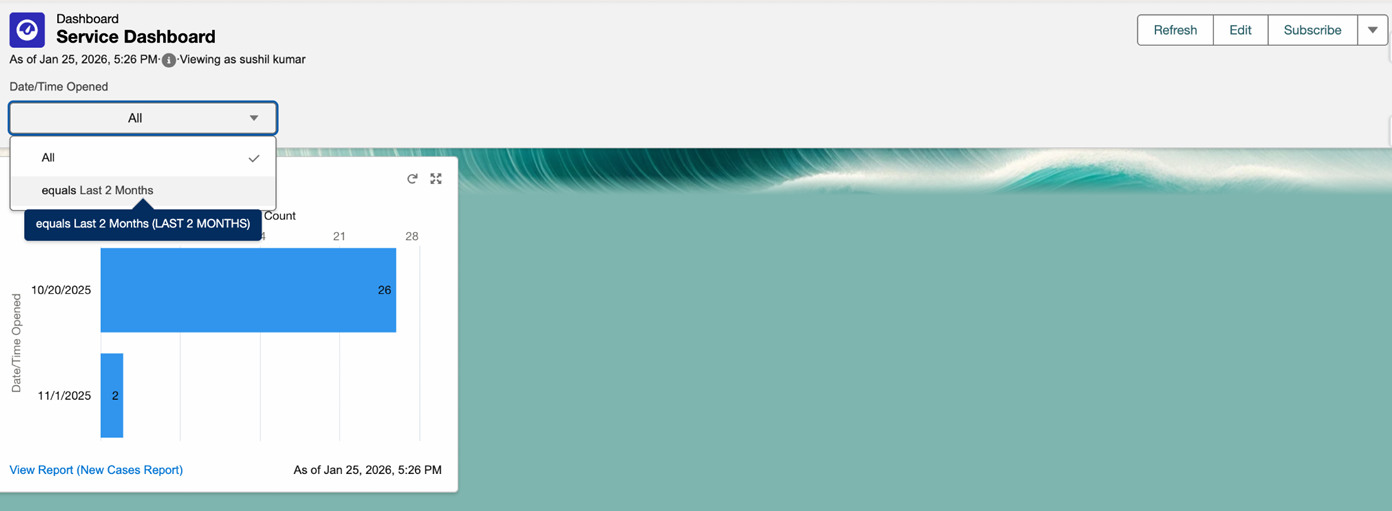
- Once you save the Dashboard, you should be able to see the Filters available for use
Numéro d’article de la base de connaissances
005306445
Cet article a-t-il résolu votre problème ?
Dites-nous ce que nous pouvons améliorer !