組織を選択
Out of the Box Experience Cloud PasswordLess Login implementation (LWR)
公開日: Feb 22, 2026
説明
How Passwordless Login Works
Signing Up
-
Click Sign Up on the login page.
-
Enter your email address or mobile phone number.
-
You’ll receive a one-time verification code.
-
Enter the code to complete your registration (No password is required).
Logging In
-
Enter your registered email address or mobile number.
-
We’ll send you a one-time verification code.
-
Enter the code on the login page.
-
You’ll be securely signed in.
Each code is time-sensitive and can only be used once, helping protect your account.
Why Use Passwordless Login?
Passwordless login provides several benefits:
-
Convenience – No need to remember complex passwords.
-
Security – One-time verification codes reduce the risk of password-related breaches.
-
Speed – Log in quickly without going through password reset processes.
-
Reduced Frustration – No more locked accounts due to incorrect passwords.
Frequently Asked Questions
Do I need to create a password?
No. Passwordless login eliminates the need for a password entirely.
How will I receive my verification code?
You’ll receive your code via:
-
Email (standard option)
-
Text message (if mobile verification is enabled)
What if I don’t receive my code?
-
Check your spam or junk email folder.
-
Confirm you entered the correct email address or phone number.
-
Wait a few minutes and request a new code if needed.
Can existing users use passwordless login?
Yes. If your email address or mobile number is already verified, you can log in using the passwordless option.
解決策
Configuration Steps
1️⃣ Create a Custom Login Discovery Page
-
Go to Setup → Search for All Sites.
-
Click Workspaces next to your site.
-
Navigate to Administration → Login & Registration.
-
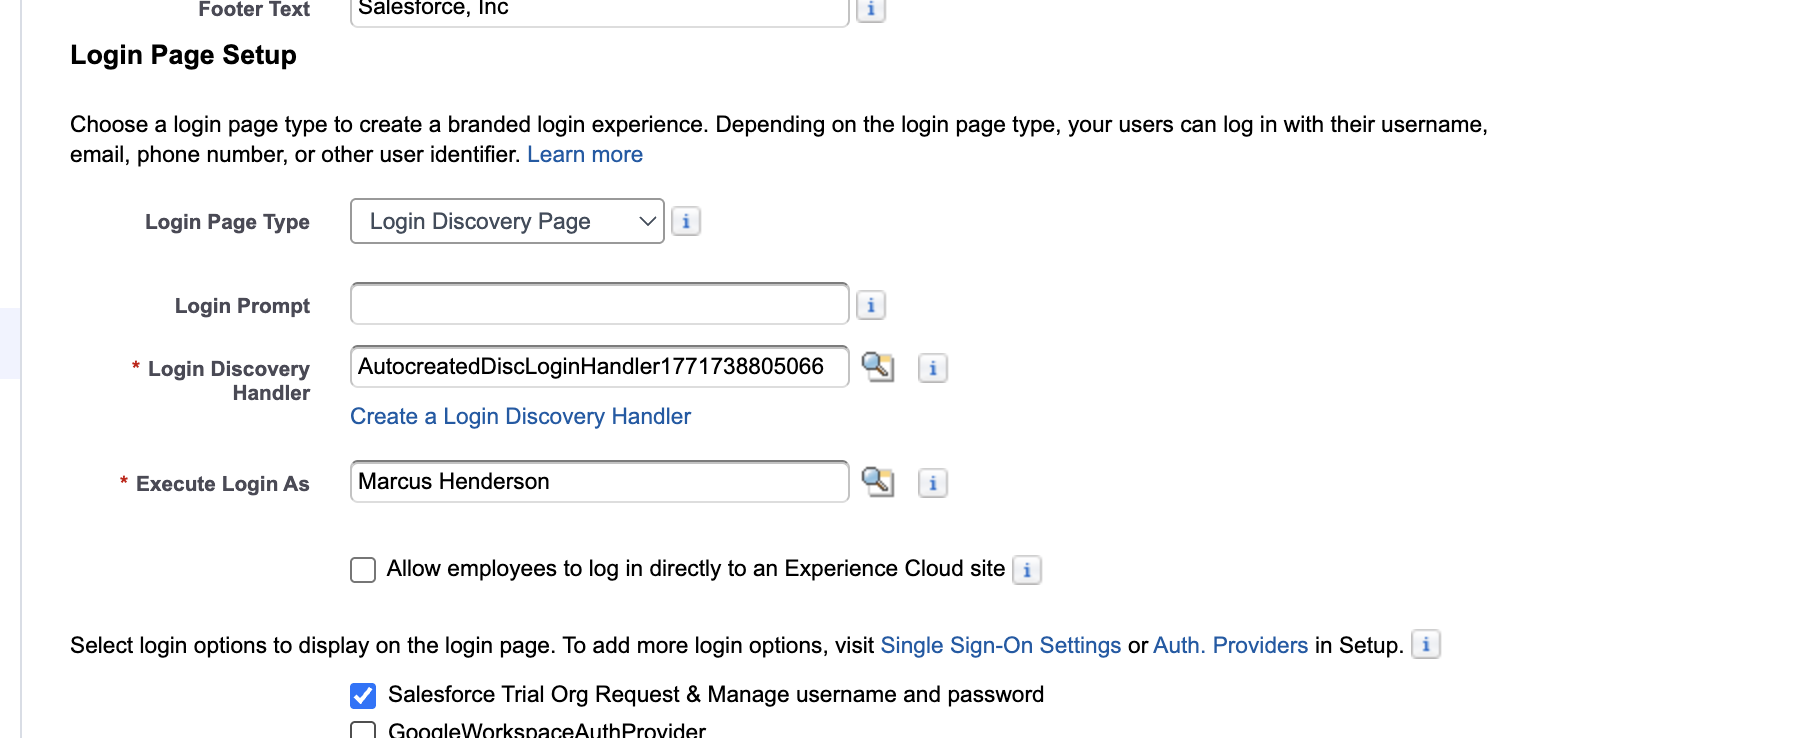
Under Login Page Setup, select Login Discovery Page.
-
Customize the login prompt text (e.g., “Email Address or Phone Number”) using a custom label if needed.
-
Leave the Login Discovery Handler field blank.
-
Click Create a Login Discovery Handler.
-
Salesforce will auto-generate an Apex class.
-
For Execute Login As, select a Salesforce administrator with the Manage Users permission.
-
Deselect Allow employees to log in directly to the site (if selected).
Note:
‣ The generated class name begins with: AutocreatedDiscLoginHandler followed by system-generated digits. You can rename and customize this class as needed.
‣ The Login Discovery Page does not support direct login for internal org employees. Employees should instead be redirected to an Identity Provider (IdP).
2️⃣ Configure the Registration Page
Under Login & Registration:
-
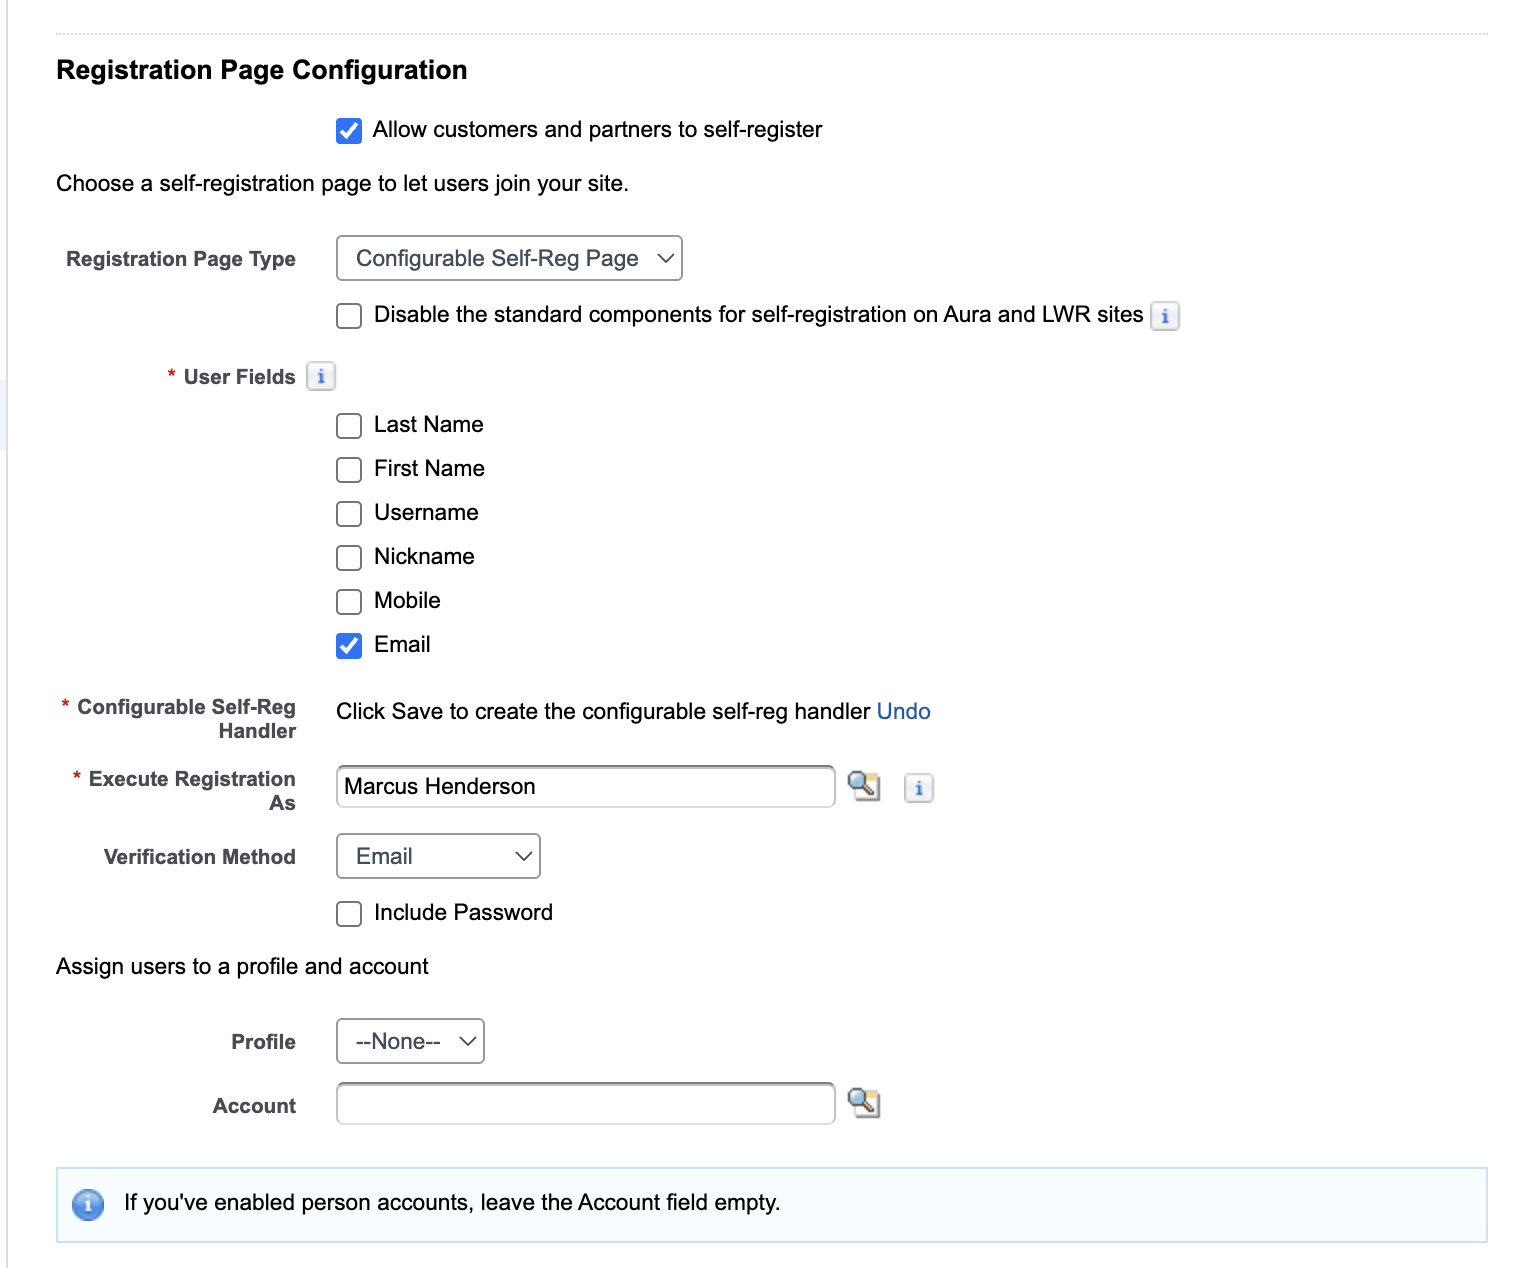
Enable Allow customers and partners to self-register.
-
For Registration Page Type, select Configurable Self-Reg Page (recommended for greater customization).
-
Select the required User Fields to collect during registration.
For the handler:
-
Leave Configurable Self-Reg Handler blank.
-
Click Create a Configurable Self-Reg Handler.
Note: The generated class name begins with: AutocreatedConfigSelfReg followed by system-generated digits. You can rename and customize this class as needed.
-
For Execute Login As, select a Salesforce admin with Manage Users permission.
-
Choose your preferred verification method (Email or Text Message).
-
(Optional) Assign a default Profile and Account for newly created users.
-
Leave remaining fields as default unless customization is required.
-
Click Save.
3️⃣ (Optional) Error Handling Customization
By default, if a login error occurs, the Apex handler displays a generic message. To provide a custom error message, use:
‣throw new Auth.DiscoveryCustomErrorException('Custom error message defined by the admin user.');
Alternatively, use a Custom Label (recommended for maintainability):
‣throw new Auth.DiscoveryCustomErrorException(Label.CustomError);
This allows administrators to update error messages without modifying the Apex class.
その他のリソース
Create a Custom Login Discovery Page
Custom Login Page with LWC (For Advanced Branding and Customization)
ナレッジ記事番号
005315608
この記事で問題は解決されましたか?
ご意見をお待ちしております。