Organisation auswählen
MuleSoft 4.9 & Java 17 Migration- Anypoint Studio-test
Veröffentlichungsdatum: Apr 2, 2026
Voraussetzung(en)
Aufgabe
Please follow the below steps and update the Anypoint Studio version, Mule runtime version, connector versions, and Exchange assets to complete the Java 17 upgrade
Schritte
Step 1: Review Current Setup and Plan the Upgrade
Make sure to list all the connectors, modules, and dependencies you are currently using, along with their current versions. This way, if you ever need to roll back or just want to see how far behind you are from the latest versions.
Before jumping into the upgrade, it is important to have a clear plan. This helps avoid surprises and ensures a smooth transition across environments.
-
Inform the desire for upgrade to stakeholders.
-
Define upgrade timeline and milestones.
-
Allocate time for local, QA, UAT, and prod validation.
-
Design rollback and recovery plan.
-
Setup post-upgrade performance/log monitoring
Step 2: Validate Connector or Module Compatibility
All Anypoint connectors and modules are currently Java 17 compatible. The list of all Java 17 compatible connectors and their versions are available here.
There are two (2) ways to validate if your connector is compatible to Java 17. It can be via Anypoint Studio or Anypoint Exchange.
In Anypoint Studio:
-
Open your Mule project in Anypoint Studio.
-
Right click the Mule project.
-
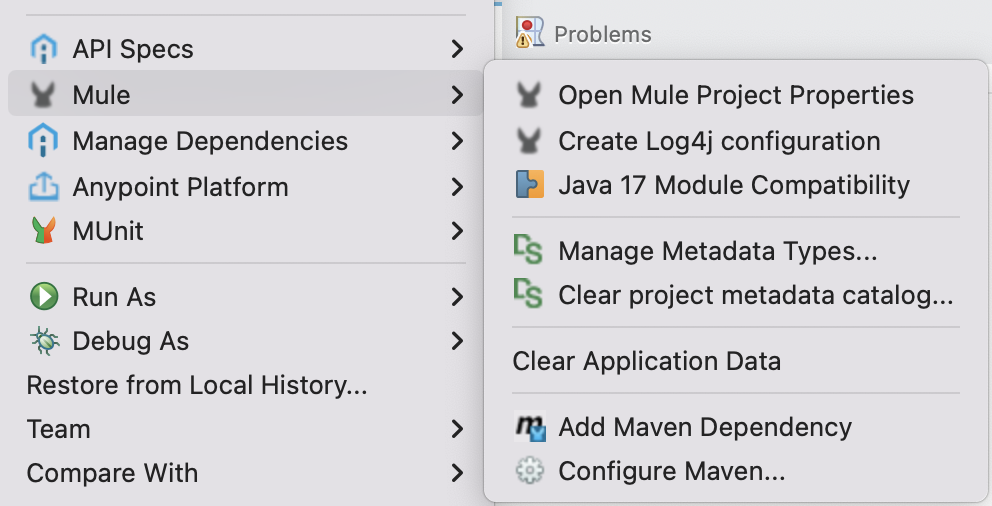
Hover to Mule and click Java 17 Module Compatibility.
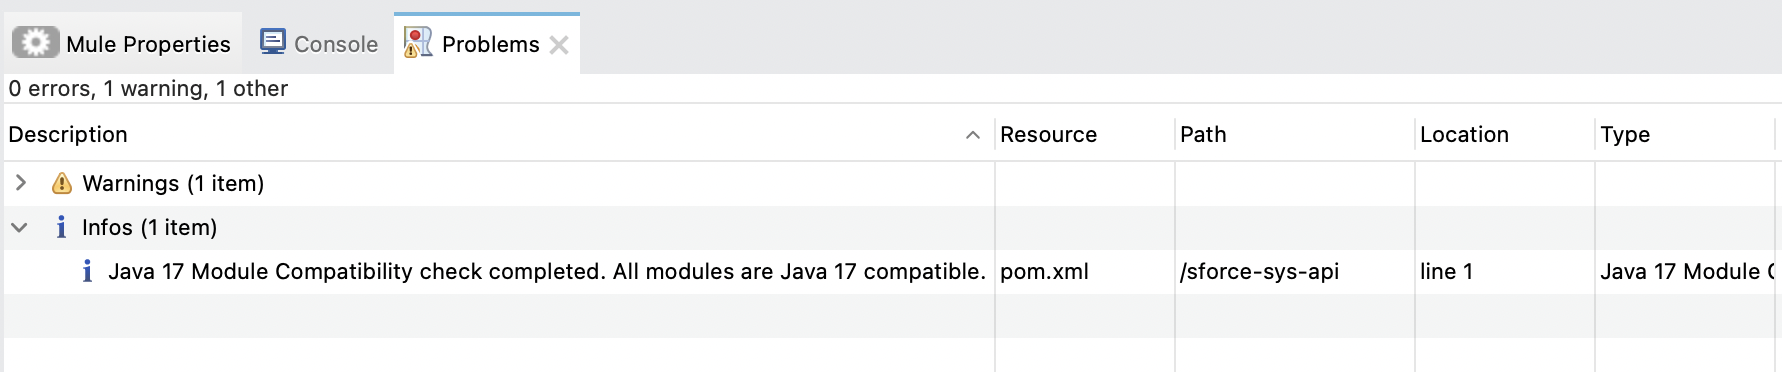
4. Wait for few seconds then check Problems tab in the console.
You should get a confirmation like "All modules are Java 17 compatible."
In Anypoint Exchange:
-
Login to your Anypoint Platform.
-
Go to the navigation bar and click Exchange.
-
In the search bar, type the name of the module or the connector (i.e. "Salesforce Connector - Mule 4").
-
Click and open the asset.
-
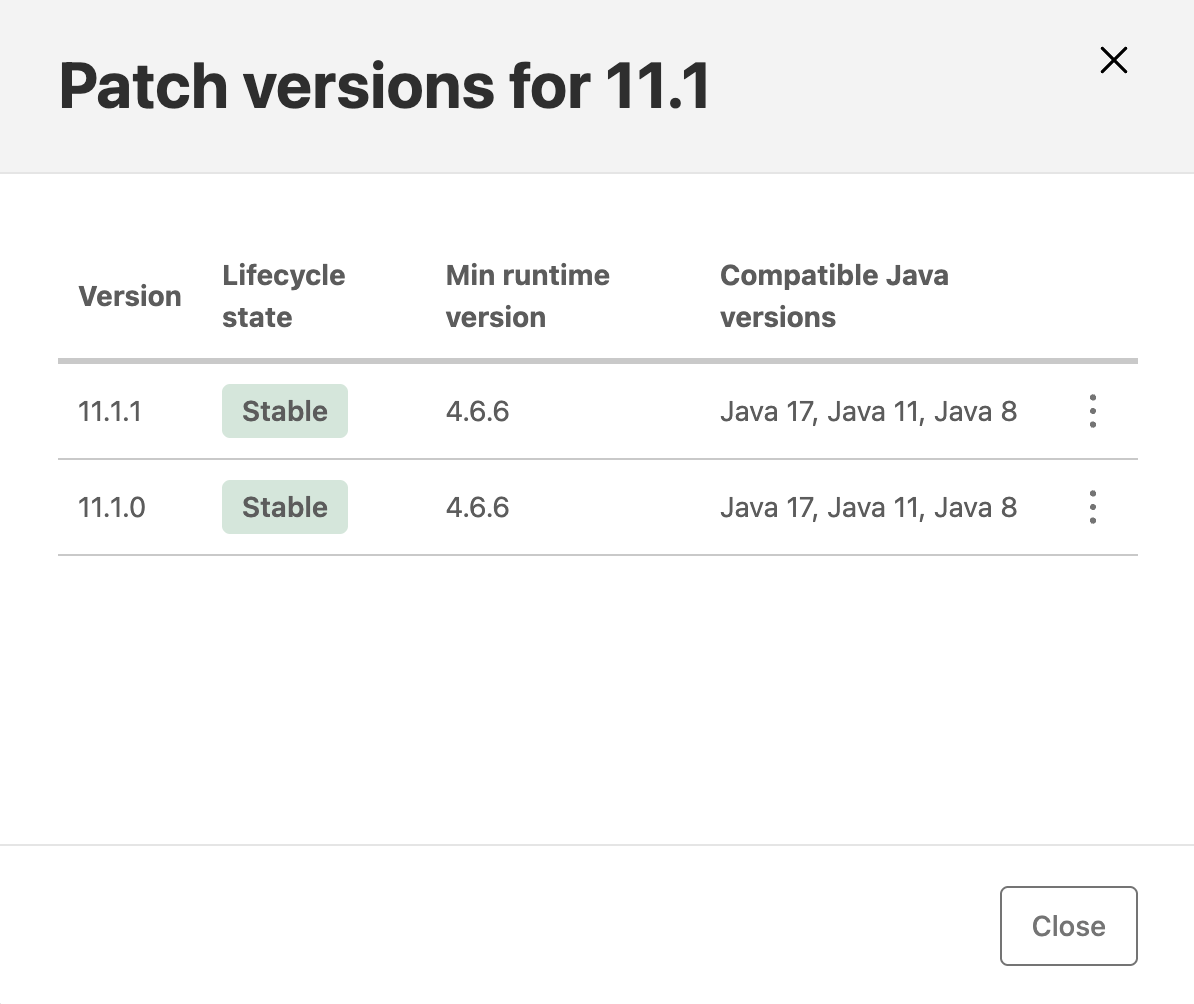
Click View versions and you would see the compatible Java versions for that asset.
Step 3: Check the Java Runtime and Mule Runtime of Anypoint Studio
-
Open your Mule project in Anypoint Studio.
-
Right click the Mule project.
-
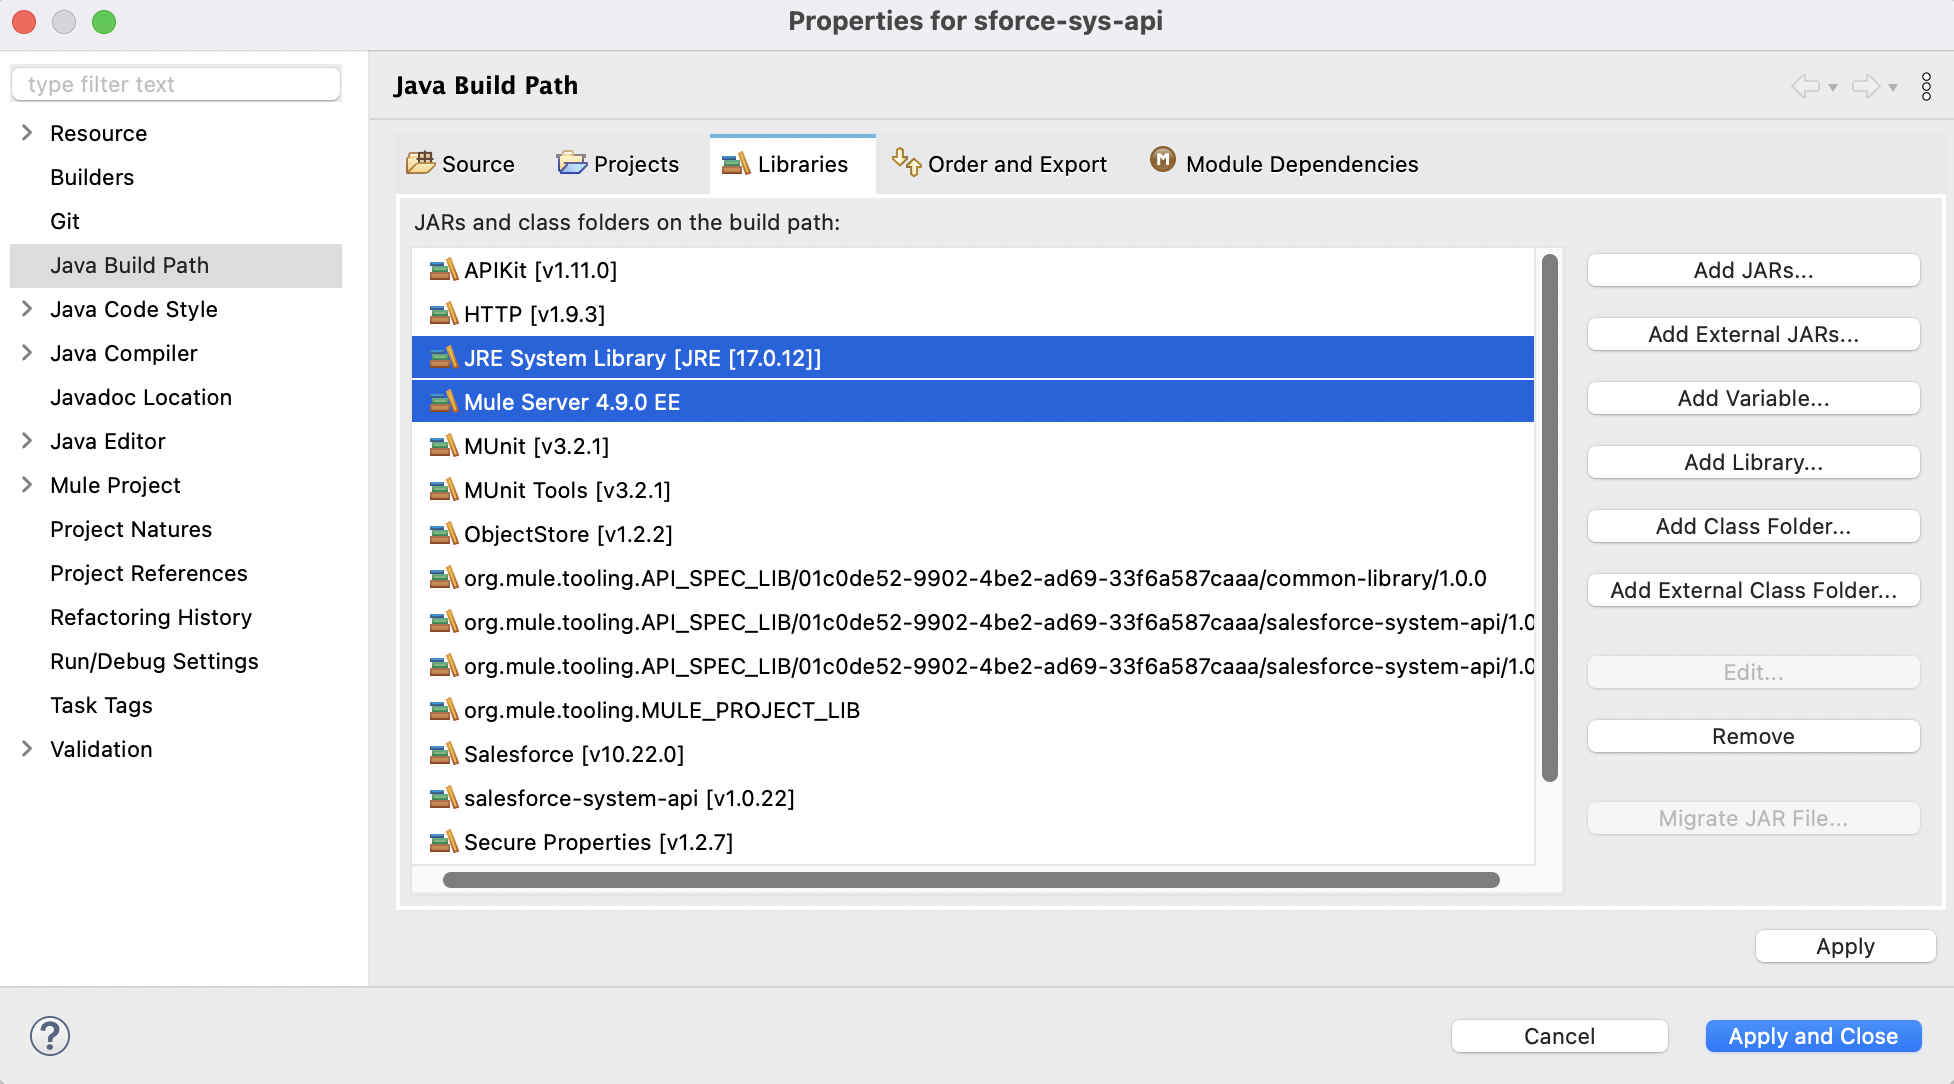
Go to Build Path > Configure Build Path > Libraries tab.
-
Look for "JRE System Library".
-
If the version is not 17, proceed to Step 4.
-
-
Look for "Mule Server".
-
If the version is not 4.9, proceed to Step 4.
-
-
If everything is aligned, you may skip Step 5 and Step 5.
Step 4: Install and set Java 17 in Anypoint Studio
-
Install the Java 17 in your machine.
-
Windows:
-
Download the JDK
-
Go to the official Oracle JDK download page or use an OpenJDK distribution like Adoptium Temurin.
-
Download the Windows x64 installer or ZIP version.
-
-
Install Java
-
Run the installer and follow setup instructions.
-
If using the ZIP version, extract it to a location.
-
-
Set Environment Variables
-
Open System Properties > Advanced > Environment Variables
-
Find JAVA_HOME under System Variables (or create a new one if it does not exist) and set the value to the JDK installation path
-
Add %JAVA_HOME%\bin to the Path variable
-
-
Check java version in command prompt:
-
java -version
-
-
-
macOS:
-
You can use Homebrew to install Java 17:
-
brew install openjdk@17
-
-
-
-
Configure the JRE 17 in Anypoint Studio.
-
Go to Preferences > Java > Installed JREs > Execution Environment and click on JavaSE-17. If Java 17 is properly installed, the studio should be able to detect it.
-
Click Apply and Close.
-
Restart your Anypoint Studio (if needed)
-
Step 5: Install and set Mule Runtime 4.9 in Anypoint Studio
-
Open your Anypoint Studio.
-
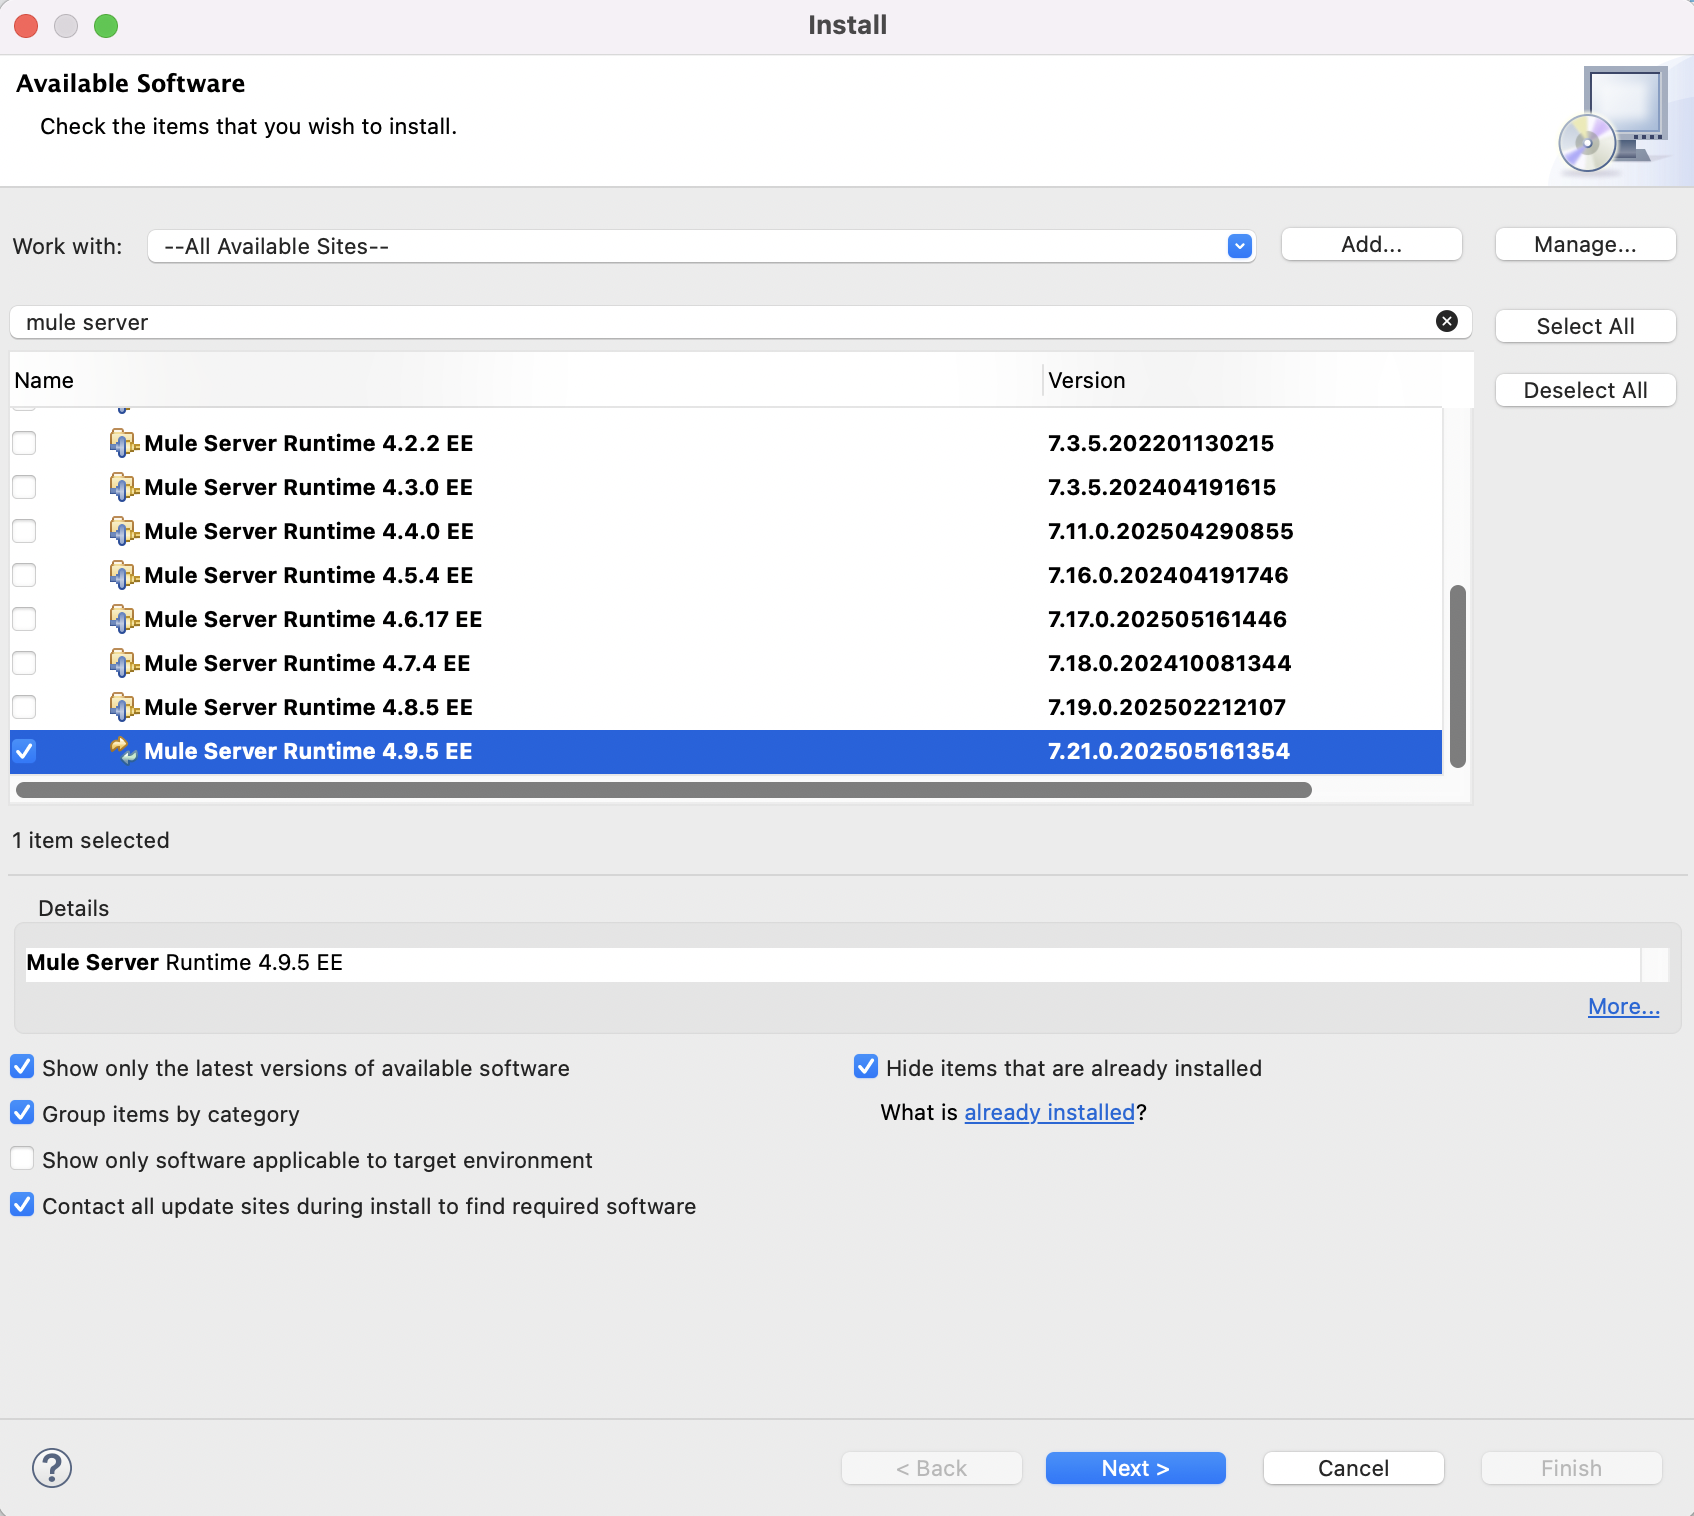
Go to Help tab and click Install New Software.
-
Type and search for Mule Server.
-
Choose Mule Server Runtime 4.9.5 EE.
-
Click Next until you finish the installation.
-
Restart your Anypoint Studio (if needed).
Step 6: Update Mule Runtime and Maven Plugin
The earliest version for Mule Runtime and Maven Plugin is 4.6.0 and 4.1.0 respectively.
-
Open your Mule project in Anypoint Studio.
-
Open your pom.xml file.
-
Update app.runtime tag under properties tag.
<properties>
    <app.runtime>4.9.0</app.runtime>
    <mule.maven.plugin.version>4.5.0</mule.maven.plugin.version>
    <munit.version>2.3.14</munit.version>
</properties>
-
Open your mule-artifact.json file.
-
Update the value of minMuleVersion key.
{
	"minMuleVersion": "4.6.0"
}
Step 7: Update Connectors and Modules
-
Open your Mule project in Anypoint Studio.
-
Right click the Mule project.
-
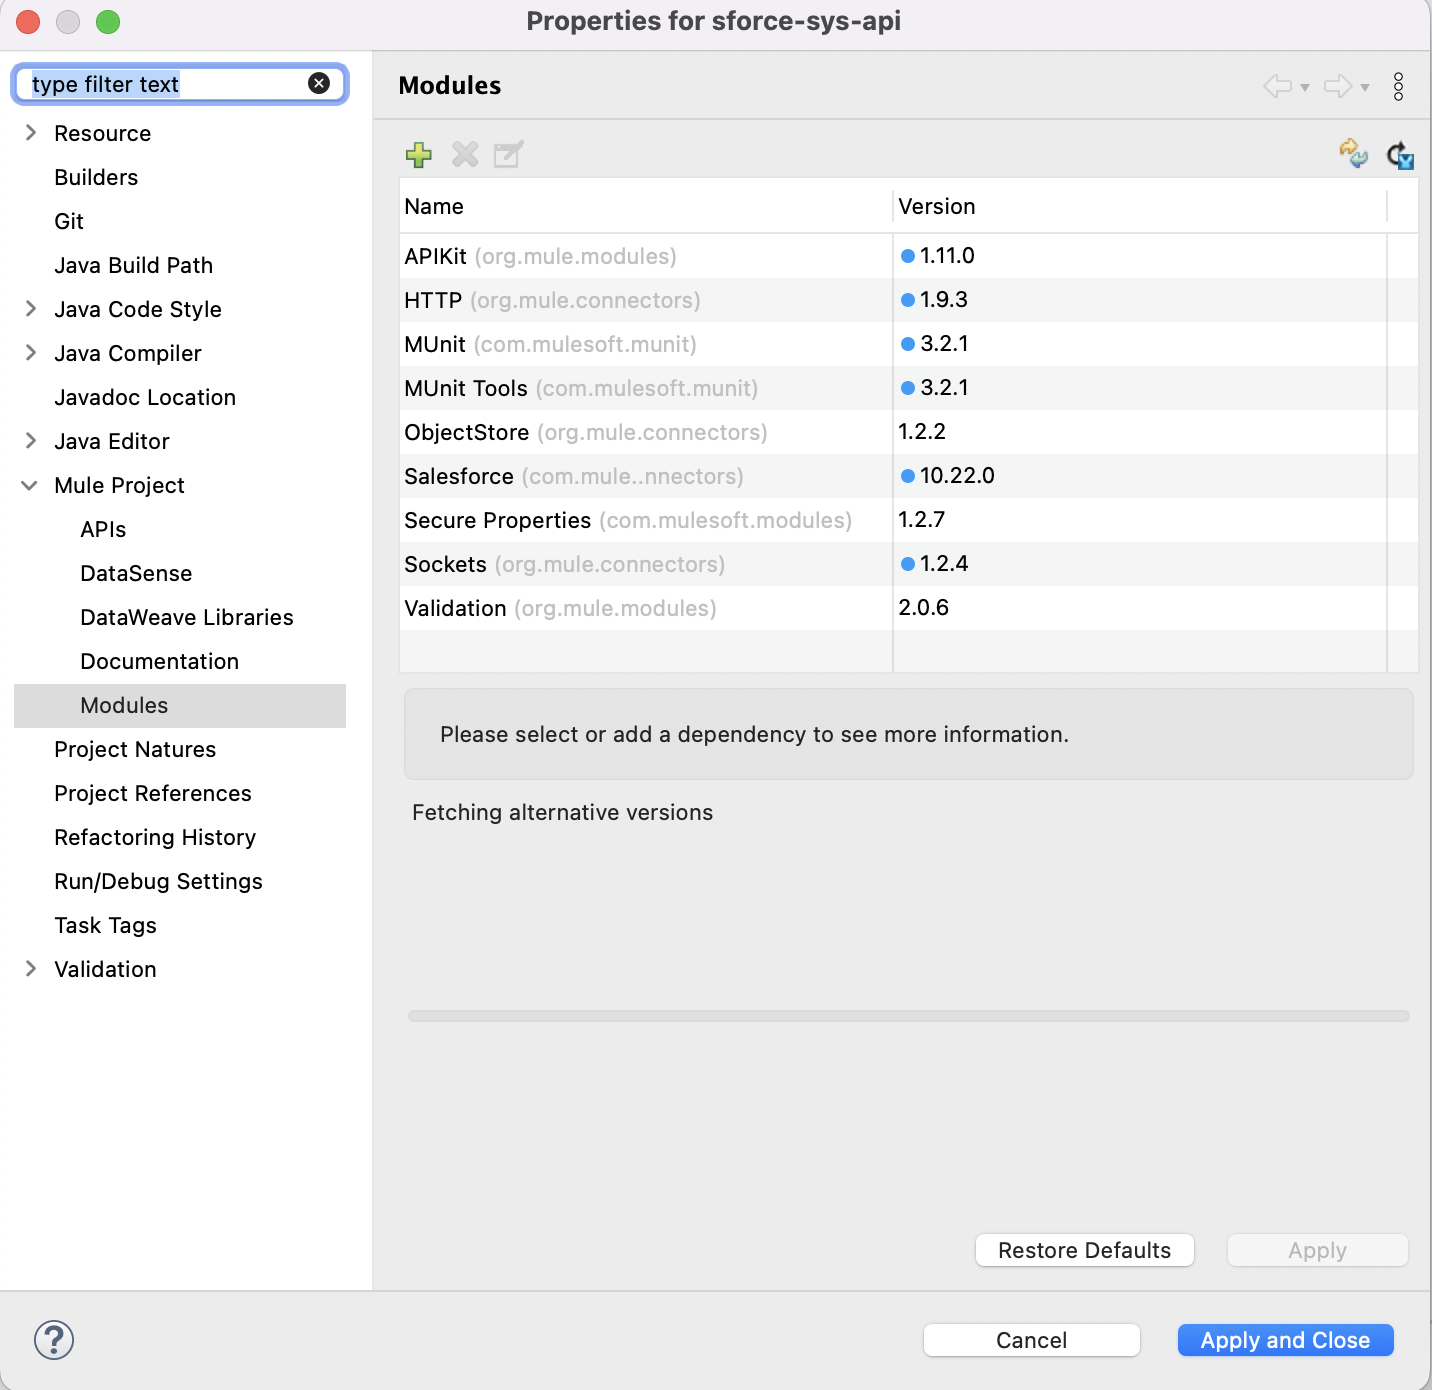
Go to Manage Dependencies > Manage Modules.
You would see the current version of your modules. If there is a blue dot beside the version, it means that it is not the latest version.
-
Click the Check for updates icon, then Update all dependencies to latest icon.
-
Once updated, click Apply and Close.
-
Restart your Anypoint Studio (if needed).
If properly configured, the application should be successfully deployed in studio.
Step 8: Update CI/CD Pipeline-related files
-
Open your Mule project in Anypoint Studio.
-
Open your pom.xml file.
-
Find your CloudHub configuration and add the following tags:
-
releaseChannel: Set the name of the release channel used to select the Mule image. Supported values are NONE, EDGE, and LTS. By default, the value is set to EDGE. If the selected release channel doesn’t exist, an error occurs.
-
javaVersion: Set the Java version used in the deploy. Supported values are 8 and 17. By default, the value is set to 8. If the selected Java version doesn’t exist, an error occurs.
-
-
Open your pipeline files, and update the maven and java version.
Note: Mule Maven plugin versions 3.0.0, 3.1.0, 3.1.1, 3.1.2, 3.1.3, 3.1.4, 3.1.5, 3.1.6, 3.1.7, and 3.8.3 are deprecated. Check the latest versions in this link.
Nummer des Knowledge-Artikels
005317704
Konnten Sie Ihr Problem mithilfe dieses Artikels lösen?
Geben Sie uns Feedback, damit wir uns verbessern können.
