Seleziona un'organizzazione
Calculate Business Hours duration between two Timestamps
Data pubblicazione: Jul 2, 2026
Descrizione
This knowledge article walks you through calculating the duration between two timestamps based on Business Hours in Salesforce. It explains how to use an Apex class with the BusinessHours.diff() method, integrate it with a Flow, and store the calculated duration in hours on a record for reporting and automation purposes.
Risoluzione
To calculate the time taken between two events, such as Created Date and Completed Date, only during Business Hours, for use cases such as:
● Task completion time
● SLA tracking
● Case resolution time
Follow the steps below to configure Business Hours in Salesforce.
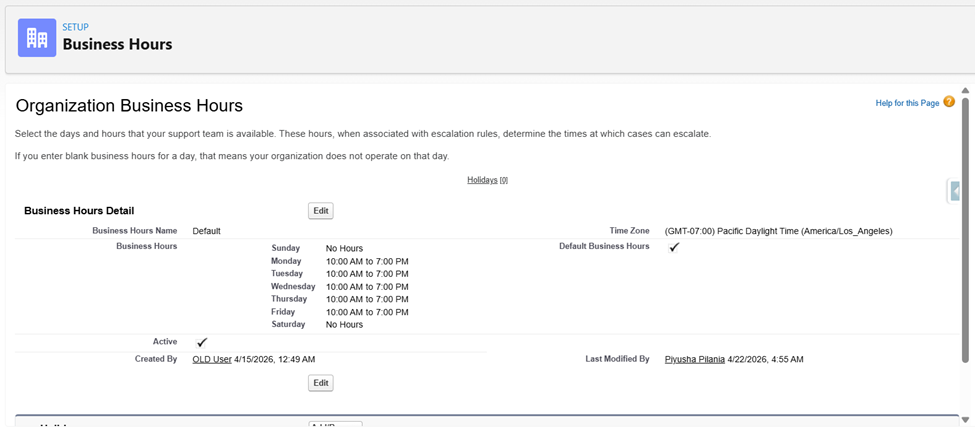
Step 1: Configure Business Hours
- Navigate to Setup
- Search for Business Hours
- Edit the desired Business Hours record
- Set it as the Default if needed
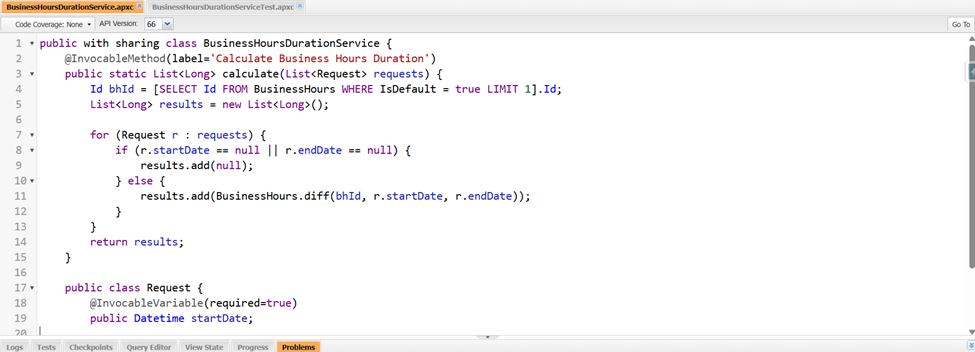
Step 2: Create an Apex Class
- Go to Setup > Developer Console
- Click File > New > Apex Class
- Enter an appropriate name for the class. In this example, the class is named BusinessHoursDurationService
- Add the following code:
Note: The Apex class uses the default Business Hours. Modify the query if using a different Business Hours record
public with sharing class BusinessHoursDurationService {
   @InvocableMethod(label='Calculate Business Hours Duration')
   public static List<Long> calculate(List<Request> requests) {
       Id bhId = [SELECT Id FROM BusinessHours WHERE IsDefault = true LIMIT 1].Id;
       List<Long> results = new List<Long>();

       for (Request r : requests) {
           if (r.startDate == null || r.endDate == null) {
               results.add(null);
           } else {
               results.add(BusinessHours.diff(bhId, r.startDate, r.endDate));
           }
       }
       return results;
   }

   public class Request {
       @InvocableVariable(required=true)
       public Datetime startDate;

       @InvocableVariable(required=true)
       public Datetime endDate;
   }
}
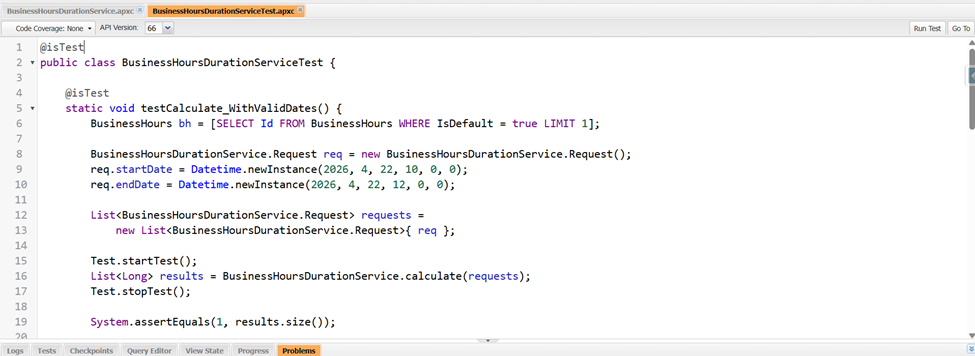
Step 3: Create a Test Class
- In Developer Console, create a new Apex Class
- Enter an appropriate name for the class. In this example, the class is named BusinessHoursDurationServiceTest
- Add test coverage:
@isTest
public class BusinessHoursDurationServiceTest {
    @isTest
    static void testCalculate_WithValidDates() {
        BusinessHours bh = [SELECT Id FROM BusinessHours WHERE IsDefault = true LIMIT 1];

        BusinessHoursDurationService.Request req = new BusinessHoursDurationService.Request();
        req.startDate = Datetime.newInstance(2026, 4, 22, 10, 0, 0);
        req.endDate = Datetime.newInstance(2026, 4, 22, 12, 0, 0);

        List<BusinessHoursDurationService.Request> requests =
            new List<BusinessHoursDurationService.Request>{ req };

        Test.startTest();
        List<Long> results = BusinessHoursDurationService.calculate(requests);
        Test.stopTest();

        System.assertEquals(1, results.size());
    }
}
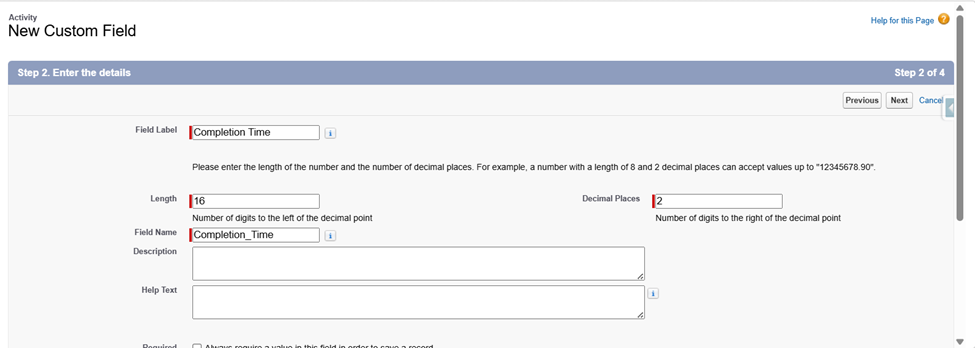
Step 4: Create a Custom field
- Navigate to Setup > Object Manager > Activity (Task)
- Go to Fields & Relationships
- Click New > Number
- Configure:
- Length: 16
- Decimal Places: 2
- Use Completion Time as the Field Name, or choose a name that aligns with the business requirements
Step 5: Create a Record-Triggered Flow
- Go to Setup > Flows > New Flow
- Create a Record-Triggered Flow on the Task object
- Configure the Flow as shown below:
| Trigger the Flow When | A record is updated |
|
Condition Requirements | All Conditions Are Met(AND) |
| Condition |
Status Is Changed = True Status Equals Completed |
| Optimize the Flow for | Actions and Related Records |
- Hover over the + icon in the Flow Builder canvas and click it
- Select Decision from the element menu
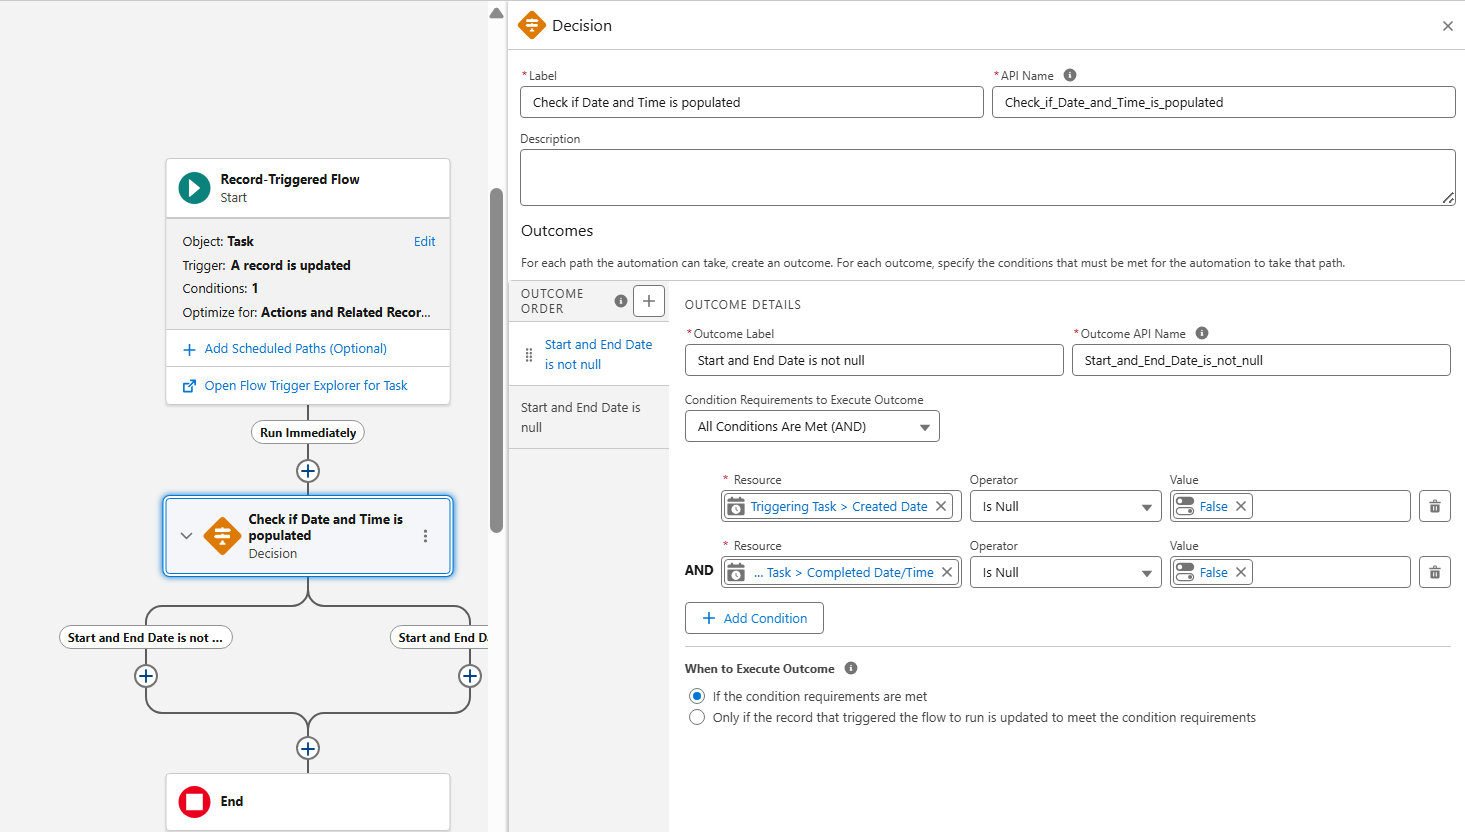
- In the Label field, enter a descriptive name for the condition being checked, for example, Check if Date and Time Populated
- API Name will be auto-populated based on the Label
- Configure the first Outcome for the Decision element as below
- Give it an appropriate Label, for example, Start and End Date is not null
| Outcome Label | Condition Requirements | Resource | Operator | Value |
| Start and End Date is not null | All Conditions Are Met (AND) |
{!$Record.CreatedDate} {!$Record.CompletedDateTime} |
Is Null Is Null |
|
- Give it an appropriate Label for the Default Outcome
Step 6: Add an Apex action to the First Outcome
- On the Start and End Date is not null outcome path, click the + icon and select Action
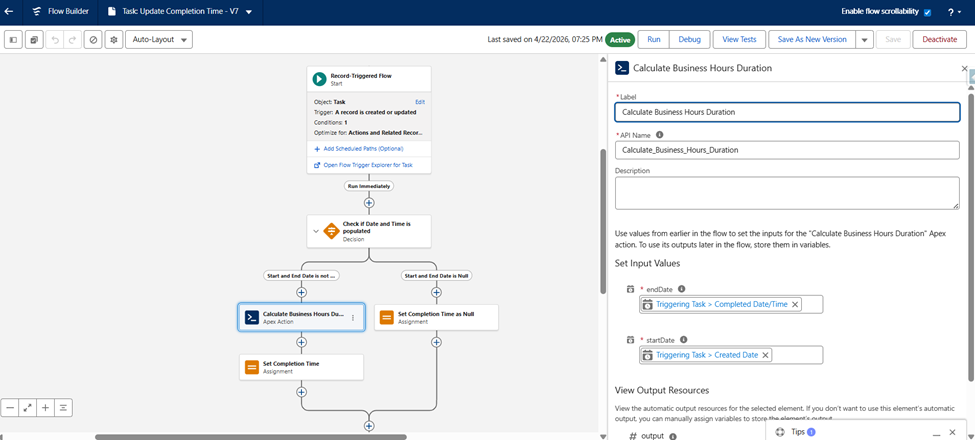
- In the search bar, look up and select Calculate Business Hours Duration
- Enter the following details:
- Label: Enter an appropriate name, such as Calculate Business Hours Duration
- In the Set Input Values section, toggle the fields to include them and map them as follows:
| Start Date | {!$Record.CreatedDate} |
| End Date | {!$Record.CompletedDateTime} |
- Click Done
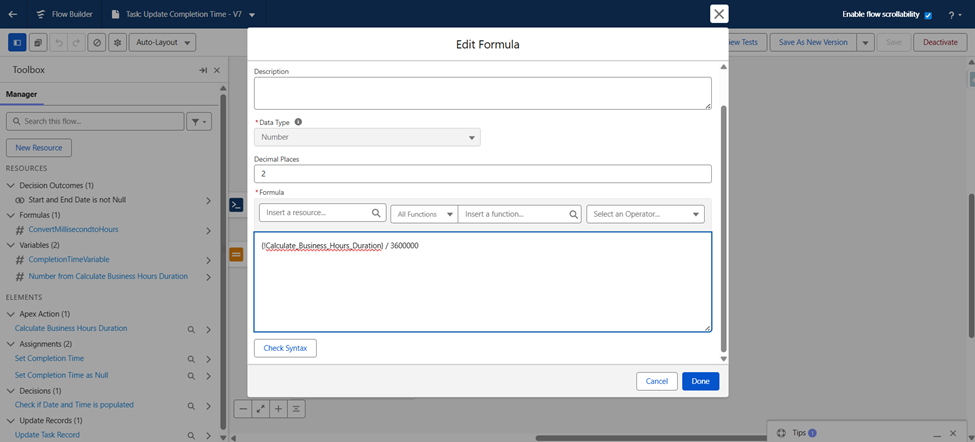
- Convert Milliseconds to Hours
- Create a Formula resource with the Data Type set to Number
{!Calculate_Business_Hours_Duration} / 3600000
Step 7: Add the Assignment Elements
Branch A: For the Start and End Date is not null Outcome
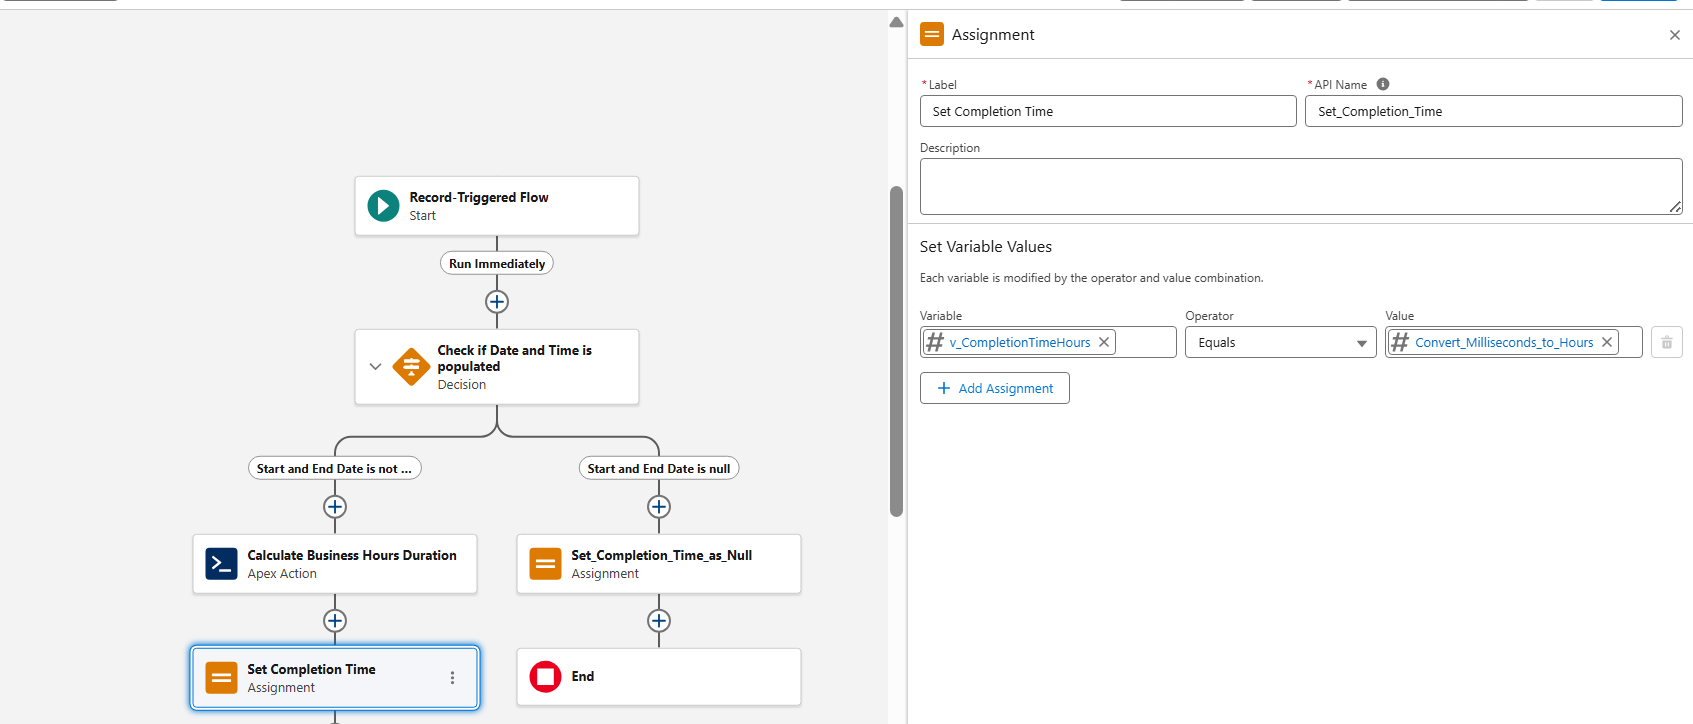
- On the Start and End Date is not null path, click the + icon and select Assignment
- Configure the element as shown below
- Label: Set Completion Time
- API Name: Set_Completion_Time
- In the Set Variable Values section, map the following:
| Variable | Operator | Value |
| {!v_CompletionTimeHours} | Equals | {!Convert_Milliseconds_to_Hours} |
- The value will be the Formula resource we created earlier, {!Convert_Milliseconds_to_Hours}
- Click Done
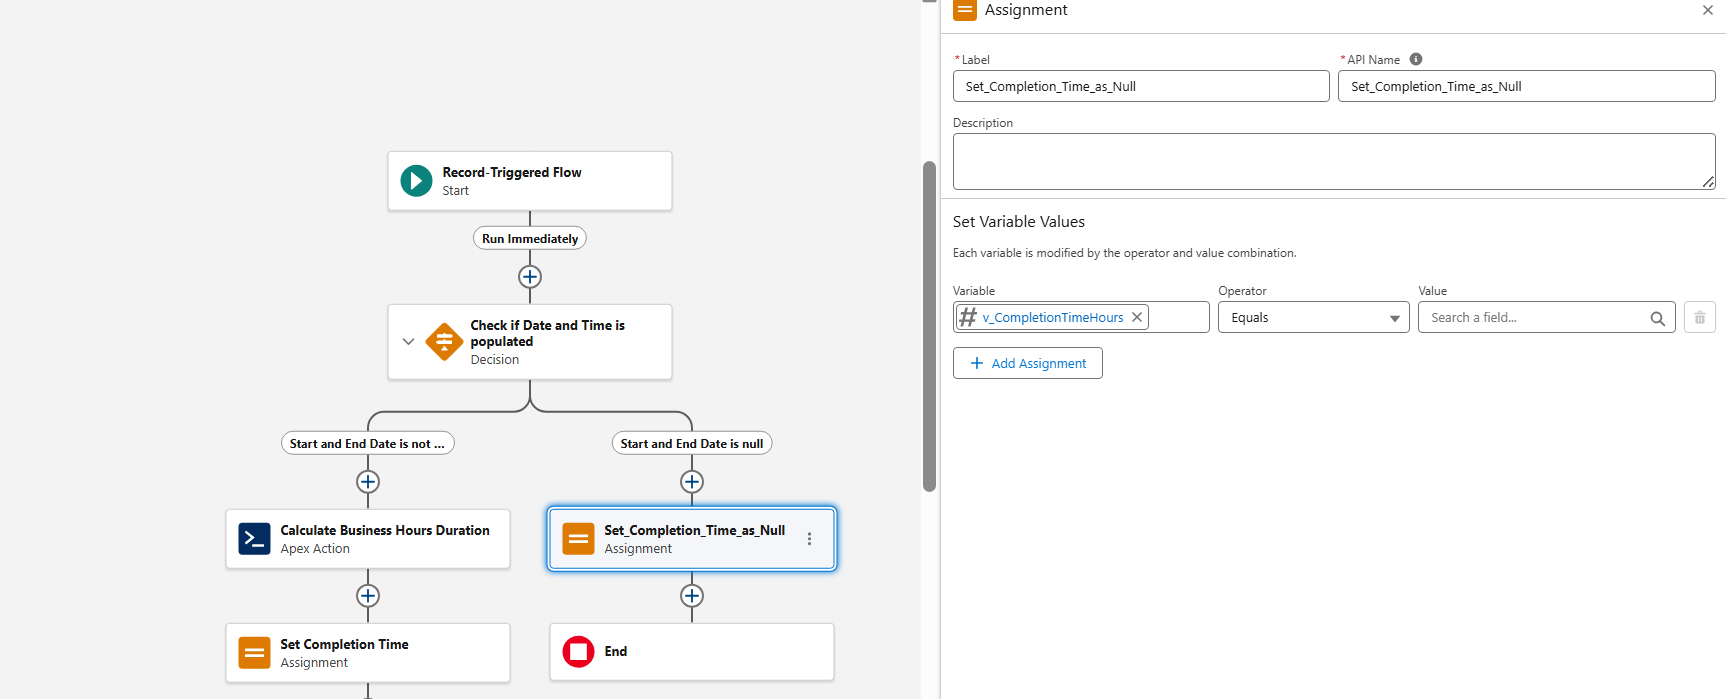
Branch B: For the Default Outcome
- On the Default Outcome path, click the + icon and select Assignment
- Configure the element as shown below
- Label: Set Completion Time as Null
- API Name: Set_Completion_Time_as_Null
- In the Set Variable Values section, map the following:
| Variable | Operator | Value |
| {!v_CompletionTimeHours} | Equals |
Keep it blank |
- Click Done
Step 8: Add the Update Records Element
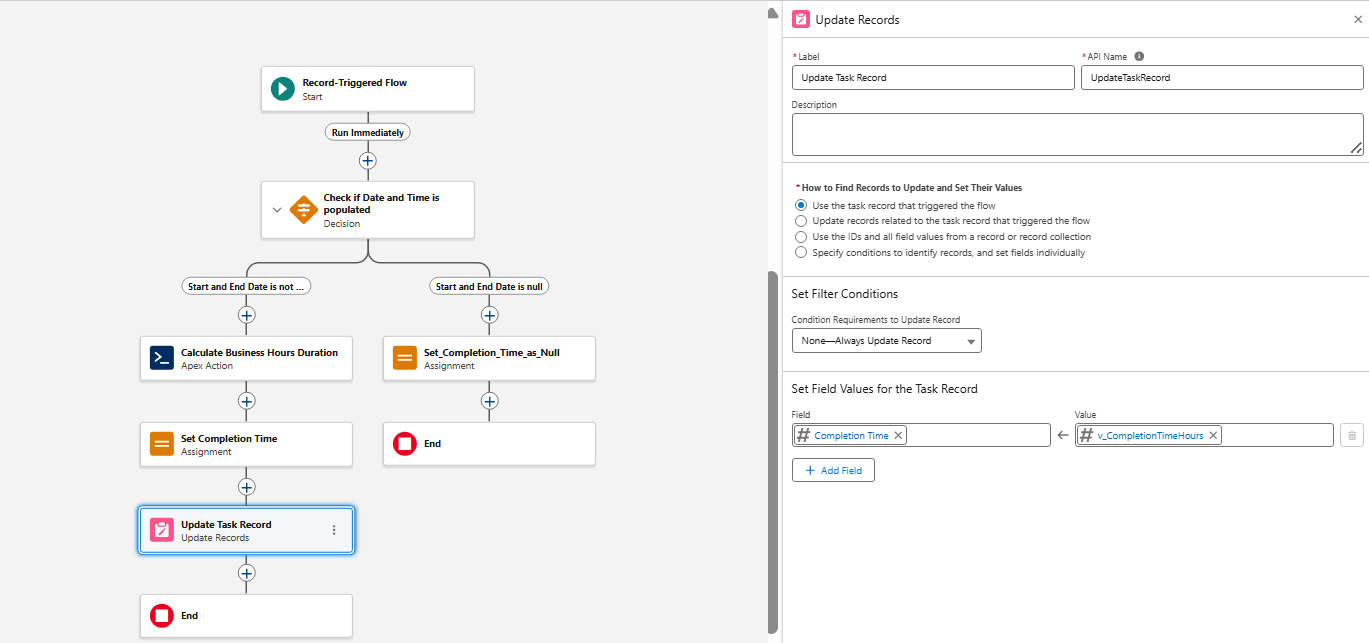
- This step commits the final calculated hours to the actual Task record
- After the Assignment element, click the + icon and select Update Records
- Configure the element settings as below:
- Label: Update Task Record
- API Name: Update_Task_Record
| How to Find Records to Update and Set Their Value | Use the task record that triggered the flow |
- In the Set Field Values for the Task Record section, map the custom field:
| Field | Value |
|
Completion_Time_Hours__c or the specific custom field name | {!v_CompletionTimeHours} |
- Click Done
Step 9: Create a Report
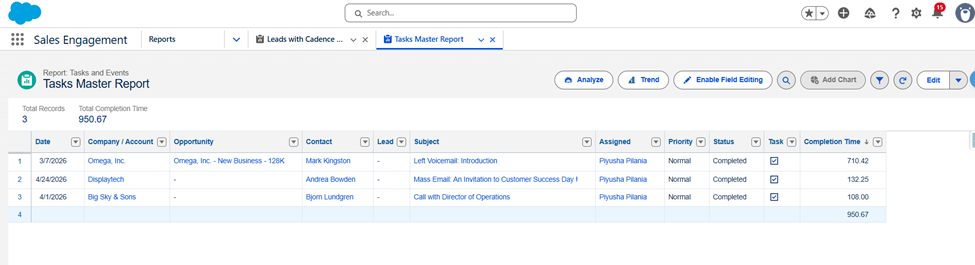
- Navigate to Reports
- Create or Edit a Report on Tasks
- Add the field:
-
- Completion Time (Hours)
- If the field is not visible, update the Report Type Layout
Final Outcome:
- We will now have:
- Business Hours based duration calculation
- Values stored in hours
- Accurate SLA tracking
- Report-ready data
Considerations:
- Ensure:
- Field-Level Security is enabled
- Apex class access is granted via Profile/Permission Set
- The Apex class can be reused across objects
- We can pass different Date/Time fields as needed
Best Practices:
- Use this for SLA-driven processes
- Combine with Cadence or Case reporting for deeper insights
_____________________________________________
Written by: Piyusha Pilania | Forum Ambassador
Piyusha is a Salesforce MVP and Golden Hoodie Recipient. She is a seasoned Salesforce consultant with 13 years of experience. She has a wealth of experience and knowledge in Martech, data, and Salesforce, and she has a deep interest in the convergence of data, AI, and Salesforce. She also leads the Slack and Salesforce community groups. Her mission is to elevate the knowledge and skills of trailblazers and to grow the Salesforce community.
Submissions reflect only the opinions of the user who made available the Submission and not the opinions of Salesforce, regardless of whether the user is affiliated with Salesforce, and may contain or constitute products, services, information, data, content and other materials made available by or on behalf of third parties ("Third Party Materials). Salesforce neither controls nor endorses, nor is Salesforce responsible for, any Third Party Materials, including their accuracy, validity, timeliness, completeness, reliability, integrity, quality, legality, usefulness or safety, or any applicable intellectual property rights. Any Submissions made available through any message board or forum in response to posted questions, or that otherwise purports to answer any questions, including any questions about Salesforce or Programs, are made available for your general knowledge only and should never be relied upon as answers to your specific questions (even if an answer is marked as a “best” answer or with any similar qualifications). You should always contact Salesforce support for answers to your specific questions. Salesforce has no control over Submissions, and is not responsible for any use or misuse (including any distribution) by any third party of Submissions.
If you have questions, tap into the wisdom of our entire Trailblazer Community here: https://trailhead.salesforce.com/trailblazer-community/feed
Numero articolo Knowledge
005321712
Questo articolo ha risolto il problema?
Facci sapere, così possiamo migliorare!
