Välj en organisation
Manage Duplicate Leads and Contacts in Salesforce
Publiceringsdatum: Aug 21, 2026
Beskrivning
Managing duplicate Leads and Contacts is a common challenge in Salesforce. This article explains how to configure Salesforce Matching Rules and Duplicate Rules to identify and manage duplicate Leads and Contacts. It also covers testing duplicate detection, displaying potential duplicates on record pages, and using Screen Flows to enhance duplicate management and improve data quality.
Lösning
This article answers a common question support engineers see: how do you stop duplicate Lead and Contact records from piling up in Salesforce, and how do you clean up the ones that already exist? Salesforce relies on two connected tools to solve this: Matching Rules, which define how potential duplicates are identified, and Duplicate Rules, which define what Salesforce does once a match is found.
How Salesforce identifies duplicate Leads and Contacts
To identify Lead duplicates, Salesforce leverages Matching Rules and Duplicate Rules:
- Matching Rules allow you to define the criteria used to identify duplicates among records in a Salesforce org.
- Duplicate Rules define what Salesforce does when it identifies these matching records.
You can create a custom Matching Rule if you want to adapt the standard behavior. This article uses the Standard Matching and Duplicate Rules. These are the conditions that apply by default when Salesforce checks whether a new or updated Lead record matches an existing one:
- OR (First Name AND Last Name AND Title AND Company)
- OR (First Name AND Last Name AND Email)
- OR (First Name AND Last Name AND Phone AND Company)
- OR (First Name AND Last Name AND Mailing Street AND (City OR ZIP OR Phone))
- OR (First Name AND Last Name AND Mailing Street AND Title)
- OR (First Name AND Last Name AND Title AND Email)
- OR (First Name AND Last Name AND Phone)
Option 1: Configure Standard Matching and Duplicate Rules for Lead management
Step 1: Configure and activate Matching Rules
- Go to Setup, click Data, click Duplicate Management, then select Matching Rules.
- Click to open the Standard Lead Matching Rule.
- Make sure the Standard Matching Rule, or the custom one you have set up, is Active. Otherwise, click Activate.
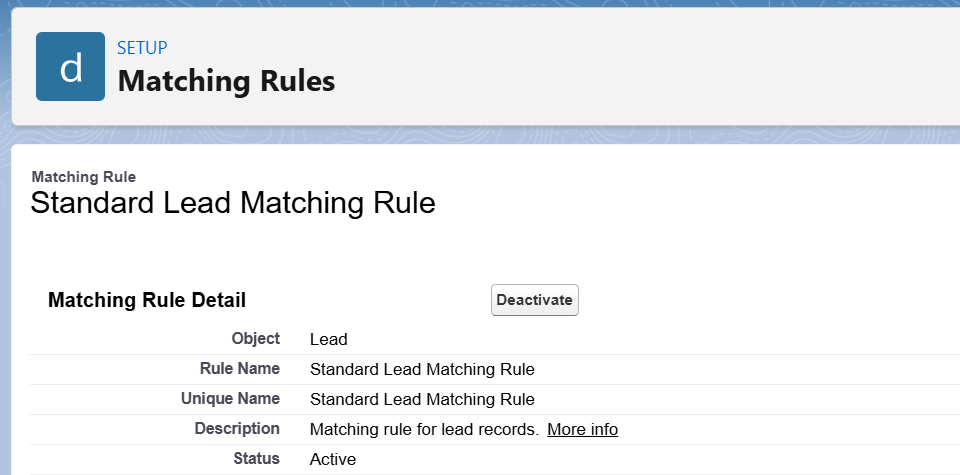
Configure the Duplicate Rule
- Once the Matching Rule is defined or identified, activate the Duplicate Rule that is based on this Matching Rule.
Step 2: Configure and activate Duplicate Rules
- Go to Setup, click Data, click Duplicate Management, then select Duplicate Rules.

- Click the Standard Lead Duplicate Rule link.
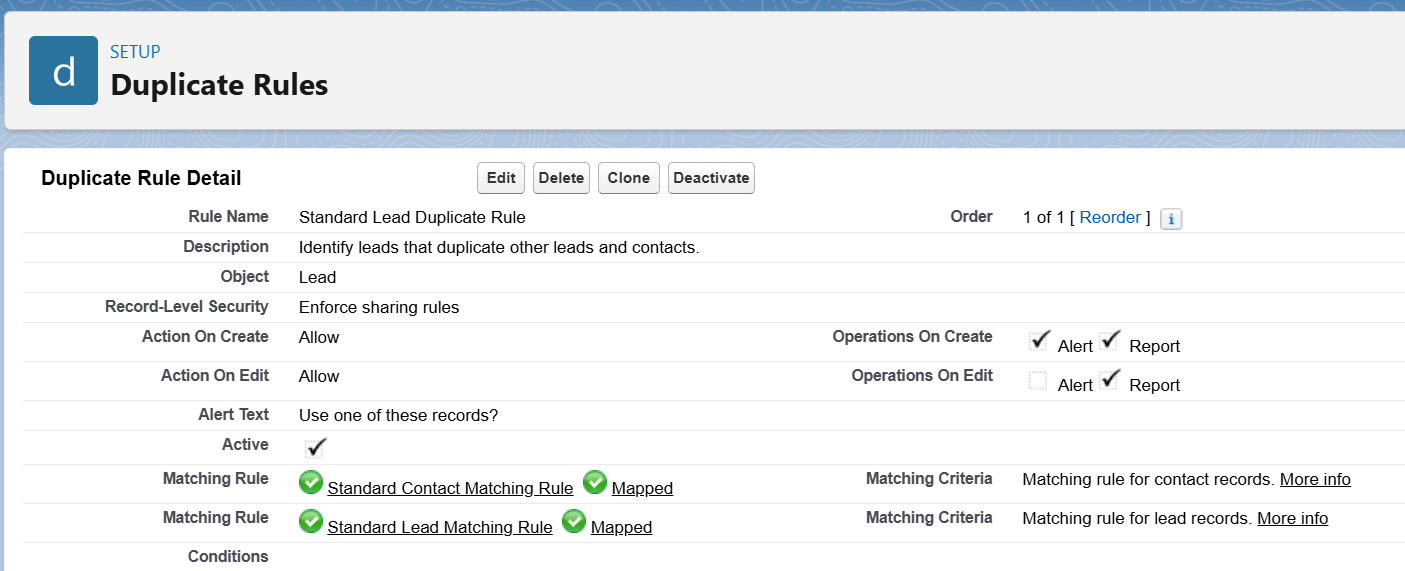
- Edit the Duplicate Rule to tweak how it applies:
a. Record-Level Security: Defines whether the rule applies only to records the current user can access under Sharing Rules, or to all records regardless of access, by bypassing Sharing Rules.

b. Actions: Defines whether Salesforce blocks or allows the creation of the Lead. You can either block a Lead creation or update outright, or allow the creation or update of the duplicate record while showing an alert.
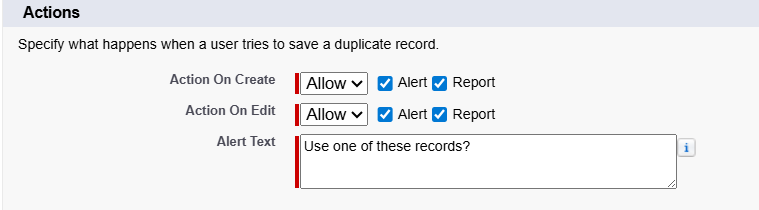
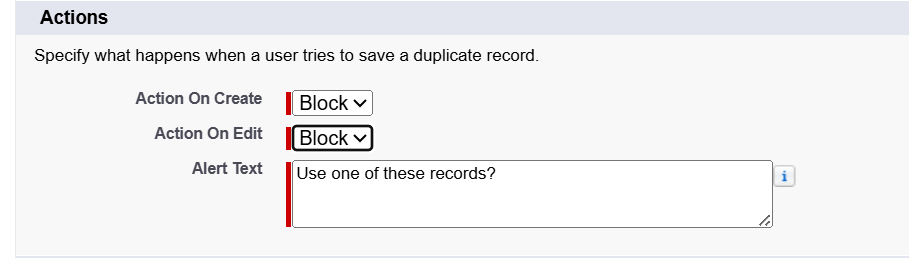
c. Check or update the Contact and Lead field mappings based on Email, Company, Domain, and other relevant fields. This section defines the Matching Rules used to compare the newly created Lead with existing Lead and Contact records.
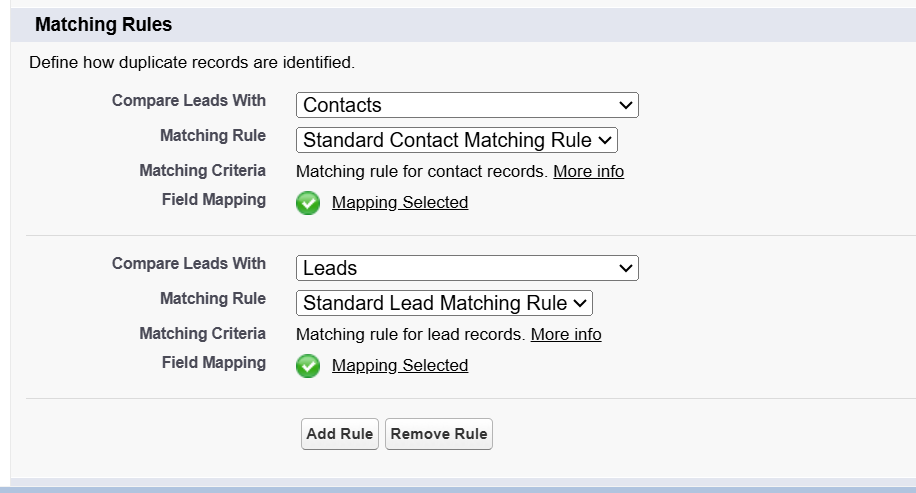
d. Save and Activate: Once saved, make sure the Standard Duplicate Rule, or the custom one you have set up, is Active. Otherwise, click Activate.
Step 3: Add the Potential Duplicates component to the Lead page layout
- On the default record page, the Potential Duplicates component should already be present to display duplicates.
- If the component is not present, follow these steps:
a. Navigate to the Lead record detail page.
b. Click the Gear icon, then Edit Page.
c. Drag the Potential Duplicates component from the Components pane onto the Lead record page.
d. Click Save and Activate.
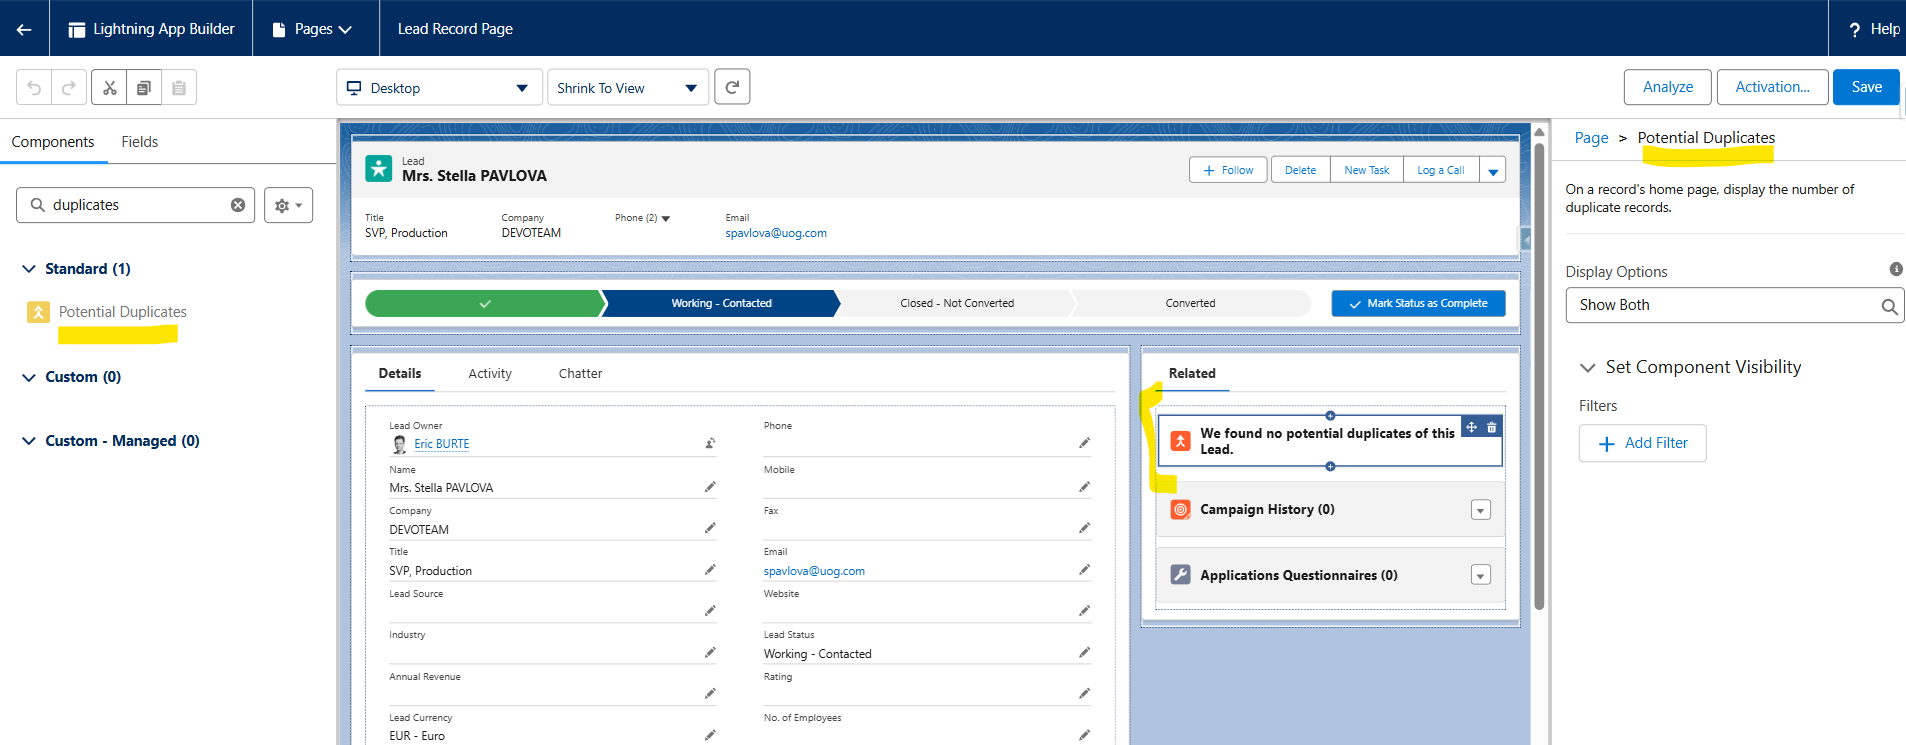
Step 4: Test the Matching and Duplicate Rules
Once the Matching and Duplicate Rules are activated, and the Lead record page is updated, create a duplicate record to confirm your configuration behaves as expected.
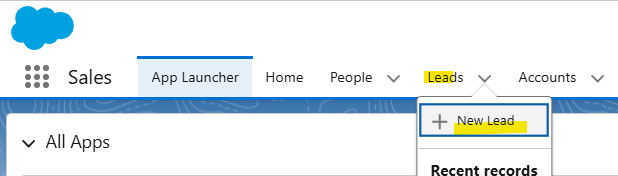
a. Go to the Leads tab and click + New Lead.
b. Create a Lead using the same field values as an existing Contact — for example, Ms. Stella Pavlova.
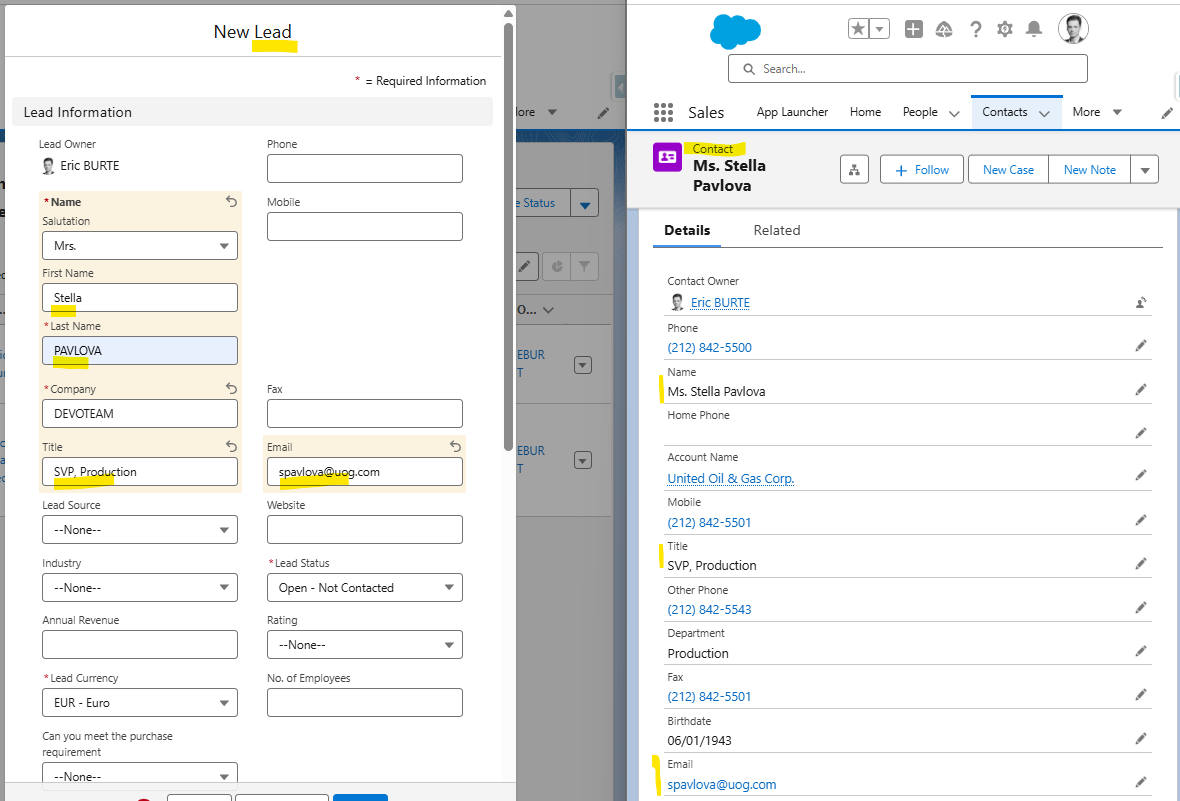
c. A few seconds later, a toast message appears on the Lead record page indicating there may be a duplicate.
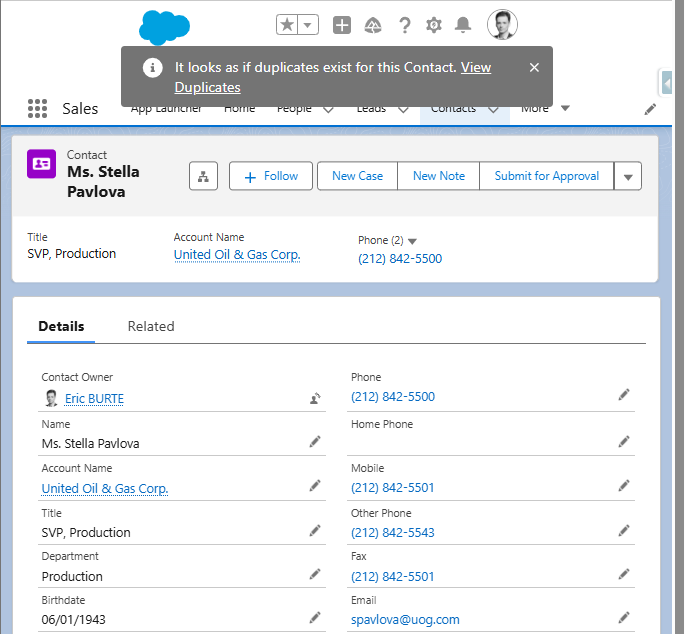
d. Click View Duplicates from the toast message to see a dedicated screen with both the duplicate Lead and Contact information.
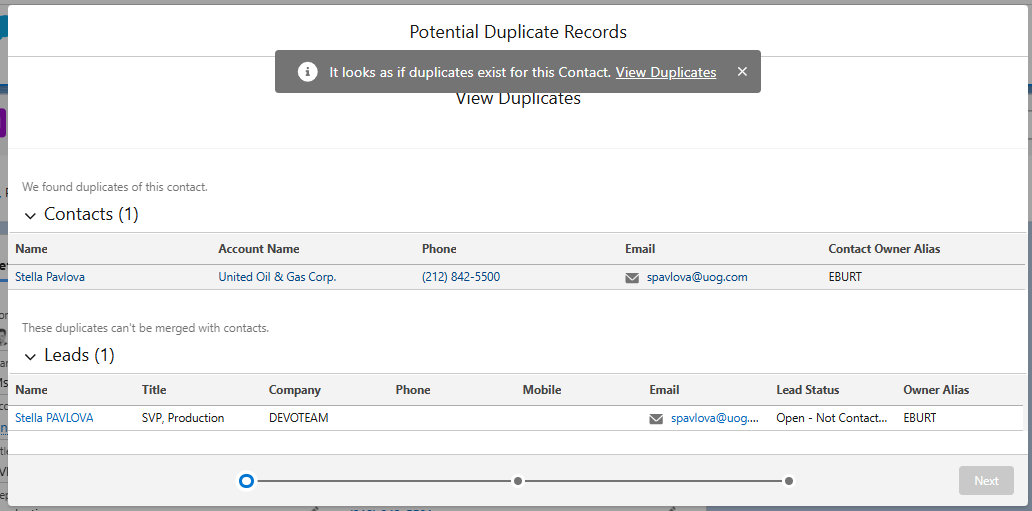
Note: Because Leads and Contacts are different object types, they cannot be merged directly. For two similar Leads, or two similar Contacts, you can merge them. For a Lead/Contact pair, the simplest approach is to open both records, complete the Contact, log any relevant activity or discussions, and delete the Lead record — or update its status.
Duplicate information doesn't display cleanly on the Lead record page itself, but it is available on the Contact record page as shown above. To see it clearly on the Lead record with full details, switch to Classic mode and click Find Duplicates on the Lead record.
Ytterligare resurser
Knowledge-artikelnummer
005386514
Löste denna artikel ditt problem?
Berätta för oss vad vi kan förbättra!
