You are here:
Deploy Advertising Sales Management Winter '26
If you're a new customer deploying Advertising Sales Management Winter '26, complete these steps.
- Prepare to Deploy Advertising Sales Management Winter '26
Complete these prerequisite steps to set up your target org before you deploy Advertising Sales Management. - Download Advertising Sales Management Static Resource Files for Winter '26
Download and reorganize the static resource files into folders before you use IDX Workbench to deploy the Advertising Sales Management components to your target org. - Deploy Advertising Sales Management Winter '26 Components
After you download the Advertising Sales Management static resource components, use IDX Workbench to deploy them to your target org.
Prepare to Deploy Advertising Sales Management Winter '26
Complete these prerequisite steps to set up your target org before you deploy Advertising Sales Management.
Download Advertising Sales Management Static Resource Files for Winter '26
Download and reorganize the static resource files into folders before you use IDX Workbench to deploy the Advertising Sales Management components to your target org.
Advertising Sales Management components are built using the capabilities of either Omnistudio for Managed Packages or Omnistudio. Depending on whether you use Omnistudio for Managed Packages or Omnistudio, you must download either of the relevant static resource files:
| Omnistudio Type | Resource Type | Static Resource File |
|---|---|---|
| Omnistudio for Managed Packages | Flexcards | Media_ASM_Cards |
| Data mappers | Media_ASM_DataRaptors | |
| Data packs |
|
|
| Omnistudio | Flexcards | Media_ASM_OS_Core_RT_Cards |
| Data mappers | Media_ASM_OS_Core_RT_DataRaptors | |
| Data packs |
|
To learn about the differences between Omnistudio and Omnistudio for Managed Packages, see Differences Between Omnistudio and Omnistudio for Managed Packages.
- From Setup, in the Quick Find box, enter Static Resources and select it.
- Click either Media_ASM_Cards or Media_ASM_OS_Core_RT_Cards static resource file and click View File to download the file.
- Similarly, download the other files that you require based on whether you use Omnistudio or Omnistudio for Managed Packages.
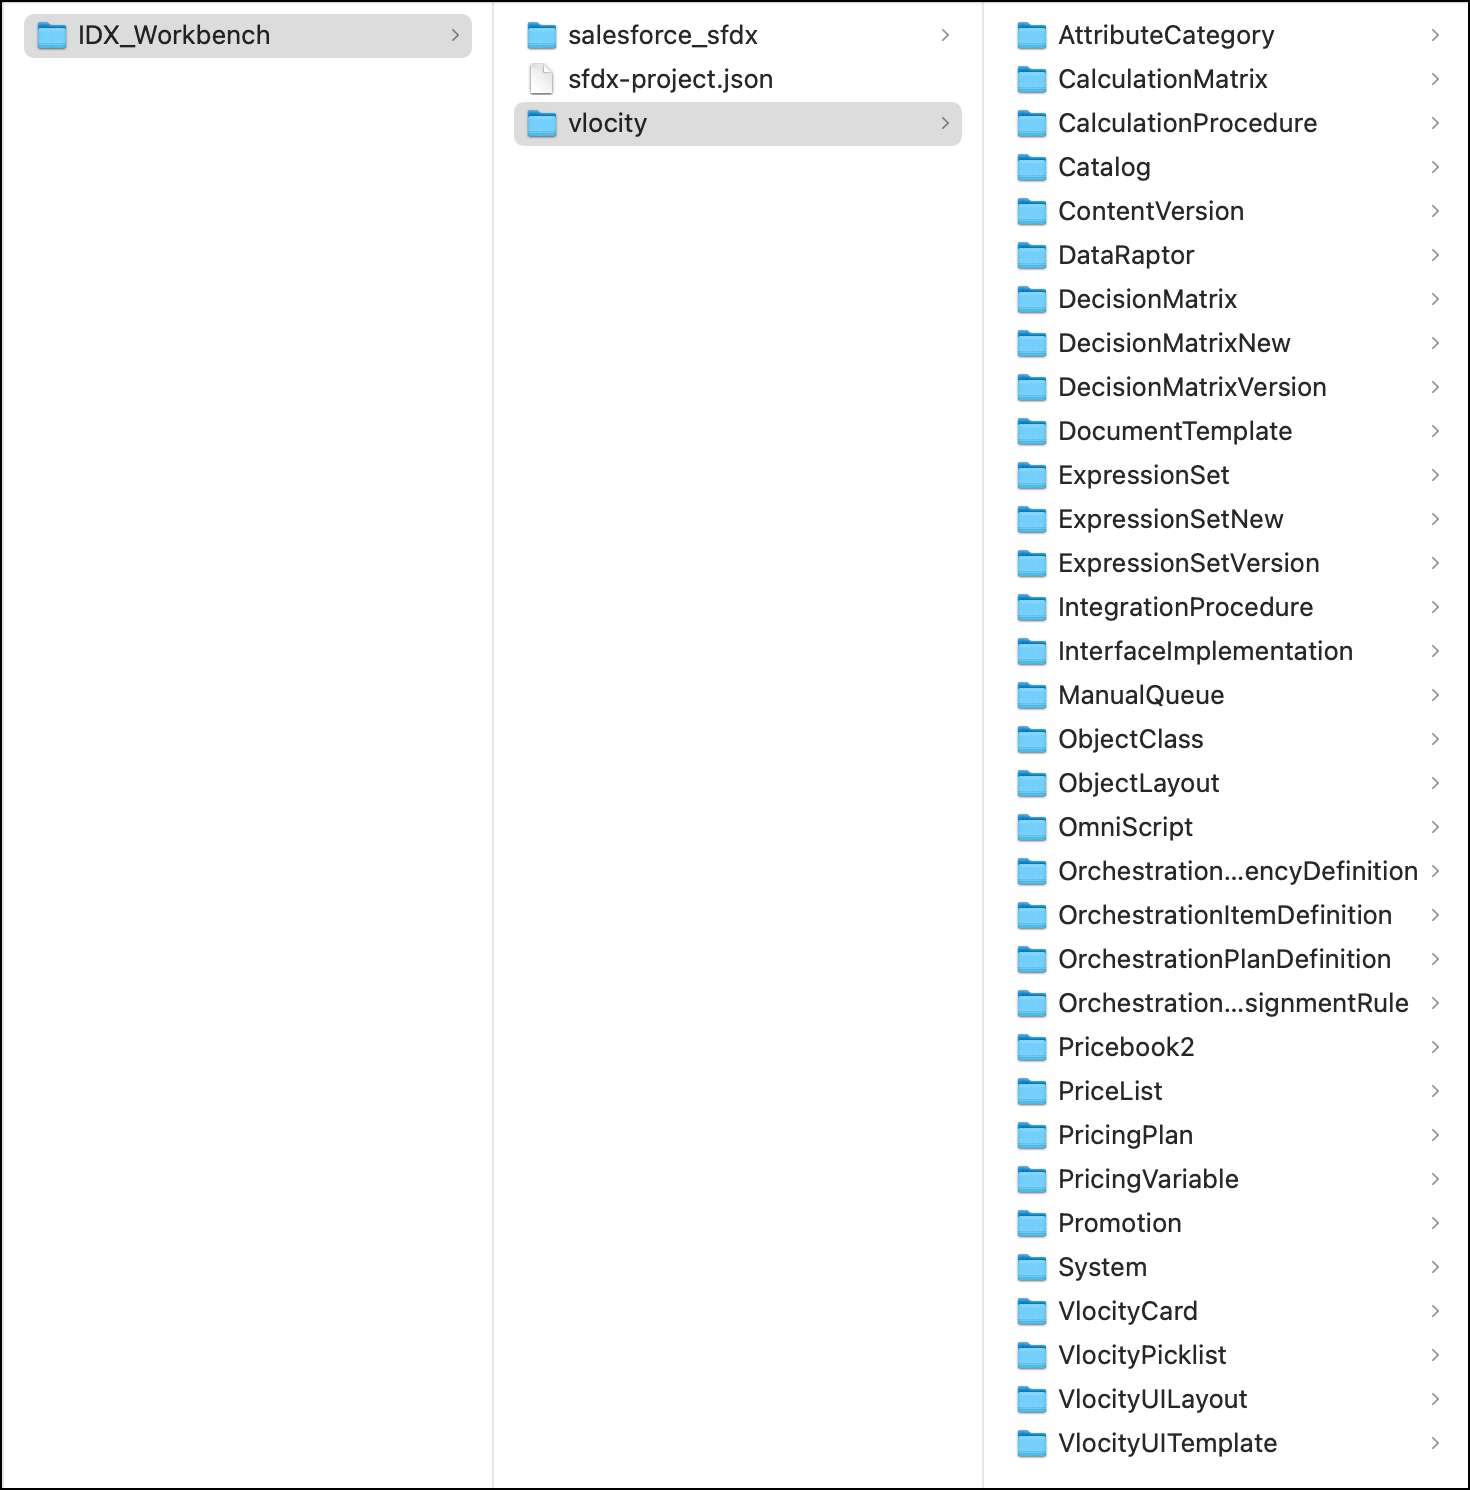
- In your local system, create a folder named IDx Workbench, and create a child folder named vlocity.
- Extract the contents of the ZIP files that you've downloaded to the vlocity folder under IDX_Workbench.
-
In the IDX_Workbench folder, create a file named
sfdx-project.json, and copy this code in the file.
{

    "packageDirectories": [
        {
            "path": "salesforce_sfdx",
            "default": true
        }
    ],
    "namespace": "",
    "sfdcLoginUrl": "https://login.salesforce.com",
    "sourceApiVersion": "65.0"
}
The folder structure in your local system should look like this.
Deploy Advertising Sales Management Winter '26 Components
After you download the Advertising Sales Management static resource components, use IDX Workbench to deploy them to your target org.
- In the IDX Workbench application, add the IDX_Workbench folder from your local system as a new repository.
- Select the newly created repository as the source.
- Set up the target org as the org that you want to upgrade to the latest version.
- After you select the repository in IDX Workbench, go to the repository path.
- To view hidden files, press Command + Shift + . on your Mac.
- Move the YAML file that you downloaded earlier into the hidden .vlocity folder in the repository.
- Go back to IDX Workbench and click Cancel.
- Click Edit and in confgiure Workspace, select the repository.
- In Project, select the YAML file that shows up in the list, and click Save.
-
Select All changed items, and then from the Actions menu, click
Migrate with Dependencies.
Deploy all the components in this order.
- Integration Procedures and DataRaptor
- RecordTypes, Fields, CompactLayouts, ListViews, StandardValueSets, CustomLabels, and Custom Metadata
-
VlocityPicklist and ObjectClass
Before you deploy ObjectClass components, run the Install Default Vlocity Objects and Layout EPC job.
- AttributeCategory and ObjectLayout
-
Vlocity Cards
Before you activate the Flexcards, update the Flexcard Object's default Lightning record page to access the Flexcard Designer. Activate all the deployed Flexcards. If you see an activation error, and if the error message indicates any missing dependent Flexcards, first activate the dependent Flexcard before activating the current one.
Check whether all the Flexcards listed in the YAML file are active. If any of the Flexcards isn't active, then activate only those cards.
If Omnistudio is enabled in your Salesforce org, use the Omnistudio Build Tool to deploy Flexcards.
-
Omniscripts
After the migration is complete, deactivate the vplAdsMediaPlanDetails Omniscript. In the Outline, Add Plaement, and View Summary steps, for vplAdsDisplayTotalCalculatedValue and vplAdsMediaPlanOsNavigation Lightning Web Components, select the option with the namespace vlocity_cmt__. Reactivate the Omniscript.
- PricingPlan, Pricebook2, and PricingVariable
- System and catalog
- VlocityUITemplate, VlocityUILayout
-
Email, reports, and reportTypes
Before you deploy reports, enable Translation Language Settings from Setup in your org.
- WebLinks and QuickActions
-
FlexiPages and layouts
Before you deploy FlexiPages, for the Status field in the contract object, create a picklist with the values Awaiting Approval, Negotiating, and Rejected Internally. See Add Contract Status Picklist Values for CME.
Before you deploy FlexiPages, make sure that you create the KPI Summary Lightning Page.
When you deploy FlexiPages, if you see an error message related to Flexcards, reactivate the Flexcard specified in the error message, and try again.
- Tabs, Triggers, Static Resources
- OrchestrationPlanDefinition
-
OrchestrationItemDefinition
Before you begin to deploy OrchestrationItemDefinition components, manually create the Data Mapper bundle in your org. If you face an error when you deploy OrchestrationItemDefinition components, then open GAMArchiveLineItemService_DataPack.json from the OrchestrationItemDefinition, and set the value of %vlocity_namespace%__RetryPolicy__c to null for those particular components.
-
OrchestrationDependencyDefinition
Deploy these OrchestratioDependencyDefinition components in this order (without dependencies). Deploy all the remaining OrchestrationDependencyDefinition components together.
- GAMPauseOrder - GAMUpdateOrderLineItemService
- GAMPauseOrder - GAMAddNewLineItemService
- GAMOrderService - GAMOrderLineItemService
- GAMOrderLineItemService - GAMLineItemCreativeAssociationService
- GAMLineItemCreativeAssociationService - GAMApproveOrderService
- GAMApproveOrderService - GAMActivateOrderLineItemService
- GAMAddNewLineItemService - GAMAddLineItemCreativeAssociationService
- GAMAddLineItemCreativeAssociationService
- GAMActivateNewLineItemService
- GAMActivateorderlineitemservice - GamEnd
- GAMActivatenewlineitemservice - GamResumeorder
- GAMStart - GAMPauseorder
- GAMStart - GAMOrderService
-
OrchestrationQueueAssignmentRule and ManualQueue
Before you deploy the OrchestrationQueueAssignemtnRule components, configure the Order Management (OM) and OM Plus Interfaces.
- Document Template
-
Flows and Workflows
Before you deploy workflows, update the Workflow datapacks with valid usernames in the assignedTo and recipient tags. These users must exist in your Salesforce org. The Contract Workflow datapack contains two alert flows, which contain three recipient users. Enter a unique username for each recipient. Before you deploy workflows, for the Task field in the quote workflow, add the picklist value Not Started.
-
Approval Process
When you deploy Approval Processes, replace the name of the user in PartyRelationship__c.Party_Relationship_Mapping_Approval_Flow.approvalProcess-meta and Account.PartnerAccountApprovalFlow.approvalProcess-meta with a valid user that exists in your Salesforce org.
If you deployed documentation templates and your flows and approval processes do not work as expected, then open the deployed templates and activate them.
-
Interface Implementations
To disable the rounding off feature in your Standard Cart API enabled orgs, activate the CpqPricingVariableCalcHook interface implementation.
- Deploy all expression sets and decision matrices.
- To make sure that the parameters are in the correct sequence, edit Flexcard parameters.
- If necessary, set up Actionable Relationship Center in Media Cloud.
- For optimized performance, enable explicit pricing.
- Salesforce recommends that you enable the optimized fetch products feature for enhanced performance and user experience.
-
Set the appropriate field level security for all the fields related to these objects.
- Ad Buy Server Account
- Ad Creative Size Type
- Ad Demo Code
- Ad Opportunity
- Ad Order Item
- Ad Order Item Creative Size Type
- Ad Order Line Ad Target
- Ad Order Items Units Split
- Ad Product Target Category
- Ad Quote Line
- Ad Quote Line Ad Target
- Ad Quote Line Creative Size Type
- Ad Quote Line Hiatus
- Ad Quote Line Units Split
- Ad Server
- Ad Server Account
- Ad Server User
- Ad Space Creative Size Type
- Ad Space Group Member
- Ad Space Specification
- Ad Spec Media Print Issue
- Ad Target Category
- Ad Target Category Segment
- Media Channel
- Media Content Title
- Media Print Issue
- Assign Lightning Pages in your target org.
- Assign page layouts in your target org.
- Update profile settings.
- Set up pagination.
- When a quote is converted to an order, the data from the quote, quote line item, and ad quote line item must be copied to the order, order line item, and ad order line item, respectively. To make sure the mapping between these fields is correctly configured, see Maintain Advertising Sales Management Object and Field Mapping.
- Disable Lightning Web Security.
- Create RollbackIPChanges and RollbackDRChanges, with values set to true, from Omni Interaction Configuration under Setup.
- If necessary, create sample product and price data in your Advertising Sales Management org.