
You are here:
Create a SharePoint Site Manually
Create a site in SharePoint to store document templates and contract documents.
Note This step is part of manually integrating Microsoft 365 Azure with Salesforce. To refer to guided
setup, see Set Up Microsoft 365 and Azure Integration Using Guided
Setup.
| USER PERMISSIONS NEEDED | |
|---|---|
| To create a site in SharePoint: | System Administrator with Azure Tenant Administrator access |
| REQUIRED EDITIONS |
|---|
| Available in: Lightning Experience |
| Available in: Enterprise, Unlimited, Professional, and Developer Editions |
-
Create a SharePoint site.
- Log in to your OneDrive account.
-
Click
 , and then click SharePoint.
- Click Create site, and then click Team site.
- Enter a site name without any spaces.
- Click Next.
-
To add members, search for and select the admin user.
Users added to the site have access to all the folders and documents saved on the site. Salesforce recommends only the Microsoft Admin to be a member to preserve the integrity of the documents.
- Click Finish.
-
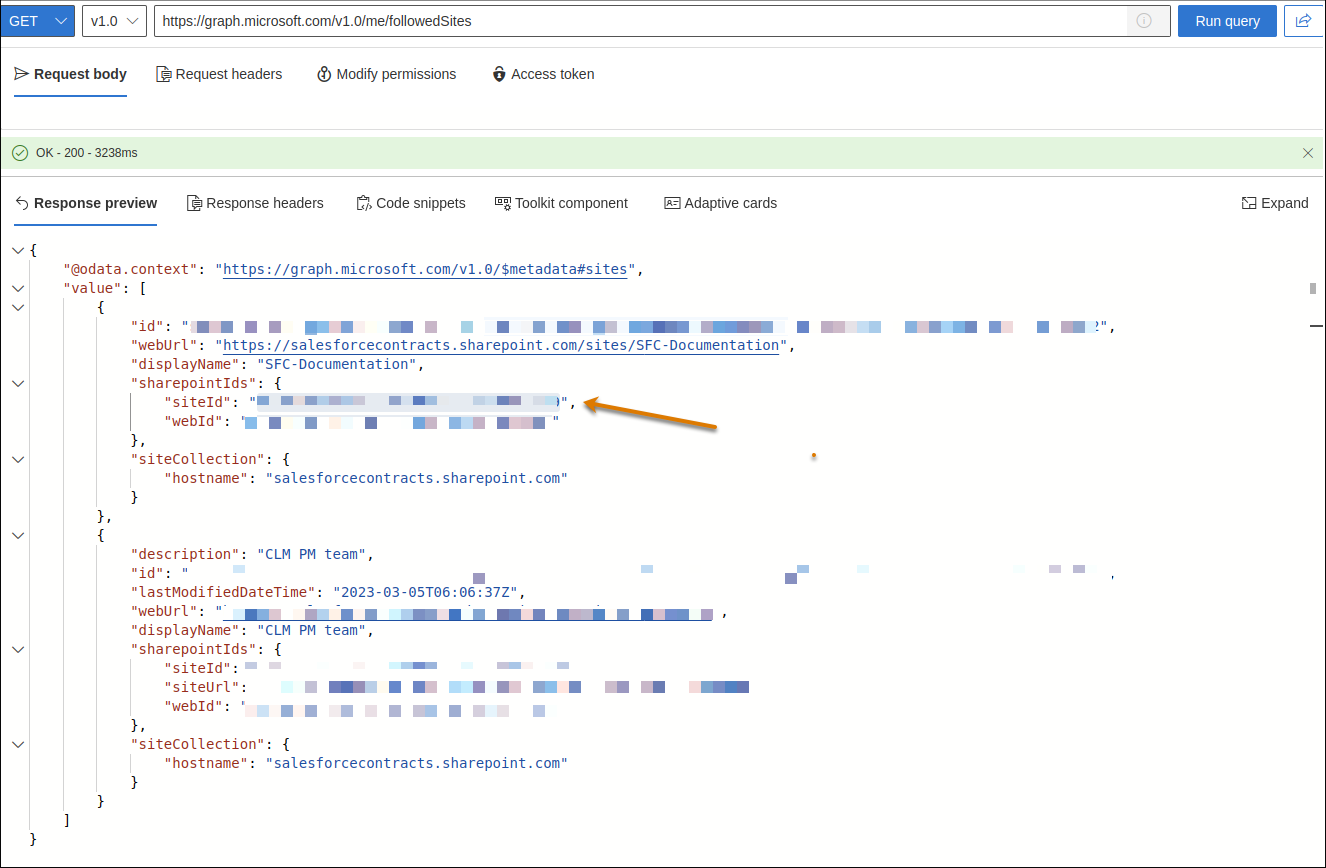
Extract the drive ID.
- Go to Graph Explorer and log in with your Microsoft credentials.
-
In the Request body, select GET, v1.0, and paste
https://graph.microsoft.com/v1.0/me/followedSitesendpoint to retrieve your site details. - Click Run query.
-
From the Response, copy and save the site ID for the site that you created in step 1.
-
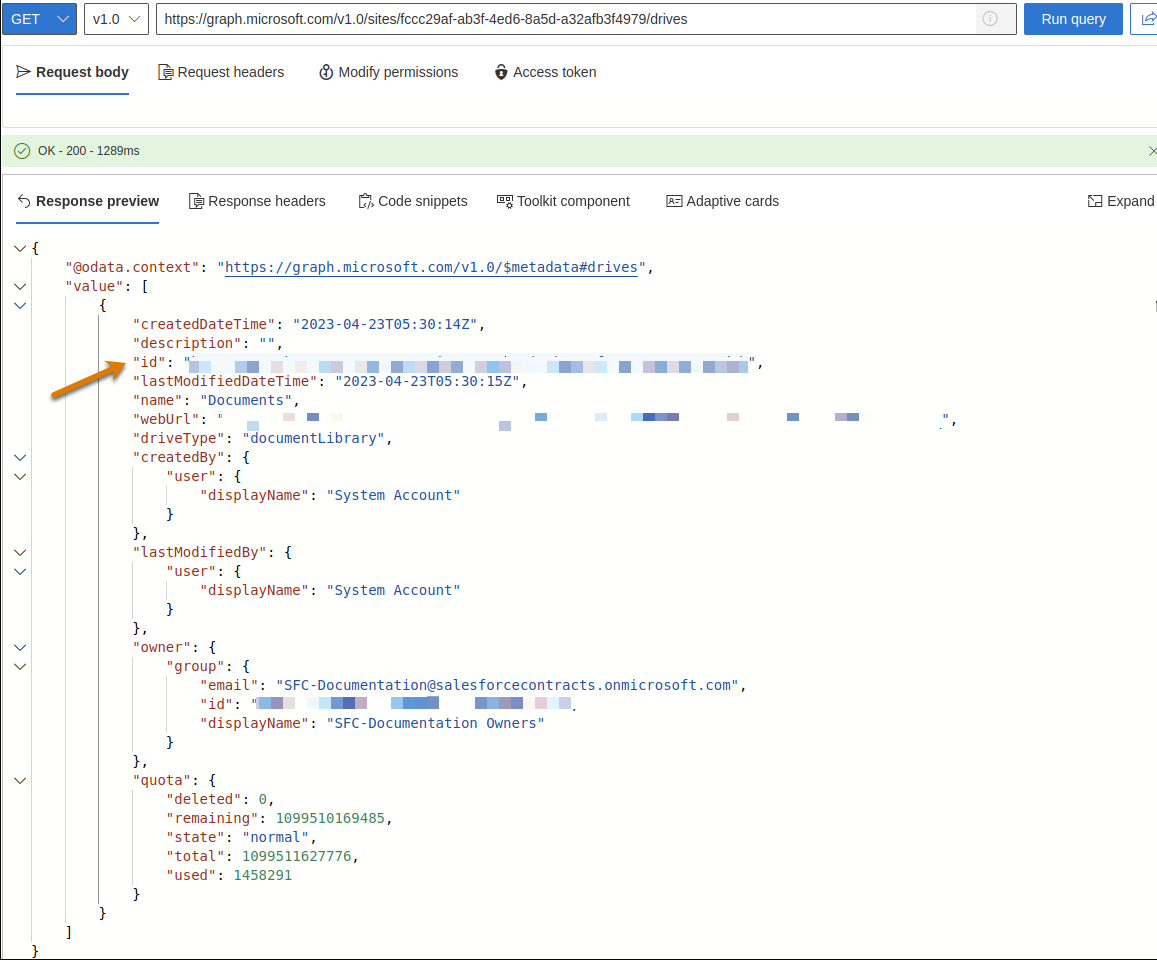
In the graph-explorer, select GET, v1.0, and paste
https://graph.microsoft.com/v1.0/sites/<SITE ID>/drives. - Replace the <Site ID> placeholder with the site ID that you copied in step 2d.
- Click Run query.
-
From the Response, copy and save the drive ID. Use the drive ID while configuring the external document storage.
¿Resolvió este artículo su problema?
¡Háganos saber cómo podemos mejorar!