
You are here:
Use a Join Node in the Recipe Canvas
In Salesforce Data Pipelines, create joins between Salesforce objects, external objects, and CRM Analytics datasets in a recipe.
- In a Data Prep recipe that already has at least one Input node, select the Add Node
button (
 ) from a single node or between two nodes or at the end of the recipe. To join a
node to itself, drag the Add Node button to the node and select the join node. To show
the Add Node button between two nodes, hover the cursor on the connecting line.
) from a single node or between two nodes or at the end of the recipe. To join a
node to itself, drag the Add Node button to the node and select the join node. To show
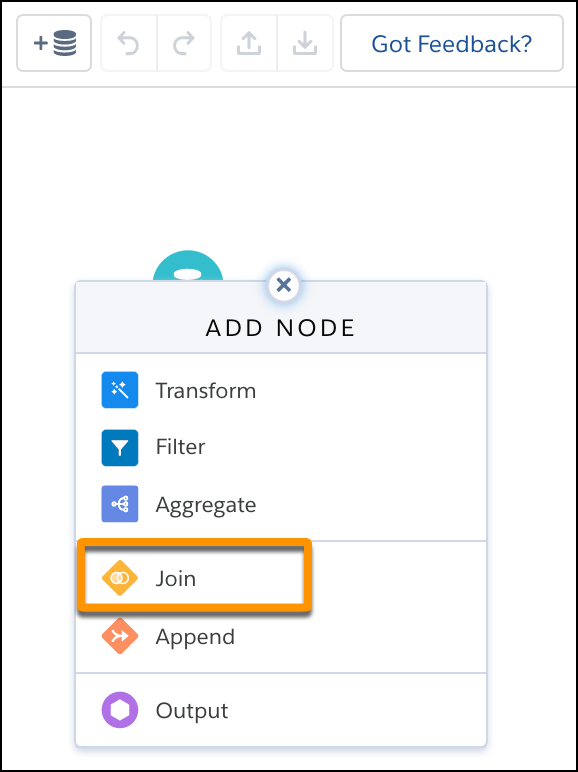
the Add Node button between two nodes, hover the cursor on the connecting line. - In the Add Node box, select Join.
- Select the data to join (1), and then choose which columns to include (2).
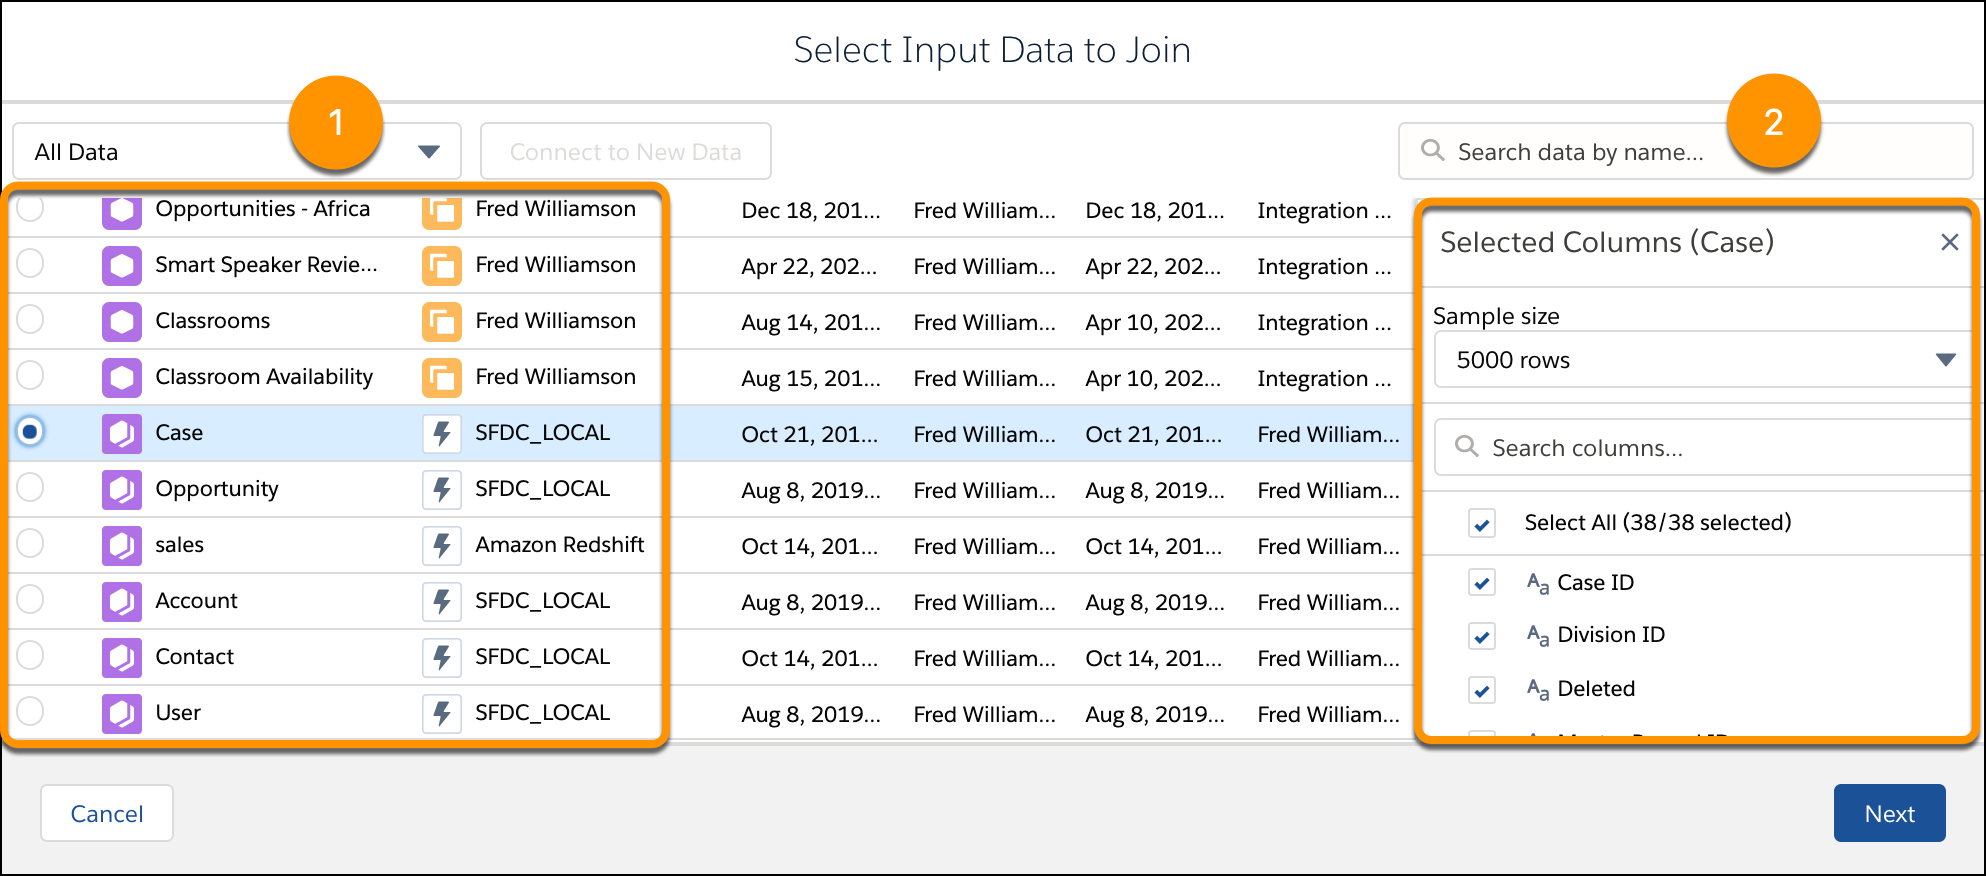
- Click Next.
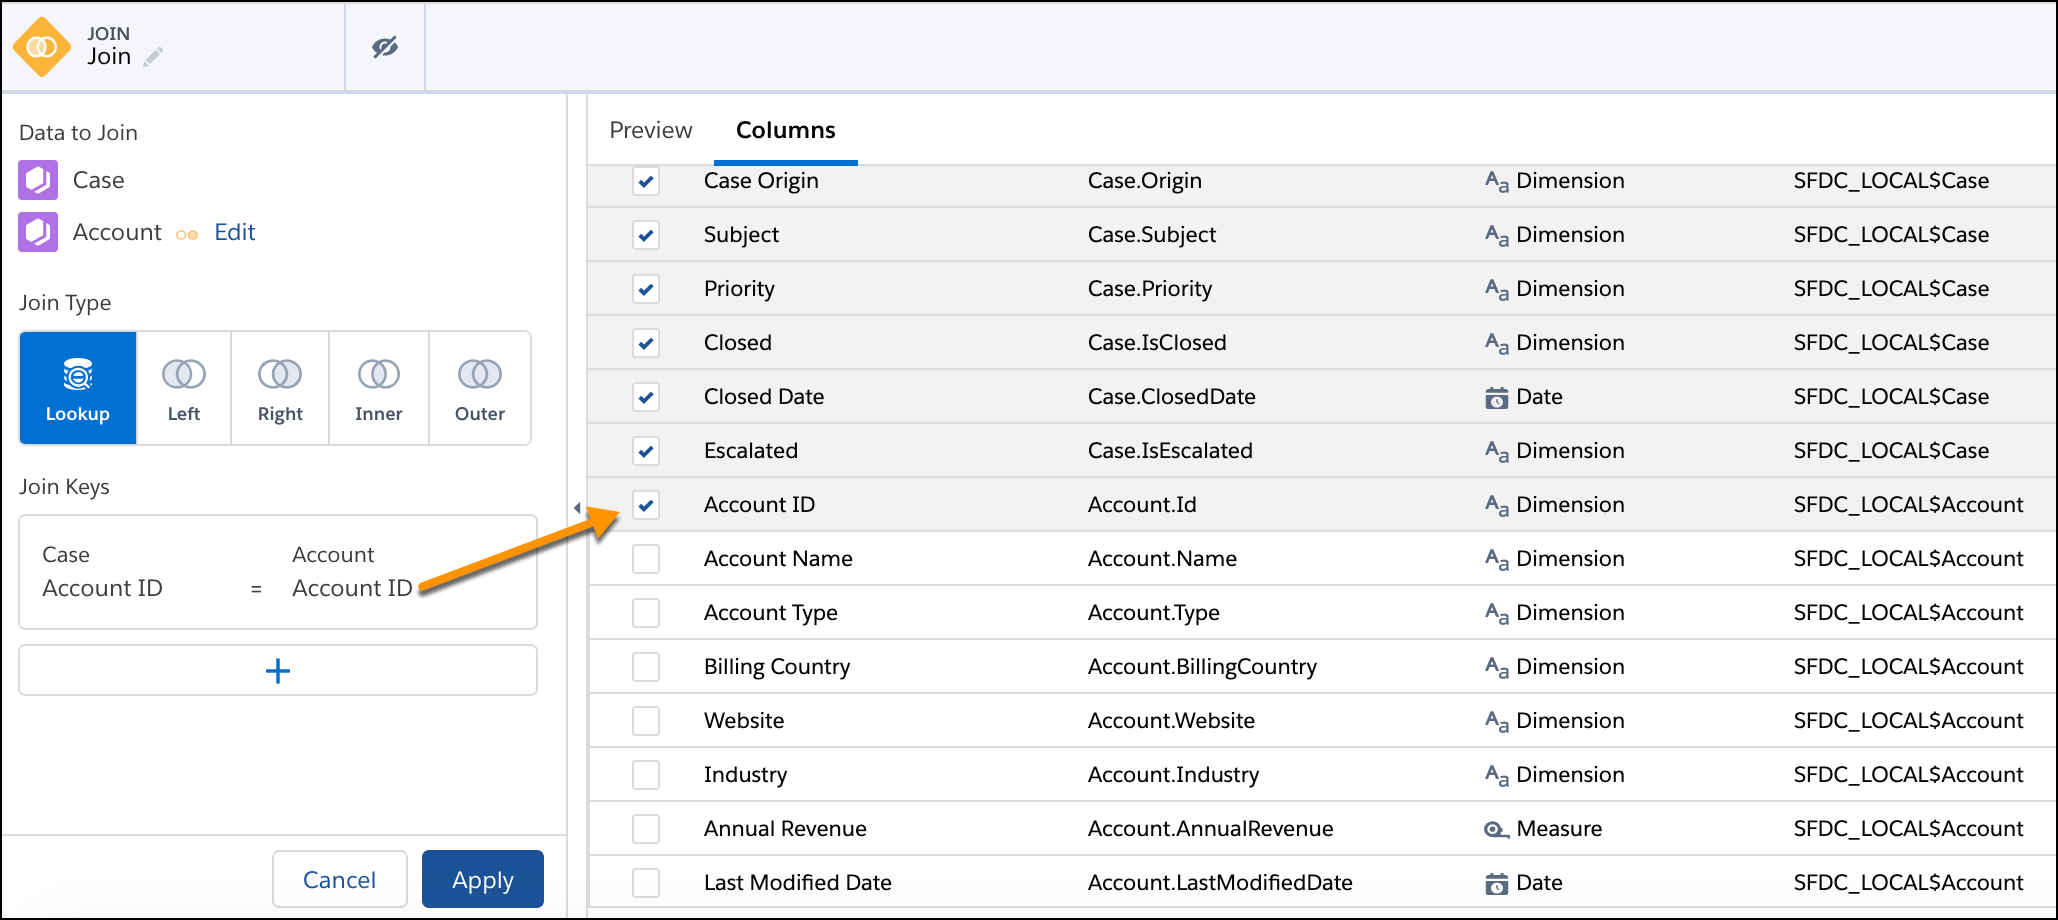
- Choose the join type.
By default, Lookup is selected.

- If needed, change the join keys.
Data Prep adds suggested join keys from both sets of input data. If needed, use multiple keys to match records. For example, imagine you’re adding contact information to lead data. Using names alone to match can result in duplicate matches when different leads have the same name. Use two keys to match on name and company to ensure you’re matching the right data. You can use up to 5 keys.
 Important
Salesforce Data Pipelines datasets contain date and time component fields (such as Year, Quarter, and Month) that are derived automatically from existing date and time fields. You can’t use these component fields as join keys.
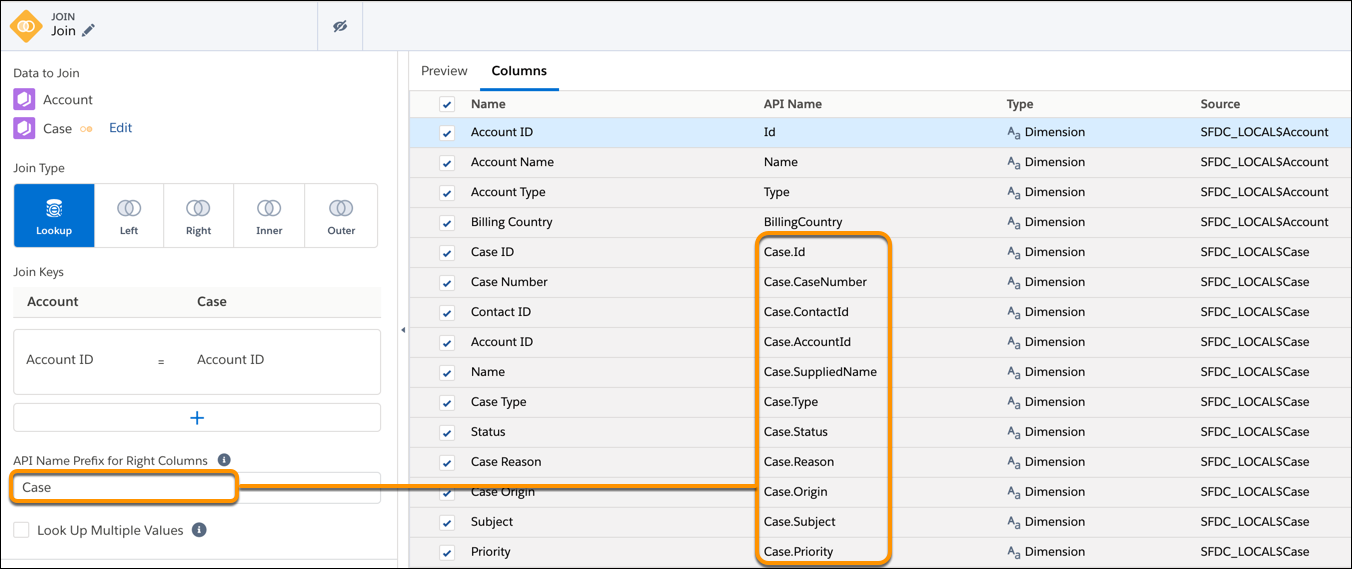
- To prevent API name conflicts between columns in the left and right data sources,
enter a prefix for columns coming from the right data source.
The Join node prepends the prefix to the API names of all columns from the right. For example, if you specify Case as the prefix, all right column API names begin with “Case.”
- If you chose the Lookup join type, select Lookup Multiple
Values for the lookup to return all matching rows from the right data
stream. If you don’t select this option, the lookup returns only one of the matching
rows.
For more information about single-match and multiple-match lookups, see Lookup.
- In the Columns tab in the right panel, select the columns to include in the recipe.
The Source column in the table shows the object where each column comes from.
By default, the recipe only adds the join key columns. If a join key column isn’t included in the recipe, you can’t apply the transformation to the recipe.
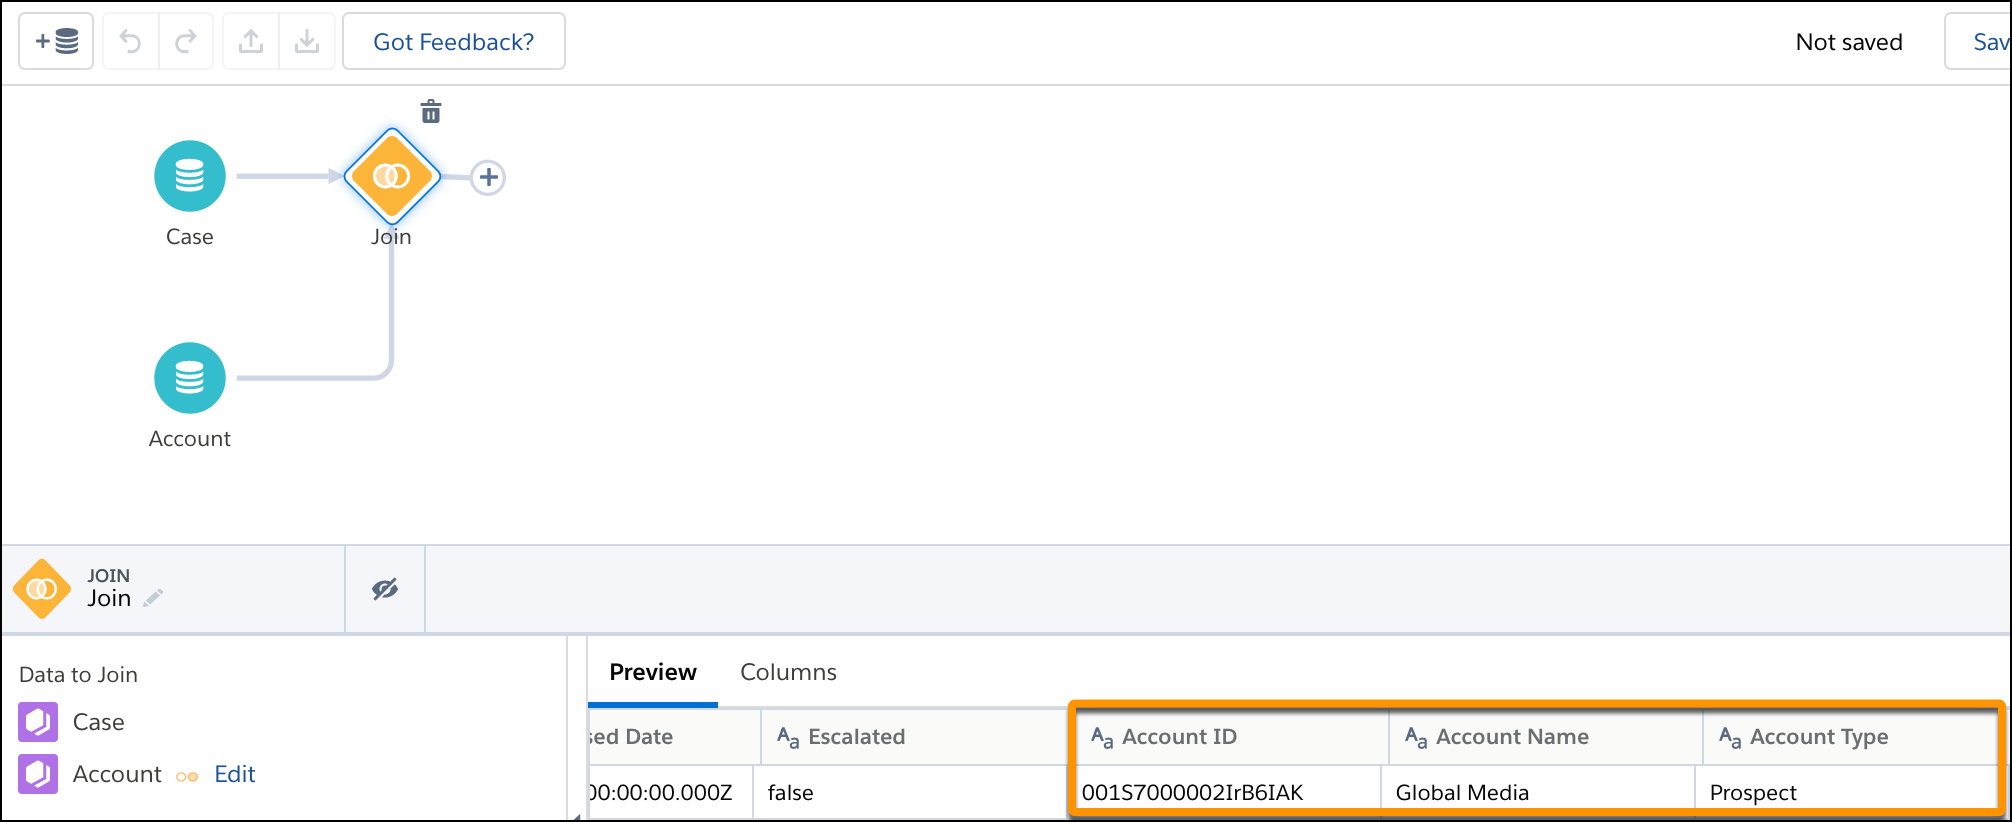
- To preview columns and their data, click Preview.
The joined columns show in Preview.
- If needed, you can show additional columns or hide existing ones from preview. To hide
columns, click the Hide button (
 ). To show columns, click the Show button (
 ).
).The preview can display up to 100 columns. Hiding columns from the preview doesn’t affect whether the columns are included in the recipe.
- Click Apply to add the node to the recipe.
- Save the recipe.