
Test Your Agent in Agentforce Builder
Manually testing your agent in Agentforce Builder provides a detailed, step-by-step trace of your agent's interactions and processes. Use the Preview panel to chat with your agent, then review subagent selection, action execution, and reasoning on the Interaction Summary panel. For more details about any step, converse with the Agentforce Assistant.
Required Editions
| Available in: Lightning Experience |
| Available in: Enterprise, Performance, Unlimited, and Developer Editions. Required add-on licenses vary by agent type. |
| User Permissions Needed | |
|---|---|
| To test agents in Agentforce Builder: | Manage AI Agents AND the required permissions for your agent type |
- From the Agents page in the Agentforce Studio app, open your agent in Agentforce Builder.
- Click Preview.
- Select your test mode.
-
In the Context Variables tab, set or override the value of variables used in your agent to
match the user’s actual context, such as their verification status or language. Setting initial
values ensures that your agent’s preview behavior accurately reflects your user’s
context.
A warning icon on the Context Variables tab or an individual variable field indicates that your agent uses a linked variable that’s set for you in production, but isn’t set in preview. For example, a value that’s filled from the Messaging Session object when your agent is live on a Messaging channel. You don’t have to set a value for any variables to preview your agent, but consider how your agent uses each variable and whether you can accurately test without it.
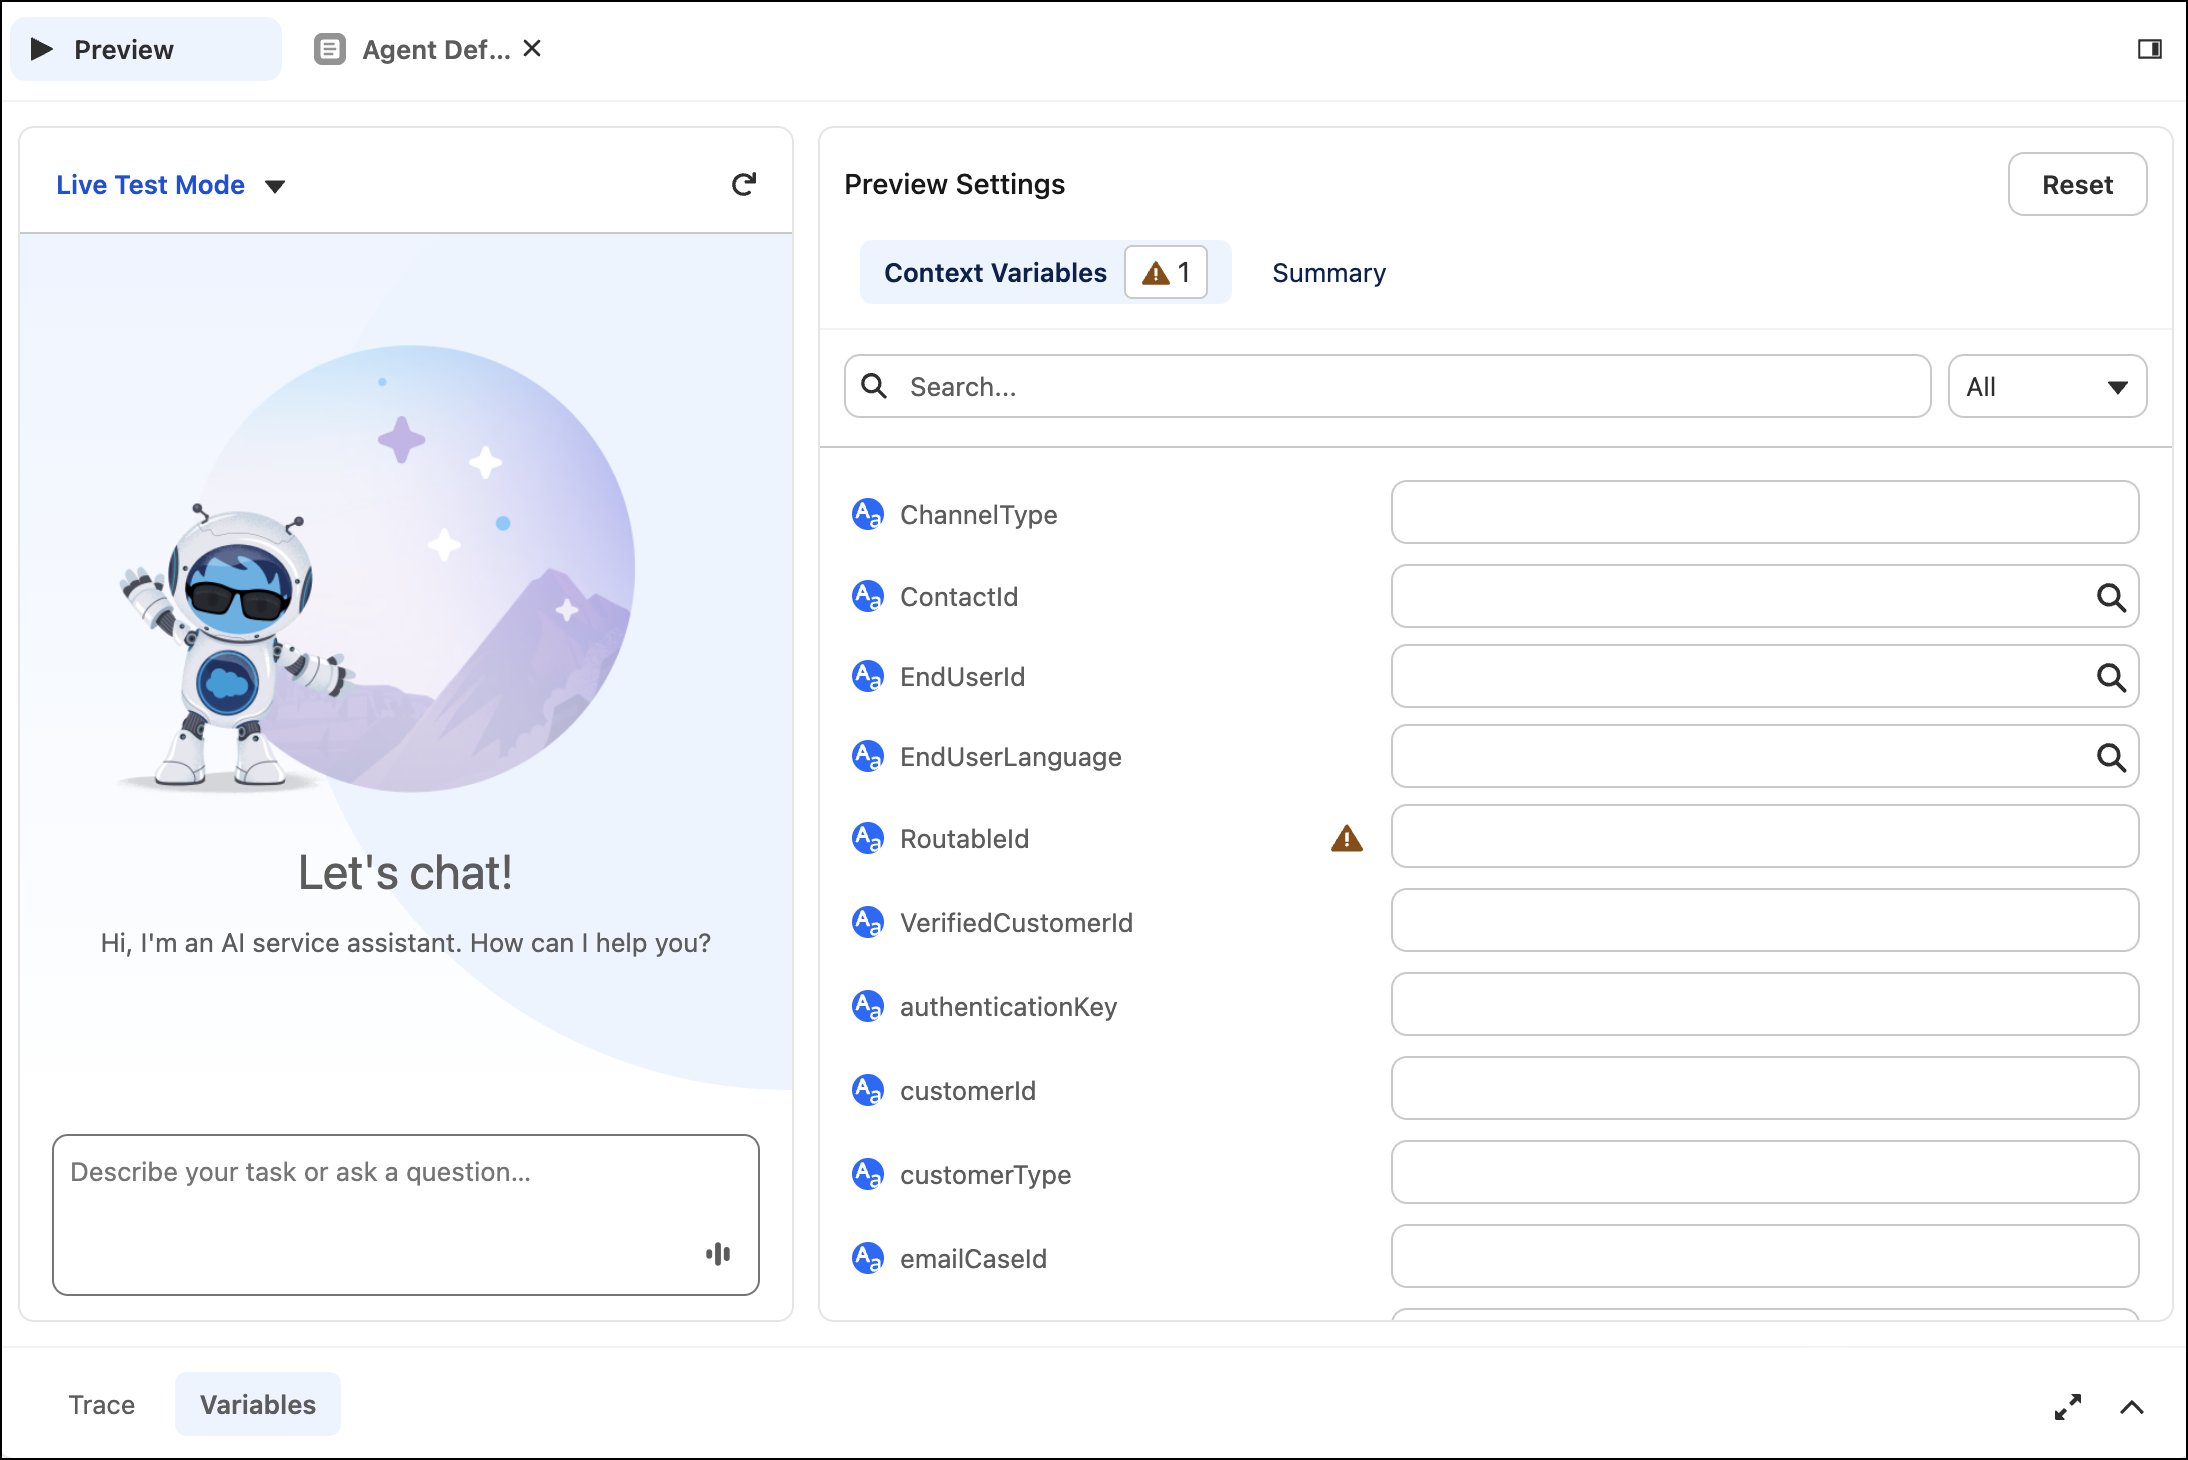
 Note If you change the value of a variable during a preview conversation, restart the conversation to apply your changes.
 - To start a preview conversatoin, in the chat window, enter a typical user question or request.
-
To review the agent’s behavior and reasoning, start with the Interaction Summary in the
Summary tab.
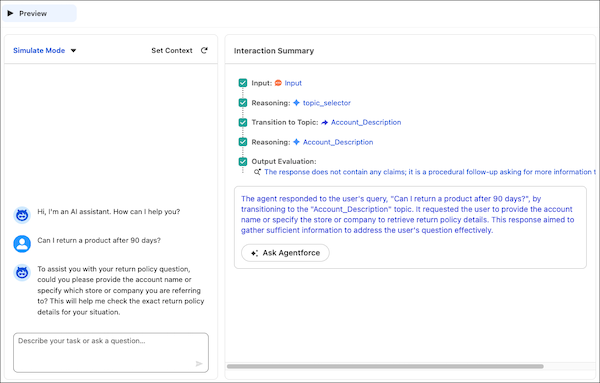
The Interaction Summary shows you a high-level overview of the steps your agent took to generate a response, including the result of each. Hover over each step for more details. The Interaction Summary also includes an AI-generated natural language explanation of your agent’s process, which helps put the steps in context.
- To drill down, click the Trace tab. The Trace panel shows the full trace data for the interaction, including each event, the time elapsed for the event, and the technical details related to that event. The agent events in the trace data are more granular than the overview of steps in the Interaction Summary, which makes them useful for troubleshooting. And you can also view the details for each event.
- Use the Variables tab to track the state of variables in your agent at the start and the end of the interaction. Tracking the value of variables at the start and end of an interaction can help you evaluate whether your agent has the right context, how well it follows instructions, and the accuracy of its responses.
- To get AI assistance, click Ask Agentforce in the Interaction Summary panel. We send the integrated Agentforce assistant information about the preview session so you can ask it questions.
- If the test reveals errors or gaps, ask the assistant to make updates, or make changes yourself in the Canvas or Script views. If your agent version is committed, make a new version first and modify it.
- To test changes, refresh the session by clicking the reset icon on the Preview panel. Continue testing, modifying, and retesting until you're satisfied with the agent’s behavior.
Did this article solve your issue?
Let us know so we can improve!
