Create a Messaging channel for incoming calls that need to be transferred to the
Agentforce agent. In the channel, map the procured PSTN phone number to the inbound Omni-Channel
flow. When an incoming call is transferred using this number, Omni-Channel uses the Omni-Channel
flow to transfer the call to the agent assigned to the channel.
Required Editions
Available in: Lightning Experience
Available in: Enterprise, Unlimited, and Developer Editions
with Foundations or Agentforce 1 Editions, and Salesforce Voice add-ons.
From Setup, in the Quick Find box, enter Agentforce Voice, then
select Agentforce Voice Setup.
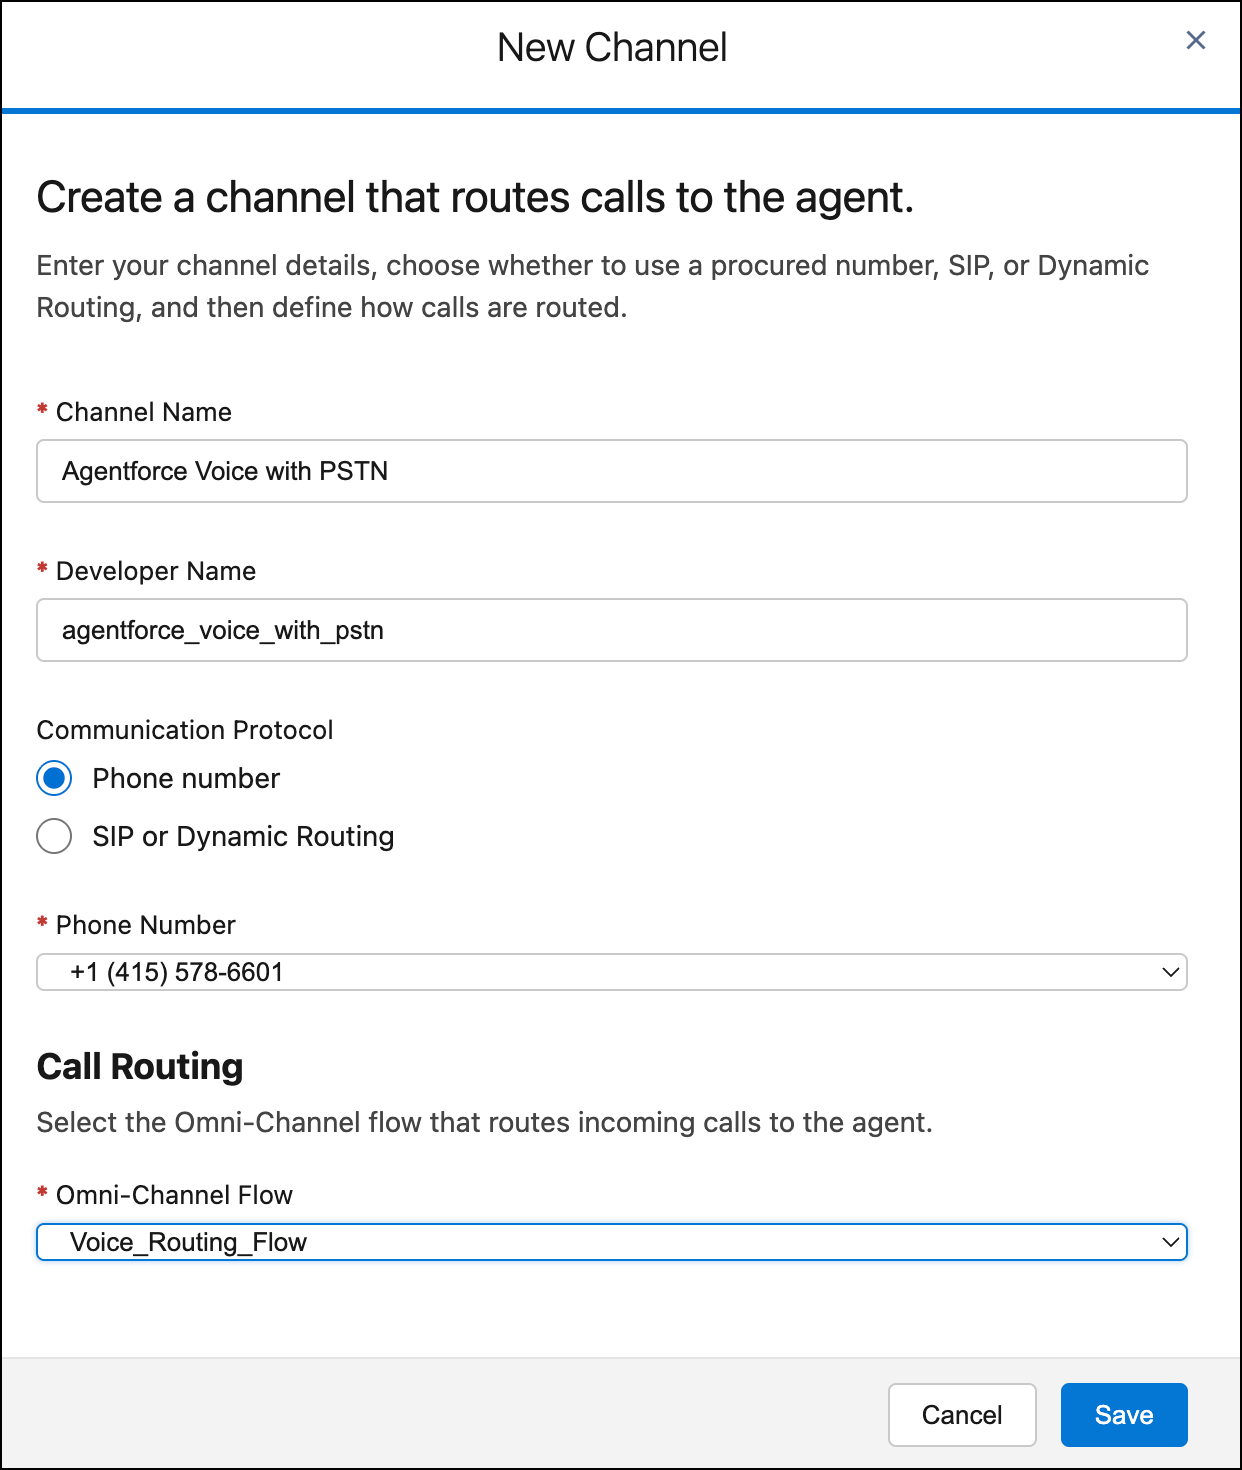
In the Messaging Channel for Agentforce Voice step on the Agentforce Voice Setup page,
click Add.
Enter the name and developer name of the channel.
Select Use a phone number and then select the phone number for the
channel.
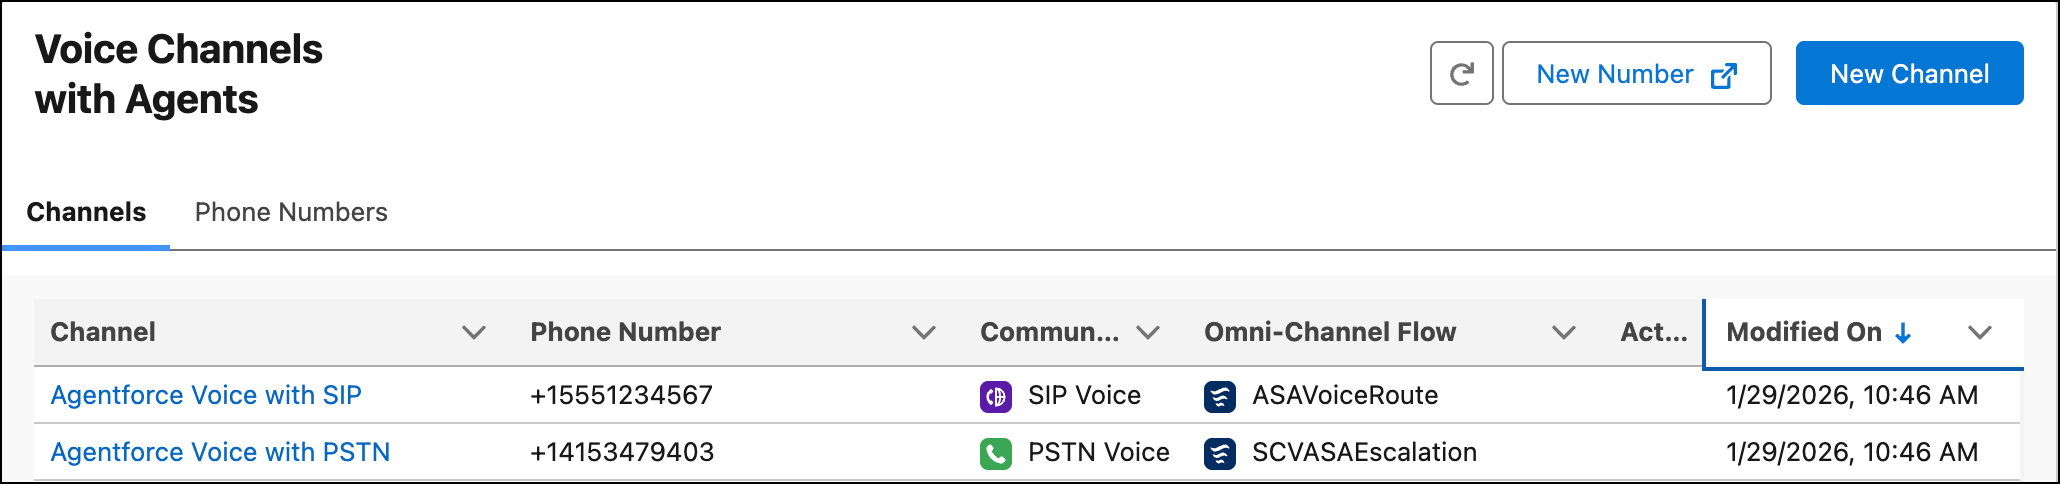
The Channels tab in the Agentforce Voice Setup page shows the channels that are
added. A newly added channel can take a couple of minutes to appear in this tab.
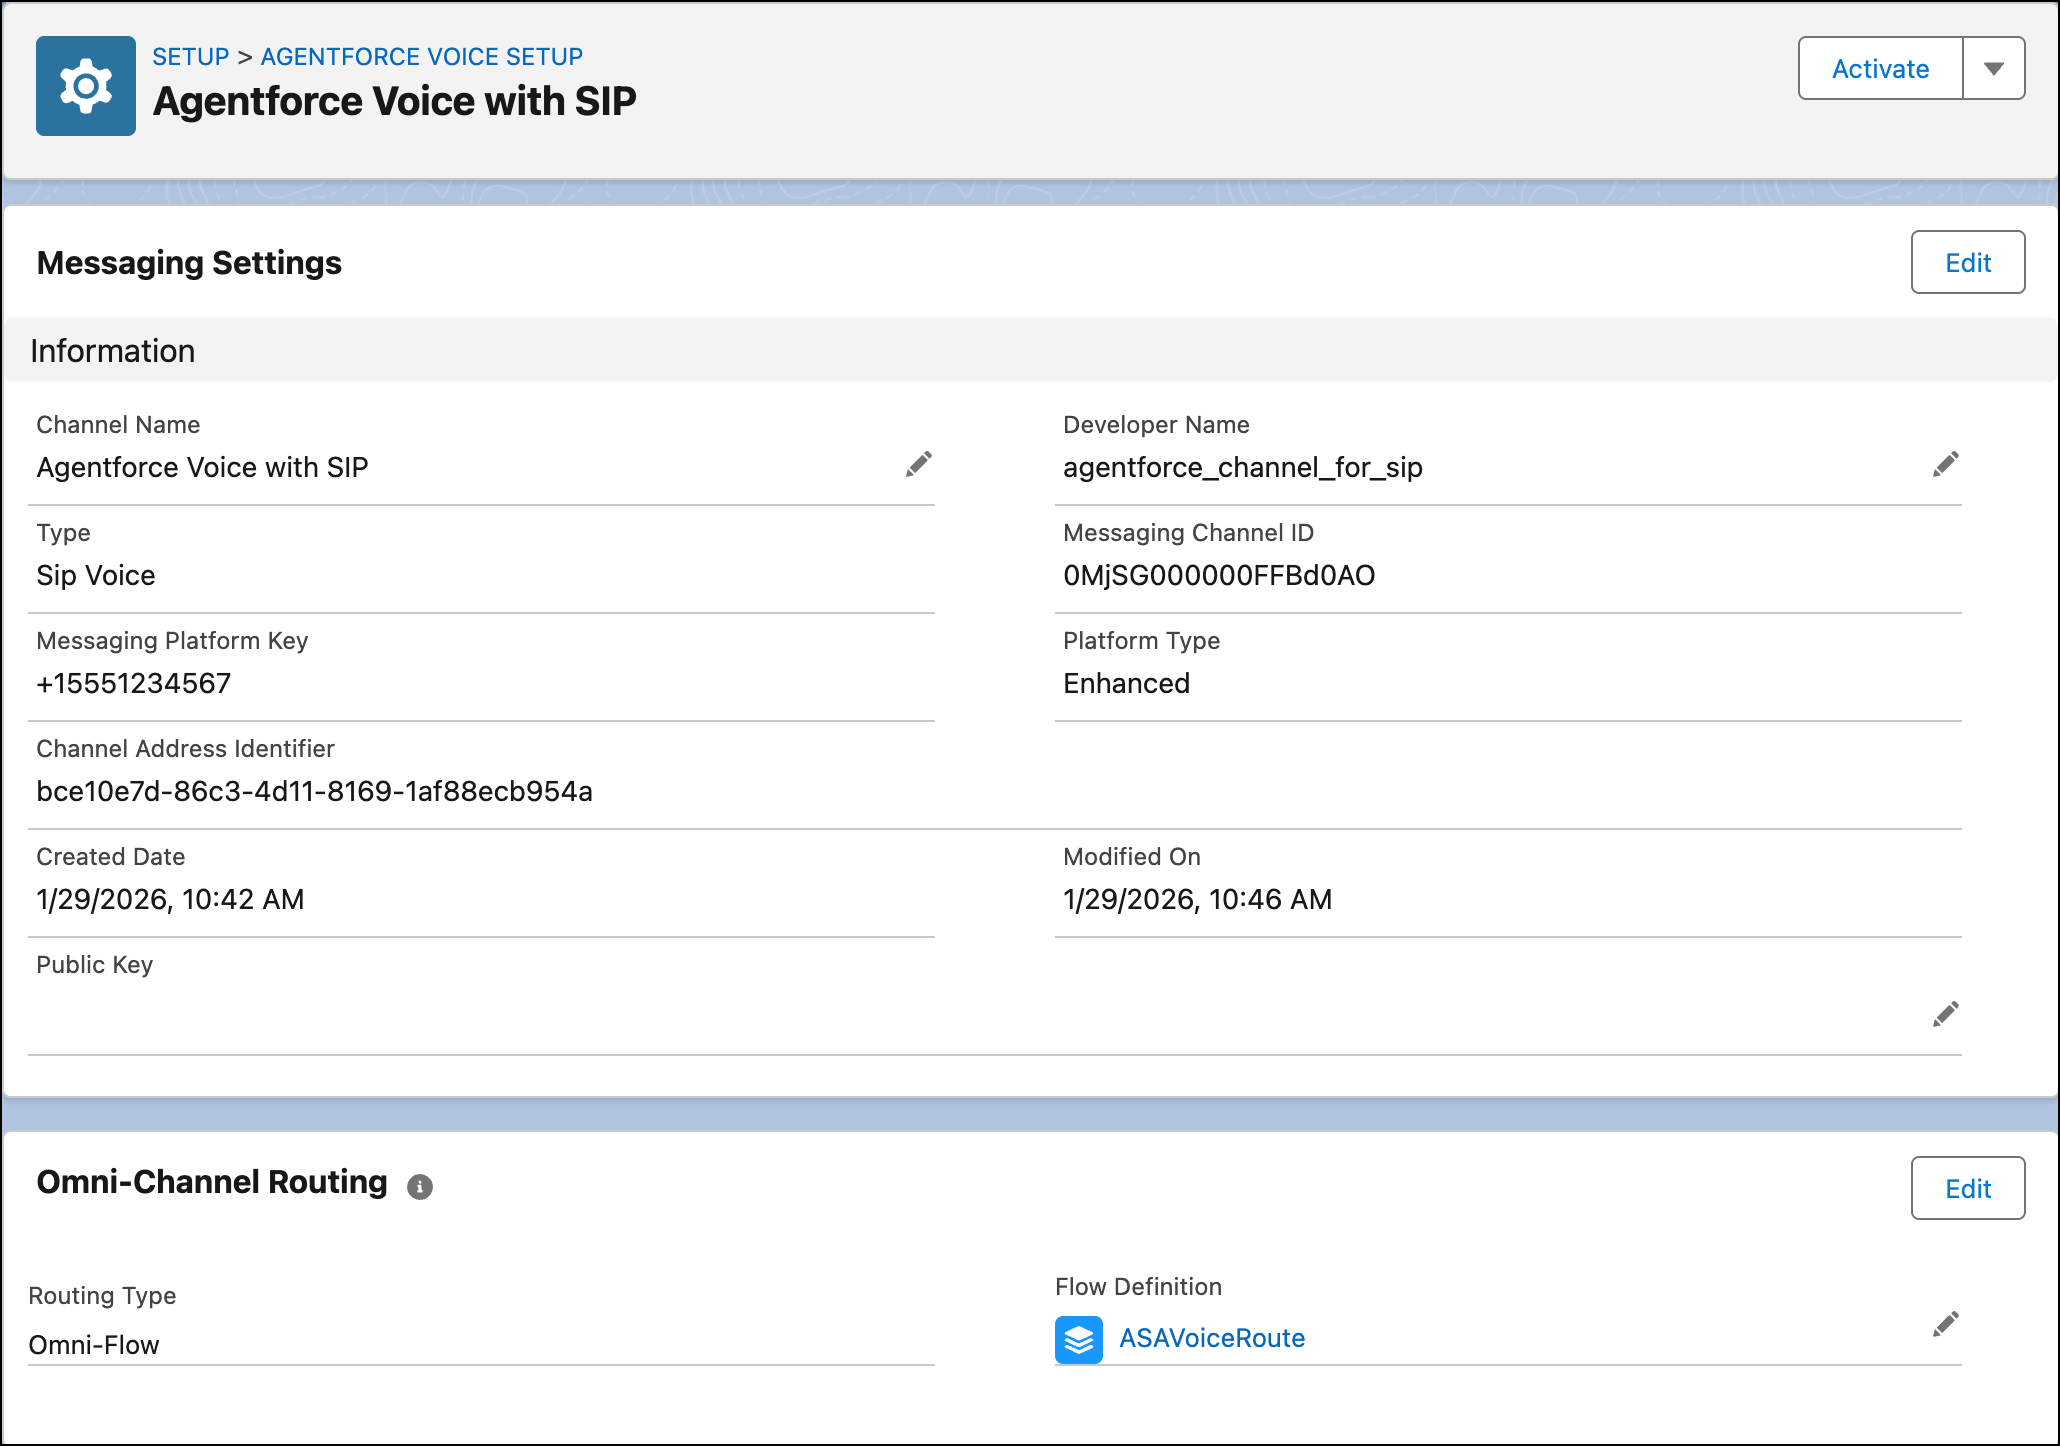
In the Channels tab, click the channel name.
If you aren’t a Salesforce Voice with Telephony Providers customer, edit the channel and,
in the Public Key field, enter an unexpired certificate. Without it, Omni-Channel will not
route the calls to the voice-enabled agent.
After you create an agent, configure calls to be transferred to the agent, and configure calls
with an agent to be escalated to a rep, it’s time to activate your agent.
Note If you call the procured phone number when the agent is deactivated, the agent
doesn’t pick up the call. You just hear music.
We use three kinds of cookies on our websites: required, functional, and advertising. You can choose whether functional and advertising cookies apply. Click on the different cookie categories to find out more about each category and to change the default settings.
Privacy Statement
Required Cookies
Always Active
Required cookies are necessary for basic website functionality. Some examples include: session cookies needed to transmit the website, authentication cookies, and security cookies.
Functional Cookies
Functional cookies enhance functions, performance, and services on the website. Some examples include: cookies used to analyze site traffic, cookies used for market research, and cookies used to display advertising that is not directed to a particular individual.
Advertising Cookies
Advertising cookies track activity across websites in order to understand a viewer’s interests, and direct them specific marketing. Some examples include: cookies used for remarketing, or interest-based advertising.