
Create a Grid Worksheet
After you have Einstein enabled and the permission assigned to your users, you’re ready to get started exploring solutions.
Required Editions
| Available in: Lightning Experience |
| Available in: Enterprise, Performance, Unlimited, and Developer Editions. Required add-on licenses vary by agent type. |
| User Permissions Needed | |
|---|---|
| To create and modify Grid worksheets: | Manage Agentforce Grids |
- From the App Launcher, find and select Agentforce Grid.
- Click Create Grid.
- Enter a name. Optionally, add a description that appears in the list of grids on the Home tab.
- Click Create.
-
Select what you want to use to populate the first column.
- Salesforce queries CRM records.
- Data Cloud queries Data 360 records.
- AI uses an LLM to generate data.
- Agent runs an Agentforce agent.
- You can also upload your own data from a CSV file.
-
With data in place, you're ready to start adding and experimenting.
- To create more columns Click +Add Column.
- To reference the data in one column and use it as input in another, @ mention it in another column.
- To see column details or sort the data and edit or delete it, click the column header.
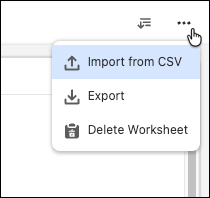
- To export or delete your worksheet or upload a CSV file, click the options icon.
- To add a new worksheet tab to your grid, click +.
- To rename your worksheet, double-click the tab name.
- To modify a cell, double-click it and change the text.
- To run data in a column, save Save and Run in the column panel or click Update All Cells in this Column in the column menu.
- To run data in a cell, click the run button.
- To run data in a row, select the rows and click Run.
- To run data in the entire worksheet, select all the rows and click Run.
Did this article solve your issue?
Let us know so we can improve!
