You are here:
Configure SIP Trunking in Your Partner Telephony System
Before you can configure your telephony system to transfer and escalate calls via SIP, connect your telephony system to Salesforce. In addition to configuring logic to manage traffic and routing, connecting the telephony system to Salesforce also involves creating an encrypted SIP trunk to support user-to-user information exchange.
Set these attributes for your SIP trunk.
- Set the Salesforce SBC endpoint, using a Salesforce SBC FQDN and port.
- Set the protocol to TLS.
- Set the media codecs to audio/PCMU and audio/PCMA.
- Set the User to User Information (UUI) header before transferring the calls.
- Set the UUI encoding format to Hex.
- Grant SIP access to IP addresses. Set the allow and deny lists for the transferred calls to Salesforce.
Sample SIP Trunking Configuration in Genesys
To illustrate how to configure SIP trunking in a partner telephony system, this section covers the tasks using Genesys.
Add a Site
Add a site that defines which SIP trunk picks up incoming calls. For the properties not mentioned, keep the default values.
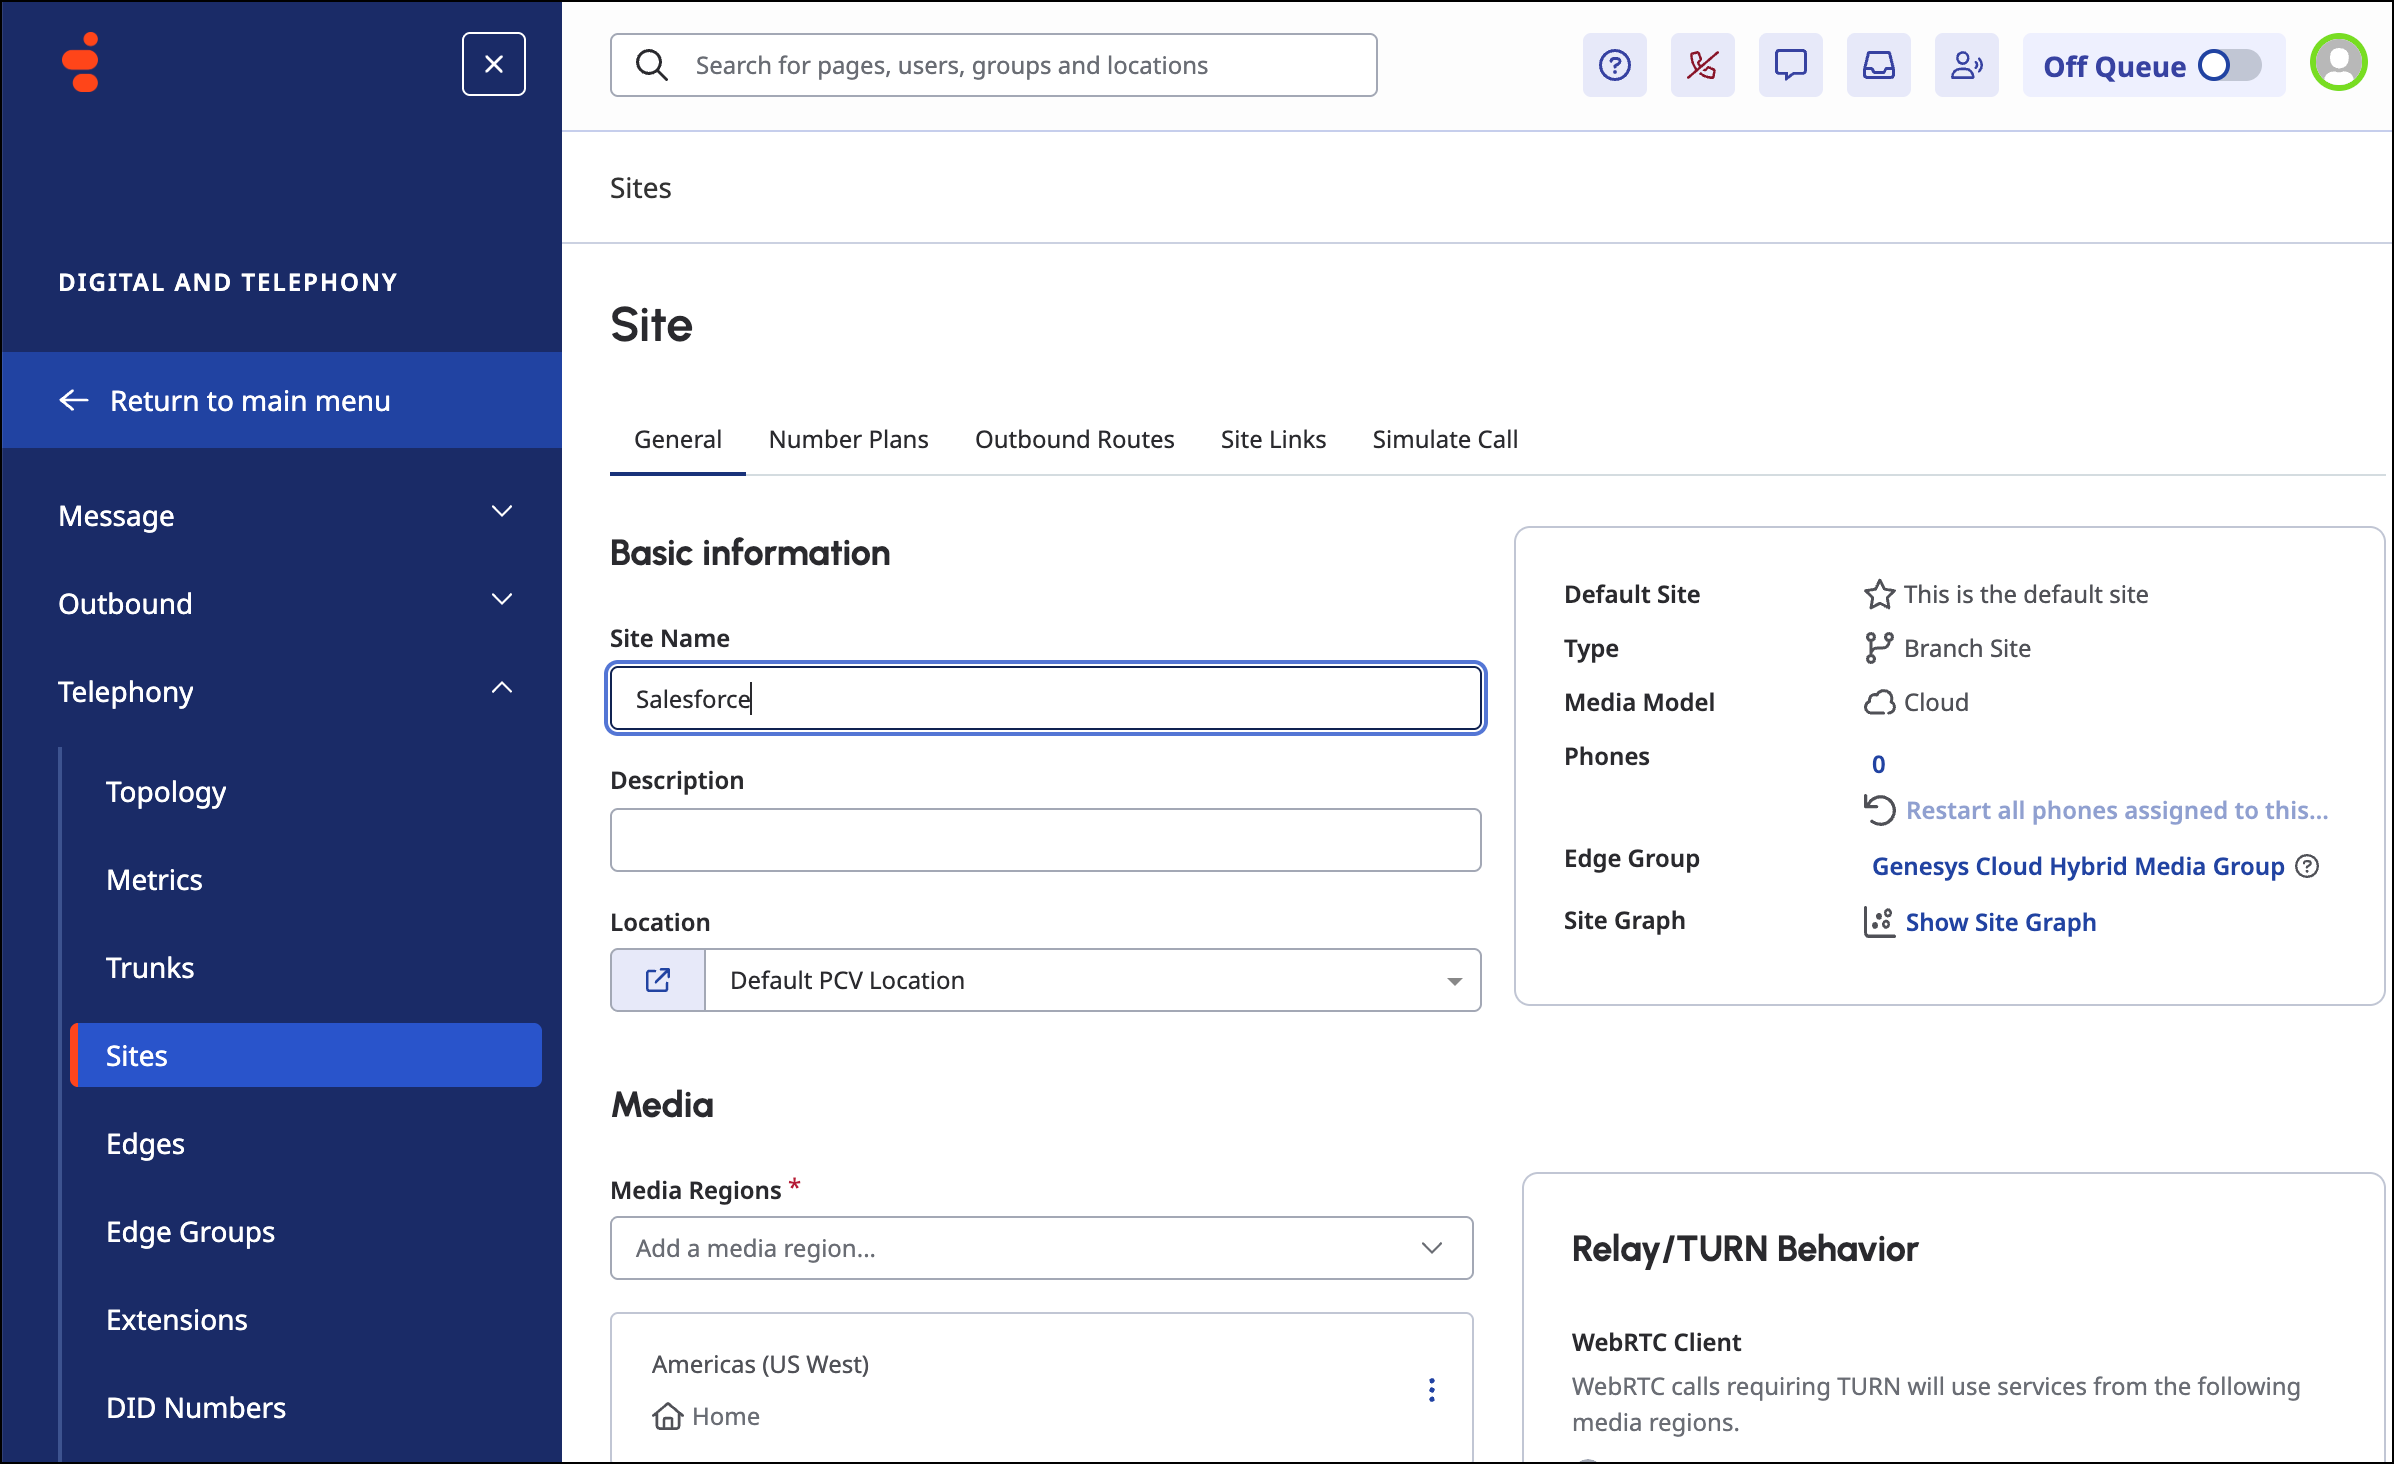
- Log in to Genesys Cloud.
- Click the menu and select Digital and Telephony | Telephony | Sites.
- In the Site page, add a new site.
- In the Name field, enter a name for the site. For example, enter Salesforce.
- In the Location field, select Default PCV Location.
- In the Media Regions field, select the region nearest to your site. For example, if your Genesys account is in the US West, select Americas (US West).
-
Save the site.
Create a Number Plan
To transfer calls using a SIP trunk, first create a number plan, assign the SIP address to it, and then select the classification for the SIP addresses in the number plan. The number plan determines which SIP trunk to route to. For the properties not mentioned, keep the default values.
Later, you’ll configure the SIP trunk.
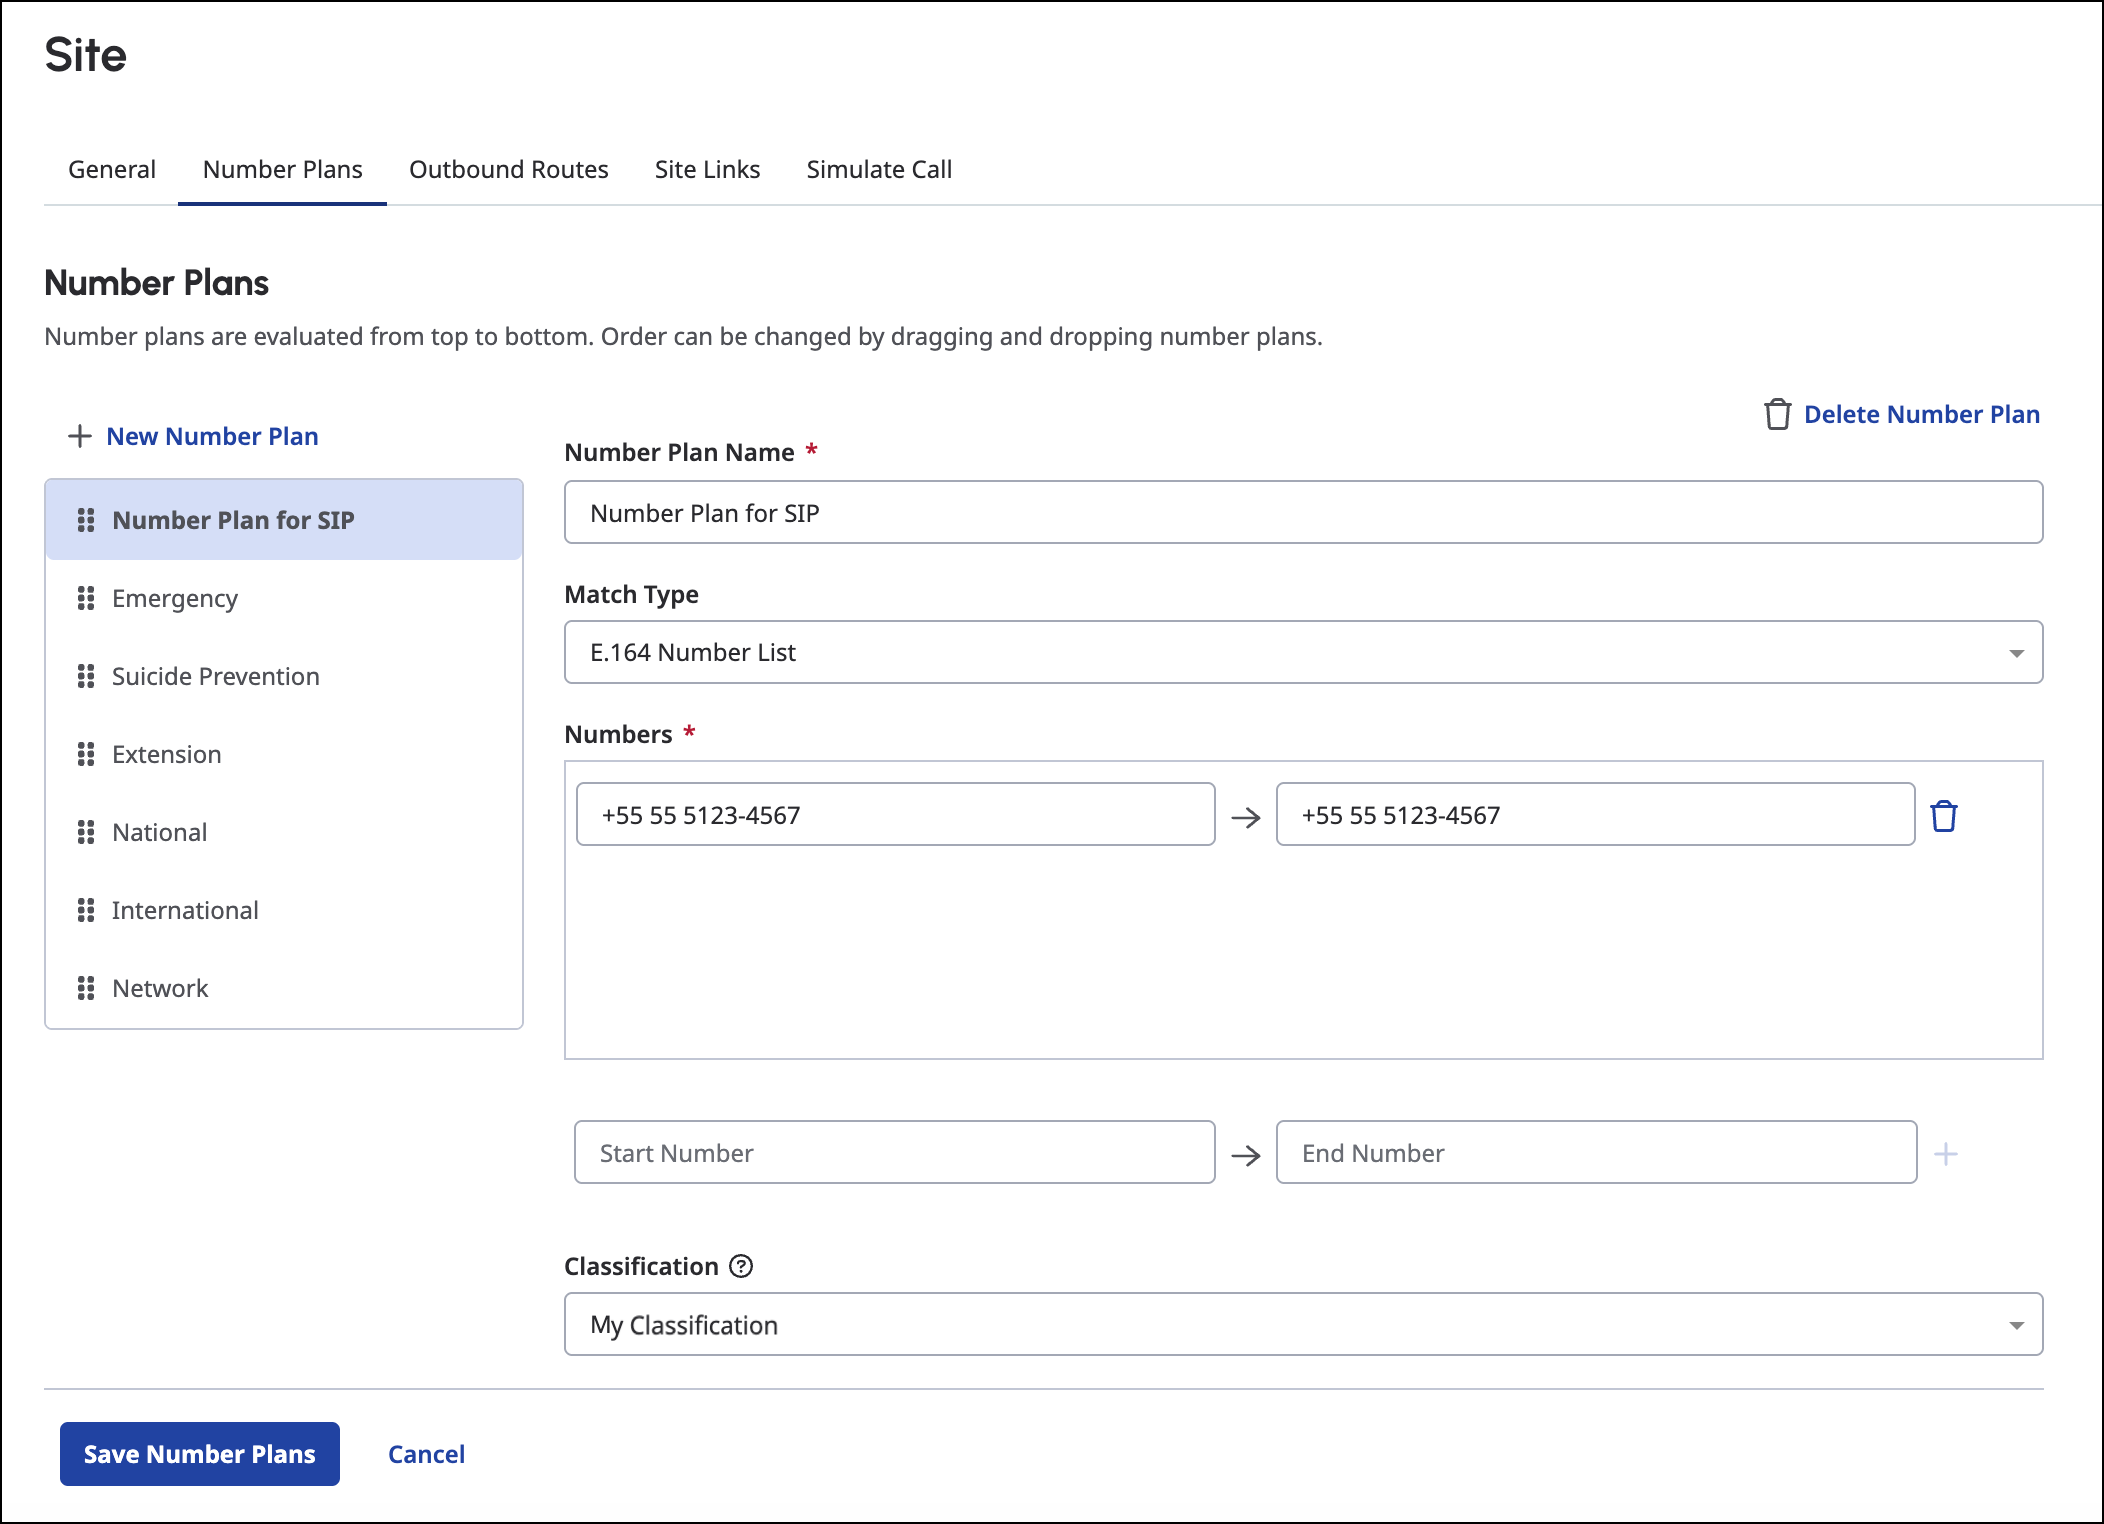
- In the Site page, click the Number Plans tab.
- Click New Number Plan.
- In the Number Plan Name field, enter the name of the plan.
- In the Match Type field, select an option. For example, select E.164 Number List.
-
In the Numbers field, enter the start and end numbers for the range of SIP addresses. If
you have only one SIP address, enter the same number for both.
Each number must be in the E.164 format.
- To route incoming calls to the SIP trunk that you will create, in the Classification field, create a classification. To create it, enter the name and click +.
-
Save the number plan.
Create a SIP Trunk
Create the SIP trunk. To route incoming calls to the SIP trunk that you created, use the classification that you assigned to the number plan. For the properties not mentioned, keep the default values.
- In the Digital and Telephony menu, click Telephony | Trunks.
- In the External Trunks page, click Create New.
- In the Name field, enter a name for the trunk.
- In the Trunk Type field, select Generic BYOC Carrier.
- In the Protocol field, select TLS.
-
In the Termination Identifier field, enter the termination URI that’s unique within your
Genesys Cloud organization's region.
Genesys uses this ID to associate inbound calls with the appropriate Genesys Cloud organization’s resources.
- In the From Site field, choose the site that you created in the previous step.
-
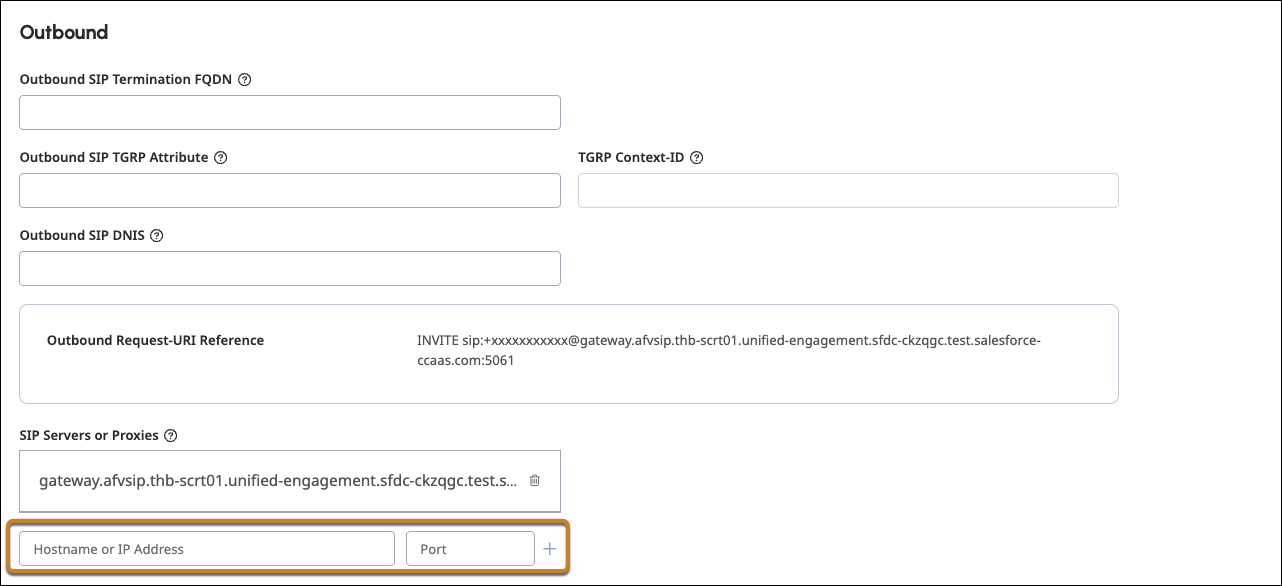
To allow Genesys to call Salesforce, in the SIP Servers and Proxies field, add the
Salesforce SBC endpoint.
-
For the SIP Server host name, enter the Salesforce SBC fully qualified domain name
(FQDN).
For a list of Salesforce SBC FQDNs, see Agentforce Voice with SIP Regional Availability Chart. Choose the SBC FQDN for your telephony provider and region.
- For the port, enter 5061.
-
Click +.
-
For the SIP Server host name, enter the Salesforce SBC fully qualified domain name
(FQDN).
-
Under the SIP Access Control section, in the Allow the Following Addresses field, specify
the IP address to allow SIP messages from the Salesforce SBC. To get the IP address, perform a
lookup against the Salesforce fully qualified domain name.
- For Windows, open the command prompt and type nslookup SBCFQDN.
- For Mac or Linux, open the Terminal and type dig SBCFQDN.
- Under the Identity section, disable Address Omit + Prefix for both Calling and Called.
- Under the Media section, in the Preferred Codec List field, add the supported Salesforce codecs: audio/PCMU and audio/PCMA and turn on recording for Genesys.
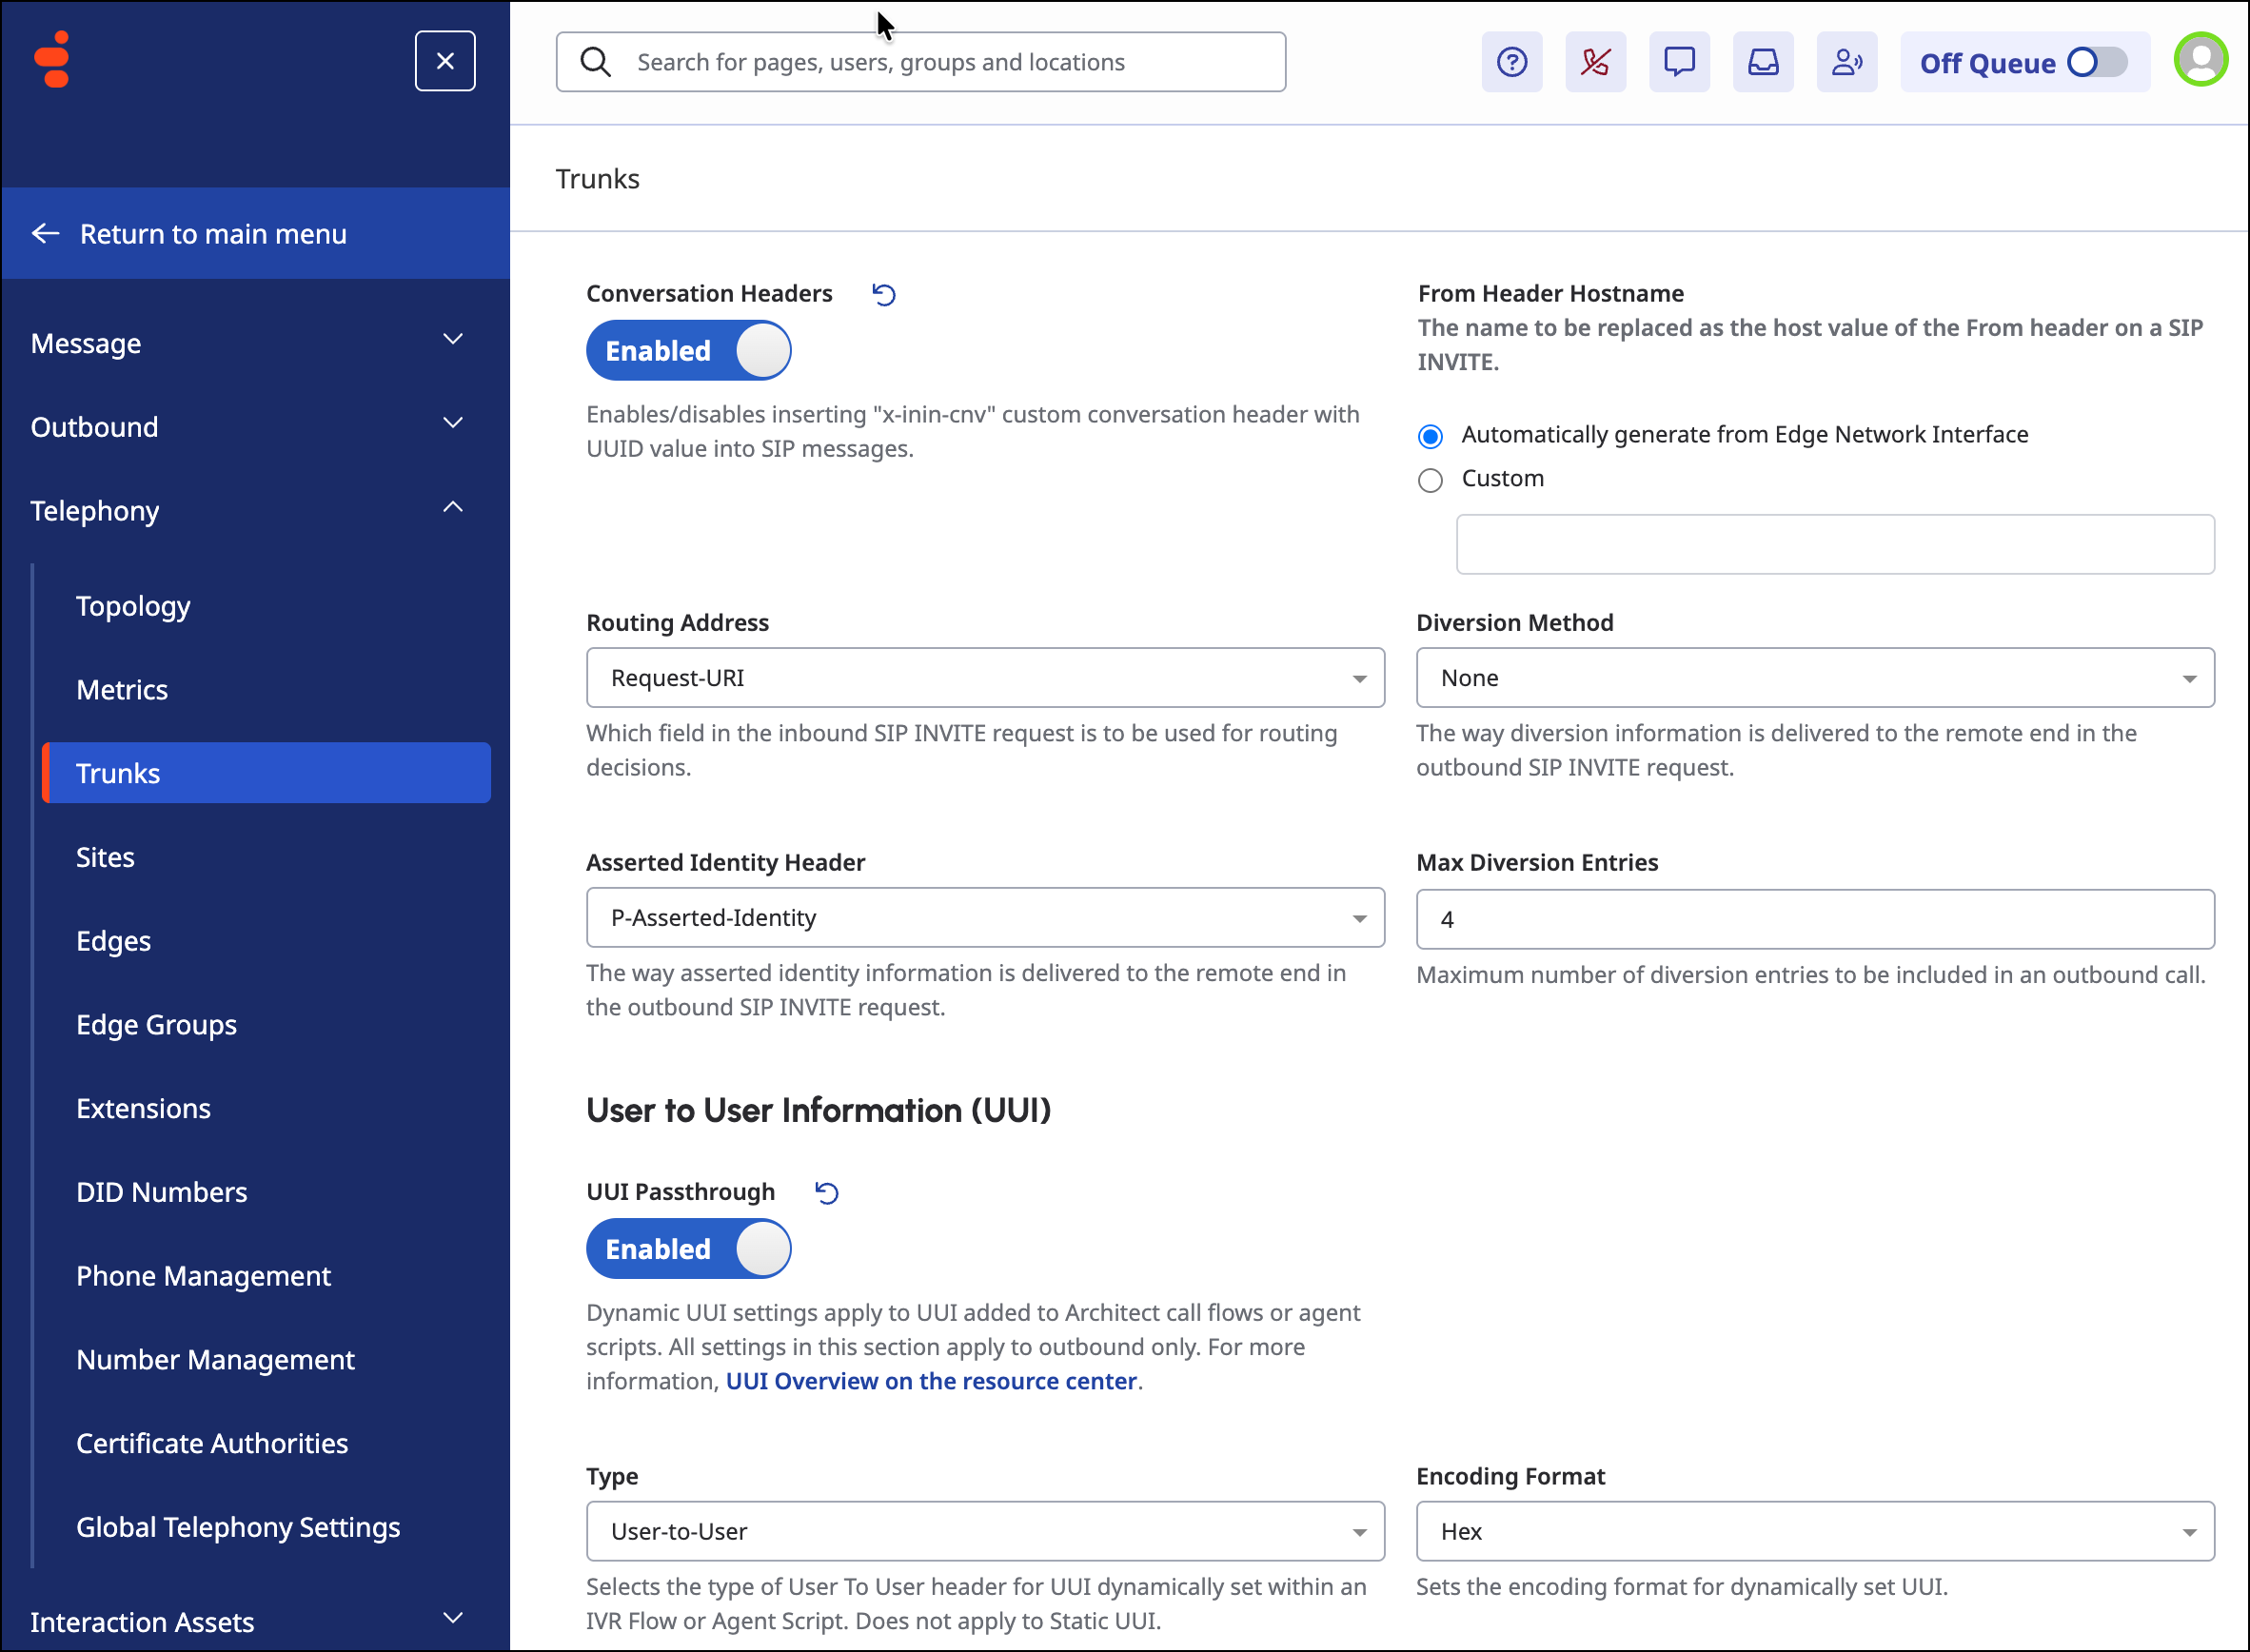
- Under the Protocol section, enable Conversation Headers, enable UUI Passthrough, set Type to User-to-User, and set Encoding Format to Hex.
-
Save the trunk.
Create an Outbound Route
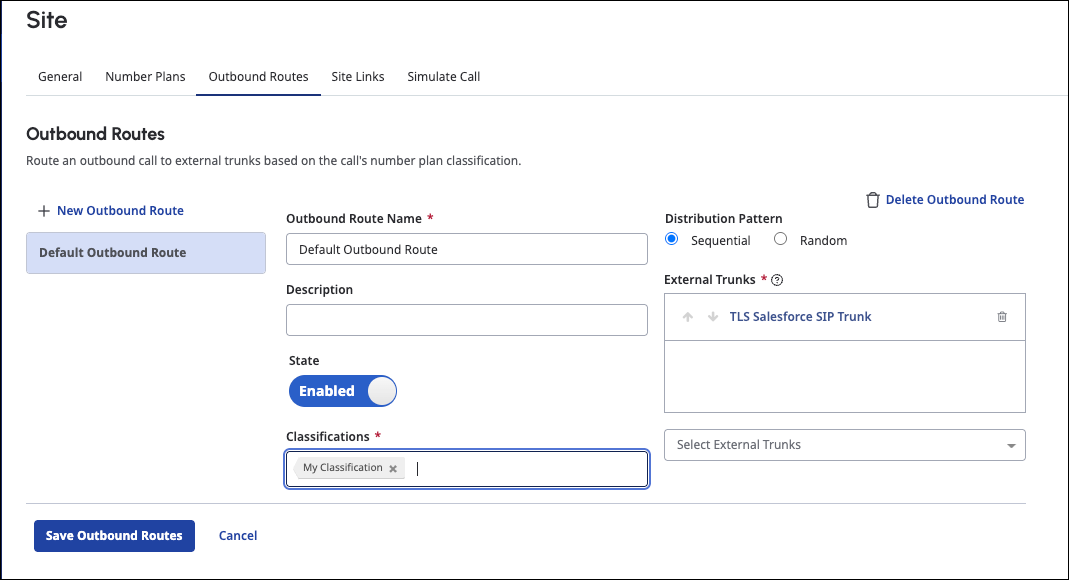
To route calls to the external SIP trunk based on the call’s classification, create an outbound route. The outbound route maps the number plan to a specific trunk. In the site that you created, add an outbound route for the SIP trunk that you created, select the trunk, and select the applicable classification. For the properties not mentioned, keep the default values.
- In the Outbound Routes tab of the site that you created, click New Outbound Route.
- Enter a name for the outbound route.
- In the Select External Trunks field, select the trunk that you created.
- In the Classification field, replace any existing classifications with the one that you created for the number plan.
-
Save the outbound route.
(Optional) Test a Call
Optionally, verify that the trunk handles incoming calls correctly.
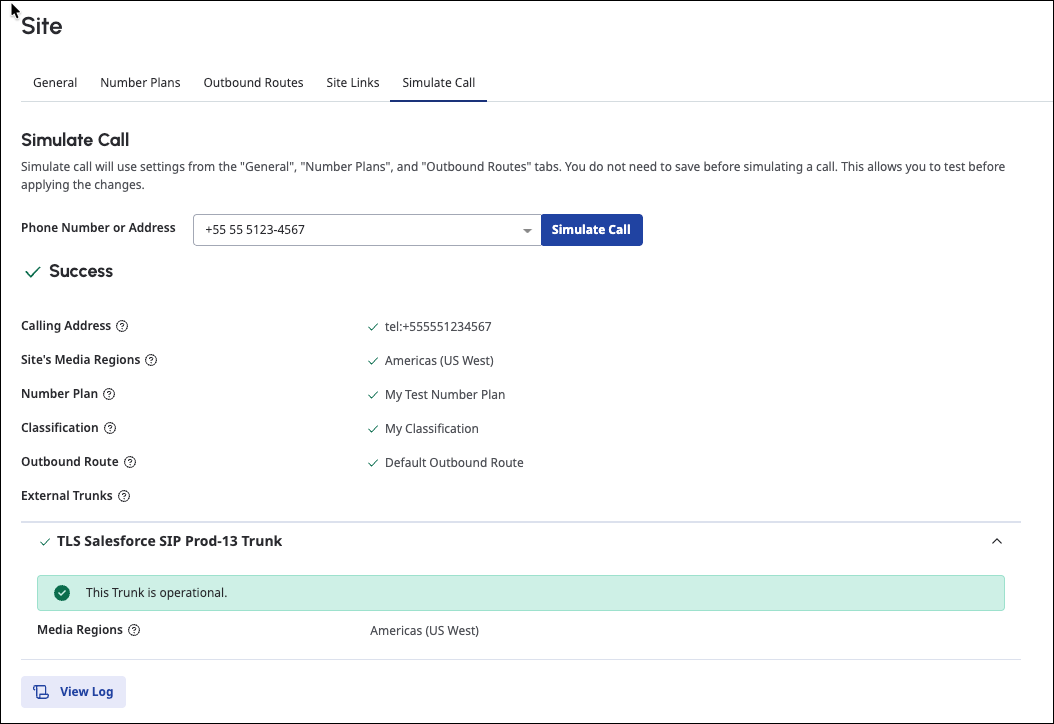
- In the Simulate Call tab of the site that you created, enter the SIP address that you added for the number plan.
- Click Simulate Call. Review the status to verify that the call went through successfully.
-
If it fails, review the error message to determine the cause.