You are here:
Add Languages to Your Aura Sites
Add the languages that you want your site to support.
Required Editions
| Available in: Salesforce Classic and Lightning Experience |
| Available in: Enterprise, Performance, Unlimited, and Developer Editions |
| Applies to: Aura sites |
| User Permissions Needed | |
|---|---|
| To customize or publish an Experience Cloud site: |
|
-
In Experience Builder, click
 | Languages.
- Click Add Languages.
- Select the languages that you want to add to your site.
- Rearrange the list in the order that you want languages to appear.
- Save your changes.
-
Optionally, for each language, select a fallback language.
The fallback language is the language to use when a page doesn’t have a translation for the language that the user selects. For example, imagine that a visitor chooses to view a page in French (CA), but there isn’t content for that page in French (CA). The fallback language is shown instead.
- Under Site Languages, select a language.
- From the Fallback Language field, select a fallback language.
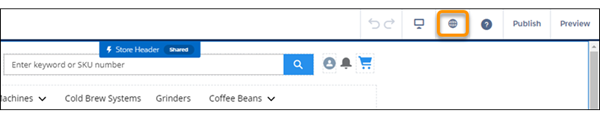
After you add a language to the site, the  Language icon
appears in the Experience Builder toolbar. Click it to switch between languages when previewing
or editing page content.
Language icon
appears in the Experience Builder toolbar. Click it to switch between languages when previewing
or editing page content.

Tip Consider offering
users a way to get instant translations of feed items. (Feed items include posts, questions,
polls, and their comments, answers, and replies.) For more information, see Add a Translate Button to Feed Items in Experience Builder Sites.
Did this article solve your issue?
Let us know so we can improve!
