
You are here:
Use Holt Winters Forecasting
Predict future values based on historical patterns in a single variable by using the Holt-Winters algorithm. For example, use a data transform to forecast sales by account based on opportunity data.
Required Editions
| Available in: All Editions supported by Data 360. See Data 360 edition availability. |
| User Permissions Needed | |
|---|---|
| Allow users to manage models in Einstein Studio (AI Models) | Enables you to create, update, and delete models in the Data 360 AI Models tab. |
| Permission sets | |
|---|---|
| Data Cloud Architect | Admin-level access to all AI Models features, including the ability to create, update, delete, and activate models. |
| Data Cloud User | Restricted access to use a model, including getting predictions and improvements derived from a model. |
Before you begin:
- Make sure that the Opportunity data model object (DMO) in your org contains structured data. Fields to consider include account name, account ID, closed, closed date, created date, month, and sales.
- Use at least two historical data points, such as three months of sales per opportunity.
Run a Forecast Model with a Batch Data Transform
Use a batch data transform to apply forecasting across large datasets.
- From Data 360, go to Data Transforms, and click go to Data Transforms, and click New.
- Select Batch Data Transform.
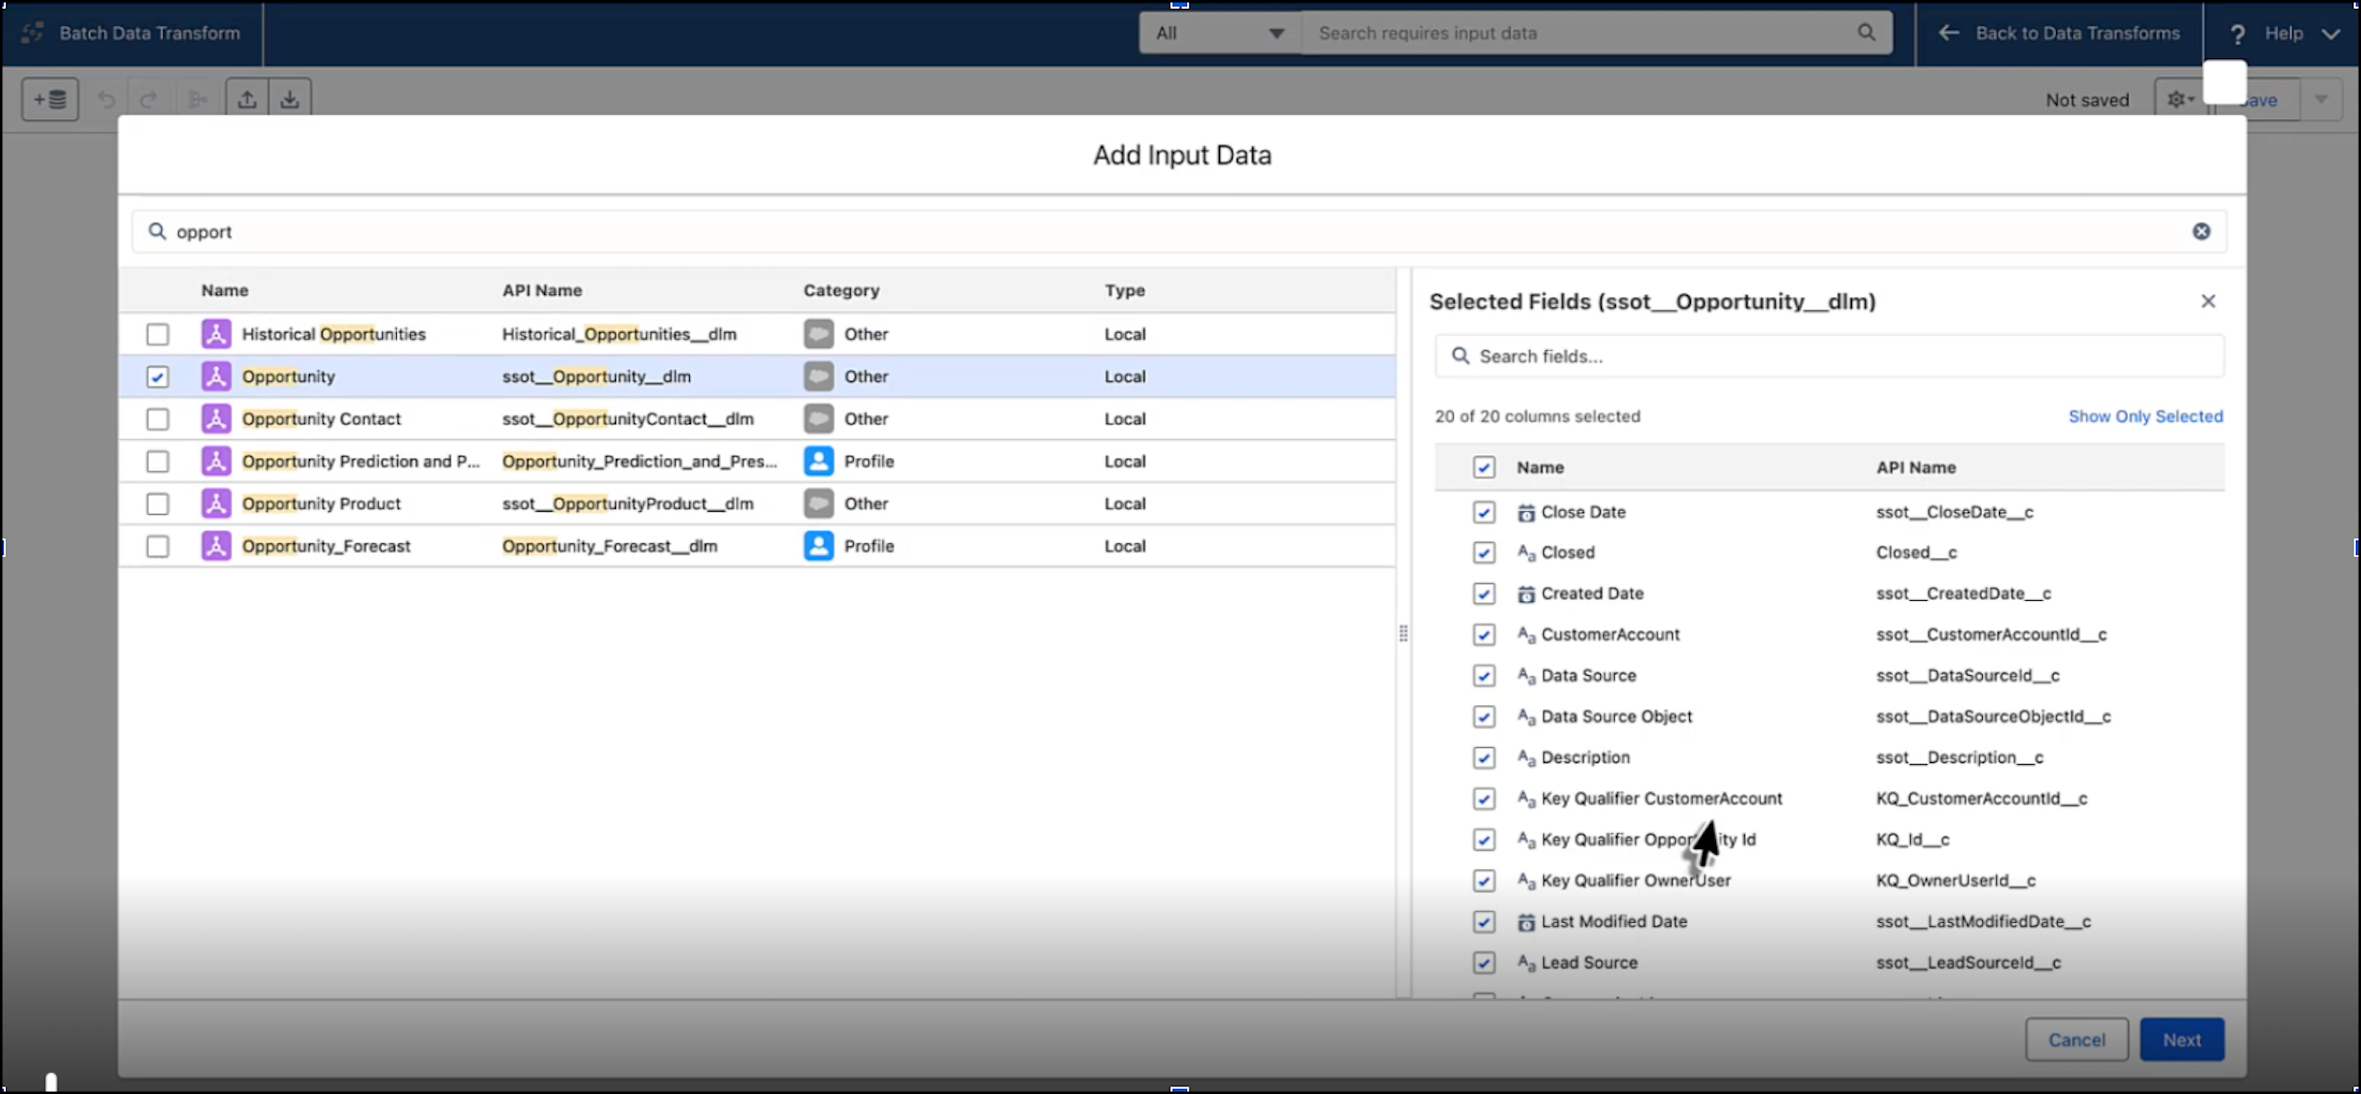
- Select Data Model Objects and the data space.
-
To add your input data, select a data model object. For this example, use
Opportunity.
-
Add a node to select an AI function.
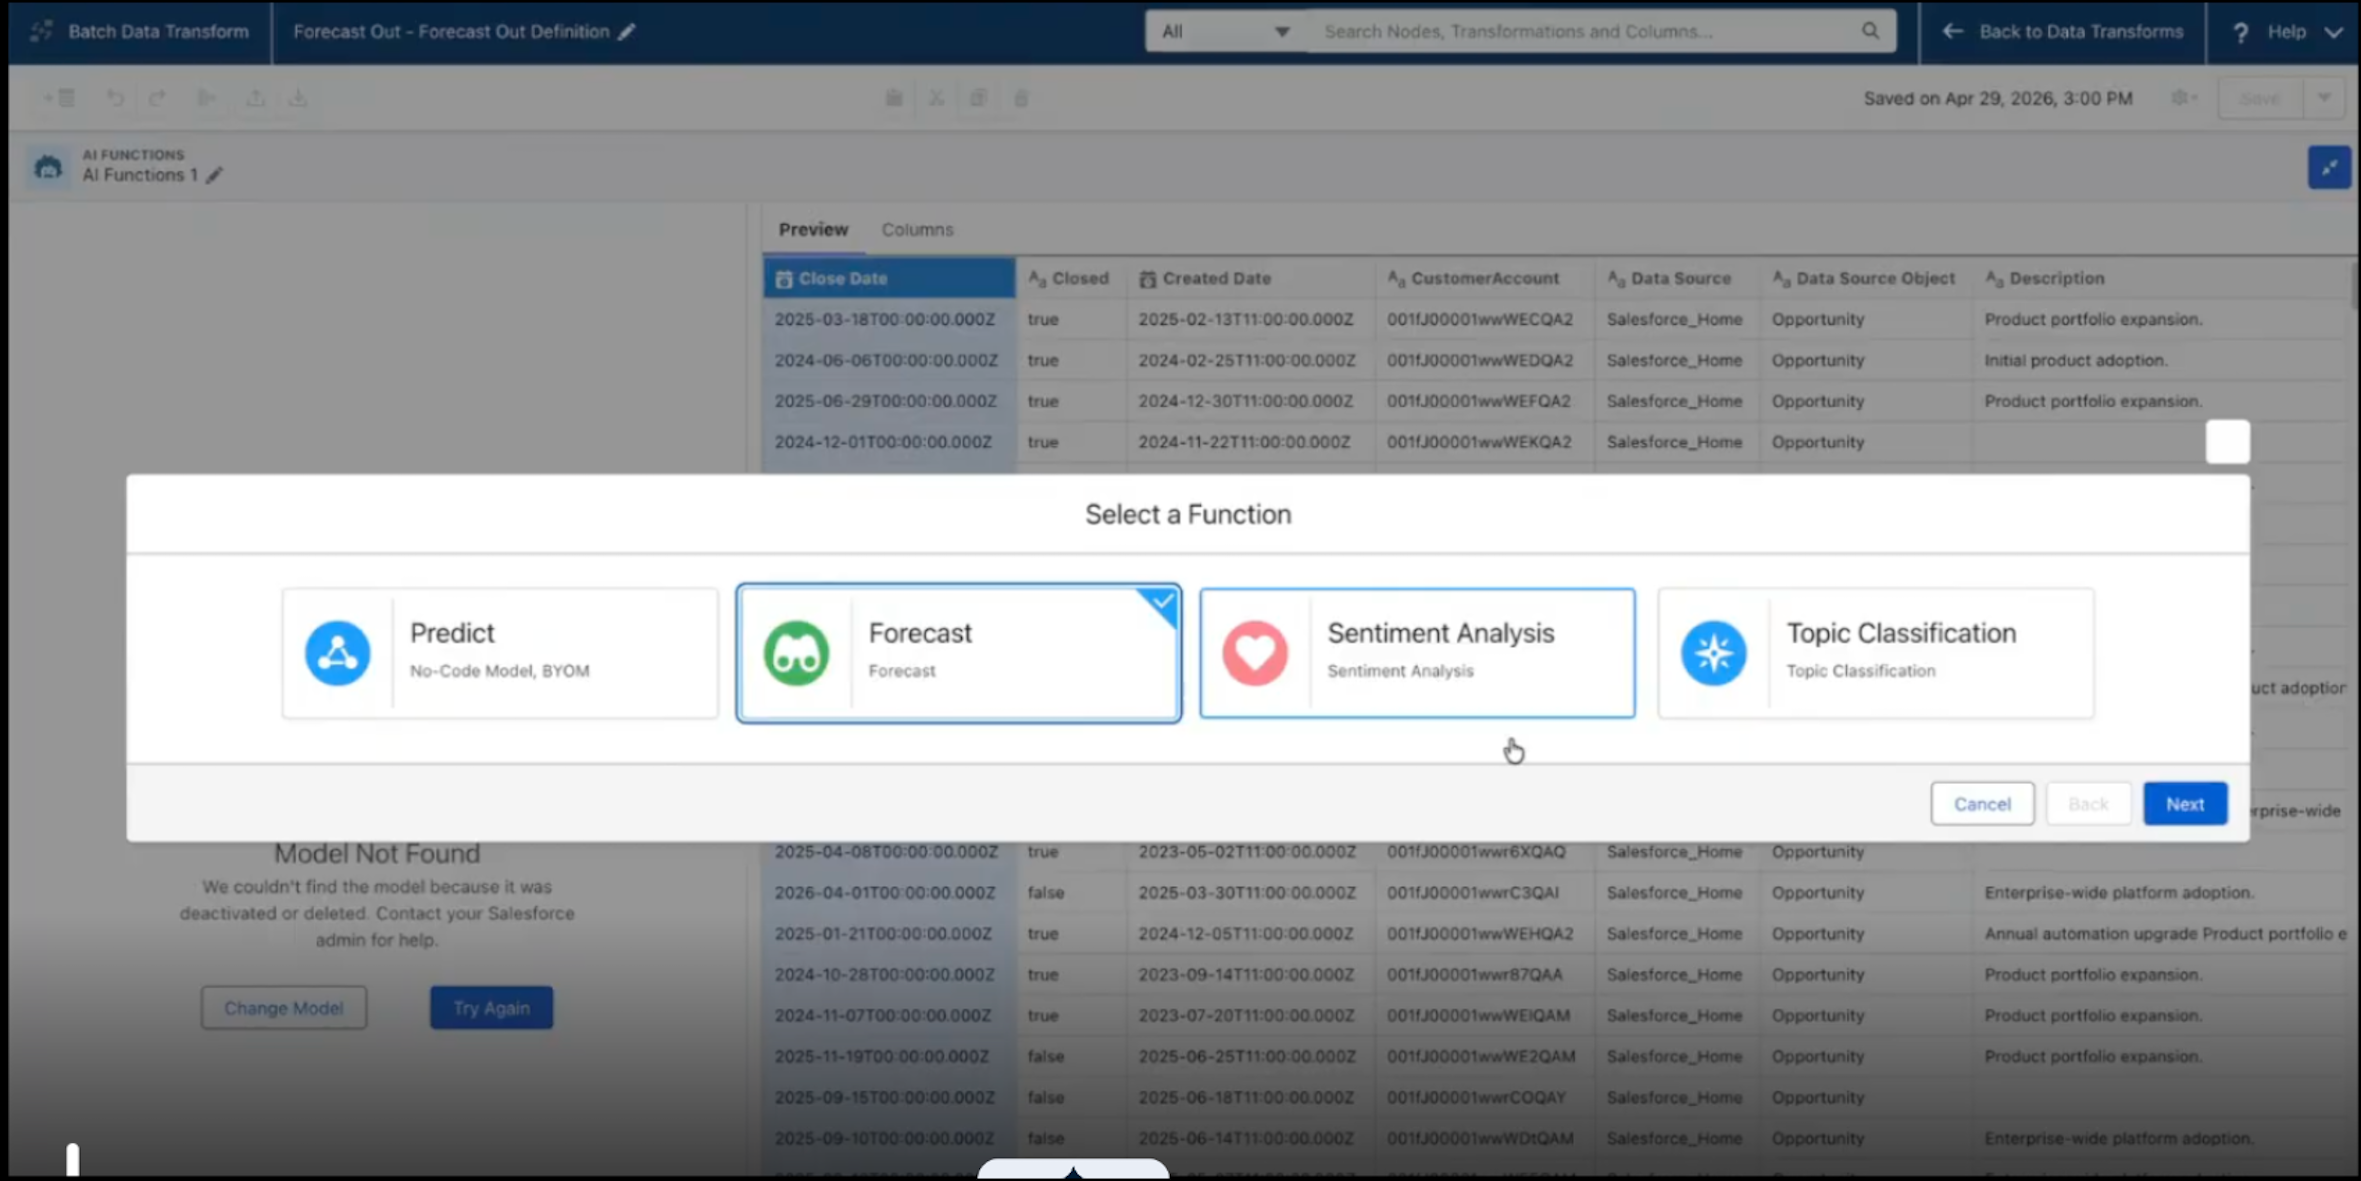
- Select Forecast.
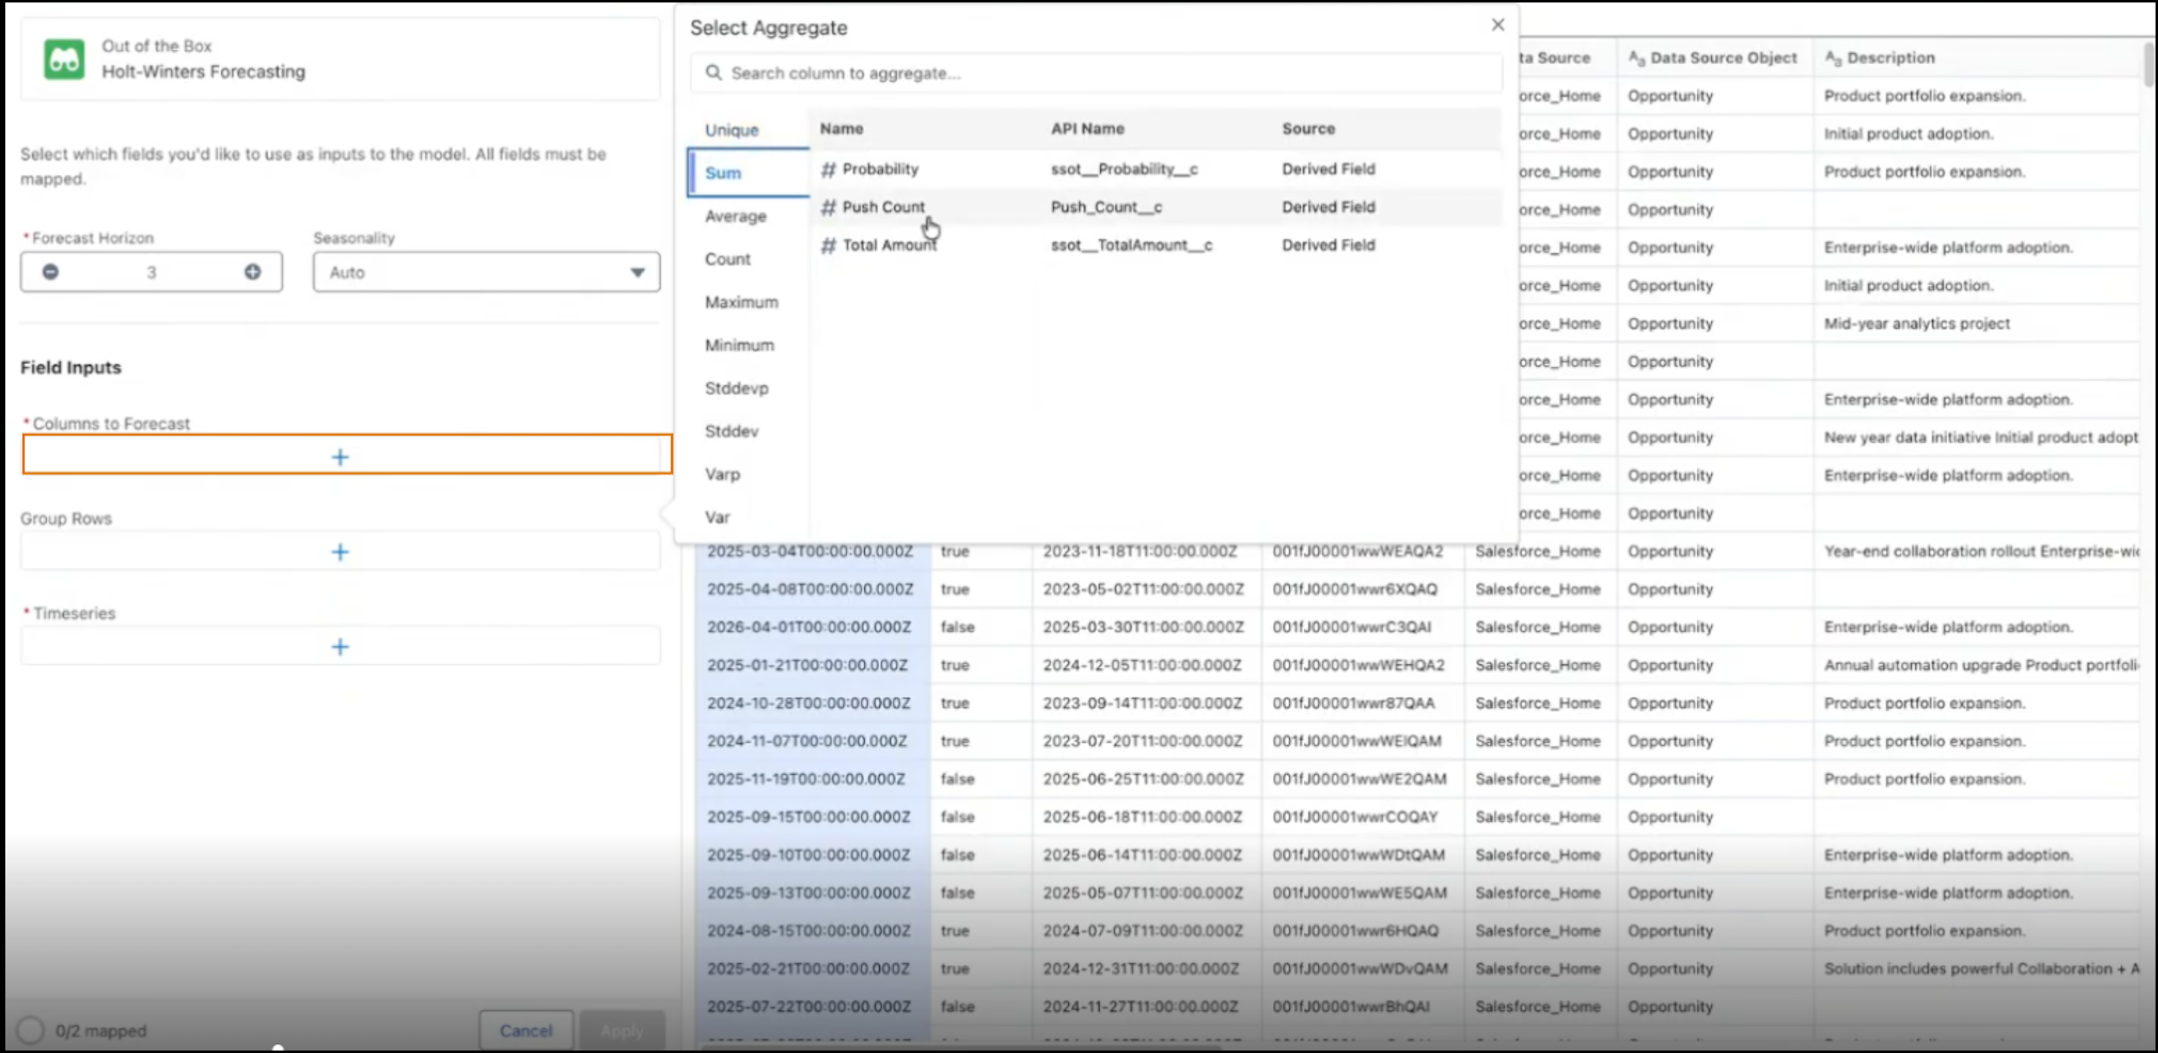
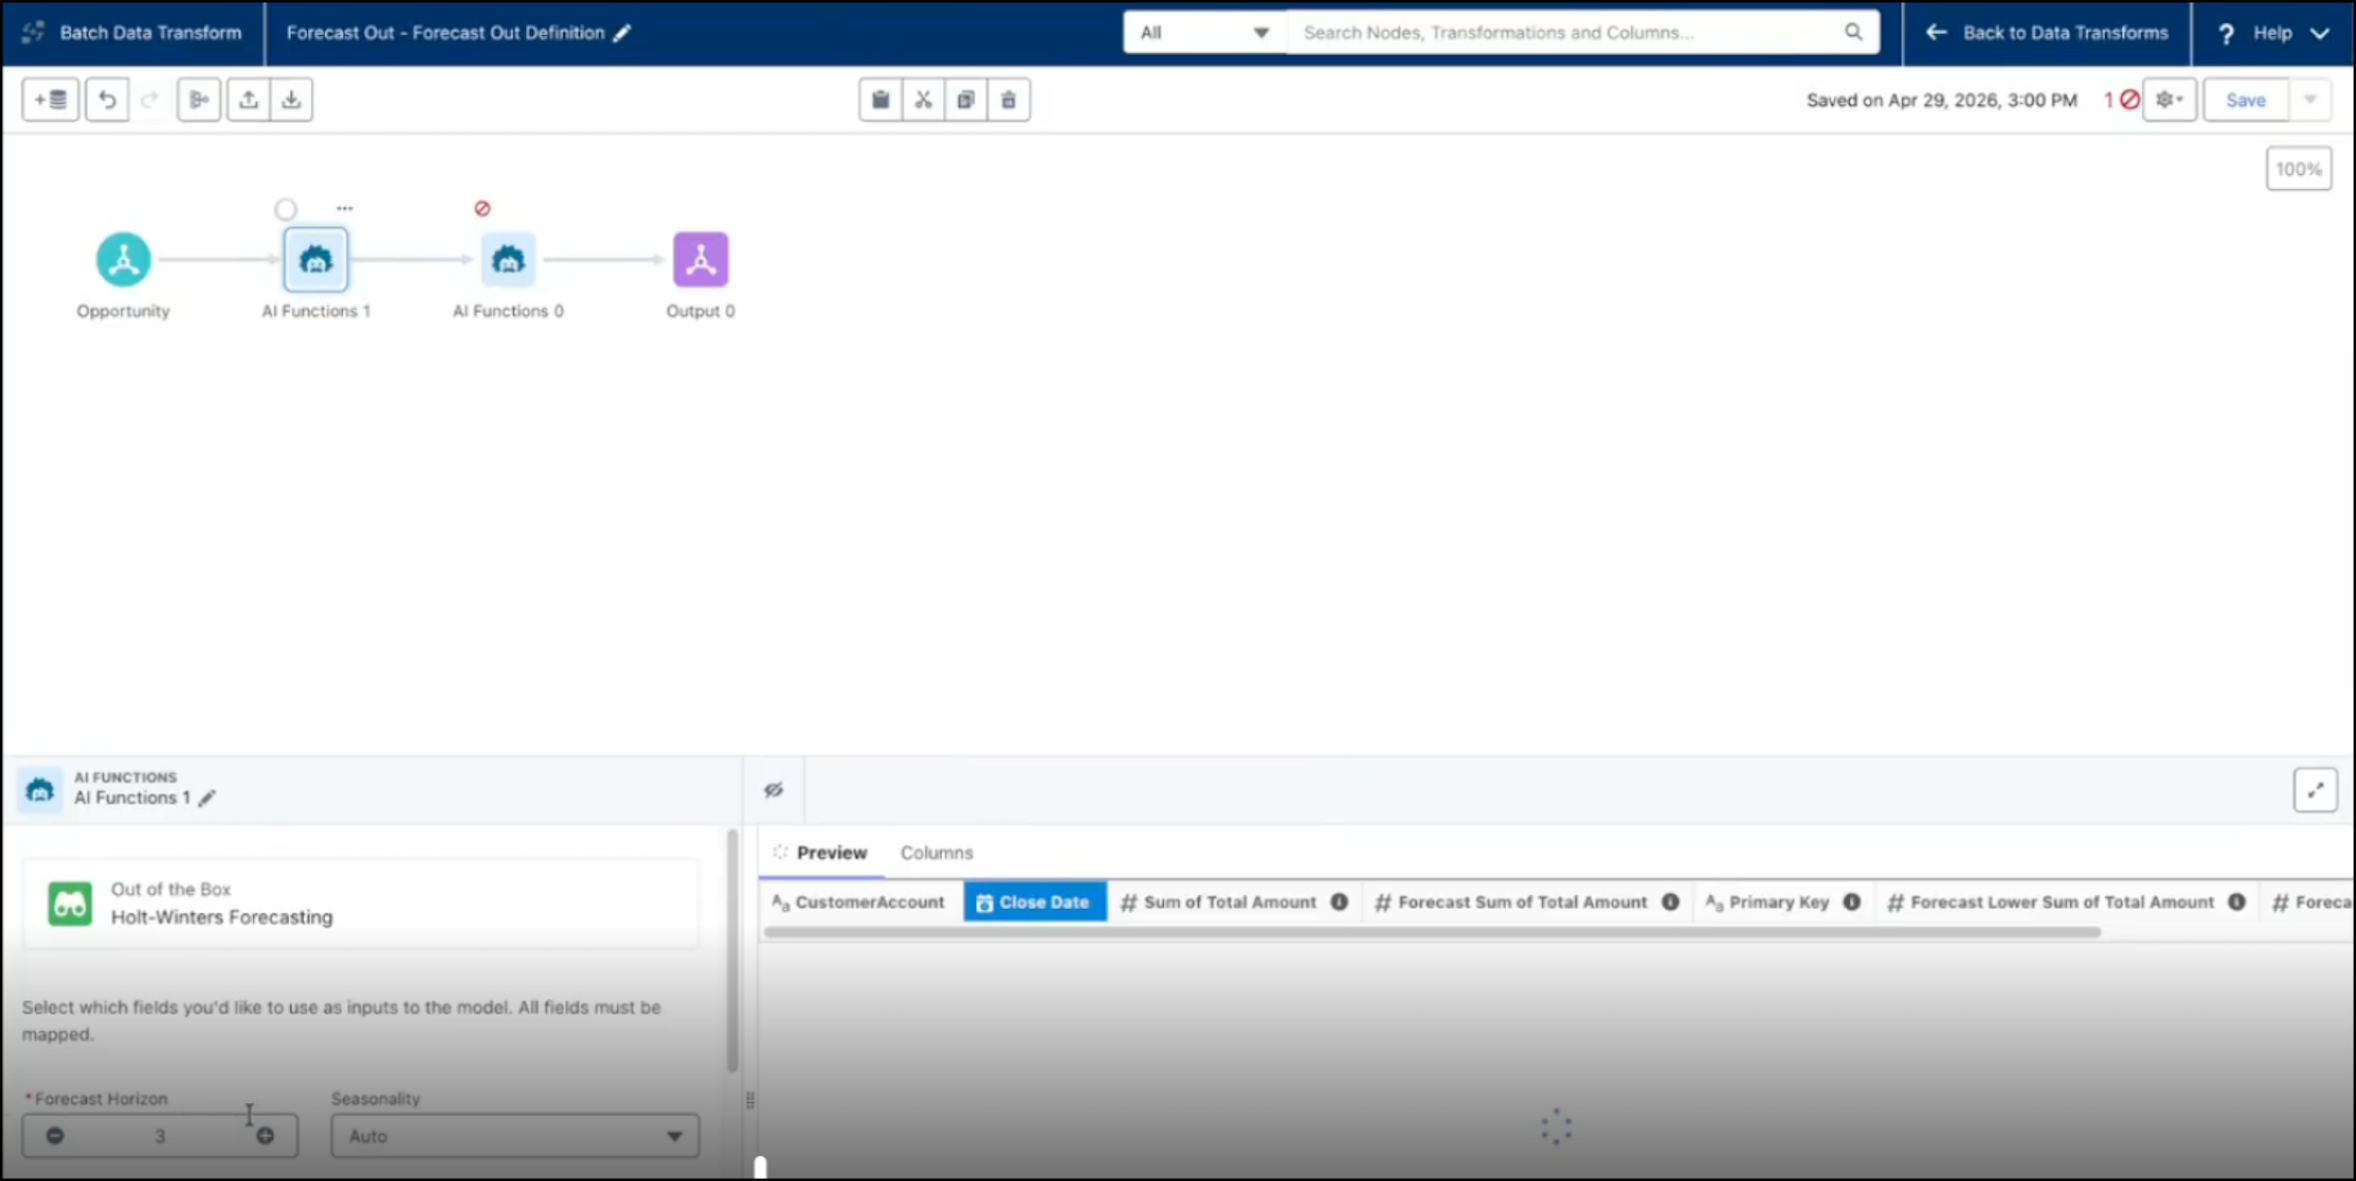
- Select the Holt-Winters forecasting model.
-
Configure these details and input fields.
- Specify a forecast horizon, such as 3 (months).
- Keep the auto seasonality selected.
-
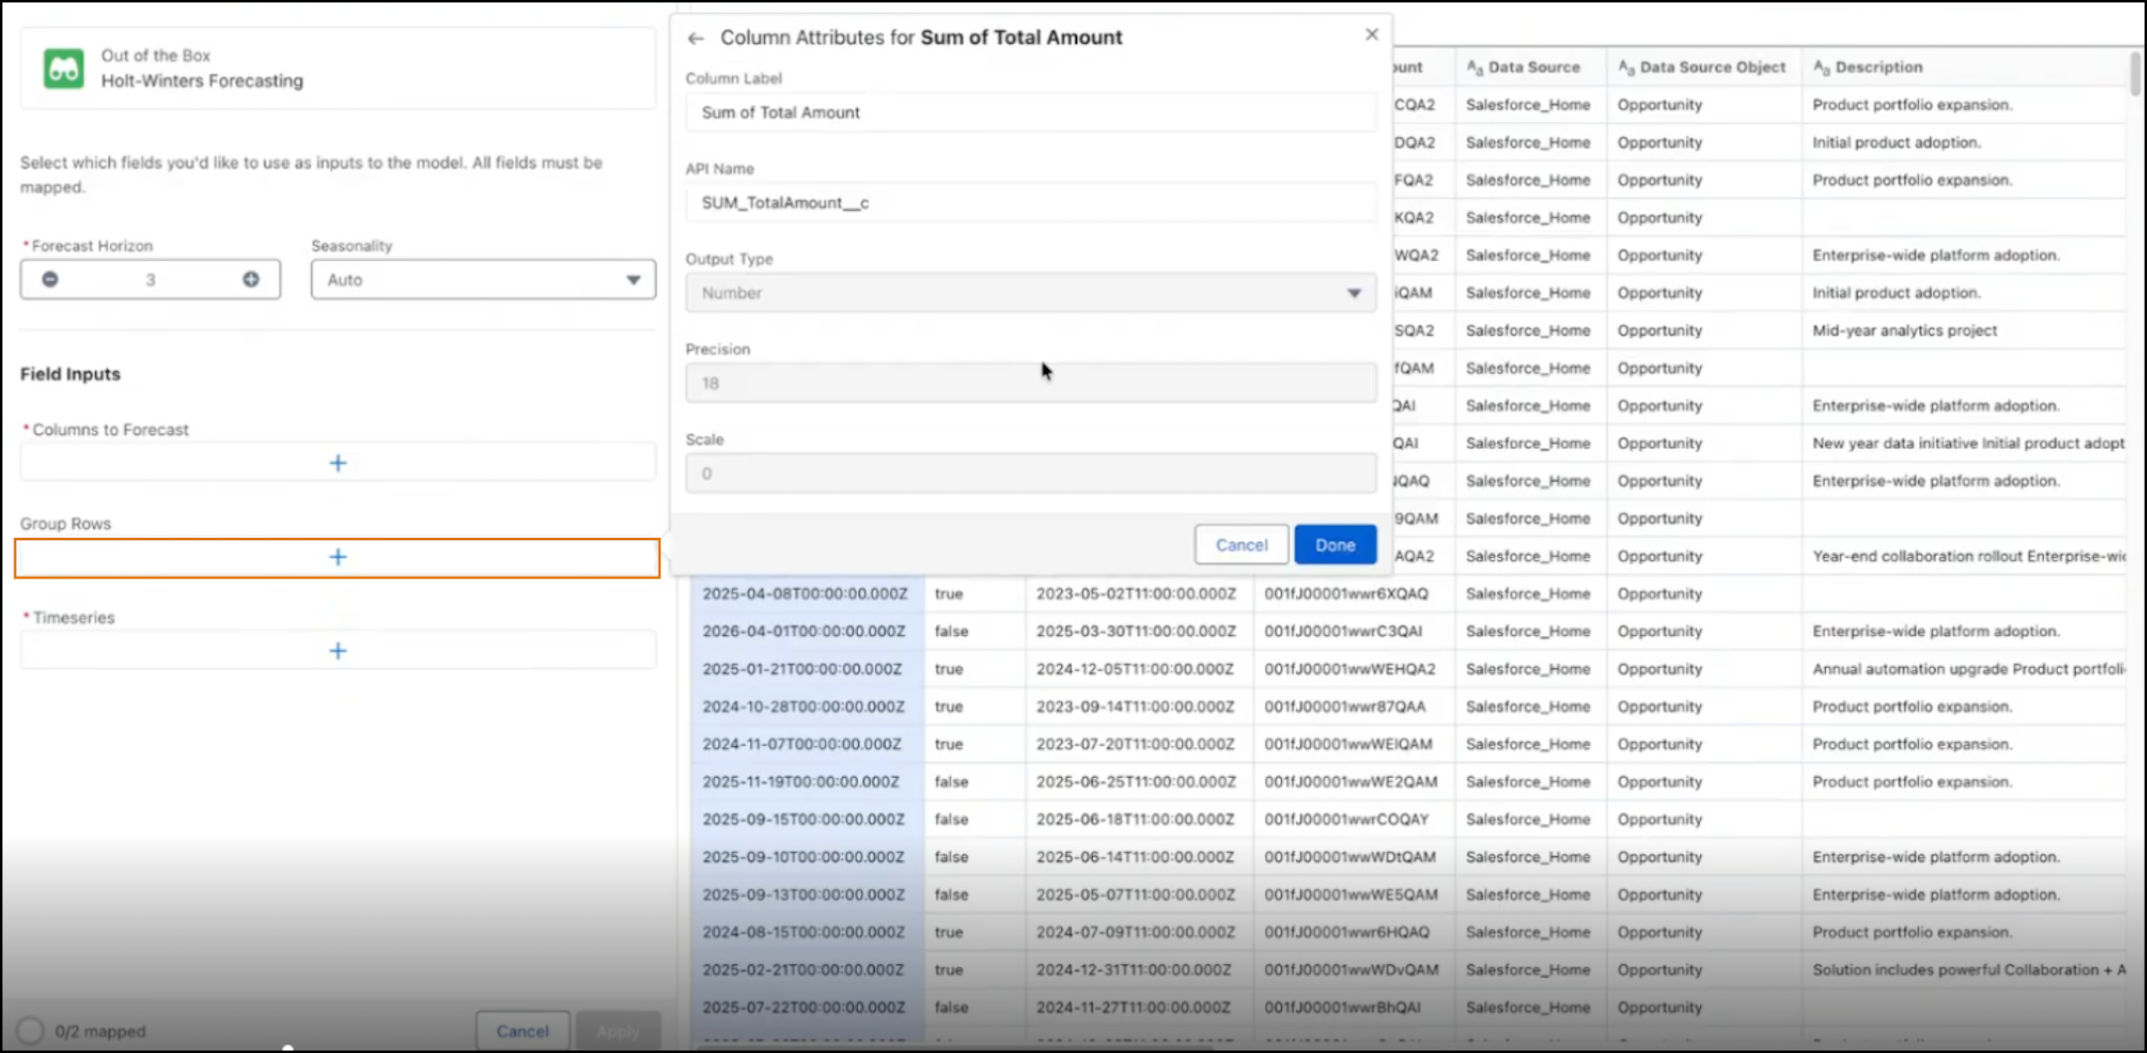
Select the Sum of Total Amount as the aggregate metric to
forecast.
-
Group data by customer account ID, and configure the close date field by year/month to
ensure monthly granularity.
- Specify the time series, such as the Close Date field, and select Year-Month to forecast out by month.
- Map the output field (forecasted value, upper bound, and lower bound). This action saves the transformed data to a new DMO.
-
Save your settings. A preview shows data in three forecasted fields based on your
horizon of 3.
- Run the transform to incorporate historical data with the future forecasted rows in the output DMO.
-
To append the transformed data back to the Account DMO, use the Join node.
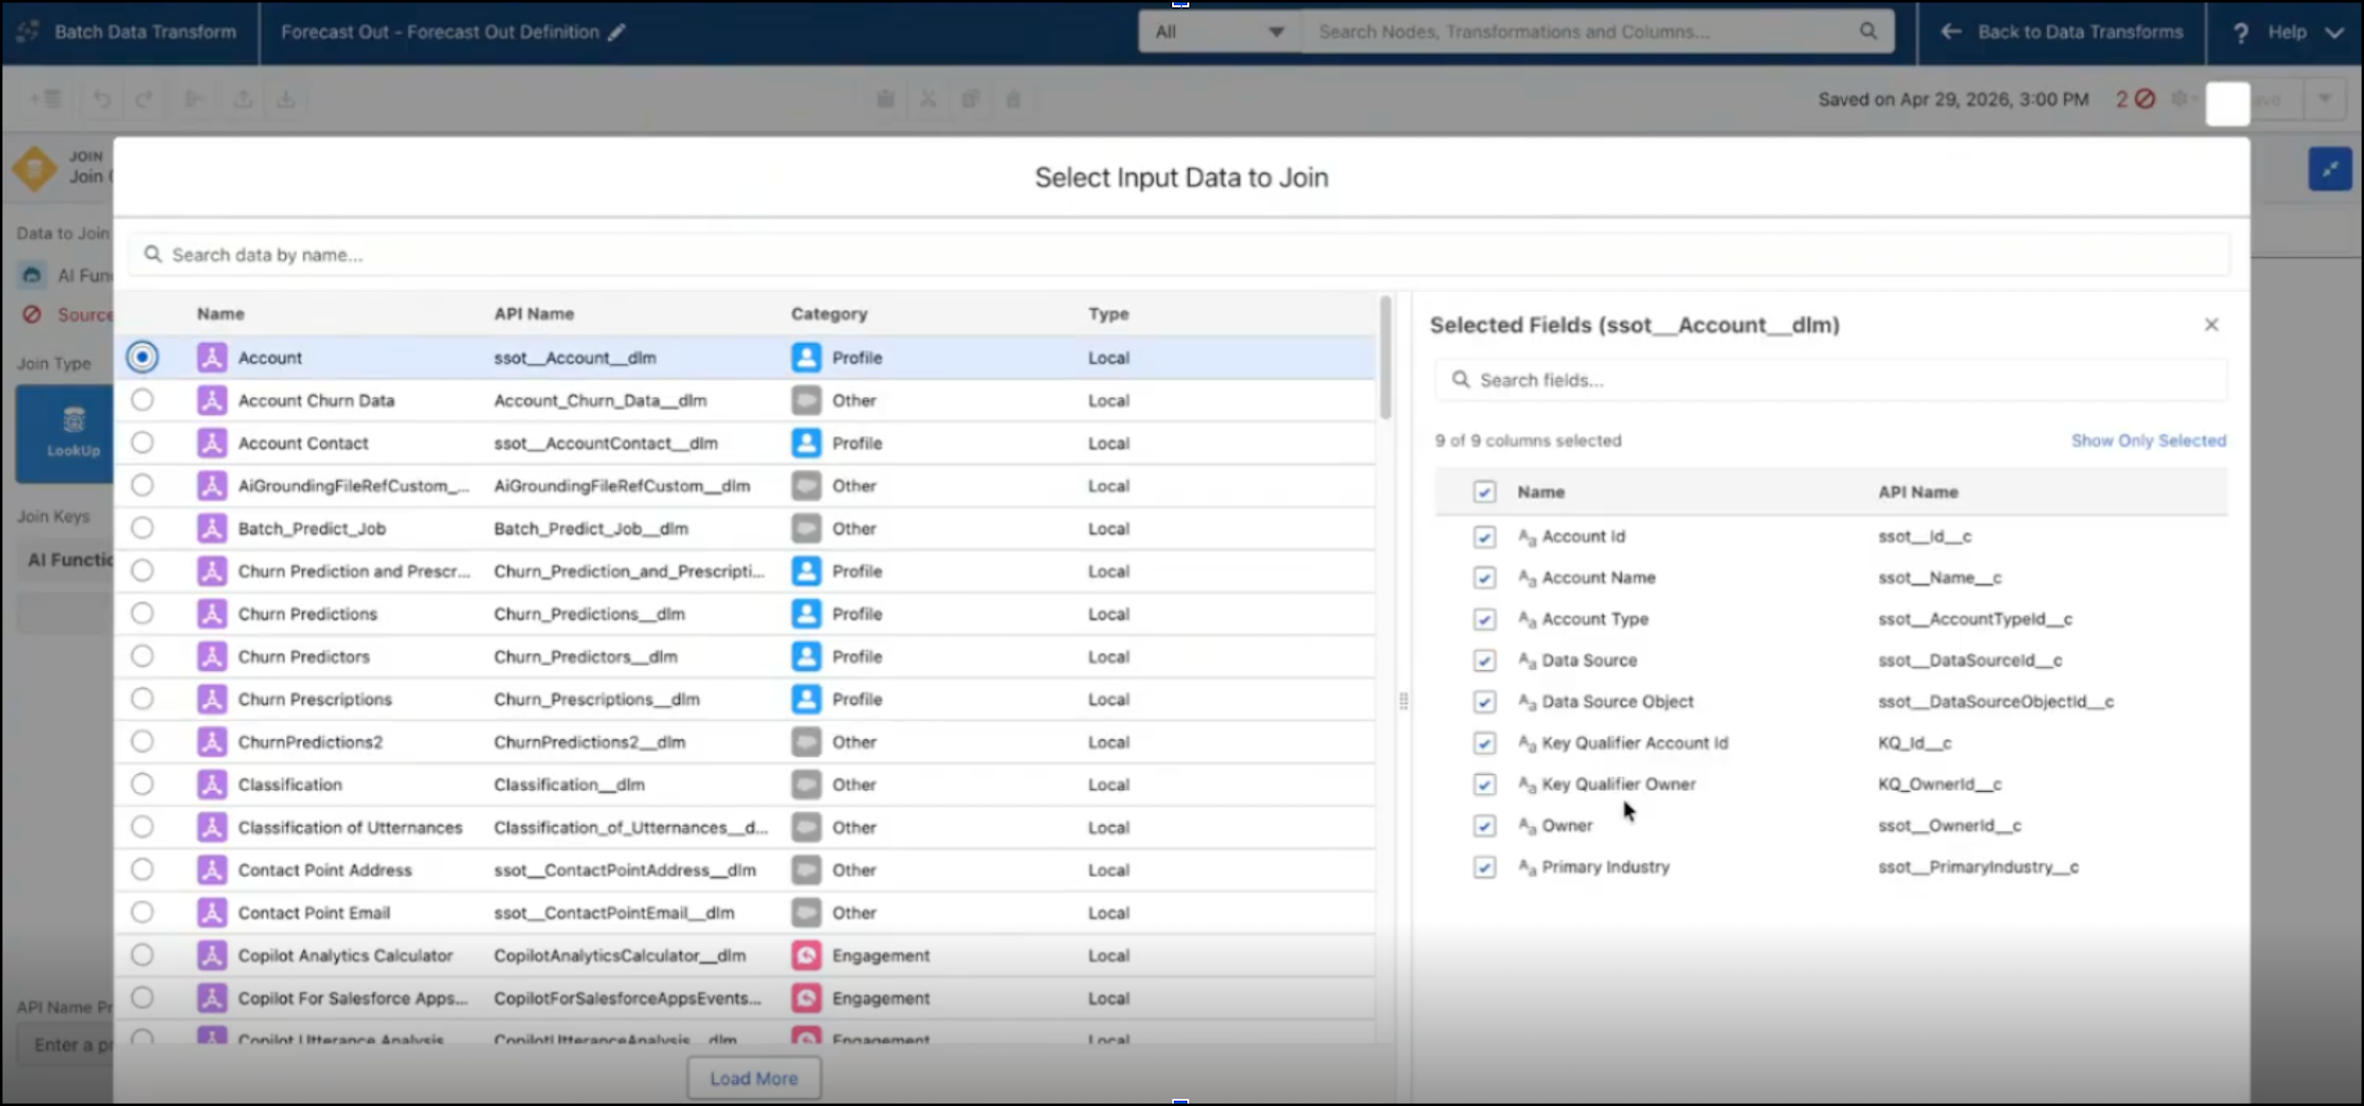
- Select the forecast fields to add to the Join.
- In the data transform, connect the Join node to Output to append forecasted values to the output object.
Did this article solve your issue?
Let us know so we can improve!