
You are here:
Activate the Segment, Add, and Filter Related Attributes
When your segment is complete, the next step is to activate it and add related attributes. Because this campaign is specific to users with new auto policies within a specific date range, add filters to prevent other policies from being sent to Marketing Cloud.
Set up a Marketing Cloud activation target before creating an activation.
- In the Data 360 Segment tab, select the New Auto Policy Holders tab.
- In the Activation section of the segment record, click New.
- Select Marketing Cloud Engagement-Cumulus BU as the activation target or the destination of the segment data.
- Confirm activation membership and click Continue.
- Next click Email as the contact point (channel) for the campaign, and then click Next.
- The Cumulus email has placeholders for personalization to include the customer’s first
name, insurance policy type, and policy number. To make sure this information gets sent to
Marketing Cloud, add attributes to the activation. Click Add
Attributes.
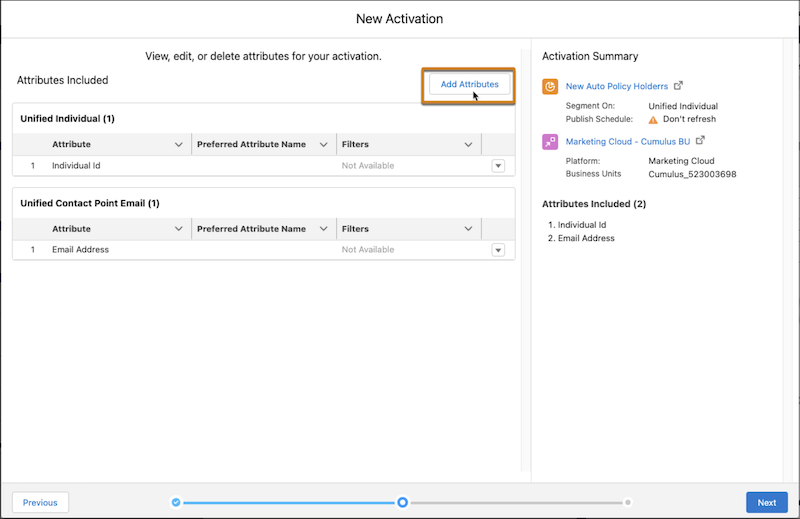
- In addition to Individual Id and Email Address, from the direct attribute list, select First Name and drag it to the canvas.
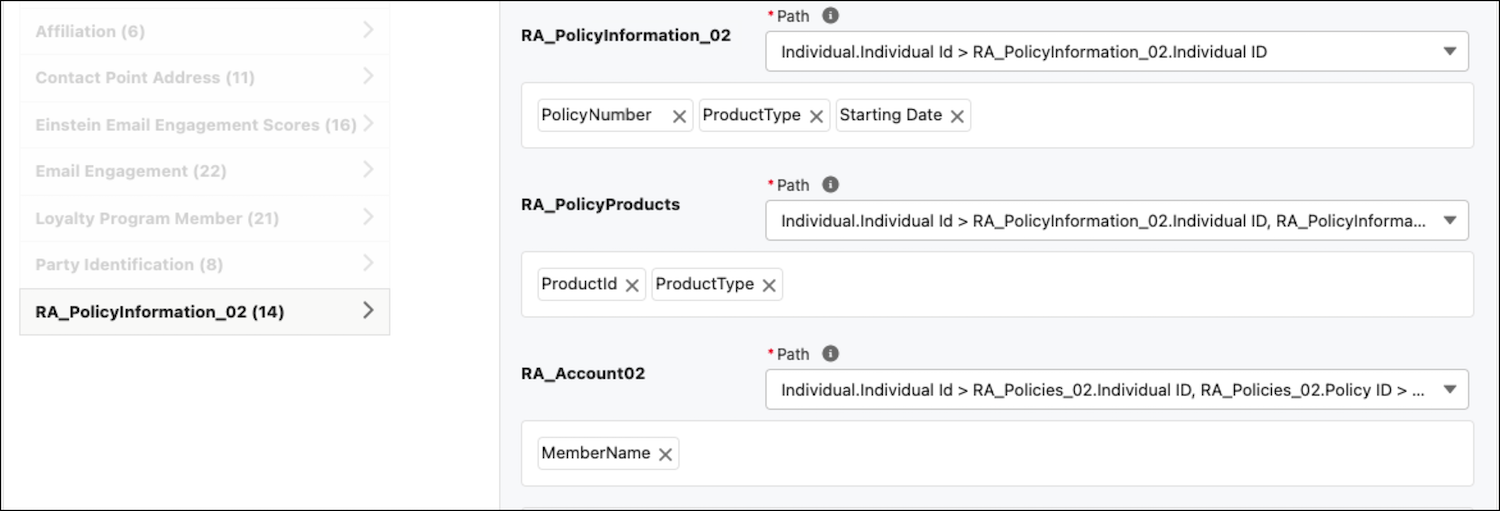
- From the related attribute list:
- From RA_PolicyInformation_02, select: Policy Number, Starting Date, and Product Type.
- From RA_PolicyProducts, select: Product Type 1 and Product Id.
- From RA_Account02, select: Member
Name.
- Click Save.
- Next to RA_PolicyInformation_02, click Add Filters.
- Select the Product Type attribute, set the Operator to Is Equal To, and add the value of Auto.
- Select the Starting Date attribute, set the Operator to Last number of months, and add a value of 1.
- Click Done and then click Save.
- To set a limit to applicable attributes relevant to this marketing campaign, set the Max. # of Attribute Values field, to 2.
- Because this campaign is based on new auto policy start dates, select Starting Date from the Sort By dropdown, and select Most Recent to define how to sort the data.
- For RA_PolicyProducts, sort by the Product ID from highest to lowest.
- For RA_Account02, sort by the Member ID from highest to lowest.
- Click Next.
- Name the activation New Auto Policy Holders and click Done.
The activation is sent to Marketing Cloud.
Did this article solve your issue?
Let us know so we can improve!