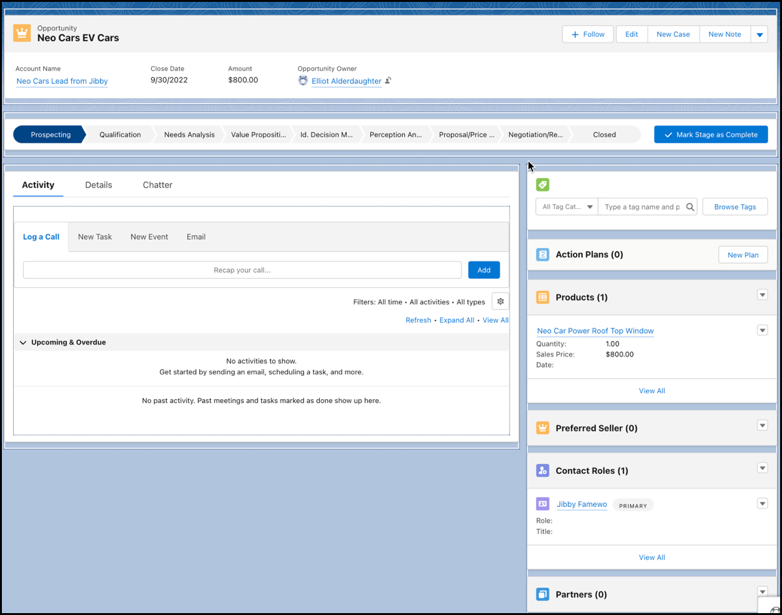
Customize the Opportunity Page for Automotive Cloud
When a lead gets converted into an opportunity, the underlying records for Lead Line
Item and Lead Preferred Seller also get converted. Add the Products and Preferred Sellers related
lists to the Opportunity record page layout to display the information to your users.
Required Editions
Available in: Enterprise, Unlimited, and Developer
Editions.
User Permissions Needed
To customize page layouts:
Customize Application
From Setup, go to Object Manager.
Search for and select Opportunity.
Click Page Layouts, and select a page layout.
Drag and drop the Products, Preferred
Sellers, and Service Appointments related lists from the
palette to the Opportunity Related Lists section on the page.
Drag the Schedule Test Drive button from the palette onto the
Standard Buttons section of the page.
Remove the Schedule Appointment quick action from the page.Drag the
Related Lists component onto the right sidebar area on the page. Or,
add a Related tab in the main region, and add the Related
Lists component to that tab.
Important This quick action automatically gets added to the page layout when you
enable Salesforce Scheduler but launching this action would allow you to only use the default
flow for appointment scheduling. To use the predefined test drive appointment flow unique to
Automotive Cloud, remove this action and add the Schedule Test Drive button to the
page.
Save your changes.
Open an Opportunity record, and click Edit Page.
Drag and drop the Related Lists component to the right sidebar area
of the page. Or, add a Related tab in the main region, and add the
Related Lists component to that tab.
Tip It’s easier for sales personnel and dealer reps to view information when you
add the related lists to the right sidebar, because the related lists appear as cards showing
key details of records.
Drag the Interest Tags component to an area of the page, preferably
to the right sidebar.
Select the following.
Enter a title.
To let users search for interest tags, select Show
Search.
Enter the maximum number of tag categories to display in the component. Users can
expand the list to see more.
Enter the maximum number of interest tags to display in the component. Users can expand
the list to see more.
Save your changes.
To apply the changes, click Activation.
Did this article solve your issue?
Let us know so we can improve!
Loading
Salesforce Help | Article
Cookie Consent Manager
Cookie Consent Manager
General Information
Required Cookies
Functional Cookies
Advertising Cookies
General Information
We use three kinds of cookies on our websites: required, functional, and advertising. You can choose whether functional and advertising cookies apply. Click on the different cookie categories to find out more about each category and to change the default settings.
Privacy Statement
Required Cookies
Always Active
Required cookies are necessary for basic website functionality. Some examples include: session cookies needed to transmit the website, authentication cookies, and security cookies.
Functional Cookies
Functional cookies enhance functions, performance, and services on the website. Some examples include: cookies used to analyze site traffic, cookies used for market research, and cookies used to display advertising that is not directed to a particular individual.
Advertising Cookies
Advertising cookies track activity across websites in order to understand a viewer’s interests, and direct them specific marketing. Some examples include: cookies used for remarketing, or interest-based advertising.