
You are here:
Manage Products and Locations in Automotive Cloud
Track products at specific locations such as, manufacturing plants, warehouses, dealer lots, and dealer showrooms. Create locations, products, product items, and product transfers to track stock and movement of products between dealerships, or other inventories.
Required Editions
| Available in: Enterprise, Unlimited, and Developer Editions. |
-
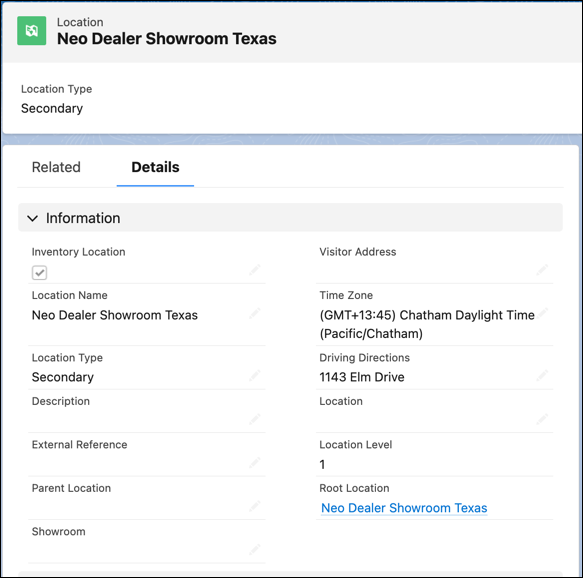
Create Location records that are marked as inventory locations.
- From the App Launcher, find and select Locations.
- Click New.
- Enter a location name.
- Select a location type such as Warehouse, Site, Van, or Plant.
- If inventory is stored at the location, select Inventory Location.
- If the location can be moved, like a van or tool box, select Mobile Location.
- Complete the other fields as appropriate.
-
Save your changes.
-
Associate the location to an account.
- From the App Launcher, find and select Accounts.
- Open an Account record and go to the Related tab.
- Click New on the Associated Locations related list.
- Select a Location.
- Select Active From and Active To dates.
-
Save your changes.
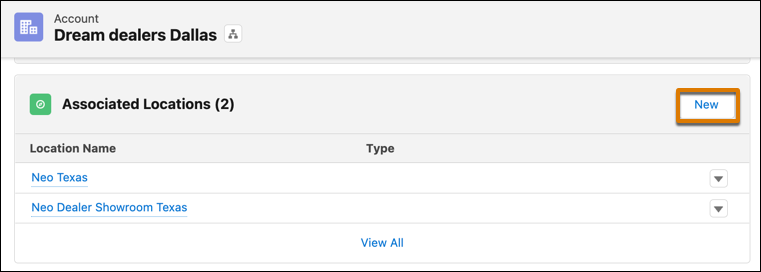
 Note If you’re using vehicle inventory search capabilities, make sure one location is not associated with multiple accounts. For example, the Neo Dealer Showroom Texas location should only be linked to a single dealer account.
-
Create Product records that are serialized or deserialized.
For serialized products, each product item represents a single item in your inventory: For example, a gear box with serial number 0165 stored at the dealer lot at Neo Motors New York. If you choose not to assign serial numbers, you can specify a quantity on each product item.
- From the App Launcher, find and select Products.
- Click New.
- For the Transfer Record Mode, select Send and Receive or Receive.
- Enter the Product Name.
- Click Save.
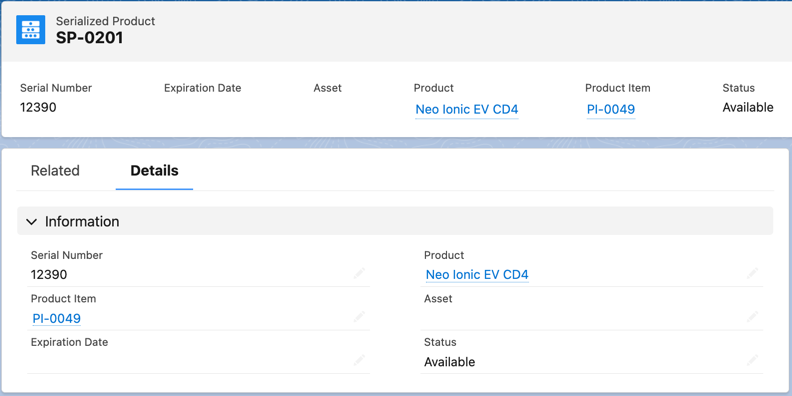
- From the App Launcher, open Serialized Products and click New.
-
Enter the Serial Number.
If you’re using vehicle inventory search capabilities, make sure the vehicle identification number matches the serial number to be considered as inventory.
- Select a Product Item or an Asset depending on whether the product is accounted for in inventory or not.
-
Save your changes.
-
Create Product Item records.
- From the App Launcher, find and select Product Items.
- Click New.
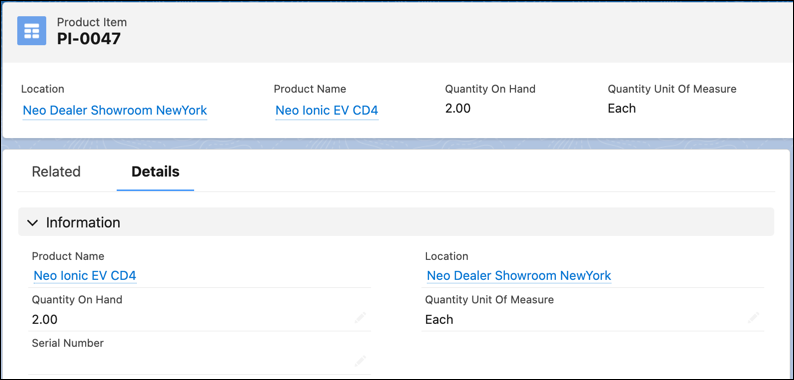
- In the Product Name field, select the product you’re creating an inventory for.
- In the Location field, select the location you created for the product’s inventory.
- In the Quantity On Hand field, enter a value as follows.
- If your product is serialized, then enter 0. This number is automatically updated with each serial number you create for this inventory.
- If your product isn’t serialized, enter the actual quantity available at that inventory.
-
Enter a unit of measure for the quantity and save your record.
If your product is serialized, then the unit of measure must be Each.
-
Save your changes.
The Product Item Transactions related list on the product item now contains a Replenished transaction that tells you when the product item was created. If you update a product item, a new product item transaction is created with a type of Adjusted and a quantity that is the difference between the old and new Quantity On Hand.
-
Create Product Transfer records.
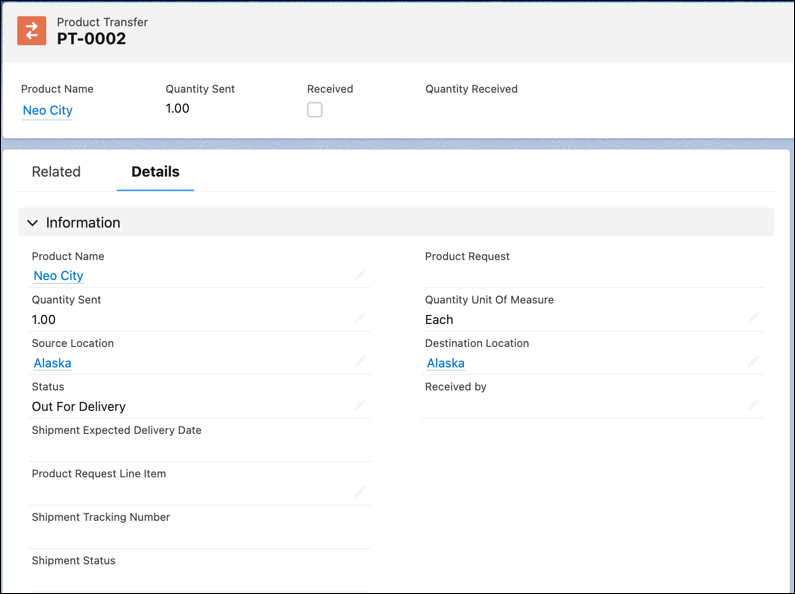
Typically, you create product transfers in response to a product request. Create one product transfer for each product request line item so that you can track the status of each part.Note If you use the Criteria-Based Search and Filter feature, you can select vehicles from the search results and transfer them to a selected destination location. The application automatically creates Product Transfer records for the underlying serialized products when the action is successfully completed.
- From the App Launcher, find and select Product Transfers.
- Click New.
- Enter a source product item or product.
- Enter the quantity to transfer and the Quantity Unit of Measure.
- If it’s not already populated, enter the related product request line item.
- Enter the destination, and if applicable, the source location.
- Enter the expected pickup date.
- Add a description.
- After the transferred parts are received, select Received.
-
Update these fields: Received By, Quantity, Received checkbox, and Status.
After you mark a product transfer received, you can’t undo it.
-
Save your changes.
-
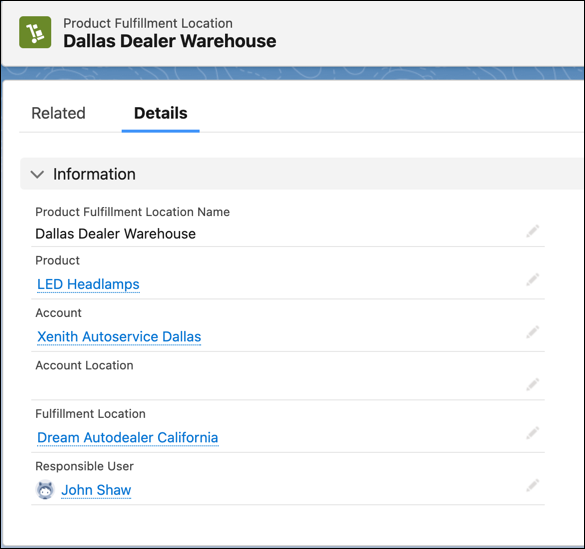
Create Product Fulfillment Location records.
This object is available with the Partner Visit Management permission set license.
- From the App Launcher, find and select Product Fulfillment Locations.
- Click New.
- Enter a name for your product fulfillment location.
- Select a product in the Product field.
- Select the inventory location in the Fulfillment Location field.
- In the Responsible User field, select the user in charge of this inventory.
-
Save your changes.
Did this article solve your issue?
Let us know so we can improve!
