
You are here:
Create a Timeline Using Cases and Engagements in Automotive Cloud
Create a timeline for a Contact record and show information from engagement interactions and cases. You can select the fields to show for each timeline entry, and even show fields from other related objects and custom objects.
Required Editions
| Available in: Enterprise, Unlimited, and Developer Editions. |
| User Permissions Needed | |
|---|---|
| To configure and customize Timeline: | Customize Application |
Make sure that you have read and create access on all objects and fields that you configure on a timeline.
See how you can add a timeline with multiple related objects from Contact and display the timeline on a Contact record. You can use these steps to create a timeline with other objects as per your company’s requirements.
- From Setup, in the Quick Find box, enter Timeline, and then select Timeline.
- Click New Timeline.
- In the New Timeline window, enter a name for the timeline.
- Enter an API name for the timeline or accept the name that's auto-generated.
-
Select an object to base the timeline on.
You can base your timeline on a standard or custom Salesforce object that meets your needs. For example, select Contact to show the timeline on a Contact page record.
- Save your changes.
- Click Next.
-
To add an object, click Add Related Object.
- For Parent Object, select Use Timeline Object.
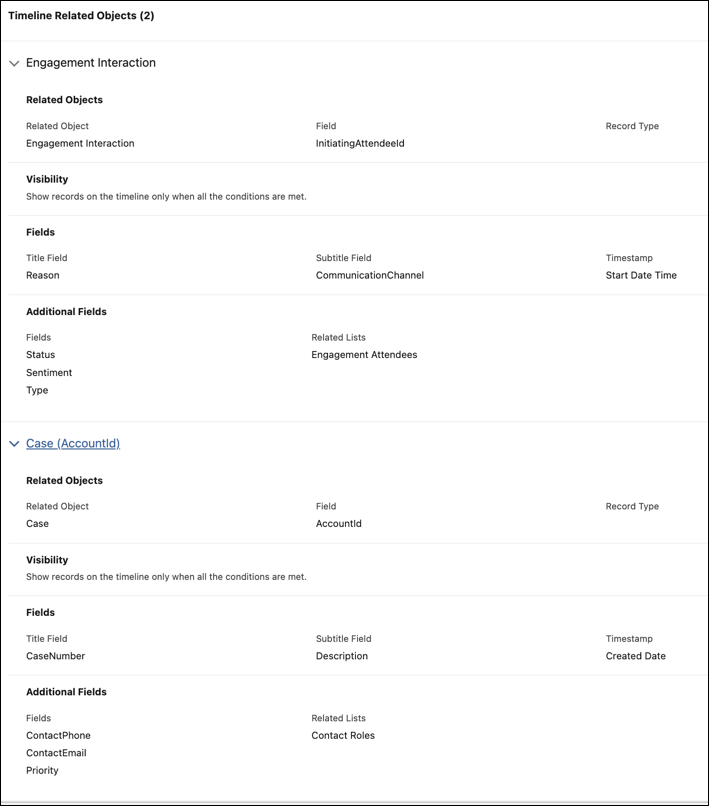
- For Related Object, select Engagement Interaction.
- For Field, select InitiatingAttendeeId, and then click Next.
- Add filter conditions to show records on the timeline, and then click Next.
- For Title Field, select Reason.
- For Subtitle Field, select CommunicationChannel.
- For Timestamp, select Start Date Time.
- Click Next.
- Select the Status, Sentiment, and Type fields and the Engagement Attendees related lists to show on the timeline, and then click Add.
-
To add an object, click Add Related Object.
- For Parent Object, select Account.
- For Related Object, select Case.
- For Field, select AccountId, and then click Next.
- Add filter conditions to show records on the timeline, and then click Next.
- For Title Field, select Case Number.
- For Subtitle Field, select Description.
- For Timestamp, select Created Date.
- Click Next.
- Select the Contact Phone, Contact Email, and Priority fields and the Contact Roles related lists to show on the timeline, and then click Add.
- Save and activate the timeline.
-
Optionally, click Preview Timeline and select a base object record,
like a Contact record in the View Timeline On field.
 Tip To make the most of the preview, choose a record that has enough data to show for the different related objects and fields.
Did this article solve your issue?
Let us know so we can improve!
