
You are here:
Configure Your Custom Metadata Types
Create a custom metadata type to house your field mappings. These field mappings are required for all the additional fields you want to include in your tax callouts. Associate your custom metadata type with your tax engine provider so it's aware of the fields used in the request and response.
Required Editions
| Available in: Lightning Experience |
| Available in: Enterprise, Unlimited, and Developer Editions with the Revenue Cloud Advanced license or the Revenue Cloud Billing license |
| User Permissions Needed | |
|---|---|
| To create custom metadata types and tax engine providers: | Billing Admin permission set OR Tax Admin permission set |
- Verify your tax setup prerequisites.
- Create the necessary custom fields on the applicable objects. Tax callout extensions are supported for the Invoice, Invoice Line, Invoice Line Tax, Credit Memo, Credit Memo Line, and Credit Memo Line Tax objects.
- Create a custom metadata type.
-
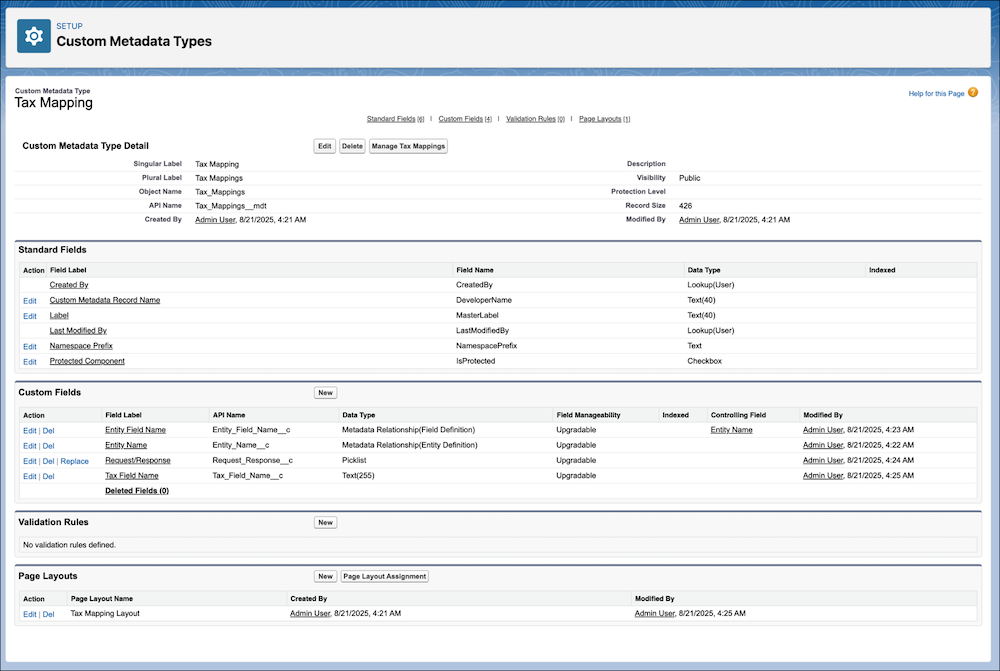
Click New in the Custom Fields section and add these fields
exactly as shown here.
Field Label API Name Field Type Entity Field Name Entity_Field_Name__c Metadata Relationship (Field Definition) Entity Name Entity_Name__c Metadata Relationship (Entity Definition) Request/Response Request_Response__c Text Tax Field Name Tax_Field_Name__c Picklist
Add the values Request, Response, and Request and Response to the Request/Response picklist.
-
Save the changes. Here’s how a configured custom metadata type appears.
- To define records, click Manage [Your Custom Metadata Type Label].
- To add your custom field mappings, click New.
- For each field mapping, provide the entity name, entity field name, tax field name, and request/response field values.
-
Save the changes. Here’s how a configured tax mapping appears.
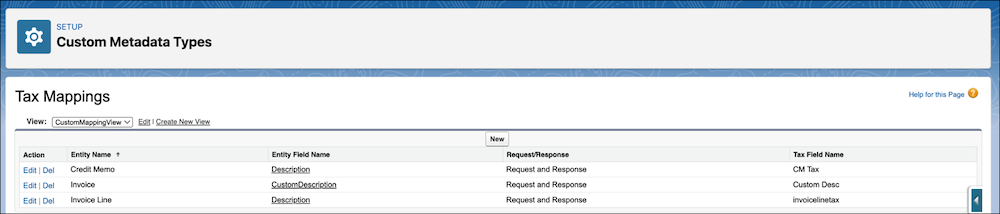 For the API response, make sure your tax response field names match the API names as mentioned in the custom metadata type and defined in the custom mappings.
 - Associate the custom metadata type with your tax engine provider.
After you configure the tax mappings and when a tax call is triggered, the system extends
the API request and response with your custom data.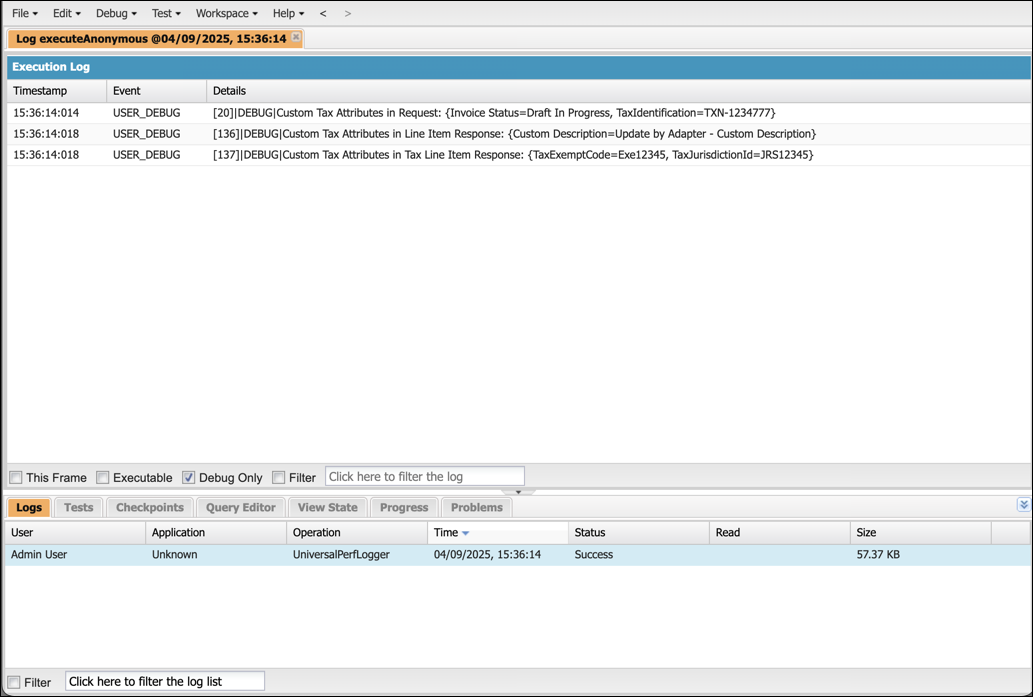
For the API request, the tax request sent to your provider includes a custom tax attributes section. This section contains the fields you mapped to the tax engine provider that’s part of the request. The Tax Field Name from your mapping becomes the key, and the value is dynamically pulled from the corresponding Salesforce record.
For the API response and storing the response values, when your tax provider's response includes the custom fields, the system uses your mappings with the response to save the data. The values provided by the tax engine for the tax field name are automatically saved on the mapped field of the correct Salesforce object record.
