
You are here:
Generate Pay Now Links for Business Accounts
Collect invoice payments against the correct business account by generating Pay Now links. Your customers pay as a guest with their preferred payment method and can save it for future use.
Required Editions
| Available in: Lightning Experience |
| Available in: Enterprise, Unlimited, and Developer Editions with the Revenue Cloud Billing license. Contact your Salesforce account executive for more information. |
| User Permissions Needed | |
|---|---|
| To generate Pay Now payments links and associate payments with business accounts: | Payment Admin permission set |
- From the App Launcher, find and select Stores.
- Set up a new Pay Now store or select an existing one.
- Click Settings, and select Store.
- Click Buyer Access..
- Turn off Self-Registration.
- From Setup, in the Quick Find box, enter Flows, and then select Flows.
- Click Generate Payment Link.
- Click Save As New Flow and name the flow Generate Payment Link V2.
-
In the With Products or Predefined Amount Link Type? Decision element, , delete the
With Products outcome and all its elements one by one. To select and
delete multiple elements at after, switch to Free-Form layout, click Drag to
select, select the elements, and press Delete. Delete the
With Products outcome only if your org does not have a Salesforce Commerce license.
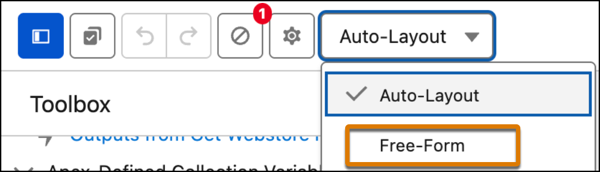
Delete the With Products outcome only if your org doesn’t have a Salesforce Commerce license.
-
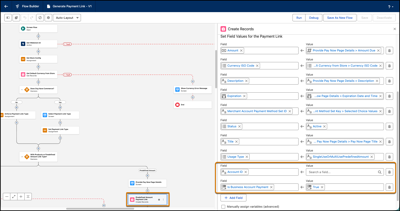
In the Predefined Amount branch, click the Predefined Amount Payment
Link Create Records element.
-
In the Set Field Values for the Payment Link panel, click Add Field
and add these fields.
Field Value Account ID The business account ID from your data source Is Business Account Payment True  Note To set the Account ID value dynamically, use a Get Records element in the flow to get the business account ID from your data source. For example, if you’re running this flow from an invoice record page, get the account ID from the invoice record and pass it to this field.
 -
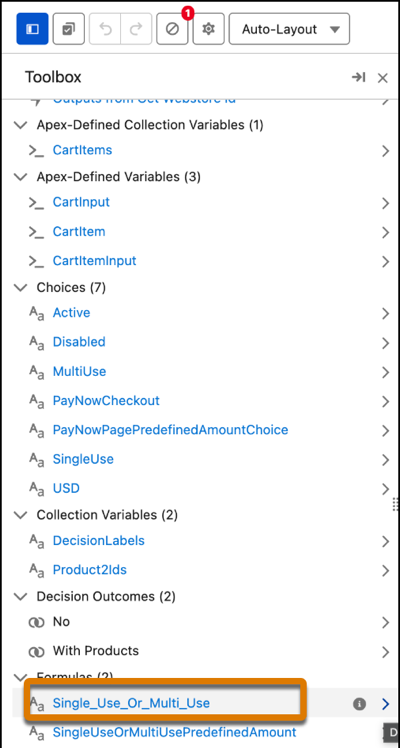
In the Toolbox, expand the Formulas section and delete the
Single_Use_Or_Multi_Use formula to avoid an activation error.
-
Save and activate the flow.
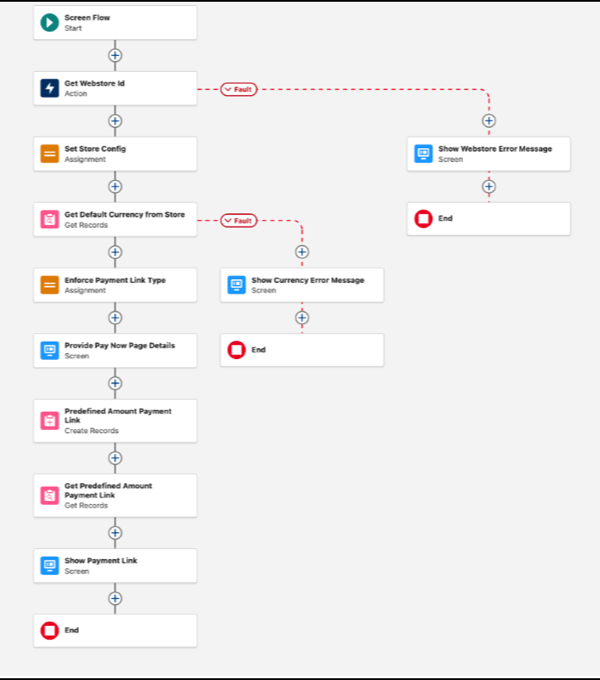
When your customer completes the payment, they can select Save this payment method for future use to save the payment method to the business account.
Note To run the flow and generate a payment link, see Generate a Pay Now Payment Link. To add the Generate
Payment Link V2 flow as an action button on a record page so that you can generate payment links
directly from any record, see Add a Payment Link to a Salesforce Record.
Did this article solve your issue?
Let us know so we can improve!
